Table of Contents >> Show >> Hide
- Before You Start: What Makes Ribeye Special?
- What You’ll Need
- How to Pan Fry a Ribeye Steak: 12 Steps
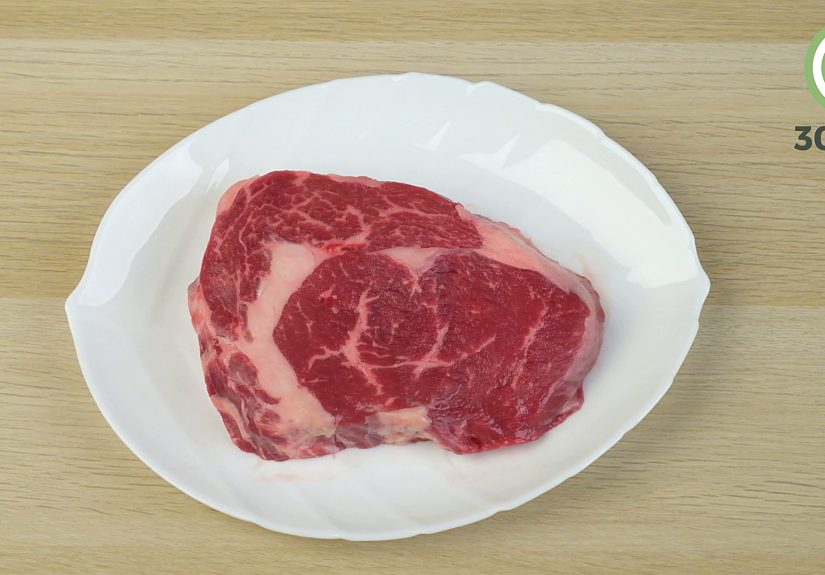
- Step 1: Pick the right steak (thickness matters)
- Step 2: Let it lose the fridge chill
- Step 3: Dry it like you mean it
- Step 4: Salt smart (two good options)
- Step 5: Preheat the pan until it’s truly hot
- Step 6: Add a thin layer of oilthen the steak
- Step 7: Sear the first side without poking it to death
- Step 8: Flipand consider flipping more often than you were told
- Step 9: Render the fat cap (ribeye’s built-in flavor strip)
- Step 10: Add butter and aromatics at the right time
- Step 11: Baste like a steakhouse (without the steakhouse bill)
- Step 12: Temp it, rest it, slice it right
- Doneness and Temperature Cheat Sheet
- Should You Finish Ribeye in the Oven?
- Common Mistakes (and How to Fix Them)
- Optional Steakhouse Extras (Still Weeknight-Friendly)
- How to Store and Reheat Without Ruining It
- Experiences People Commonly Have When Learning to Pan-Fry Ribeye (About )
Pan-frying a ribeye is basically the shortest path between “I have a steak” and “I have a steakhouse moment.”
The goal is simple: a deep brown crust (hello, flavor), a juicy interior (hello, happiness), and a kitchen that
doesn’t smell like a five-alarm smoke situation (hello, keeping the peace). This guide walks you through 12
practical stepsno culinary wizard robe required.
Along the way, you’ll learn why drying the steak matters, how to use high heat without burning your butter,
and how to hit your target doneness using temperaturenot vibes. (Vibes are great. Thermometers are better.)
Before You Start: What Makes Ribeye Special?
Ribeye is prized for marblingthose thin streaks of fat that melt as the steak cooks, keeping it tender and flavorful.
Because ribeye has more internal fat than leaner cuts, it’s forgiving… but not invincible. It can still overcook,
and it can still steam instead of sear if the surface is wet. We’re going to prevent both.
What You’ll Need
- Ribeye steak: ideally 1 to 1½ inches thick for best crust-to-center balance
- Heavy skillet: cast iron or stainless steel (avoid nonstick for high-heat searing)
- High smoke-point oil: canola, grapeseed, avocado, or similar
- Kosher salt + black pepper
- Tongs (so you don’t play “hot pan roulette” with a fork)
- Instant-read thermometer (your secret weapon)
- Optional but delightful: butter, smashed garlic cloves, thyme/rosemary
- Optional: paper towels, rack, and a small spoon for basting
How to Pan Fry a Ribeye Steak: 12 Steps
-
Step 1: Pick the right steak (thickness matters)
For pan-frying, a ribeye around 1 to 1½ inches thick is the sweet spot: thick enough to develop a crust without
instantly overcooking the center. Super-thin steaks can still work, but they’re less forgiving and cook fastlike,
“blink and it’s well-done” fast. -
Step 2: Let it lose the fridge chill
Set the steak out for about 30–60 minutes so it’s not ice-cold. This helps it cook more evenly. If you’re short on time,
don’t panicjust expect a slightly bigger gap between crust and center doneness. -
Step 3: Dry it like you mean it
Pat the steak dry with paper towels. Moisture is the enemy of browning: water has to evaporate before the surface can sear.
A dry surface = faster crust = more flavor. -
Step 4: Salt smart (two good options)
You’ve got two great choices:
-
Option A (best flavor): Salt the steak 45 minutes to 24 hours ahead and chill it on a rack (uncovered).
This “dry brine” seasons deeper and helps the surface dry out. -
Option B (right now): Salt generously just before cooking. It still works greatespecially if you’re hungry
and your stomach is doing the “cook it now” drum solo.
Add black pepper either now or near the end. Pepper can scorch at very high heat; it’s not dangerous, just sometimes bitter.
-
Option A (best flavor): Salt the steak 45 minutes to 24 hours ahead and chill it on a rack (uncovered).
-
Step 5: Preheat the pan until it’s truly hot
Place your cast iron or stainless skillet over medium-high to high heat and let it heat for several minutes.
You’re looking for that first faint wisp of smoke or a shimmering surfacesignals the pan is ready for searing.
Turn on your vent fan now (future-you will be grateful). -
Step 6: Add a thin layer of oilthen the steak
Add 1–2 teaspoons (or up to a tablespoon for a larger pan) of high smoke-point oil and swirl to coat.
Carefully lay the steak in the pan away from you to avoid oil splatter. You should hear a confident sizzle.
If it whispers sadly, your pan isn’t hot enough. -
Step 7: Sear the first side without poking it to death
Let the steak sear until a deep brown crust forms. Depending on thickness and heat, this is often 2–5 minutes.
If it sticks when you try to lift it, it probably needs more time; once a crust forms, it releases more easily.Quick safety note: hot oil and hot pans are not the time to freestyle. Use tongs, keep handles turned inward, and don’t wear loose sleeves.
-
Step 8: Flipand consider flipping more often than you were told
Flip the steak with tongs. Traditional advice says “flip once.” Modern testing shows frequent flipping can cook
more evenly while still building a great crust. If you like, flip every 30–60 seconds after the initial sear.
It keeps the outside from overcooking while the inside catches up. -
Step 9: Render the fat cap (ribeye’s built-in flavor strip)
If your ribeye has a fat cap, use tongs to stand the steak on its edge and sear that strip for 20–60 seconds.
This helps render and crisp it. Translation: less chewy fat, more “why is this so good?” energy. -
Step 10: Add butter and aromatics at the right time
Once both sides have good color, reduce heat to medium (or medium-low if your butter browns too fast).
Add 1–2 tablespoons of butter plus optional smashed garlic and herbs (thyme/rosemary). Butter adds richness,
but it can burn at high heatso timing matters. -
Step 11: Baste like a steakhouse (without the steakhouse bill)
Tilt the pan slightly so butter pools on one side. Use a spoon to scoop the foaming butter and pour it over the steak repeatedly
for 30–90 seconds, flipping once or twice. This boosts browning, adds aroma, and tastes like you know what you’re doing.If the garlic is getting too dark, move it asideburnt garlic tastes like regret.
-
Step 12: Temp it, rest it, slice it right
Use an instant-read thermometer and check the thickest part. Pull the steak a few degrees before your target
because it keeps cooking as it rests (“carryover cooking”). Rest 5–10 minutes, loosely tented with foil.
Then slice against the grain for the most tender bite.
Doneness and Temperature Cheat Sheet
Thermometers beat guesswork. Here are common targets:
- Rare: pull at ~120–125°F, rest to ~125–130°F
- Medium-rare: pull at ~125–130°F, rest to ~130–135°F
- Medium: pull at ~130–140°F, rest to ~135–145°F
- Medium-well: pull at ~140–150°F, rest to ~145–155°F
- Well-done: pull at ~150°F+, rest to ~155°F+
Food safety note: Many people enjoy steak at lower temps, but U.S. food-safety guidance commonly lists
145°F with a short rest as a safe minimum for whole cuts of beef. If you’re cooking for someone at higher risk
(older adults, pregnant people, immune-compromised), consider following that guidance.
Should You Finish Ribeye in the Oven?
Sometimes, yesespecially if the steak is thick (1½ inches or more) or you’re getting great crust but the center is lagging.
A simple approach:
- Sear both sides in a hot skillet for color.
- Move the skillet to a preheated oven (often around 400–500°F) for a few minutes.
- Temp early and often; overshooting happens fast at high oven heat.
This method can help you nail the “brown outside, juicy inside” combo without burning butter or turning your kitchen into a smoke-themed escape room.
Common Mistakes (and How to Fix Them)
Your steak is gray, not brown
- Cause: pan not hot enough or steak surface too wet
- Fix: preheat longer; pat dry aggressively; use a heavy pan; don’t overcrowd
The butter burned
- Cause: butter added too early or heat too high
- Fix: add butter after crust forms; lower heat before basting; swap in a little oil with butter if needed
The outside is perfect, the inside is overcooked
- Cause: heat too high for too long; steak too thin; no temp checks
- Fix: use a thermometer; flip more often; reduce heat after sear; choose a thicker steak
The smoke alarm thinks it’s the head chef
- Cause: oil with low smoke point; pan too hot too long; leftover burnt bits
- Fix: use high smoke-point oil; turn on ventilation early; wipe out burnt oil and restart if needed
Optional Steakhouse Extras (Still Weeknight-Friendly)
1) Make a quick pan sauce
After the steak rests, you can turn those browned bits (fond) into a sauce:
pour off excess fat, add a splash of broth or water, scrape up the fond, and swirl in a small piece of cold butter.
It takes about a minute and makes the plate look like you paid for valet parking.
2) Compound butter in 30 seconds
Mash softened butter with a pinch of salt, black pepper, and chopped parsley (or a tiny smear of mustard).
Top the resting steak and let it melt. Instant “steakhouse finish.”
3) Slicing and serving that actually matters
Ribeye can be served whole, but slicing it into strips (against the grain) makes it easier to eat and share.
Plus, it shows off the juicy centerwhich is basically your edible trophy.
How to Store and Reheat Without Ruining It
Store leftovers in an airtight container in the fridge and eat within 3–4 days.
To reheat gently:
- Best: warm slices in a skillet on low heat with a tiny bit of butter, just until heated through
- Also good: reheat in the oven at a low temp (around 250°F) until warm
- Avoid: nuking it on high in the microwave unless you enjoy “steak-flavored rubber”
Experiences People Commonly Have When Learning to Pan-Fry Ribeye (About )
The first time many people pan-fry a ribeye, the biggest surprise isn’t the steakit’s the sound. A properly heated skillet
doesn’t gently sizzle; it announces itself. That loud, confident crackle is the sound of moisture flashing off the surface
and the Maillard reaction doing its delicious work. If you don’t hear it, most beginners instinctively crank the heat later,
but the real fix is usually earlier: preheat longer and dry the steak better. The “aha” moment often comes when someone
pats the steak dry twiceonce before seasoning and once right before it hits the panand suddenly gets a crust that looks
restaurant-level.
Another common experience is learning that butter has a personality. People love the idea of butter-basting (and for good reason),
but adding butter too soon can turn “nutty brown butter” into “why does my kitchen smell like campfire toast?” The lesson tends to stick
after one smoky attempt: sear first with oil, then lower the heat before butter joins the party. Many home cooks also discover that garlic
burns faster than their confidence. A good trick is to add smashed cloves later, keep them moving, and treat them like a cameo appearance
rather than the main character.
Temperature is where most folks become converts. At first, people try to judge doneness by touchpressing the steak like it’s a stress ball
and hoping the steak understands the assignment. Then they use a thermometer once, realize how precise (and calming) it is, and never go back.
The thermometer also teaches a very real phenomenon: carryover cooking. Pulling the steak a few degrees early feels wrong the first timelike
taking cookies out before they look donebut after resting, the steak lands exactly where you wanted. That’s when “rest your steak” stops being
advice and starts being a rule.
Many people also go through a “flip anxiety” phase. They’ve heard “flip once,” so they stand guard like a bouncer outside a club,
refusing to let the steak move. Then they try more frequent flipping and notice the center cooks more evenly, especially with thicker ribeye.
It’s not magic; it’s heat management. Frequent flips can reduce the chance that one side becomes overdone while you wait for the middle to catch up.
The result is often a nicer gradient from crust to centerand fewer “oops, it’s medium-well now” moments.
Finally, there’s the smoke-alarm reality check. Even experienced cooks sometimes discover that the oil they grabbed “because it was right there”
has a lower smoke point than the heat they’re using. The fix becomes part of the ritual: use a high smoke-point oil, start ventilation early,
and accept that great crust is a little dramatic. The good news? Once people dial in these small detailsdry surface, hot pan, smart fat management,
and thermometer timingpan-fried ribeye becomes one of those meals that feels fancy without being fussy. It’s the kind of confidence-building dish
that turns “I’m just cooking dinner” into “I could open a tiny steakhouse, but only on weekends.”