Table of Contents >> Show >> Hide
- Why Before-and-After Posts Hit So Hard (In a Good Way)
- What Counts as a “Project” (Spoiler: Almost Everything)
- How to Take Before-and-After Photos That Actually Compare
- What to Write in Your Caption (So People Don’t Just Scroll Past)
- Project Photo Editing: Keep It Real, Just Clearer
- Privacy and Safety Checklist (Especially Important When Posting Online)
- Common Before-and-After Mistakes (And Easy Fixes)
- How to Get More Comments Without Being Cringe
- Wrap-Up: Your Project Deserves a Before-and-After Moment
- Extra: What People Often Experience After Posting a Before-and-After (About )
There are two kinds of people in this world: the “I’ll remember what it looked like” crowd, and the “I took 73 photos and labeled them
BEFORE-FINAL-FINAL-v3” crowd. If you’re reading this, congratulationsyou’re about to become the second kind (the superior kind, obviously).
“Hey Pandas, Post A Before And After Picture Of A Project You Are Working On” is the internet’s most wholesome dare. It’s an open invitation to show
your progress, your creativity, and yesyour chaotic “in the middle” stage where everything looks worse before it gets better.
Before-and-after photos aren’t just satisfying. They’re proof. They teach, motivate, and spark ideas in people who are stuck staring at their own
half-finished project like it personally betrayed them.
Why Before-and-After Posts Hit So Hard (In a Good Way)
Before-and-after photos work because they deliver a complete story in two frames. The “before” sets the problem, the “after” reveals the payoff, and
your brain gets a tidy little narrative arc without reading a novel-length caption (although we love those too).
They turn progress into something you can actually see
When you’re working on a projectpainting a room, rebuilding a shelf, knitting a scarf, restoring a chairprogress can feel invisible day to day.
Photos make the change undeniable. The camera doesn’t care if you’re feeling dramatic; it will calmly show that you did move the mountain
(or at least the pile of laundry off the chair).
They help other people learn (without you writing a textbook)
A good before-and-after can teach someone what a fresh coat of paint really does, how lighting changes a corner, or how swapping hardware transforms a
cabinet. One post can save a stranger hours of guesswork and “Is this going to look weird?” anxiety.
They invite community energy
Before-and-after posts are naturally interactive. People ask questions (“What paint color is that?”), share alternatives (“Try a matte finish next
time!”), and offer encouragement (“Keep goingyou’re so close!”). The result is a mini support group with better memes.
What Counts as a “Project” (Spoiler: Almost Everything)
If you’re building, fixing, making, upgrading, organizing, or learningwelcome. You’ve got a project. Here are popular categories that shine in a
before-and-after format:
- Home DIY: painting, shelving, small renovations, furniture flips, renter-friendly upgrades, lighting swaps.
- Crafts & art: drawing practice, pottery, crochet/knit pieces, digital illustration, woodworking builds.
- Organization resets: pantry refresh, closet zones, desk setup, tool wall systems, cable management victories.
- Garden & outdoor: raised beds, patio refreshes, plant growth, landscaping cleanups, compost setups.
- School/skill builds: science fair builds, robotics prototypes, coding projects, portfolio pieces, music practice setups.
- Restoration projects: vintage items, thrift finds, bicycles, lamps, toys, anything you rescued from the “why is it sticky?” bin.
One note (especially if you’re a teen): keep the “before and after” focused on your workyour space, your build, your art, your
creation. Avoid personal “body transformation” themes. This prompt is about projects, progress, and creativitynot comparing people.
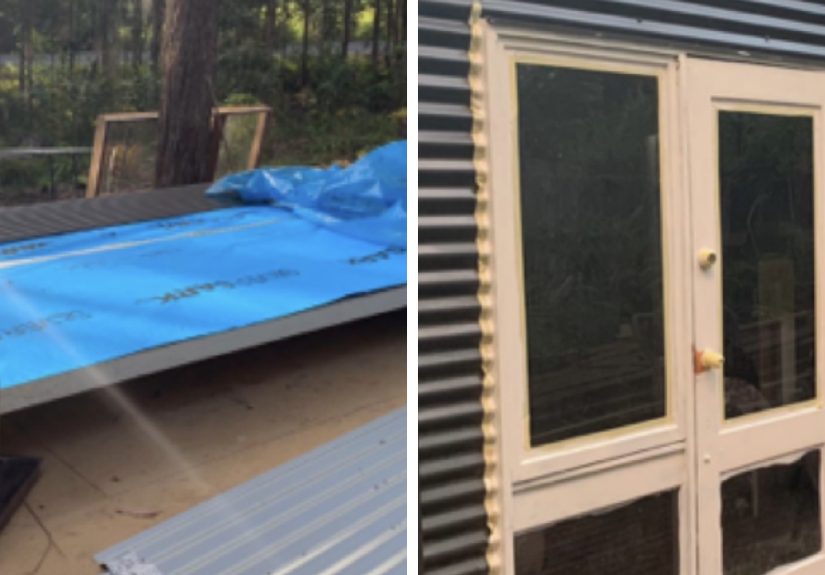
How to Take Before-and-After Photos That Actually Compare
The secret to a great before-and-after isn’t fancy gear. It’s consistency. Your goal is to make the “before” and “after” feel like two timestamps in
the same place, not two different universes.
1) Lock in your angle like it’s a legal document
Pick your viewpoint and commit. If it’s a room, shoot from a corner where you can see the main features. If it’s an object, choose a distance and
height that shows the full shape.
- Use your phone’s grid/level so lines stay straight (walls, shelves, frames).
- Mark the spot: a piece of painter’s tape on the floor for your feet or tripod is embarrassingly effective.
- Go wider than you think: you can crop later, but you can’t magically add missing wall space.
2) Match lighting (because lighting can “cheat” without trying)
Lighting is the difference between “Wow, you transformed it!” and “Did you just open a window?” Aim to shoot both photos at a similar time of day,
ideally with natural light. Try to avoid harsh overhead lights or intense midday sun that changes shadows dramatically.
- Same time of day is your best friend (morning-to-morning or evening-to-evening).
- Choose natural light when possible; turn off mixed indoor lights that create weird color shifts.
- Consistency over perfection: an evenly lit “boring” photo compares better than a moody masterpiece.
3) Do a quick “camera-ready” reset (without faking reality)
You don’t need a magazine shoot, but you do want a fair comparison. Basic staging helps your audience understand what changed.
- Clear distractions that aren’t part of the project (random cups, mystery cords, yesterday’s snack plateno judgment).
- Smooth obvious mess (wrinkled bedding, crooked rugs) so the “after” doesn’t win purely by tidiness.
- Keep it honest: don’t hide flaws that are part of the processpeople learn from real projects.
4) Add one “in-progress” shot if the journey is the interesting part
Before-and-after is the headline, but the middle is where the story lives. Consider including a third image:
- the “primer stage” where everything looks worse
- the “tools everywhere” reality shot
- the “first coat panic” moment
- the “fixed one corner and now the rest looks unacceptable” phase
That extra photo doesn’t dilute the impactit builds credibility. It says, “This wasn’t magic. This was work.”
What to Write in Your Caption (So People Don’t Just Scroll Past)
A before-and-after image stops the scroll. A good caption earns the comment. Use your caption to make the transformation meaningful, not mysterious.
A simple caption formula that works
- What it was: “This corner was dark and unused…”
- What you wanted: “…so I turned it into a reading nook.”
- What you did: “Paint, thrifted chair, new lamp, DIY shelf.”
- What surprised you: “The hardware swap made the biggest difference.”
- What you’d do differently: “Next time I’d sand longer before painting.”
- Invite responses: “Should I add a rug or keep it clean?”
Include specifics people always ask for
- Timeline: “Weekend project” or “three weeks of evenings.”
- Budget range: even a rough number helps others plan realistically.
- Materials/tools: paint type, brush/roller, adhesive, wood type, software used, etc.
- Skill level: “First time doing this” gives beginners courage.
If you mention a product because you genuinely love it, that’s fine. If you have any real relationship with a brand (free product, discount, paid
partnership), be clear and upfront. People trust transparencyand it keeps you on the right side of advertising rules.
Project Photo Editing: Keep It Real, Just Clearer
Editing should help your images match what your eyes saw, not turn your “after” into a fantasy. Light touch wins.
- Straighten the image so vertical lines don’t lean like they’re tired.
- Adjust brightness so viewers can see the details.
- Match color temperature if one photo looks too warm or too blue.
- Crop consistently so the framing stays comparable.
Tip: if your “before” looks crooked, it’s okay to straighten it afterward. A clean baseline makes your transformation easier to appreciate.
Privacy and Safety Checklist (Especially Important When Posting Online)
Before you post, do a quick scan like you’re a detective looking for accidental oversharing. This takes 30 seconds and can save you a lot of stress.
Privacy
- Hide personal info: mail with addresses, school documents, name tags, prescription labels, barcodes, serial numbers.
- Watch reflections: mirrors, windows, glossy frames can reveal more than you think.
- Location clues: street signs, house numbers, identifiable landmarkscrop or blur if needed.
- Minors & faces: if a kid appears in the background, consider cropping or blurring for safety.
Safety
- Don’t glamorize risky setups: unstable ladders, no eye protection, unsafe tool useskip those shots.
- Keep dangerous items out of frame: sharp blades, chemicals, or anything that could encourage copycat mistakes.
- Focus on process, not hazards: you can share what you learned without showing unsafe details.
Common Before-and-After Mistakes (And Easy Fixes)
Mistake: The “after” is shot from a totally different angle
Fix: Re-shoot the “after” from the original spot. If you can’t, include multiple angles in both sets so the comparison still feels fair.
Mistake: Different lighting makes it look like a filter trick
Fix: Re-shoot in similar light or do a gentle edit so brightness and white balance are closer.
Mistake: The “before” is cluttered, the “after” is staged
Fix: Either tidy the “before” slightly (to compare the project, not the mess) or show a realistic “lived-in” after. Consistency creates trust.
Mistake: No context, so viewers don’t know what changed
Fix: Label images “Before” and “After,” and use the caption to point out the key changes (paint, layout, hardware, lighting, materials).
How to Get More Comments Without Being Cringe
Engagement doesn’t require begging (“SMASH THAT LIKE BUTTON”). It just requires making it easy for people to join the conversation.
- Ask one clear question: “Should I add open shelving or keep cabinets?”
- Share one lesson: “I learned the hard way that prep work matters more than paint.”
- Invite tips: “Any sealing recommendations for a tabletop?”
- Reply like a human: a simple “Thank you!” plus one detail keeps threads alive.
The “Hey Pandas” vibe is friendly, curious, and supportive. When you post, you’re not just showing the resultyou’re giving others permission to try,
to fail, to learn, and to keep going.
Wrap-Up: Your Project Deserves a Before-and-After Moment
Whether your project is a full room refresh or a tiny handmade thing you’re proud of, a before-and-after post is a powerful way to document your
progress. Keep the angle consistent, match the lighting, write a caption with real details, and protect your privacy. The result is a post that’s not
just “pretty”it’s useful, inspiring, and genuinely fun to share.
So yes, Hey Pandas: post your before and after. Show the glow-up. Show the work. And if your “before” is a disaster, you’re in excellent company.
Extra: What People Often Experience After Posting a Before-and-After (About )
Posting a before-and-after is weirdly emotional in the best way. Most people think they’re just sharing photos, but what they’re actually doing is
stepping into a public “progress story”and that tends to spark a few predictable (and surprisingly helpful) experiences.
1) The motivation bounce. The first reaction many creators have is, “Oh… people noticed.” Even a handful of comments can feel like a
mini boost of fuel. It’s not about internet pointsit’s the simple realization that your effort is visible. That encouragement often pushes people to
finish the last 10% of the project (the part that takes 90% of the patience).
2) The “I didn’t realize how far I’d come” moment. This is huge. You might have been staring at the work every day, thinking it was
moving slowly. Then you post the comparison and suddenly the transformation looks obvious. People frequently describe feeling more proud and more
confident afterwardnot because the project is perfect, but because the progress is undeniable.
3) The helpful questions you didn’t expect. You’ll often get comments like, “What finish did you use?” or “How did you prep that
surface?” Those questions can reveal what part of your project is most interesting to others. They also nudge you to remember your steps, which is
helpful when you tackle your next project and can’t remember what glue you used or why you chose that particular paint sheen.
4) The gentle reality check (a.k.a. constructive feedback). If you’re posting in a DIY-heavy community, someone may suggest a better
method, a safer approach, or a product that lasts longer. The best communities do this kindly. The key is to treat it like free coaching, not a
personal attack. You can always respond with, “That’s a good pointnext time I’ll try that,” and keep the mood positive.
5) The “messy middle” solidarity. One of the most comforting experiences is realizing that everyone has an awkward in-between phase.
People will jump in with their own photos or stories: peeling wallpaper nightmares, paint drips, crooked shelves, or the classic “I started this and
now my entire house is a construction zone.” That shared honesty makes the whole process feel lighter. You stop thinking, “I’m bad at this,” and start
thinking, “Oh, this is normal.”
6) The unexpected inspiration chain. The coolest part is when your post triggers someone else’s next step. A reader might finally try
painting cabinets, attempt a thrift flip, start a sketch practice habit, or organize their workspacebecause your photos proved that change is
possible. Before-and-after posts don’t just show results; they show that effort has a payoff.
In the end, posting a before-and-after becomes more than a share. It becomes a bookmark in your own timeline: “This is what I started with, and this
is what I made.” That’s a powerful receipt for your creativityand it tends to age really well.


