Table of Contents >> Show >> Hide
- What AutoText Is (and Why Word Calls It a “Building Block”)
- Before You Start: Pick Snippets That Actually Deserve AutoText
- How to Add AutoText in Word: 12 Steps
- Three Fast Ways to Insert AutoText Without Breaking Your Flow
- How to Edit, Rename, Delete, and Organize AutoText Entries
- Where AutoText Is Stored (So You Can Back It Up and Stop Panicking)
- Troubleshooting: Common AutoText Problems (and Fixes That Don’t Involve Screaming)
- AutoText on Mac and Word for the Web: What’s Different
- Conclusion
- Real-World Experiences: What AutoText Feels Like After You Actually Use It
- SEO Tags
If you’ve ever typed the same address, disclaimer, email sign-off, or “Per my last email…” line for the 900th time,
congratulations: you are now emotionally ready for AutoText. AutoText is Microsoft Word’s built-in way to
save reusable chunks of content (from a one-line signature to a full clause) and drop them into any document fastwithout
copy/paste chaos or hunting through old files like a digital archaeologist.
In this guide, you’ll learn how to add AutoText in Word step-by-step, how to insert it with a couple of
clicks (or a keyboard shortcut), how to organize it so it doesn’t turn into a junk drawer, and how to avoid the classic
“Where did my snippets go?!” moment.
What AutoText Is (and Why Word Calls It a “Building Block”)
AutoText is a type of reusable content stored in Word’s “building blocks” system. Think of building blocks as Lego pieces
you can snap into a document: text, formatted paragraphs, images, fields, even tables. The Quick Parts
menu is the popular doorway to those pieces, and AutoText is one specific “gallery” inside that system.
Translation: AutoText isn’t just plain text. You can save formatting, line breaks, and even graphicsso your signature
block can keep its spacing, your contract clause can keep its indentation, and your letterhead can stop freelancing.
Before You Start: Pick Snippets That Actually Deserve AutoText
AutoText shines when you reuse content often enough that your fingers could type it from memory… and yet you still resent
the fact that they can. Great candidates include:
- Signature blocks (name, title, phone, pronouns, the whole vibe)
- Boilerplate paragraphs (privacy notes, disclaimers, delivery terms)
- Contract clauses (NDA language, jurisdiction lines, standard definitions)
- Frequently used formatting blocks (a styled header, a table layout, a “Case Summary” template)
- Client or project metadata (addresses, file numbers, internal routing notes)
One more sanity-saving tip: choose short, unique names for your AutoText entries. If you name everything “Clause1,” Word
isn’t the problemyou are. (Kidding. Mostly.)
How to Add AutoText in Word: 12 Steps
These steps work best in Word for Windows (Microsoft 365/Word 2016+), where AutoText is accessed through Quick Parts. If
you’re on Mac, jump to the Mac section later for the slightly different path.
-
Create the content you want to reuse.
Type your snippet into a document exactly the way you want it to appear later (including punctuation, spacing,
capitalizationyes, even the Oxford comma). -
Format it now, not “future you.”
Apply fonts, bold/italics, paragraph spacing, indentation, and alignment before saving. AutoText can preserve formatting,
so set it up once and stop re-formatting forever. -
(Optional but smart) Turn on paragraph marks so you can capture spacing.
Go to Home > ¶ (Show/Hide). This reveals paragraph marks and line breaks, which matter if you want your
AutoText to keep paragraph-level formatting. -
Select the contentcarefully.
Highlight the exact text (and anything else) you want saved. If you want Word to preserve paragraph formatting (like
indentation and spacing), include the final paragraph mark (¶) in your selection. -
Open the AutoText command.
Go to Insert > Quick Parts (in the Text group). -
Save it specifically as AutoText.
From the dropdown, choose AutoText > Save Selection to AutoText Gallery. -
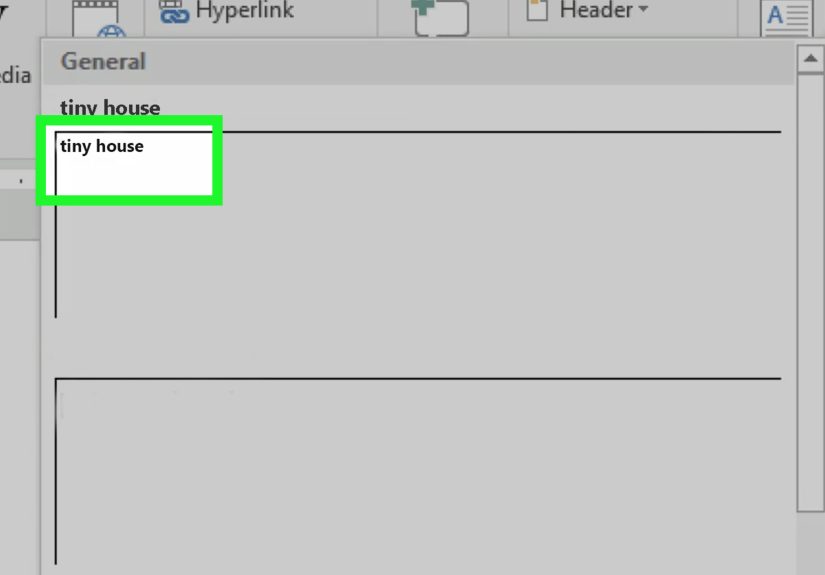
Name it like you’ll be typing it at 4:59 PM on a Friday.
In the “Create New Building Block” dialog, give it a short, memorable name (examples: sig_huy, nda_clause,
invoice_footer). The goal is easy recall and minimal typing. -
Confirm the Gallery is set to AutoText.
Make sure Gallery says AutoText. (Word sometimes offers other galleries, but for AutoText,
you want the AutoText gallery.) -
Choose or create a Category for organization.
If you plan to save more than five snippets (spoiler: you will), create categories like Legal, HR,
Client Emails, Reports, or Sales so your library stays usable. -
Pick how Word should insert it.
Under Options, choose:- Insert content only (inline at the cursorgreat for short phrases)
- Insert in its own paragraph (best for signature blocks and multi-line text)
- Insert in its own page (useful for cover pages or full-page blocks)
-
Decide where to save it (this affects whether you can find it later).
In Save in, choose the right home:- Normal.dotm if you want it available in most documents you create on this computer
- A specific template (like a company letterhead template) if you only want it for documents based on that template
If Word asks to save changes to your template when closing, say yesotherwise your new AutoText entry may not stick.
-
Test the insertion so you know it actually worked.
Click where you want the snippet, then insert it either:- From the menu: Insert > Quick Parts > AutoText > pick your entry
- With your keyboard: type the entry name (or enough letters to uniquely identify it) and press F3
If you want the little “AutoComplete” suggestion popup while typing, turn it on in Word Options (we’ll cover that below).
Three Fast Ways to Insert AutoText Without Breaking Your Flow
1) Insert from the Quick Parts menu
This is the easiest method when you can’t remember the entry name. Go to Insert > Quick Parts > AutoText
and select your snippet. If you have a lot of entries, use the Building Blocks Organizer to browse and search.
2) Insert by typing the name + F3
If you do remember the name, you can insert faster: type the entry name and press F3. The typed name
gets replaced by the saved content, formatting included. This is where short, unique names pay off.
3) Turn on AutoComplete suggestions (the “Word reads my mind” mode)
If you want Word to suggest your AutoText while you type, enable it here:
File > Options > Advanced > Editing options > Show AutoComplete suggestions.
Then, when you start typing a saved entry name, Word may offer a suggestion you can accept.
How to Edit, Rename, Delete, and Organize AutoText Entries
Edit the content of an entry (the safe way)
Word doesn’t give you a big “Edit AutoText” button (because that would be too kind). The common workflow is:
insert the AutoText into a document, edit it there, select the updated content, then save it again using the
same name and confirm you want to redefine/replace the existing entry.
Rename or delete entries using Building Blocks Organizer
When you’ve built a library, the Building Blocks Organizer becomes your control room. You can open it from:
Insert > Quick Parts > Building Blocks Organizer. From there, you can find entries by name, view their
gallery/category, edit properties, and delete what you no longer use.
Create categories you’ll actually use
Categories are your friend when your list grows. A simple system works best:
- By department: Sales, Legal, HR, Operations
- By document type: Proposals, Contracts, Reports, Emails
- By client/project: Client_A, Client_B, Internal_Projects
Keep it boring. Boring is searchable. Searchable is powerful.
Where AutoText Is Stored (So You Can Back It Up and Stop Panicking)
AutoText and other building blocks live in templates. By default, many AutoText entries are saved in the
Normal template (Normal.dotm). Other custom building blocks may be stored in a building blocks template file
(often called something like Building Blocks.dotx) in your user profile’s “Document Building Blocks” folder.
The practical takeaway: if you’re moving to a new computer, changing profiles, or your IT team is “optimizing” things,
you’ll want to back up the relevant template files. A quick safety habit is to periodically copy your Normal.dotm and
building blocks file(s) to a secure folder (or an approved cloud location).
Troubleshooting: Common AutoText Problems (and Fixes That Don’t Involve Screaming)
AutoText entries disappeared
- Check whether Normal.dotm changed or got replaced. Updates, profile moves, and template corruption can wipe custom entries.
- Confirm you saved changes when prompted. If Word asked to save the Normal template and you clicked “Don’t Save,” the entry may not persist.
- Look in Building Blocks Organizer. Sometimes your entry exists, but it’s stored in a different template or category than you expected.
F3 doesn’t insert anything
- Make sure you typed a unique name string. If two entries start similarly, type more letters before pressing F3.
- Try inserting from the menu first. If it inserts there, the entry existsyour name match is the issue.
AutoComplete suggestions never appear
- Enable Show AutoComplete suggestions in Word Options (Advanced > Editing options).
- Use a name that’s easy for Word to match (letters/numbers/underscores). Super-long names are not your productivity soulmate.
AutoText on Mac and Word for the Web: What’s Different
If you’re using Word for Mac, AutoText exists, but the Quick Parts/Building Blocks experience may not match
Windows exactly. In some Mac builds, AutoText is available directly under Insert as its own command, while the
full Quick Parts feature set is more limited than on Windows.
If you’re using Word for the web (browser version), expect limitations: many advanced template and building
block features don’t behave the same way as the desktop apps. If AutoText is central to your workflow (legal, HR,
standardized reports), the desktop version is usually the smoother ride.
Conclusion
Learning how to add AutoText in Word is one of those small upgrades that quietly saves you hours over the year. Once your
best phrases, clauses, and signatures are stored, you stop retyping, stop reformatting, and stop relying on ancient files
named “final_FINAL_use-this-one.docx.” Build a clean library, use smart names, back up your templates occasionally, and
AutoText becomes the closest thing Word has to a superpower.
Real-World Experiences: What AutoText Feels Like After You Actually Use It
The first time you set up AutoText, it feels a little like meal-prepping: you’re doing extra work now so future-you can
coast. And honestly, future-you deserves it. After a week of using AutoText, the biggest change isn’t just speedit’s the
weird sense of calm that comes from knowing your “standard stuff” is always consistent.
Here’s what people typically notice once AutoText becomes a habit. First, email signatures and contact blocks
stop being a formatting gamble. Instead of copying from a sent email (which somehow always imports the wrong spacing),
you insert a signature block that looks exactly the same every time. That consistency matters more than you’d thinkyour
documents look cleaner, and you spend less mental energy fiddling with alignment.
Second, AutoText quietly improves quality control. Teams that reuse contract language, policy notes, or
standard instructions often discover that the “version floating around” problem is real: someone copied an old paragraph,
someone else edited it “just this once,” and suddenly the company disclaimer has three slightly different meanings.
Saving the approved wording as AutoText reduces that drift. You’re still responsible for using the right snippet in the
right context, but at least you’re starting from the correct baseline instead of reinventing it each time.
Third, you get faster at writing because your brain stops wasting time on the boring parts. When your report template,
meeting notes header, or proposal intro can be inserted instantly, you can focus on the content that actually changes:
the analysis, the recommendation, the story. AutoText doesn’t replace thinkingit removes the repetitive scaffolding so
you can spend your attention on the part that matters.
Fourth, naming conventions become surprisingly important. Most people start with names like “Address” and “Signature,”
then realize they need “sig_short,” “sig_full,” “addr_billing,” and “addr_shipping.” The moment you standardize names,
the F3 shortcut becomes incredibly satisfying. Type three or four characters, hit F3, and boomyour paragraph appears,
perfectly formatted, like Word finally decided to cooperate.
Fifth, AutoText changes how you handle repeatable complexity. For example: a customer support rep can store
troubleshooting steps with formatting and bullet points; a recruiter can store outreach templates; a project manager can
store risk statements and mitigation language; a lawyer can store clauses categorized by practice area. In each case, the
“hard part” isn’t typingit’s remembering the exact wording and formatting that works. AutoText makes that repeatable.
Finally, the most practical lesson: once you rely on AutoText, you learn to respect where it’s stored. People who switch
computers or profiles without backing up templates sometimes discover their AutoText library didn’t come along for the
ride. The fix is simpleperiodically back up the template files that store your building blocksbut you only learn that
after the first scare. Consider this your friendly warning from the future.