Table of Contents >> Show >> Hide
- First, What “Monkey Grass” Are We Talking About?
- Table of Contents
- What You’ll Need
- Step 1: Identify Your Monkey Grass Type
- Step 2: Choose Your Seed Source (Buy or Harvest)
- Step 3: Harvest Berries at the Right Time
- Step 4: Depulp the Seed (Yes, It Matters)
- Step 5: Optional Quick-Disinfect for Cleaner Starts
- Step 6: Stratify to Wake the Seed Up (Warm, Cold, or Both)
- Step 7: Prep Containers and a Well-Draining Mix
- Step 8: Sow at the Right Depth and Spacing
- Step 9: Dial In Moisture and Temperature
- Step 10: Be Patient, But Not Careless
- Step 11: Pot Up Seedlings Like a Pro
- Step 12: Harden Off and Transplant Outdoors
- Step 13: Long-Term Care for Thick, Tidy Clumps
- Common Problems (and the Fix That Usually Works)
- Conclusion
- Experience Notes: What Gardeners Learn the “Ohhh, That’s Why” Way (Extra)
- SEO Tags
Monkey grass is the plant equivalent of that friend who “doesn’t do drama” and then shows up looking perfect
in every group photo anyway. Once established, it’s a low-maintenance, evergreen-ish ground cover that can handle
sun, shade, and the occasional “I forgot to water” week. The twist? Growing monkey grass from seed is a slow-burn
projectmore crockpot than microwave.
This guide walks you through a seed-to-garden method that actually respects how liriope (the most common “monkey grass”
in the U.S.) behaves: its berries, its dormancy quirks, and its “I’ll germinate when I feel like it” energy.
If you like satisfying garden projects with a payoff you can brag about later, let’s do it.
First, What “Monkey Grass” Are We Talking About?
In the U.S., “monkey grass” usually means liriope (often Liriope muscari) or sometimes
its cousin mondo grass (Ophiopogon). Liriope muscari is clump-forming and spreads slowly;
Liriope spicata (creeping lilyturf) spreads more aggressively and can wander like it pays rent nowhere.
This article focuses on the most common landscape “monkey grass” that people seed-start: liriope/lilyturf.
Bonus truth: it’s called “grass,” but it’s not a true grass. (Botany loves a plot twist.)
Seed-growing reality check (so you don’t hate gardening)
- Seeds can be slow and irregular. Some sprout quickly; others take weeks to months.
- Fresh seed matters. The more “recently harvested,” the better the odds.
- Cultivars may not come true. Variegated parents can produce mixed results (including non-variegated seedlings).
What You’ll Need
- Monkey grass (liriope) seeds (purchased or harvested)
- Seed-starting trays or small pots with drainage
- Seed-starting mix (light, sterile, and well-draining)
- Spray bottle or gentle watering can
- Plastic dome or clear bag (mini greenhouse effect)
- Labels (future-you deserves kindness)
- Optional: vermiculite or fine grit for a light top cover
Step 1: Identify Your Monkey Grass Type
Before you sow anything, confirm what you have (or what you’re buying). Liriope muscari is the clumping
“border grass” used for edging and under trees; Liriope spicata creeps more and can be harder to contain.
If your goal is a neat border, muscari is usually the calmer roommate.
Quick ID cues
- Muscari: clumps, slower spread, showy flower spikes, berries later.
- Spicata: more spreading habit; great coverage, but can roam.
Step 2: Choose Your Seed Source (Buy or Harvest)
You can start from purchased seeds (convenient) or harvest from existing plants (free, satisfying, and mildly smug).
If you’re harvesting from a named cultivarespecially variegatedknow that seedlings may vary. Seed-growing is genetics’
surprise party.
If uniformity is your top priority (same height, same color, same vibe), division beats seed. But if you want a budget-friendly
way to cover space and don’t mind some natural variation, seeds are fair game.
Step 3: Harvest Berries at the Right Time
Liriope produces small berry-like fruits after flowering. Harvest when berries turn dark (often blackish) and feel mature.
If you pick them too early, the seed inside may not be ready. If you pick them too late, birds may “help.”
Simple harvesting method
- Slip a paper bag over the fruit cluster, snip the stem, and let the spike drop into the bag.
- Wear gloves if you don’t want your hands dyed “mystery berry purple.”
Step 4: Depulp the Seed (Yes, It Matters)
This is the step people skipand then wonder why nothing sprouts. The fleshy pulp can contain compounds that delay germination,
so you want clean seed. Think of it as removing the seed’s “Do Not Disturb” sign.
How to depulp without a science lab
- Soak berries in warm water for about a day to soften them.
- Rub berries gently between your fingers to separate pulp from seed.
- Rinse well until seeds feel clean (not slimy).
Step 5: Optional Quick-Disinfect for Cleaner Starts
If you’ve ever lost seedlings to fuzzy mold, you already respect the “optional” disinfect step. A brief soak can help reduce
surface pathogens and may also remove germination-inhibiting residues from the seed coat.
Easy option
- Soak seeds ~10 minutes in a mix of 1 part household bleach to 9 parts water, then rinse thoroughly.
Don’t extend the soak “just to be safe.” In seed-land, “more” is often “worse.”
Step 6: Stratify to Wake the Seed Up (Warm, Cold, or Both)
Monkey grass seeds can have dormancy that responds well to stratification. Research and propagation references commonly emphasize
warm stratification after depulping to improve germination rates and consistency, with temperatures roughly in the
70–85°F range for several weeks.
Two practical stratification approaches
-
Warm stratification (common for liriope): Keep cleaned seeds in a lightly moist medium (like barely damp
seed-starting mix in a bag) in a warm spot for ~4–6 weeks. -
Cool period (helpful when germination is stubborn): Some gardeners refrigerate sown pots or bagged seeds for a few weeks,
then move them warm. This can improve timing for certain seed lots.
If you’re using purchased seed, follow the packet firstsome are already treated, others expect stratification.
Step 7: Prep Containers and a Well-Draining Mix
Use clean pots or trays with drainage. Monkey grass seedlings don’t want soggy feet; they want even moisture and air.
A light seed-starting mix is ideal. If your mix looks like heavy garden soil, it’s going to compact and invite damping-off.
Small UX upgrade that helps
- Pre-moisten your mix so it’s damp like a wrung-out spongenot dripping.
- Label everything. “Mystery Grass #4” is not a helpful future conversation.
Step 8: Sow at the Right Depth and Spacing
Sow seeds about 1/4 inch deep (or lightly covered with fine mix/vermiculite). Give seeds a little space so airflow stays decent.
Crowding can turn your tray into a tiny humidity swamp with opinions.
Quick sowing rules
- Plant depth: ~1/4 inch.
- Spacing: at least 1 inch apart in trays, or a few seeds per small pot (thin later).
- Top cover: light dustingdon’t bury them like treasure.
Step 9: Dial In Moisture and Temperature
Keep the surface consistently moistnever bone-dry, never waterlogged. Cover trays with a dome or a clear bag to hold humidity,
but vent daily or crack the cover once seedlings appear. Temperature matters too: many growers aim for a mild, steady warmth
for weeks rather than dramatic hot-cold swings.
A practical setup
- Bright, indirect light (or gentle morning sun) once sprouted.
- Steady warmth: roughly mid-60s to low-70s °F is a common target zone.
- Bottom watering can help keep stems drier and reduce fungus issues.
Step 10: Be Patient, But Not Careless
Germination can be fast or wildly inconsistent depending on seed freshness and treatment. Some guides mention sprouting in a couple weeks,
while seed directions often warn it can take much longer. Your job is to keep conditions stable long enough for the slowpokes to show up.
What “patient” looks like in real life
- Check moisture daily (it dries out faster than you think).
- Remove any moldy debris promptly.
- If nothing happens after a long stretch, try a “reset”: a short cool period, then warmth again.
Step 11: Pot Up Seedlings Like a Pro
Once seedlings are sturdy enough to handle and have a couple true leaves, move them to individual pots or thin them so each has space.
Handle by leaves, not stems (stems bruise easily). Think “gentle librarian,” not “fast-food drive-thru.”
Feeding and growth
- Start with a very dilute fertilizer after seedlings settle (too much too soon = crispy regrets).
- Keep them evenly moist as roots develop.
- Good airflow helps prevent disease.
Step 12: Harden Off and Transplant Outdoors
When seedlings reach about an inch tall or seem robust enough to survive real weather, start hardening off:
move them outdoors to shade for a few hours a day, gradually increasing time and light exposure over a week or two.
Then transplant after frost danger passes.
Site selection that makes monkey grass happy
- Light: full sun to partial shade; tolerates heavy shade but grows slower.
- Soil: well-drained, slightly acidic to neutral is a sweet spot.
- Spacing: give plants room to fill intight spacing establishes faster, wider spacing costs less.
Water consistently in the first growing season so roots establish deeply.
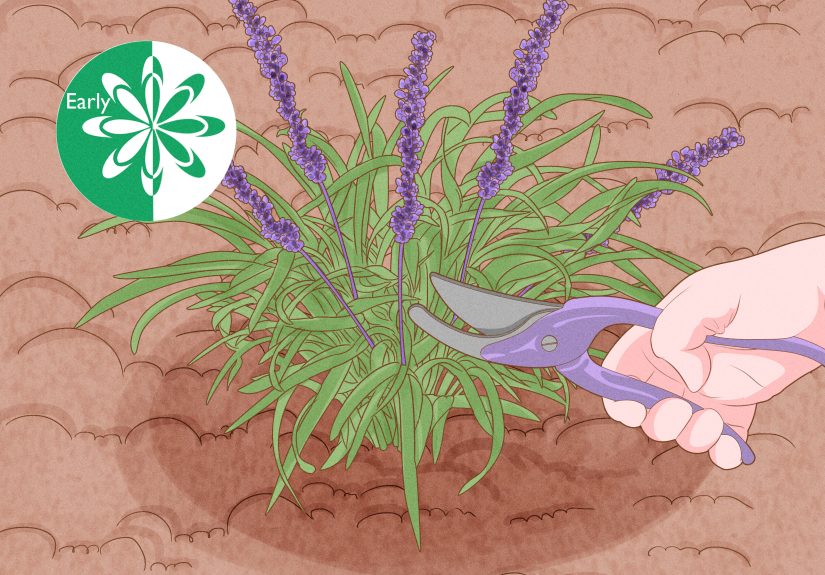
Step 13: Long-Term Care for Thick, Tidy Clumps
Once established, liriope is famously low-fuss. The main annual ritual is a haircut: cut back tired foliage in late winter
or very early spring before new growth takes over. After that, let it do its thingedge, groundcover, and quietly outperform
plants that need weekly pep talks.
Maintenance checklist
- Water: regular moisture the first year; drought-tolerant later (with better looks if watered in heat).
- Fertilizer: light feeding in early spring if growth looks weak.
- Trim: shear back before spring flush for cleaner new leaves.
- Watch: slugs/snails and occasional leaf/crown issues in overly wet conditions.
Common Problems (and the Fix That Usually Works)
“My seeds didn’t sprout… at all.”
The three most common culprits: old seed, skipped depulping, or inconsistent moisture. Try again with fresher seed,
clean it thoroughly, and keep conditions steady. If you’ve been warm the whole time, try a short cool period, then return to warmth.
“I got mold in the tray.”
Mold loves stagnant air. Vent your cover daily, avoid splashing the stems, and consider bottom watering. If the tray stays swampy,
your mix is too heavy or you’re overwatering.
“The seedlings don’t match the parent plant.”
That’s seed genetics doing what seed genetics does. Named cultivars and variegated types can produce mixed offspring.
If exact duplication is required, division is the reliable path.
Experience Notes: What Gardeners Learn the “Ohhh, That’s Why” Way (Extra)
People who successfully grow monkey grass from seed almost always say the same thingjust with different levels of dramatic flair:
consistency beats intensity. You don’t need special gadgets or mystical compost brewed under a full moon. You need a repeatable routine:
keep the mix lightly moist, keep temperatures steady, and resist the urge to “fix” things every 12 hours. Seeds don’t respond well to helicopter parenting.
Another common lesson is that the seed-cleaning step is not optional in spirit, even if it’s optional in some quick-start guides.
When gardeners skip depulping, they often end up with trays that look perfectly maintained… and perfectly empty. The people who get germination tend to be
the ones who treat berry pulp like glitter: it spreads everywhere, it’s annoying, and you’ll still be finding it later unless you clean thoroughly.
A long soak and a careful rub-rinse routine can save weeks of confusion.
Timing also shows up as a quiet superpower. Gardeners who start seeds when they can hold stable indoor conditionsnot during a week of travel,
not during a home renovation, not during the season when the heating system turns the air into crunchy toasthave better results. Monkey grass seedlings aren’t
fragile divas, but early germination is when they’re most vulnerable to drying out. Missing two days of watering can undo two months of waiting, which feels like
losing a board game on the last turn.
There’s also a practical, experience-driven trick: start more seeds than you think you need. Germination can be uneven, and even healthy sprouts
may grow at different speeds. If your goal is a uniform edging line, extras let you “select” similar-looking seedlings and pot up the slower ones for a second wave.
It’s the gardening version of ordering fries for the table: you will not regret having more.
Once seedlings are outside, gardeners often discover that monkey grass is tougher than expectedbut only after roots establish. The first season is about
root-building, not showmanship. Plants may sit there looking like miniature green commas while they expand underground. People who keep watering
steadily that first year (especially through heat) typically see a much faster fill-in the following season. The payoff is real: once clumps settle in, maintenance
drops to a simple yearly cutback and occasional tidy-up, and weeds have a harder time muscling in.
Finally, the “fun” discovery: seedlings from seed can surprise you. Some gardeners end up liking the subtle variationslightly different greens, slightly different
growth habitsbecause it looks more natural and less like a copy-paste border. If you’re okay with that, growing monkey grass from seed becomes less of a precision
project and more of a long-term win. The kind where you point at your ground cover two years later and say, “Yep, I grew that,” and everyone politely nods while you
glow on the inside.


