Table of Contents >> Show >> Hide
- What Is a Baguette Bag (and Why Is It Called That)?
- Plan Your DIY Baguette Bag Like a Pro
- Materials and Tools Checklist
- Draft a Simple Pattern (No Fancy Software Required)
- Step-by-Step: Sew the Baguette Bag
- Step 1: Prep and Cut Everything
- Step 2: Add Structure (Interfacing and/or Foam)
- Step 3: Make the Interior Pocket (Optional but Mighty)
- Step 4: Build a Clean Zipper Top
- Step 5: Attach the Zipper Unit to the Bag Body
- Step 6: Sew the Gusset to the Exterior
- Step 7: Sew the Lining (Similar, But Leave a Turning Hole)
- Step 8: Join Exterior and Lining (The “Magic Turn”)
- Step 9: Make and Attach the Strap
- Design Upgrades That Make It Look Store-Bought
- If You Meant a Literal “Baguette Bag” for Bread
- Troubleshooting (Because Bags Love Drama)
- Care and Longevity Tips
- Maker Experiences: What Actually Happens at the Sewing Machine (500+ Words)
- Conclusion
The baguette bag is the fashion equivalent of a great one-liner: short, memorable, and somehow it goes with everything.
It’s that slim, under-the-arm shoulder bag that looks like it’s headed to brunch even if you’re headed to the post office.
And the best part? You can make one yourselfcustom size, custom fabric, custom “I refuse to pay $400 for something I can sew” energy.
What Is a Baguette Bag (and Why Is It Called That)?
A baguette bag is a compact shoulder bag with a short strap designed to sit snugly under your armsimilar to how you’d
tuck a French baguette. The classic silhouette is long-ish and shallow (think: phone, keys, lip balm, and the emotional
support receipt you can’t throw away).
Modern versions range from structured and boxy to slouchy and soft, with closures like zippers, magnetic snaps, or a flap
with a buckle. Your DIY version can be any of thesebecause you’re the boss, and your sewing machine is your HR department.
Plan Your DIY Baguette Bag Like a Pro
Pick Your Size (Use Your Stuff as the Measuring Tape)
Instead of guessing dimensions, measure what you actually carry. A common finished size is around
10–12″ wide by 5–7″ tall with a 2–3″ depth.
If you carry sunglasses in a case, add width. If you carry nothing but vibes, you can go micro.
- Everyday baguette: 11″ W × 6″ H × 2.5″ D (fits phone + wallet + keys)
- Mini baguette: 9″ W × 5″ H × 2″ D (fits phone + cards + tiny dreams)
- Roomy baguette: 13″ W × 7″ H × 3″ D (fits more, still looks sleek)
Choose Your Vibe: Structured vs. Slouchy
Structure comes from stabilizers and interfacing. If you want the bag to keep its shape and stand up a bit,
use woven fusible interfacing plus foam (or a firm stabilizer). If you want a relaxed, “effortlessly cool” drape,
use lighter interfacing or skip foam and rely on fabric weight.
Decide on a Closure (Zipper = Secure, Snap = Fast)
- Zipper: best for security; adds a polished finish.
- Magnetic snap: quick access; great if you hate zipper wrestling.
- Flap + snap/buckle: more design detail; slightly more steps.
Materials and Tools Checklist
Here’s a practical list for a classic lined baguette bag with a zipper. Swap as needed.
- Exterior fabric: canvas, denim, twill, quilted cotton, faux leather/vinyl
- Lining fabric: quilting cotton, broadcloth, lightweight canvas
- Interfacing: woven fusible (for crispness) and/or foam stabilizer (for body)
- Zipper: 10–12″ (or longer and cut down)
- Thread: all-purpose polyester (heavier thread for topstitching if desired)
- Optional hardware: D-rings, swivel hooks, slider buckle (for adjustable strap)
- Tools: sewing machine, zipper foot, rotary cutter/scissors, ruler, clips/pins, seam ripper, iron
Draft a Simple Pattern (No Fancy Software Required)
We’ll draft a beginner-friendly pattern using rectangles plus a curved end option. This example uses a
finished bag size of 11″ W × 6″ H × 2.5″ D with a 1/2″ seam allowance.
Pattern Pieces (Cut Sizes)
-
Main body (Exterior): Cut 2 rectangles, 12″ W × 7″ H.
(Optional: round the two top corners for a softer silhouette.) - Main body (Lining): Cut 2 rectangles, 12″ W × 7″ H.
-
Gusset (Depth strip): Cut 1 strip, 3.5″ W × 24″ L.
(Length = bottom + both sides: 11 + 6 + 6 = 23″, add 1″ for seam allowance wiggle room.) - Zipper panels (Exterior): Cut 2 strips, 2.5″ W × 12″ L.
- Zipper panels (Lining): Cut 2 strips, 2.5″ W × 12″ L.
- Optional interior pocket: 1 rectangle 8″ W × 6″ H.
-
Strap: Cut 1 strip 3″ W × 22–26″ L (short shoulder strap),
or make an adjustable strap using webbing + hardware.
Why these numbers? The “cut size” includes seam allowance. The gusset width controls depth: for a 2.5″ finished
depth, you need 2.5″ + 1″ seam allowance total = 3.5″ cut width.
Step-by-Step: Sew the Baguette Bag
Step 1: Prep and Cut Everything
Wash and press fabrics if they’re washable (especially cotton). Cut all pieces accuratelybags are like geometry homework:
the more you “eyeball it,” the more it’s going to make you cry later.
Step 2: Add Structure (Interfacing and/or Foam)
Fuse woven interfacing to the wrong side of your exterior main body pieces and zipper panels for a crisp look.
If you want a structured designer feel, add foam stabilizer to the exterior pieces as well (baste within seam allowance
or follow your foam’s instructions).
Step 3: Make the Interior Pocket (Optional but Mighty)
- Fold the pocket rectangle right sides together (8″ W × 6″ H becomes 8″ W × 3″ H).
- Sew around three sides, leave a small turning gap, then turn and press.
- Topstitch the finished edge.
- Place the pocket on one lining piece (centered, a few inches below the top edge) and stitch sides + bottom.
Step 4: Build a Clean Zipper Top
This method creates a professional zipper opening using zipper panels (so you’re not fighting bulky corners).
-
Place one exterior zipper panel right side up. Lay the zipper face down along the long edge, aligned.
Place one lining zipper panel right side down on top, making a sandwich. - Sew along the zipper edge with a zipper foot.
- Flip fabrics away from zipper, press, and topstitch close to the seam for a crisp finish.
- Repeat for the other side of the zipper with the remaining zipper panels.
- You now have a “zipper unit” that’s about 12″ wide. Zip it halfway open (important for turning later).
Step 5: Attach the Zipper Unit to the Bag Body
- With right sides together, sew the top edge of one exterior main body piece to one side of the zipper unit.
- Repeat for the second exterior main body piece on the other side of the zipper unit.
- Press seams toward the body and topstitch if desired.
Step 6: Sew the Gusset to the Exterior
The gusset is what gives your baguette bag that satisfying depth. Use clips (especially if you’re sewing thicker layers).
- Mark the center of the gusset and the center bottom of each main body piece. Matching centers keeps everything even.
-
With right sides together, clip the gusset around the sides and bottom of the first exterior body piece.
Sew slowly, pivoting at corners. - Repeat with the second exterior body piece, forming the exterior shell.
- Trim seam allowance slightly and notch curves if needed to reduce bulk.
Step 7: Sew the Lining (Similar, But Leave a Turning Hole)
- Attach the lining body pieces to the lining side of the zipper unit the same way as the exterior.
- Sew the lining gusset around the lining body pieces.
-
Leave a 5–6″ opening on the bottom of the lining gusset or bottom seam for turning.
(Future-you will thank you. Past-you will still pretend it was your idea.)
Step 8: Join Exterior and Lining (The “Magic Turn”)
- With the zipper still halfway open, place the exterior inside the lining, right sides facing.
- Match seams at the top/zipper edges and clip around the opening.
- Sew around the top opening to connect exterior and lining.
- Turn the bag right side out through the lining opening. Push corners out gently, then press and topstitch the top edge.
- Close the lining opening with a ladder stitch (hand sewing) or a neat edge stitch on the machine.
Step 9: Make and Attach the Strap
For a classic baguette look, a short strap is perfect. For extra versatility, add hardware so you can swap straps later.
Option A: Fabric Strap (Short, Classic)
- Fold strap strip in half lengthwise, press.
- Open, fold raw edges to center crease, press again.
- Fold closed and topstitch both long edges.
- Attach strap ends to the bag sides (reinforce with a box stitch or bartacks).
Option B: Adjustable Strap (Hardware-Friendly)
Use webbing or a fabric strap plus a slider buckle (aka tri-glide) and swivel hooks. This lets you go shoulder or crossbody.
Keep hardware widths consistent (1″, 1.25″, etc.), and test-thread the strap through hardware before sewing the final end.
Design Upgrades That Make It Look Store-Bought
Add a Magnetic Snap (Even With a Zipper)
Some makers add a snap to stabilize the top edge or create a “quick close” on a flap. If you install a magnetic snap,
reinforce the area with a small square of heavy stabilizer so it doesn’t tear out over time.
Quilt It for Texture (and Forgiveness)
Quilted baguette bags look luxe and hide tiny wobbles. If topstitching isn’t your favorite sport, quilting also gives the eye
something pretty to focus on while your seams quietly mind their business.
Use Piping for Crisp Edges
Piping along the seams creates that structured “designer” outline. It’s optional, but it’s one of the fastest ways to level up
a simple shape.
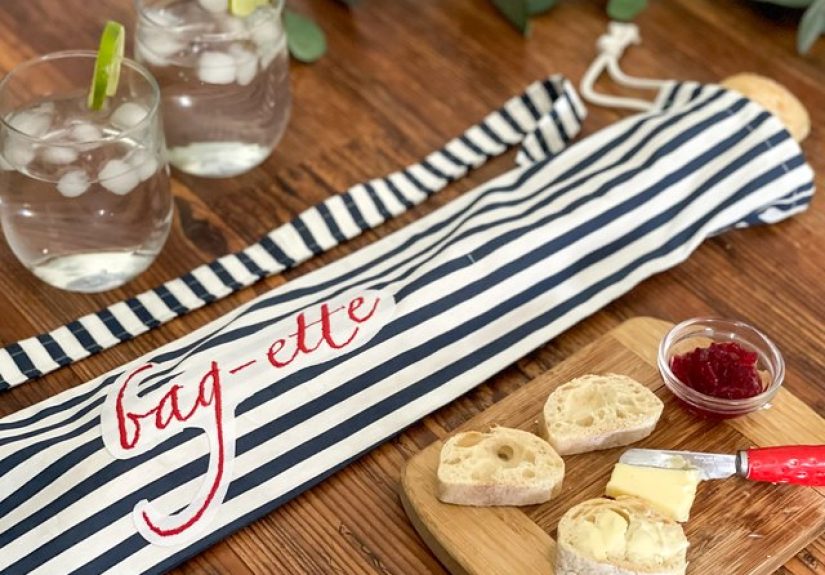
If You Meant a Literal “Baguette Bag” for Bread
Sometimes people mean a bag that holds an actual baguette loaf (the edible kind). The build is similar but simpler:
think a long fabric tube with a drawstring or flapgreat for picnics and farmers markets.
Use washable cotton or canvas, and skip foam/interfacing so it folds easily.
Troubleshooting (Because Bags Love Drama)
My Bag Looks Lopsided
- Check gusset center marks and seam matching. Clip first, sew second.
- Measure cut pieces again1/4″ off in cutting becomes “why is it haunted?” in assembly.
My Zipper Waves or Buckles
- Press the zipper panels after stitching.
- Topstitch to keep layers flat.
- Use interfacing on zipper panels for stability.
The Bag Is Too Floppy
- Add foam stabilizer or a firmer interfacing to exterior pieces.
- Choose a heavier exterior fabric (canvas/denim) next time.
Care and Longevity Tips
- Spot clean first: it’s gentler on hardware and structure.
- If washable: remove detachable straps, use a laundry bag, cold water, and air dry.
- Store smart: stuff lightly with tissue to keep the shape if structured.
Maker Experiences: What Actually Happens at the Sewing Machine (500+ Words)
Let’s talk about the part no pattern ever warns you about: the “real life” experience of making a baguette bag.
Not the glossy tutorial version where every seam presses flat like it’s auditioning for a runway show. The real version.
First, most makers discover that a baguette bag is basically a lesson in edge management. Because the silhouette is
long and relatively shallow, any tiny waver in the top edge becomes noticeable. That’s why people who’ve made a few bags
often swear by two habits: pressing constantly (yes, constantly), and topstitching as a design feature rather than a
reluctant afterthought. Topstitching doesn’t just look polishedit acts like a tiny seatbelt that keeps layers from shifting.
Next comes the interfacing debate, which is like arguing about pizza toppings but with more irons involved. Makers who want
a crisp, structured “designer” look often love a woven fusible interfacing paired with foam. The foam gives body without
needing heavy quilting, and it helps the bag hold a clean silhouette under your arm. On the flip side, people making a casual,
slouchy baguette bag often realize that too much structure can fight the vibe. A soft baguette bag looks best when it drapes
slightly, so a lighter interfacing (or none at all) can be the difference between “cool and relaxed” and “why is my purse
standing at attention?”
Zippers also have a reputation: they’re either your best friend or your personal villain. The common experience is that
zipper panels (those fabric strips on either side of the zipper) are what make the difference. Without them, you can get a
bulky top edge and a zipper that feels stiff. With zipper panels, the opening looks intentional and the zipper behaves.
A lot of makers also learn the “zip it halfway” rule the hard waybecause forgetting to leave the zipper open before turning
the bag is basically a sewing rite of passage. It’s not a mistake; it’s an initiation.
Strap length is another surprisingly emotional topic. The classic baguette look wants a short strap so the bag sits snugly
under your arm. But real life involves coats, body shapes, and the occasional desire to go hands-free. Many makers end up
creating two strap options: a short strap for the “baguette silhouette” and a detachable adjustable strap for errands.
The first time you swap straps and realize your one bag now has two personalities is the moment you start looking at your
fabric stash like it’s a business plan.
Finally, the biggest practical lesson: small bags demand intentional pockets. Because you don’t have unlimited space,
you want your essentials to stay upright and easy to find. Makers who skip the interior pocket often report that everything
migrates to the corners like it’s trying to escape. Even one simple slip pocket changes the daily experience of using the bag.
And that’s really the point: a baguette bag isn’t just cuteit’s a tiny, wearable organization system. A stylish one, sure.
But still a system. (And yes, lip balm will still disappear sometimes. Sewing is powerful, but it’s not magic.)
Conclusion
A baguette bag is one of the most satisfying DIY accessories you can make: it’s stylish, customizable, and small enough
to finish without turning your dining table into a month-long construction zone. Start with a simple zipper-and-gusset build,
choose structure based on your style, and don’t skip the pressing. Your future self (the one carrying a handmade bag like it’s
totally normal to be this talented) will be very pleased.


