Table of Contents >> Show >> Hide
- Think Like a Builder: Organization Is a System, Not a Cleanup Day
- Step 1: Inventory Your Workshop Without Overthinking It
- Step 2: Design Your Layout Around Workflow, Not Vibes
- Step 3: Choose Your Storage “Stack” (Wall + Drawers + Mobile)
- Step 4: Build These High-Impact DIY Organizers First
- Step 5: Label Like Your Future Self Is a Stranger
- Step 6: Make It Safer Without Making It Complicated
- Step 7: Lock In the Reset Routine (So It Stays Organized)
- Common DIY Workshop Organization Mistakes (and Fixes)
- Real-World Experiences: What Actually Changed After I Organized My Workshop (About )
- Conclusion: Build the Workshop You’ll Actually Use
If your workshop currently looks like a tool tornado touched down, did a victory lap, and left behind three identical tape measures… welcome. You’re in the right place. A well-organized DIY workshop isn’t about making your garage look like a catalog photo. It’s about working faster, safer, and with less “Where did I put that?”so your projects feel fun again instead of feeling like an unpaid scavenger hunt.
This guide walks you through building a workshop organization system you can actually maintain: planning your layout, choosing smart storage, building a few high-impact organizers, and setting up simple habits that keep the space from sliding back into chaos. No magic. No perfection. Just a workshop that works.
Think Like a Builder: Organization Is a System, Not a Cleanup Day
The biggest workshop mistake is treating organization like a one-time eventan inspirational Saturday where you “finally do it,” followed by six months of entropy. Instead, think like a builder: you’re creating a system with three parts:
- Homes: every tool and supply gets a “where it lives.”
- Flow: your layout matches how you actually build.
- Reset: a short routine that keeps your system alive.
Once those exist, the workshop practically organizes itself. (Okay, it still won’t sweep the floor. We’re not living in a sci-fi movie. Yet.)
Step 1: Inventory Your Workshop Without Overthinking It
Before you buy bins or build cabinets, do a fast inventory. You’re not creating a museum archiveyou’re making decisions. Set a timer for 30–45 minutes and sort your stuff into broad categories:
Quick inventory categories
- Hand tools: measuring, marking, cutting, fastening, striking
- Power tools: drills/drivers, saws, sanders, routers, etc.
- Consumables: screws, nails, glue, sandpaper, blades, bits
- Materials: lumber, sheet goods, offcuts, metal stock
- Finishing: paint/stain, brushes, rags, tape, drop cloths
- Safety & cleanup: eye/ear protection, masks, vacuum, broom
As you sort, make a tiny note of your Top 20 most-used items. Those will get premium real estate later (eye-level, near the bench). Everything else can live farther away, higher up, or behind doors.
Mini declutter rule (no drama)
If it’s broken, missing parts, or you haven’t used it in years and it’s not specialconsider letting it go. Every tool you keep must “pay rent” in space and attention.
Step 2: Design Your Layout Around Workflow, Not Vibes
A great workshop layout feels like a good kitchen: tools are where you reach for them, supplies appear when you need them, and you’re not doing 10,000 steps just to drill two holes.
Create simple zones
Even in a tiny workshop, zones reduce clutter because they tell your brain where things belong. Common zones include:
- Project zone: workbench + frequently used hand tools
- Cutting zone: saws, measuring/marking, clamps nearby
- Assembly zone: clamps, glue, fasteners, squares
- Sanding/finishing zone: sandpaper, finishes, rags, tape
- Storage zone: lumber, bins, seasonal/rarely used items
A realistic example: one-car garage workshop
Here’s a layout that works in the real world (where you might still need to park a car sometimes):
- Back wall: primary bench + wall storage (tool wall) above it
- One side wall: vertical lumber rack + sheet goods storage near the garage door (easy loading)
- Other side wall: shelves for bins + a mobile cart that can roll to the bench
- Corner: sanding/finishing supplies contained in a tote or cabinet to keep dust off
Pro move: Place your most-used tools and supplies between knee and eye level. Bending, twisting, and digging in low piles isn’t just annoyingit’s how “quick projects” become “why does my back hate me?” afternoons.
Step 3: Choose Your Storage “Stack” (Wall + Drawers + Mobile)
Most workshops need a mix of storage types. Relying on only one (like “everything goes in drawers”) usually backfires. The best DIY workshop organization uses a deliberate stack:
1) Wall storage for grab-and-go tools
Wall storage keeps frequently used tools visible and off the bench. You’ve got three popular options:
- Pegboard: affordable, flexible, fast to set upgreat for lighter hand tools
- French cleats: modular and strongexcellent for custom holders, small cabinets, and heavier tools
- Track/slatwall systems: clean look, lots of accessoriesoften pricier, less DIY-ish
Which should you pick? If you like rearranging, pegboard is friendly. If you want a “forever” system that can grow with your tool collection, French cleats shine. Plenty of shops use both: a French cleat backbone with pegboard sections for quick hooks and baskets.
2) Drawer storage for small tools and “bitty stuff”
Drawers are perfect for things you don’t want dusty: drill bits, driver bits, measuring tools, chisels, sanding discs, hardware, and the tiny Allen keys that multiply like rabbits. Use drawer dividers, trays, and foam (or simple cardboard organizers) so drawers don’t become junk soup.
3) Mobile storage for flexible workflows
A rolling cart or mobile tool chest is the cheat code for small shops. It lets you bring tools to the work instead of dragging projects across the room. A basic setup might include:
- Top tray: current project tools
- Middle: power tools + batteries
- Bottom: clamps, glue, and “assembly stuff”
4) Overhead and high shelving for rarely used items
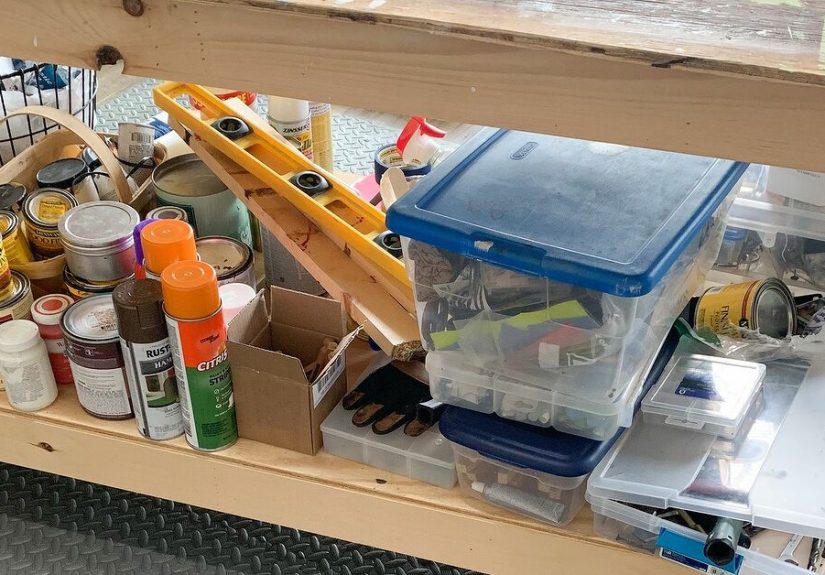
Use high shelves or overhead racks for seasonal, bulky, or rarely used gear (extra extension cords, spare parts, holiday lights, big jigs). Keep these in labeled bins so you’re not playing “guess the tote” every time.
Step 4: Build These High-Impact DIY Organizers First
If you want results fast, build the organizers that remove the most clutter per hour of effort. Here are the best “bang for your buck” DIY workshop organization projects:
DIY Project #1: The tool wall “prime zone”
Pick the wall above or beside your workbench and commit it to your most-used tools. Whether you choose pegboard or French cleats, your goal is the same: clear bench, quick reach.
What belongs here: tape measure, square, pencils/markers, screwdrivers, pliers, utility knife, small hammer, drill/driver, commonly used bits, safety glasses, hearing protection.
What does NOT belong here: rarely used specialty tools that steal attention and space.
DIY Project #2: A power tool charging station that doesn’t look like spaghetti
Charging stations are where cords go to become a knot. Fix it by dedicating a shelf or wall section to batteries and chargers. Keep it near an outlet, add a power strip with a switch, and label charger spots so they go back where they belong.
Bonus: Store the tool with its battery ecosystem (tool + battery + charger + bits/blades) so you can grab one “kit” and start working immediately.
DIY Project #3: A small-parts “hardware command center”
Hardware is the silent workshop clutter villain. One moment it’s “just a few screws,” and the next moment you own 11 partial boxes of deck screws you don’t remember buying.
Create a command center using a mix of:
- Clear drawer organizers for the most common sizes
- Stackable small-parts bins for categories (wood screws, machine screws, anchors, washers, nails)
- A labeled “project jar” for current builds (so parts don’t disappear)
Specific example: Keep a “Most-Used Fasteners” drawer: #8 x 1-1/4″ wood screws, #10 x 2-1/2″ screws, brad nails, and common wall anchors. Put the oddball stuff elsewhere.
DIY Project #4: Clamp storage that ends the clamp avalanche
Clamps are essential, but they’re awkward. Give them a dedicated home near your assembly zone. Options include a wall rack, a rolling clamp cart, or a vertical clamp holder beside the bench. The best storage keeps clamps visible and sorted by type (bar clamps, F-clamps, spring clamps) so you stop buying duplicates “because you couldn’t find yours.”
DIY Project #5: Lumber and offcut control
Lumber storage is where many workshops break down. The key is separating:
- Full-length stock (rack near the entrance/door)
- Sheet goods (vertical cart or slot storage so sheets don’t warp)
- Offcuts (bins or a “library” rack, culled regularly)
Rule of sanity: If an offcut is too small to clamp safely or too warped to use, it’s not “future potential.” It’s “future clutter.”
Step 5: Label Like Your Future Self Is a Stranger
Labels aren’t just for Instagram pantries. In a workshop, labels prevent “mystery bins” and keep you from dumping random stuff wherever there’s space.
Where labels matter most
- Hardware drawers and small bins (use clear, specific names)
- Consumables (sandpaper grits, blades, bits)
- Project totes (“Door Trim Project,” “Bike Repair Kit,” etc.)
Tip that actually works: If you store fasteners in drawers, tape the label or product info where it’s easy to see. Your goal is zero guessing and zero rummaging.
Step 6: Make It Safer Without Making It Complicated
Workshop safety isn’t just PPE (though that matters). Organization itself is a safety feature. When tools have homes, you’re less likely to trip, cut yourself reaching into a pile, or knock something heavy off a shelf.
Simple safety upgrades tied to organization
- Keep walkways clear (no “temporary” piles that become permanent)
- Store heavy items lower so you’re not lifting awkward weight overhead
- Separate chemicals/finishes into a dedicated bin or cabinet and keep lids tight
- Make PPE easy to grab (a hook or bin by the bench beats “somewhere in a drawer”)
- Improve lighting over the bench and cutting/assembly areas
Also: a clean bench is a safer bench. If you routinely clear it, you’re less likely to place your hand on something sharp, hot, or sticky (sometimes all threeprojects get weird).
Step 7: Lock In the Reset Routine (So It Stays Organized)
Here’s the truth: the best workshop organization is the one you can maintain when you’re tired and just want to go inside. That’s why you need a reset routine that takes 10 minutes or less.
The 10-minute workshop closeout
- Return the Top 20 tools to their homes (tool wall/drawers)
- Trash and scrap sweep into a bin (offcuts, packaging, sanding discs)
- Hardware back to bins (no “just set it here” piles)
- Wipe the bench so you start clean next time
- Stage tomorrow’s work (optional): lay out the next tools/materials
Do this consistently, and you’ll stop “reorganizing” your shop every month. You’ll just… use it.
Common DIY Workshop Organization Mistakes (and Fixes)
Mistake: Buying storage before you define categories
Fix: Sort first. Then choose storage sized for your real categories. Storage should serve your inventory, not the other way around.
Mistake: Storing by “shape” instead of “use”
It’s tempting to store all long things together and all small things together. Sometimes that works. But most of the time, you want to store by workflow: measuring/marking together, drilling/fastening together, sanding together.
Mistake: The “doom drawer” phenomenon
Fix: If a drawer becomes a dumping ground, it needs dividers and clearer categories. A single drawer organizer tray can rescue a drawer from chaos.
Mistake: Too much open shelving
Open shelves are convenientbut they collect dust and visually amplify clutter. Balance them with bins, cabinets, or drawers so the workshop feels calmer and cleaner.
Mistake: Ignoring future growth
Tools multiply. Plan for expansion by using modular systems (like French cleats, adjustable shelving, and stackable bins). Build a system you can extend instead of rebuilding from scratch.
Real-World Experiences: What Actually Changed After I Organized My Workshop (About )
The first time I tried to “organize my workshop,” I did what many of us do: I cleaned. I made piles. I felt productive. I even found a screwdriver I’d been missing since approximately the Jurassic era. Then I put everything back… into slightly neater piles. Two weeks later, I was right back to stepping over scrap wood like it was a nature trail.
What finally worked wasn’t a bigger shelf or a prettier storage bin. It was deciding that my workshop needed to support the way I actually workmessy bursts of energy, short sessions after work, and projects that evolve midstream. I started with one change: a “prime zone” tool wall above the bench. I didn’t try to store everything there. I picked my Top 20: tape measure, square, pencil cup, utility knife, pliers, screwdrivers, drill/driver, bit case, and safety gear. That one move immediately reduced bench clutter because I had an obvious place to put things down that wasn’t the bench itself.
Next came the hardware situation. My fasteners used to live in a half-torn assortment of boxes that constantly fell over like cardboard dominos. I built a simple hardware command center using small drawers and clear bins, and I labeled them with specifics instead of vague categories. “Wood Screws” became “#8 x 1-1/4"” and “#10 x 2-1/2".” Suddenly I stopped buying duplicates. Even better, I could grab what I needed in seconds and get back to buildingno rummaging, no muttering, no dramatic sighing at inanimate objects.
The biggest surprise was how much the reset routine mattered. I used to think, “I’ll clean up at the end of the project.” But projects can take weeks, and that meant living in chaos for weeks. So I made the closeout routine almost comically small: return the Top 20 tools, toss trash, sweep scraps into a bin, and clear the bench. I told myself it only had to take 10 minutes. Most days it took less. The payoff was huge: when I walked into the workshop next time, I could start immediately. No warm-up cleaning session. No searching for the drill battery like it was a mythical artifact.
I also learned that “mobile” beats “perfect” in small shops. A rolling cart became my project sidekickholding the current tools, glue, clamps, and fasteners for whatever I was building. When I needed the floor clear, the cart rolled out of the way. When I needed to work closer to the garage door for ventilation or space, the cart came with me. It made my workshop feel bigger without adding a single square foot.
Finally, I stopped aiming for a showroom. A workshop is allowed to look like work happens there. The goal is not spotless; it’s functional. If your system helps you find tools fast, keeps the bench usable, and makes cleanup easy enough that you’ll actually do itthen congratulations. You’ve built a workshop organization that lasts.
Conclusion: Build the Workshop You’ll Actually Use
DIY workshop organization isn’t about buying the fanciest storage system or building a wall of cabinets that takes six months to finish. It’s about choosing a layout that matches your workflow, giving your most-used tools prime real estate, building a few key organizers that eliminate clutter fast, and maintaining it with a short reset routine.
Start small: one wall, one drawer set, one hardware area. Get a quick win. Then expand. Your future self will thank youprobably by finishing projects faster and using fewer creative new curse words.