Table of Contents >> Show >> Hide
- Why a Face Mask Holder Belongs in the Entryway
- The DIY Idea at a Glance
- Materials and Tools
- Step-by-Step: Build Your DIY Face Mask Holder
- Step 1: Pick the Right Spot
- Step 2: Plan Your Layout on Paper First
- Step 3: Cut and Sand the Wood
- Step 4: Assemble the Shelf + Back Panel
- Step 5: Mark Hook Placement
- Step 6: Prime and Paint (or Stain)
- Step 7: Attach Hooks and Add Labels
- Step 8: Choose the Right Containers for Clean vs. Used Masks
- Step 9: Mount the Station Securely
- Step 10: Style It Like a Real Entryway (Not a Utility Closet)
- Design Variations for Different Homes
- Mask Care and Storage Basics for This Setup
- Common Mistakes to Avoid
- Maintenance Routine That Actually Works
- Experience and Real-Life Lessons from Using a DIY Face Mask Holder in the Entryway
- Final Thoughts
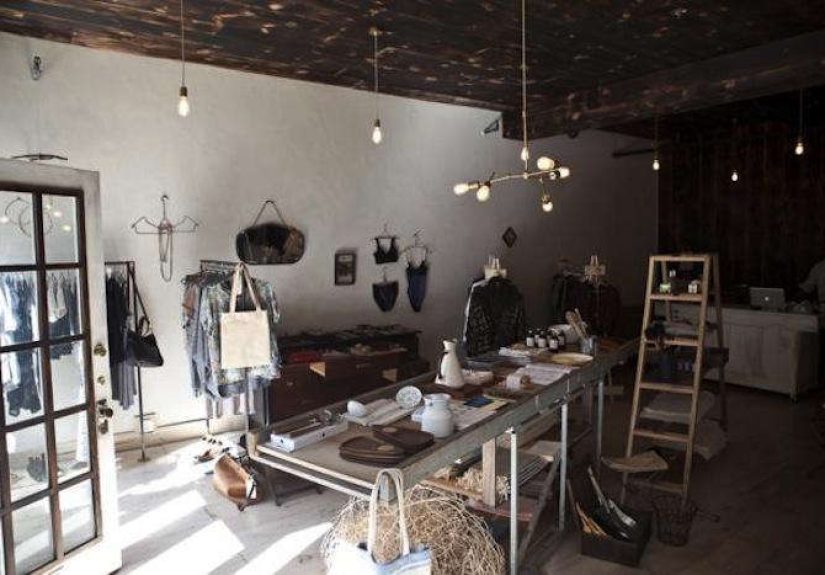
Your entryway is where life happens fast: keys disappear, shoes migrate, and somehow everyone forgets the one thing they need right after the door closes. If you still keep reusable face masks on hand for commuting, travel, clinics, dusty chores, or crowded spaces, a dedicated mask station can save time and keep the area cleaner.
This DIY face mask holder idea is really a mini “drop zone” built for real life. It combines a wall-mounted shelf, hooks, and labeled storage so masks don’t end up in pockets, on countertops, or mysteriously fused to the car seat. The best part? You can build it in a weekend (or fake a custom look in an afternoon) and style it to match your entrywayfarmhouse, modern, minimalist, or “I just want it to look less chaotic.”
Below, you’ll get a practical, good-looking setup that works in small spaces, helps separate clean and used masks, and plays nicely with the rest of your entryway essentials like keys, sunglasses, and mail. It’s organized, easy to maintain, and significantly more attractive than the random pile method.
Why a Face Mask Holder Belongs in the Entryway
A well-designed entryway works best when it has zones. Instead of one giant dumping ground, you create specific homes for specific items. That matters even more for small things like masks, which are easy to lose and easy to mix up with other stuff.
Think of your wall in layers: hooks up top for bags and jackets, shelf space at eye level for grab-and-go items, and baskets or bins lower down for bulkier items. This vertical layout makes the entryway easier to use and easier to keep tidy, especially in tight spaces. It also helps your home look more intentional instead of “lived-in by raccoons.”
The goal is not a magazine-perfect foyer. The goal is a system that works on rushed mornings, rainy afternoons, and those evenings when everyone walks in carrying seven things and exactly zero patience.
The DIY Idea at a Glance
What You’re Building
A compact wall-mounted entryway station with:
- One small top shelf (for hand sanitizer, sunglasses, or a small tray)
- 3–5 hooks underneath (for masks, keys, or lanyards)
- Two labeled mask compartments: Clean and Used
- Optional mini basket or envelope holder for kid-size masks or extras
Why This Layout Works
It uses vertical space, keeps masks visible (so people actually use the system), and separates fresh masks from worn ones. You can make it as simple or styled-up as you want: painted wood, stain-grade wood, shiplap backing, beadboard, or a sleek minimal board with matte hooks.
Materials and Tools
Materials
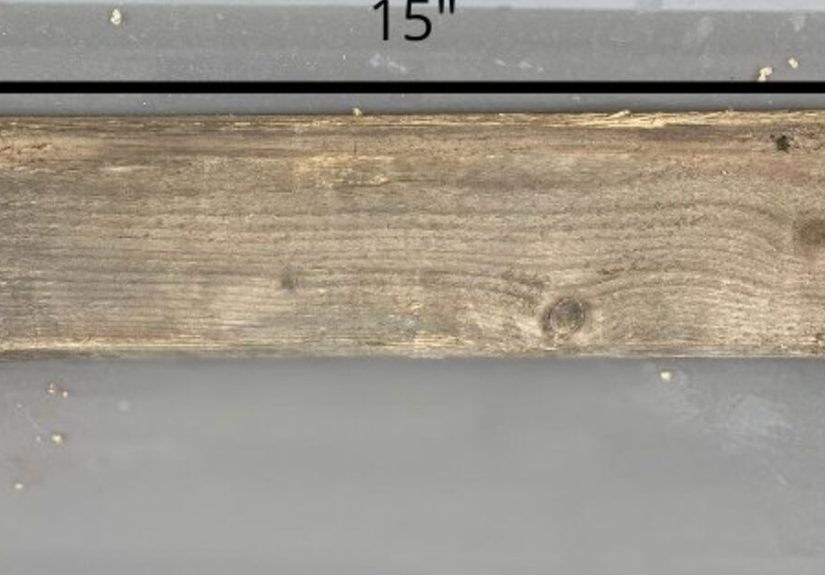
- 1 wood board for back panel (example: 1×8 or 1×10, 24–30 inches long)
- 1 wood board for shelf (example: 1×4 or 1×6, same width as back panel)
- 3–5 hooks (double hooks work great for masks + keys)
- Wood screws (including wall-mount screws long enough for studs)
- Short screws for attaching hooks
- Wood glue
- Sandpaper (medium and fine grit)
- Primer + paint or stain + clear topcoat
- Labels (vinyl labels, stencils, or a label maker)
- Two small containers:
- Clean masks: breathable pouch, paper bag holder, or mesh basket
- Used masks: sealed pouch/bin or a lidded container liner bag
Tools
- Measuring tape
- Level
- Drill/driver
- Stud finder
- Saw (miter saw, circular saw, or have boards cut in-store)
- Paintbrush or small roller
- Pencil
Beginner tip: If you don’t want to cut wood, many home improvement stores can cut boards for you. That turns this into a simple assembly-and-mount project.
Step-by-Step: Build Your DIY Face Mask Holder
Step 1: Pick the Right Spot
Choose a wall near the door, but not where the door swings into it. Ideally, mount it where you naturally pause before leavingnext to the mirror, above a small bench, or near your key tray.
If your entryway is tiny, go vertical and narrow. A 24-inch-wide station can still do a lot if it’s well organized. In extra-tight spaces, mount it above a shoe cabinet or slim bench rather than trying to add furniture.
Step 2: Plan Your Layout on Paper First
Before drilling anything, sketch your layout. Here’s a good beginner-friendly arrangement for a 24-inch-wide station:
- Top shelf: 24 inches wide
- Hooks: 3 hooks spaced evenly underneath
- Left side label/container: CLEAN
- Right side label/container: USED
- Optional center mini cup: sanitizer or lip balm
Keep frequently used items at hand or eye level. That small design choice makes the station feel effortless to useexactly what you want when everyone is halfway out the door.
Step 3: Cut and Sand the Wood
Cut your back panel and shelf to size. Sand all edges and surfaces so no one snags a sleeve on rough wood. If you’re repurposing wood crates or scrap boards, sand thoroughly and fill major dents if you want a cleaner finish.
If you want a cottage or farmhouse look, a little texture is charming. If you want a crisp modern look, fill screw holes and sand smooth before painting.
Step 4: Assemble the Shelf + Back Panel
Attach the shelf to the top portion of the back panel with wood glue and screws from the back (or use small metal brackets underneath if you prefer). Make sure the shelf is level and flush.
If you want extra style points, add a thin trim piece under the front edge of the shelf to make it look thicker and more custom. This is a tiny trick that makes a basic project look expensive.
Step 5: Mark Hook Placement
Use a pencil and ruler to mark hook positions evenly across the lower section of the back board. A clean layout matters here. Crooked hooks can make an otherwise lovely project look like it lost a fight with a tape measure.
As a simple guide, keep hooks a few inches in from the edges and space them evenly. If you’re using three hooks, center one in the middle and place the others symmetrically on each side.
Step 6: Prime and Paint (or Stain)
Finish the wood before mounting hardware whenever possible. It’s faster, cleaner, and you won’t have to paint around hooks while muttering things you can’t put on a family blog.
Good finish options for entryways:
- Warm white or cream: bright, classic, easy to style
- Muted green or navy: hides scuffs and adds depth
- Natural stain: cozy, farmhouse, or modern rustic
- Two-tone: painted back panel + natural wood shelf
Let everything dry fully before attaching hooks.
Step 7: Attach Hooks and Add Labels
Screw hooks into the pre-marked spots. Then add your labels for mask storage. You can label the containers directly or mount small plaques to the board:
- Clean Masks
- Used Masks
If you live with kids or multiple adults, you can also number hooks or assign names so everyone has a designated spot. That small bit of structure reduces “Whose mask is this?” debates by approximately 87%.
Step 8: Choose the Right Containers for Clean vs. Used Masks
This is the most important part of the whole setup. The station should not just look cuteit should help you store masks correctly.
For clean, dry masks: Use a breathable option like a paper bag holder, mesh pouch, or open-weave basket insert. Breathable storage helps keep clean masks protected without trapping moisture.
For used or damp masks: Use a sealed bag or sealed mini bin liner until wash day. This is especially helpful if someone gets home sweaty, caught in the rain, or has been wearing the mask for a long commute.
If you want a neat look, place both containers inside matching baskets and label the inside pouches instead of the baskets themselves.
Step 9: Mount the Station Securely
Use a stud finder and level before drilling. Whenever possible, mount into wall studs for strength. Many wall-mounted storage projects are designed with common stud spacing in mind, and anchoring into studs is the best long-term move.
If you can’t hit studs, use high-quality wall anchors rated for the weight of the shelf plus whatever people will inevitably hang on it (bags, jackets, umbrellas, and at least one “temporary” item that lives there forever).
Step 10: Style It Like a Real Entryway (Not a Utility Closet)
Now add the finishing touches so the station blends into your home:
- A small tray on the shelf for keys
- A narrow mirror above or beside it
- A small basket below for shoes
- A stool or bench nearby if space allows
- A tiny plant or framed print for personality
The secret is mixing function and decor. Hooks and shelves can be practical and still look intentional.
Design Variations for Different Homes
1) Small Apartment Entryway
Go slim: one board, three hooks, one narrow shelf, and compact labeled pouches. Pair it with floating shelves and a mirror to keep the floor clear.
2) Family Drop Zone Version
Use a wider board (30–36 inches), five hooks, and labeled sections for each person. Add baskets underneath for gloves, hats, and pet leashes. This works especially well if your entry doubles as a mini mudroom.
3) Farmhouse Entryway Style
Use stained wood, black hooks, and woven baskets. Add a beadboard or shiplap-style backing for texture and a cozy look. It feels warm and hides everyday chaos surprisingly well.
4) Renter-Friendly Version
Skip wall drilling and adapt the idea to an over-the-door hook rail plus a hanging organizer with labeled pouches. It’s not as custom, but it gives you the same clean/used mask separation and a much tidier entry routine.
Mask Care and Storage Basics for This Setup
This project is about organization, but it also works best when paired with good mask habitsespecially for reusable cloth masks.
- Store clean, dry reusable masks in a breathable container (paper or mesh works well).
- Store wet or dirty cloth masks in a sealed bag or container until laundering.
- Wash reusable cloth masks regularly (ideally after a day of use or sooner if wet/dirty).
- Don’t stuff used masks into pockets for later. Your entryway station should make the better choice the easier choice.
Also, keep a few masks in rotation. A good system is one in use, one clean backup, and one in the laundry cycle. Your future self will be weirdly grateful.
Common Mistakes to Avoid
No “Clean” and “Used” Separation
If everything goes into one basket, the system looks organized but isn’t actually functional. Separate containers are the whole point.
Too Many Hooks, Not Enough Plan
Hooks are helpful, but random hooks create visual clutter. Assign each hook a job: masks, keys, dog leash, tote bag, etc.
Ignoring Height and Reach
If kids need to use the station, add one or two lower hooks. If only adults use it, keep mask storage at hand level for speed.
Using Delicate Materials in a High-Traffic Area
Entryways get scuffed. Use durable paint, easy-to-clean finishes, and containers that can be wiped out quickly.
Skipping Secure Mounting
A shelf with hooks attracts weight. Mount securely to studs or use proper anchors. “It seemed sturdy” is not a mounting strategy.
Maintenance Routine That Actually Works
Keep it simple so it sticks:
- Nightly (30 seconds): Move used masks to the sealed container if they aren’t already there.
- Laundry day: Wash reusable masks and restock the clean side.
- Weekly: Wipe the shelf, hooks, and bins; toss receipts and random paper clutter.
- Monthly: Edit what’s on the station so it doesn’t become a “miscellaneous museum.”
Organization works best when every item has a home. That rule sounds basic, but it’s basically the difference between a calm entryway and a daily scavenger hunt.
Experience and Real-Life Lessons from Using a DIY Face Mask Holder in the Entryway
One of the biggest surprises people notice after adding a face mask holder to the entryway is not the storage itselfit’s the reduction in tiny daily friction. Before the station, masks usually lived in three places: coat pockets, the kitchen counter, and “somewhere in the car.” After the station, everyone knows where to look. That alone can make mornings feel more organized, especially in homes with kids or shared schedules.
A common experience in small apartments is realizing the entryway doesn’t need to be large to be useful. Even a narrow wall can become a high-function zone when you use hooks, a slim shelf, and two labeled pouches. People often think they need a full mudroom setup, but the better solution is usually a compact wall system that handles the exact items used every day. The biggest win is visibility: if masks are tucked into a drawer, people forget them; if they’re in a clean labeled spot, they get used.
Families also tend to learn quickly that labels matter more than fancy decor. A beautiful basket without a label becomes a mystery basket by day three. A simple “Clean Masks” and “Used Masks” label, even printed on basic sticker paper, prevents mix-ups. Some households add names or numbers to hooks, which helps with school mornings and reduces arguments over whose gear is whose. It’s a small change, but it creates a repeatable routineand repeatable routines are what make organization systems last.
Another real-world lesson: the “used” side needs to be easy to use, not hidden. If the sealed bag or bin is inconvenient, people will skip it and drape masks over hooks or dump them on the shelf. The best setups make the used-mask container obvious and within easy reach. Some people use a lined mini-bin tucked into a basket, while others hang a washable zip pouch on a side hook. Both work, as long as the habit is easy.
Styling choices also affect whether the system survives. When the holder looks like it belongs in the homematching hooks, a paint color that complements the wall, a small tray for keysit gets treated as part of the entryway instead of a temporary add-on. That means people are more likely to maintain it. In contrast, a purely utilitarian setup (plastic container, no labels, random hook placement) often becomes cluttered fast because it feels temporary.
People who use the station for more than masks often get the best results. Once the holder is in place, it naturally becomes a smarter drop zone: keys on one hook, dog leash on another, sunglasses on the shelf, sanitizer in a small cup, and masks stored correctly. In other words, it solves more than one problem, which is why it stays useful even when routines change.
The final lesson is simple: don’t wait for a perfect entryway. Many of the most successful setups are “good enough” DIY projects made from one board, a few hooks, and labels. You can always upgrade later with better baskets, prettier hardware, or a larger built-in cabinet. The important part is creating a system that is easy to follow on busy days. If your entryway helps you leave the house with the right stuffand come home without making a messit’s doing its job beautifully.
Final Thoughts
A DIY face mask holder for the entryway is a small project with a big payoff. It combines organization, hygiene-minded storage, and smart design in one practical station. You don’t need a giant mudroom or a pro-level workshopjust a simple plan, a few materials, and a clear “clean vs. used” system.
Build it once, label it well, and your entryway instantly gets calmer, cleaner, and much easier to use. Which is a pretty great return on a weekend project.