Table of Contents >> Show >> Hide
- What Are Miniature Roses?
- Before You Plant: Choose the Right Spot and the Right Plant
- When to Plant Miniature Roses
- How to Plant Miniature Roses in the Ground
- How to Plant Miniature Roses in Containers
- Miniature Rose Care Basics (The Part That Makes Them Bloom)
- Common Problems and How to Fix Them
- Winter Care and Overwintering Miniature Roses
- Quick Miniature Rose Success Checklist
- Conclusion
- Grower Experiences and Practical Lessons (500+ Words)
Miniature roses are proof that good things come in small, thorny packages. They deliver all the charm of full-size rosesbuds, blooms, fragrance, and repeat floweringbut in a compact size that fits patios, borders, balconies, and even sunny windows (with the right care). If you’ve ever brought home a cute mini rose and watched it go from “adorable” to “dramatic” in two weeks, don’t worryyou’re not cursed. Miniature roses are real roses, and they thrive when you treat them like roses, not like a decorative bouquet with roots.
In this guide, you’ll learn exactly how to plant and grow miniature roses in the ground or in containers, how to water and feed them without overdoing it, how to prune and deadhead for more blooms, and how to handle common problems like spider mites, black spot, and powdery mildew. We’ll also cover overwintering and real-world grower experiences so you can skip the rookie mistakes and get to the part where your rose actually blooms like it means it.
What Are Miniature Roses?
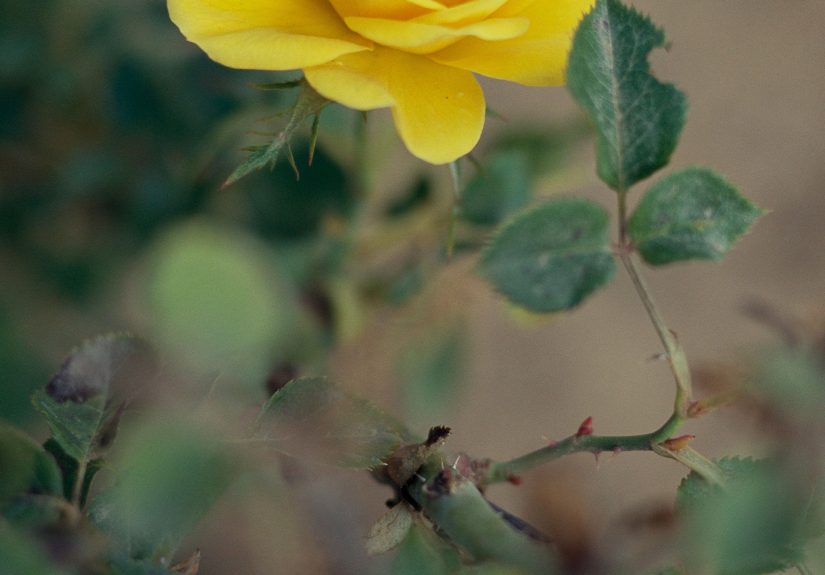
Miniature roses are true roses bred to stay smaller in overall plant size, bloom size, or both. Many varieties stay roughly 1 to 3 feet tall, though some micro-minis stay much shorter and some climbing miniatures can grow much taller than people expect. That means “miniature” often refers to the scale of the blooms and plant habitnot always a tiny, desk-friendly forever plant.
They’re ideal for:
- Small garden beds and edging
- Patios, porches, and balconies
- Containers and window boxes
- Gift plants that can be grown on (instead of tossed after blooming)
Before You Plant: Choose the Right Spot and the Right Plant
1) Start with a healthy plant
Look for a miniature rose with firm green stems, healthy foliage, and no obvious webbing, sticky residue, or black-spotted leaves. If the plant is blooming, greatbut don’t choose it only for flowers. A compact shape and clean leaves matter more than having the biggest bloom at the store.
Tip: Grocery-store mini roses can be charming impulse buys, but they often struggle because they’re treated as short-term décor. They can still become long-term plants if you replant them properly and give them enough sun and airflow.
2) Give miniature roses enough sun
This is the big one. Miniature roses generally need at least 6 hours of direct sun a day, and many varieties perform best with 6–8 hours. In hot climates, morning sun plus some protection from intense late-afternoon heat can help. Too much shade leads to weaker growth, fewer blooms, and more disease pressure.
3) Use well-drained soil (roses hate “wet feet”)
Miniature roses like rich, loose, well-drained soil. If your soil is heavy clay, amend generously with compost and organic matter before planting. Good drainage plus good airflow is the one-two punch that helps prevent a lot of rose headaches later.
4) Plan spacing for airflow
Miniature roses can be planted closer than full-size roses, but don’t cram them together like commuters on a subway. Many guides recommend spacing mini roses roughly 12 to 24 inches apart depending on the variety’s mature spread. Better airflow means foliage dries faster, and faster-drying foliage means fewer fungal problems.
When to Plant Miniature Roses
Spring is usually the best time to plant miniature roses, especially in colder climates. That gives roots time to settle in before summer heat or winter cold. Container-grown mini roses can often be planted during much of the growing season, but if you plant in peak summer, keep soil moisture steady and consider temporary shade while the plant establishes.
How to Plant Miniature Roses in the Ground
Step-by-step planting guide
- Pick the site: Choose a sunny location with well-drained soil and room for airflow.
- Prepare the soil: Loosen the soil and mix in compost or other organic matter. If drainage is poor, improve it before planting.
- Dig the hole: Make it wider than the pot/root ball so roots can spread. For container-grown plants, a hole several inches wider than the pot is a good rule of thumb.
- Remove the plant carefully: Slide it out of the pot and gently loosen circling roots.
- Set the plant at the proper height: Plant at the same depth as the nursery pot (or just slightly lower if recommended for your local conditions and soil type). Backfill with amended soil.
- Water thoroughly: Water right after planting to settle soil around the roots and eliminate air pockets.
- Mulch lightly: Add mulch to help retain moisture, reduce weeds, and moderate soil temperaturewhile keeping mulch from pressing directly against the stems.
If you’re planting several mini roses, space them according to the variety’s mature size. Compact plants still need breathing room.
How to Plant Miniature Roses in Containers
Miniature roses are fantastic in containers, and for many gardeners, this is the easiest way to grow them. You can move the plant to the best light, protect it from severe weather, and keep a closer eye on watering.
Container setup that works
- Pot size: Use a pot with drainage holes. Many mini roses do well in containers at least 6–8 inches deep, but larger pots are usually easier to manage because they dry out more slowly.
- Potting mix: Use a high-quality, well-draining potting mix (not dense garden soil).
- Drainage: Drainage holes are non-negotiable. Mini roses like moisture, not swamp life.
- Sun exposure: Place the pot where it gets 6–8 hours of direct sun.
Indoor mini roses: possible, but picky
Yes, miniature roses can be kept indoors for periods of time, but they need much brighter light than most houseplants. A sunny south- or west-facing window is usually best. Rotate the pot for even growth, keep the soil consistently moist (not soggy), and watch closely for spider mitesone of the most common indoor rose problems. If you move the plant outdoors in spring, harden it off gradually by starting in shade and increasing sun exposure over several days.
Miniature Rose Care Basics (The Part That Makes Them Bloom)
Light
Give miniature roses full sun whenever possible. More sun generally means better flowering and better disease resistance. If a plant is getting leggy, sparse, or bloom-shy, the first question is usually: “Is it getting enough sun?”
Watering
Miniature roses like consistent moisture. A common rose-care guideline is about 1 inch of water per week, but real life is messier than a textbook. Sandy soil dries faster than clay. Containers dry faster than garden beds. Hot, windy weather can turn “once a week” into “check daily.”
- Water deeply rather than frequent tiny sips.
- Water at the base of the plant when possible.
- Morning watering is best so foliage dries before evening.
- Don’t let containers sit in standing water.
For potted mini roses, check soil often. If the top layer is dry to the touch, it may be time to water thoroughly until water drains from the bottom.
Mulch
A light layer of mulch helps keep the root zone cooler, conserves moisture, and reduces weeds. Miniature roses often have relatively shallow root systems, so mulch can make a noticeable difference during heat and dry spells.
Fertilizer
Miniature roses bloom repeatedly, so they benefit from regular feeding during the growing season. Use a rose fertilizer or balanced fertilizer according to the product label. Many gardeners start feeding after spring leaf-out and continue periodically through mid- to late summer, then stop before the first frost so the plant can prepare for dormancy.
Because miniature roses are smaller than standard roses, avoid overfeeding. More fertilizer does not equal more flowersit can burn roots or cause leafy growth with fewer blooms. In containers, lighter but more frequent feeding often works well.
Deadheading for repeat blooms
Deadheading is the rose equivalent of saying, “Nice effort, now do it again.” Remove faded blooms regularly to encourage new growth and more flowers. Cut just above a healthy outward-facing leaf set (often a five-leaflet leaf on many roses) when practical.
Pruning
Prune miniature roses in late winter or early spring (before strong new growth) by removing dead, diseased, damaged, or crossing canes. Shape the plant lightly to maintain a tidy form and encourage airflow. During the growing season, minor cleanup pruning is fine.
Common Problems and How to Fix Them
Spider mites (especially indoors or in hot, dry conditions)
Spider mites are tiny troublemakers. You may notice stippled or discolored leaves, fine webbing, or a dusty-looking plant. They thrive in hot, dry, dusty conditions and often explode after broad-spectrum insecticides wipe out beneficial predators.
What to do:
- Rinse foliage (especially leaf undersides) with water.
- Reduce dust and improve plant vigor with proper watering.
- Use insecticidal soap or horticultural oil if needed, covering undersides thoroughly.
- Recheck the plant oftenmites are persistent.
Black spot and other fungal leaf diseases
Black spot is one of the classic rose diseases. You’ll usually see dark spots on leaves followed by yellowing and leaf drop. Good sanitation and prevention matter more than panic.
- Plant in sun with good airflow.
- Avoid overhead watering when possible.
- Remove infected leaves from the plant and ground.
- Choose disease-resistant cultivars when shopping.
- Follow local extension/IPM guidance for treatments if disease pressure is severe.
Aphids, sawflies, and other pests
Check buds, stems, and leaf undersides regularly. Early detection makes control easier. A strong spray of water can help with some pests, and targeted products (such as insecticidal soap) may be useful if the infestation builds.
Yellow leaves
Yellowing can come from overwatering, underwatering, poor drainage, disease, nutrient issues, or normal aging of older leaves. Before adding fertilizer “just in case,” check soil moisture and inspect the leaves for spots, webbing, or insects.
Winter Care and Overwintering Miniature Roses
Winter care depends on your climate, whether the rose is in the ground or in a container, and the cultivar. In many areas, miniature roses are surprisingly hardy outdoors with some protection. Containers are more vulnerable because roots are exposed to colder temperatures than they would be in the ground.
In-ground mini roses
- Apply mulch after the ground begins to cool.
- In colder climates, add extra protection around the base as recommended locally.
- Wait until late winter/early spring for major pruning.
Container mini roses
- Protect the root zonethis is the priority.
- Move pots to a sheltered area, unheated garage, or protected spot if needed.
- In some regions, gardeners sink the pot into the ground for winter insulation.
- Avoid forcing an outdoor-acclimated plant into a hot indoor room suddenly.
Quick Miniature Rose Success Checklist
- ✅ 6–8 hours of sun
- ✅ Well-drained soil or potting mix
- ✅ Consistent moisture (not soggy)
- ✅ Morning watering when possible
- ✅ Regular deadheading
- ✅ Light seasonal pruning
- ✅ Routine pest checks (especially spider mites)
- ✅ Winter root protection for containers
Conclusion
Learning how to plant and grow miniature roses is less about having a “green thumb” and more about mastering a few rose basics: sunlight, drainage, moisture, airflow, and regular maintenance. Mini roses reward consistency. Give them a bright spot, a proper container or planting site, and a little weekly attention, and they’ll return the favor with repeat blooms that look way fancier than the amount of work you actually did.
Start with one healthy plant, keep the care routine simple, and treat problems early. In a season or two, you may find yourself doing what rose gardeners always do: saying, “I only planned to buy one,” while making room for three more.
Grower Experiences and Practical Lessons (500+ Words)
One of the most useful things about growing miniature roses is that the same plant can teach very different lessons depending on where it lives. A mini rose on a sunny apartment balcony behaves differently from one in a front-border bed, and both behave very differently from a gift rose left on a dim coffee table “for now” (which, let’s be honest, sometimes becomes “for three weeks”). The following are common grower experiences and patterns that show up again and again.
Experience #1: “It looked amazing at the store, then declined fast indoors.” This is probably the most common mini rose story. The plant arrives loaded with blooms, then starts dropping leaves, buds dry up, and the whole thing looks offended by your hospitality. In most cases, the problem is not that miniature roses are impossibleit’s that they’re being treated like tropical foliage plants. They want more direct sun, more airflow, and more consistent watering than many indoor plants. Once moved to a much brighter window (or gradually acclimated outdoors in good weather), many recover surprisingly well.
Experience #2: “My potted mini rose dries out every five minutes in summer.” Containers are fantastic, but they heat up and dry out quicklyespecially small ones. New growers often assume they are overwatering because the plant wilts in the afternoon, when the real issue is that the potting mix is drying too fast. The solution is usually a larger container, better potting mix, mulch on top of the soil, and a more consistent watering schedule. It’s also a reminder that “water once a week” is a guideline, not a law of nature. Weather wins.
Experience #3: “It grows leaves but not many flowers.” This usually points back to light. Mini roses can survive in lower light than they can bloom well in. If the plant is green but stingy with flowers, check the number of direct-sun hours first. Some gardeners fix the issue simply by moving the pot a few feet to a brighter location. Others realize nearby shrubs or patio umbrellas are creating more shade than expected. Roses are not subtle about thisthey bloom best when they can “see the sky.”
Experience #4: “The leaves got spotty, then yellow, then fell off.” This sounds dramatic, but it’s common and manageable. Many growers first reach for fertilizer, when what they really need is better disease prevention and cleanup. Spotting and yellowing can come from fungal disease, watering practices, or poor airflow. Once growers start watering at the base, thinning crowded growth, removing infected leaves, and checking plants weekly, the problem often becomes much easier to manage. The lesson here: observation beats guessing.
Experience #5: “Spider mites attacked when I brought it indoors.” Indoor air, especially during heating season, can be rough on roses. A plant that looked fine outside can suddenly develop stippling and webbing indoors. Growers who succeed long-term usually build a habit of inspecting leaf undersides, rinsing foliage when needed, and acting quickly at the first sign of mites. Waiting “to see if it gets better” is a classic way to end up in a tiny war with a huge mite population.
Experience #6: “I thought it died in winter, but it came back.” This is a favorite. Miniature roses can look unimpressive or fully dormant in cold weather, especially in containers. Gardeners sometimes assume the plant is done for and toss it too early. Then they learn that roses often need patience, root protection, and proper spring timing. A mini rose that looks rough in winter can rebound with pruning, feeding, and warm weather. Moral of the story: don’t write the obituary before spring.
These experiences all point to the same truth: miniature roses are not fragile little ornaments. They’re small-scale roses with real rose needs. Once growers stop babying them and start managing them like roseswith sun, drainage, airflow, and routine carethe plants usually become far easier and more rewarding to grow.