Table of Contents >> Show >> Hide
- Why You’ll Love This Peanut Butter Swirl Ice Cream
- Ingredients
- Step-by-Step: How to Make Peanut Butter Swirl Ice Cream
- Food Safety Tips for Homemade Ice Cream
- Serving Ideas and Flavor Variations
- Troubleshooting Common Peanut Butter Swirl Issues
- of Real-Life Peanut Butter Swirl Ice Cream Experience
- Final Thoughts
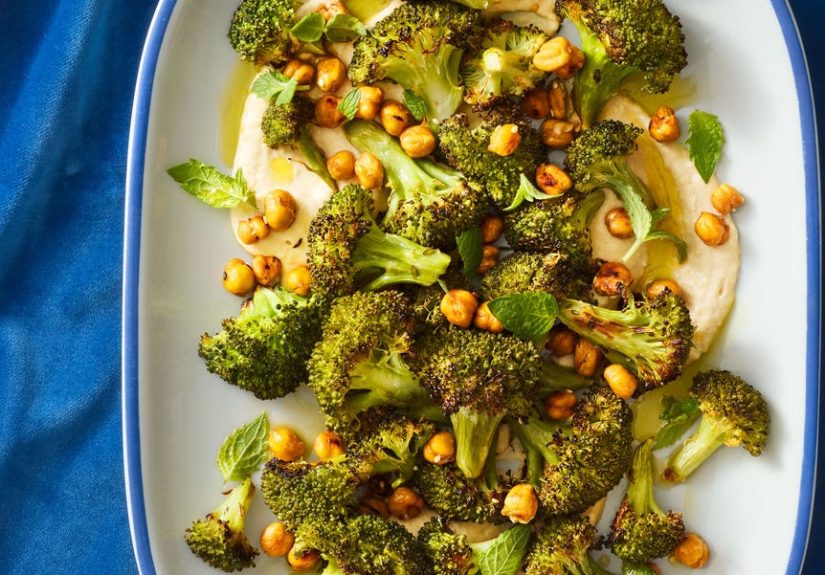
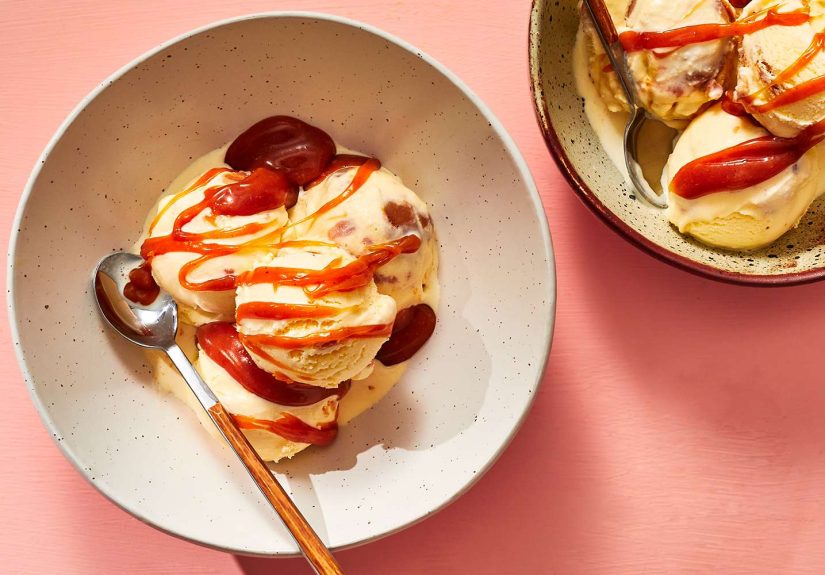
If you believe peanut butter belongs on everything, this peanut butter swirl ice cream recipe is about to become your new personality trait. It’s rich, creamy, full of salty-sweet ribbons of peanut butter, and you don’t need a fancy ice cream machine to pull it off.
Drawing on popular U.S. recipe trends, this version uses the modern no-churn method (whipped cream + sweetened condensed milk) that food writers and test kitchens love for its silky texture and simplicity. We’ll also borrow swirl techniques from classic “ripple” and “fudge swirl” ice creams so you get those gorgeous streaks of peanut butter in every scoop.
Whether you’re making a celebratory dessert, a kid-friendly weekend project, or just stress-eating in style, this small-batch ice cream delivers big flavor with very little effort.
Why You’ll Love This Peanut Butter Swirl Ice Cream
- No churn, no problem: You only need a mixer and a loaf pan. The whipped cream plus condensed milk combo mimics churned ice cream texture at home.
- Big peanut butter payoff: The base is vanilla-forward and creamy, with bold peanut butter swirls that steal the show.
- Customizable: Add chocolate chips, chopped peanut butter cups, or crushed cookies to turn it into your signature house flavor.
- Make-ahead friendly: The texture actually improves after a few hours in the freezer, making it ideal for parties.
Ingredients
For the No-Churn Ice Cream Base
- 2 cups cold heavy whipping cream
- 1 can (14 ounces) sweetened condensed milk
- 2 teaspoons pure vanilla extract
- Pinch of fine salt (balances the sweetness and enhances the peanut flavor)
For the Peanut Butter Swirl
- 3/4 cup creamy peanut butter (not natural “stir” style if you want ultra-smooth ribbons)
- 3 tablespoons powdered sugar or light corn syrup
- 2–3 tablespoons heavy cream or milk, as needed to thin
Optional Mix-Ins
- 1/2–3/4 cup chopped mini peanut butter cups
- 1/3 cup chopped roasted peanuts
- Chocolate sauce or fudge ripple for drizzling
This ingredient lineup mirrors many popular U.S. peanut butter ice cream recipes that rely on the whipped-cream-plus-condensed-milk foundation and a separate swirl mixture for those dramatic ribbons.
Step-by-Step: How to Make Peanut Butter Swirl Ice Cream
1. Prepare the Peanut Butter Swirl
- In a small microwave-safe bowl, combine the peanut butter and powdered sugar (or corn syrup).
- Microwave in 15–20 second bursts, stirring between each, until the mixture is warm, glossy, and pourable.
- Stir in 2–3 tablespoons of heavy cream or milk, just enough to create a thick but fluid saucethink warm fudge consistency.
- Let the mixture cool to room temperature. It should still be pourable but not hot. Warm swirls are easier to layer into ice cream, a trick borrowed from traditional churned ripple recipes.
2. Whip the Cream
- Pour the cold heavy whipping cream into a large mixing bowl or the bowl of a stand mixer.
- Beat on medium-high speed until soft to medium peaks formwhen you lift the whisk, the cream should hold its shape but the peaks should gently curl over.
- Don’t over-whip. If the cream looks grainy or starts clumping, you’re on the road to butter. Stop while it’s smooth and fluffy.
This whipped cream step is the backbone of almost every no-churn recipe; it creates the air and structure that keep ice crystals tiny for a creamy scoop.
3. Build the Ice Cream Base
- In a separate large bowl, whisk together the sweetened condensed milk, vanilla extract, and salt.
- Add one big spoonful of the whipped cream to the condensed milk mixture and whisk gently. This “sacrificial scoop” lightens the base so the rest of the cream folds in more easily.
- Gently fold in the remaining whipped cream using a spatula. Work slowly from the bottom up, turning the bowl, until no streaks remain. Try not to deflate the mixturethat airy texture is what keeps the ice cream scoopable.
4. Layer and Swirl
- Pour about one-third of the ice cream base into a chilled metal loaf pan or freezer-safe container.
- Drizzle a few tablespoons of the cooled peanut butter sauce on top. Don’t worry about being perfect; random puddles become great pockets of flavor.
- Repeat: add another one-third of the ice cream base, more peanut butter drizzle, then the final layer of ice cream.
- Finish with the remaining peanut butter on top.
- To create those classic swirls, submerge a butter knife or long skewer straight down into the pan and gently drag it in long figure-eight motions from one end to the other. This technique is adapted from peanut butter “ripple” ice cream recipes to give you visible ribbons without fully mixing everything together.
5. Add Mix-Ins (Optional but Highly Recommended)
- If using chopped peanut butter cups, peanuts, or chocolate chunks, sprinkle them between layers before you swirl.
- Press larger pieces in slightly with a spoon so they don’t all sit on top.
6. Freeze
- Smooth the top with a spatula and cover the pan tightly with plastic wrap or a lid.
- Freeze for at least 6 hours, or preferably overnight, until firm enough to scoop.
- For the best texture, let the ice cream sit at room temperature for 5–10 minutes before serving. This short tempering time makes scooping easier and helps the peanut butter swirl become lusciously soft.
Food Safety Tips for Homemade Ice Cream
This recipe is egg-free, which makes food safety easier. Many traditional churned recipes use raw or lightly cooked eggs, but U.S. food safety agencies recommend using pasteurized eggs or fully cooking the egg-milk mixture to 160°F to avoid Salmonella risk. With a no-churn base, you skip eggs entirely while still getting luxurious texture from cream and condensed milk.
- Store the ice cream tightly covered in the coldest part of your freezer.
- Aim to enjoy it within 2–3 weeks for best flavor and texture.
- Always use clean utensils to scoopno double-dipping after tasting.
Serving Ideas and Flavor Variations
Easy Serving Upgrades
- Classic sundae: Top scoops with warm chocolate sauce, chopped peanuts, and a little whipped cream for a dessert-shop feel.
- Peanut butter & jelly moment: Swirl a spoonful of strawberry or raspberry jam over each serving.
- Coffee shop scoop: Serve a small scoop over a shot of hot espresso (affogato style) if you love peanut butter mochas.
Fun Variations
- Chocolate peanut butter swirl: Add 1/4 cup cocoa powder to the condensed milk before folding in the whipped cream, then proceed with the peanut butter swirl as written.
- Peanut butter cup explosion: Fold in 1/2–3/4 cup chopped mini peanut butter cups along with the swirl.
- Salty crunch: Mix in crushed pretzels for a sweet-salty, texture-packed version.
- Protein-boosted version: Swap part of the peanut butter with powdered peanut butter or add a scoop of neutral-flavored protein powder, as seen in many high-protein ice cream recipes. Just keep moisture low so the texture stays creamy.
Troubleshooting Common Peanut Butter Swirl Issues
The Swirl Sank to the Bottom
If your swirl ends up in one thick layer at the bottom instead of streaked throughout, it was probably too warm or too thin when you added it. Let the peanut butter mixture cool a bit more next time, and aim for a thicker, fudgy texture.
The Swirl Hardened into Peanut Butter Rocks
Pure peanut butter can freeze into very firm chunks. That’s why many recipes blend peanut butter with cream, sugar, or corn syrupto soften the texture and keep it scoopable. If your swirl is too firm, add a little more cream next time.
The Ice Cream is Icy
Big ice crystals usually mean too much water or not enough fat/air. No-churn ice cream relies on:
- Properly whipped cream (not under-whipped).
- Not adding watery ingredients like large amounts of fruit puree without reducing them first.
- Freezing in a cold, stable freezer (no constant opening and closing of the door during the first few hours).
of Real-Life Peanut Butter Swirl Ice Cream Experience
Recipes are great, but the fun really starts once you’ve actually made your first pan of peanut butter swirl ice cream. Here are some hands-on lessons, wins, and “well, that was interesting” moments that home cooks often discover.
1. The swirl is more forgiving than you think. The first time many people attempt a ripple ice cream, they worry about creating the perfect Instagram-worthy pattern. In reality, the swirl looks best when you stop trying so hard. A few loose figure eights with a knife usually create prettier, more organic streaks than meticulous tiny zigzags. If you over-swirl and it all blends together, congratulationsyou’ve invented peanut butter ice cream instead of peanut butter swirl ice cream. It will still taste fantastic.
2. Pan choice matters. A metal loaf pan freezes faster and more evenly than a deep plastic container. Experienced no-churn fans often notice that ice cream in metal stays creamier at the edges and doesn’t develop as much frost on the top. If you only have a glass dish, it works, but give it extra time to freeze solid in the center.
3. Temperature is flavor. Straight-from-the-freezer ice cream can taste muted and a bit hard. Letting the pan sit on the counter for 5–10 minutes softens the texture and wakes up the peanut butter aroma. Many people find that peanut butter swirl ice cream is at its peak when it looks just slightly melty around the edges of each scoop.
4. Salt is your secret weapon. If you’ve ever tasted peanut butter ice cream that just felt flat, it was probably under-salted. A tiny pinch of salt in the base and using a salted or lightly salted peanut butter can transform the flavor from “sweet and sticky” to rich and complex. That sweet-salty combo is exactly what makes commercial peanut butter swirl flavors so addictive.
5. Mix-ins can make or break your texture. Chopped peanut butter cups are amazing in theory, but huge frozen chunks can be teeth-breakers. Many seasoned ice cream makers recommend cutting candies smaller than you think you need and avoiding very dry, crumbly cookies, which can soak up moisture and feel stale. If you want crunch, roasted peanuts or pretzel pieces hold up surprisingly well.
6. Kids love the layering step. If you’re making this with children, let them be in charge of drizzling the peanut butter swirl between layers of ice cream. It’s messy, yes, but very “science-experiment-meets-dessert.” They’ll feel like they created their own store-brand flavor, and it’s an easy way to turn dessert into a fun activity instead of just an end result.
7. Leftovers turn into excellent milkshakes. If your ice cream sits in the freezer long enough to get a little firmer or frostier, blend a scoop or two with a splash of milk for an ultra-thick peanut butter milkshake. The swirls blend into the base and you get that classic malt-shop vibe without leaving home.
8. This flavor plays well with others. Peanut butter swirl ice cream is an incredible team player. Pair it with chocolate cake, warm brownies, or banana bread. Use it in ice cream sandwiches with chocolate cookies or graham crackers. Some people even scoop it alongside fruit piesthe salty peanut butter swirl cuts through the sweetness in a very satisfying way.
After a batch or two, you’ll probably start tweaking the recipe automatically: a little more swirl here, a handful of pretzels there, maybe a drizzle of honey or caramel sauce. That’s the beauty of a simple, reliable baseonce you trust that the ice cream will turn out creamy every time, you’re free to play. And when that first spoonful hits and you see the peanut butter ribbons stretching across your scoop, you’ll understand why peanut butter swirl ice cream has such a loyal fan base among home cooks and ice cream brands alike.
Final Thoughts
Peanut butter swirl ice cream is proof that homemade desserts don’t need complicated techniques to feel special. By leaning on a proven no-churn method, using a thoughtfully balanced peanut butter ripple, and paying attention to a few small details, you get a dessert that tastes like it came from a craft ice cream shopwithout leaving your kitchen.