Table of Contents >> Show >> Hide
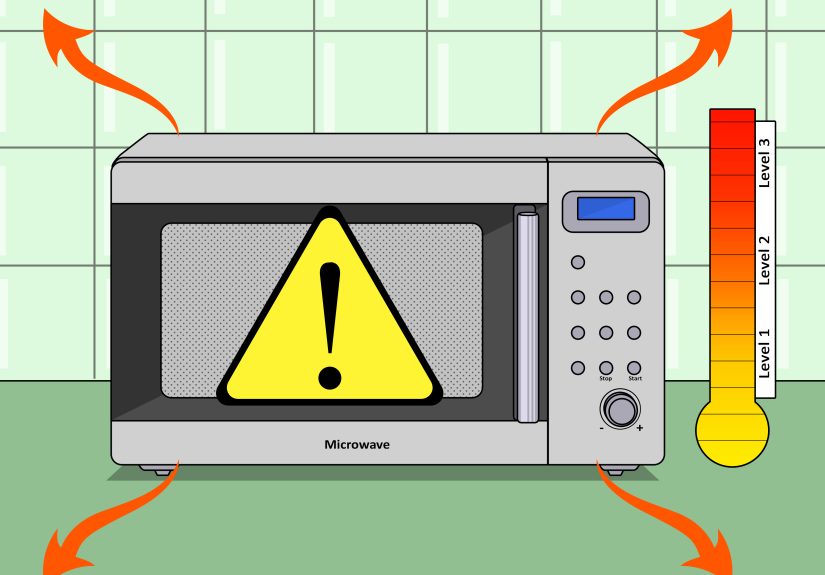
- First, What Does “Microwave Leak” Actually Mean?
- Way #1: The “No-Gadgets” Safety Check (Door, Seal, Latch, and Interlock)
- Way #2: Use a Microwave Leakage Detector (The Right Way, Not the TikTok Way)
- Way #3: Get a Professional Microwave Leakage Test (Especially for Used, Damaged, or Commercial Units)
- Signs You Should Stop Using the Microwave Immediately
- Myth-Busting Corner: “Can I Check Microwave Leaks With…”
- How to Reduce Leakage Risk (Even If Your Microwave Is Fine)
- Conclusion: Leak Checks Without the Drama
- Real-World Experiences: What People Learn When They Actually Check for Microwave Leaks (500+ Words)
- Experience #1: The Used Microwave “Deal” That Came With a Plot Twist
- Experience #2: The “My Microwave Smells Weird, So It Must Be Leaking Radiation” Moment
- Experience #3: The DIY Meter That Turns a Calm Person Into a Detective
- Experience #4: The “It Still Heats, So It Must Be Fine” Trap
- Experience #5: The “Break Room Microwave” That Has Seen Things
Let’s clear something up right away: your microwave is not secretly plotting to “nuke” you while you reheat pizza.
In normal condition, microwave ovens are designed like tiny metal fortressesenergy stays inside, food gets hot, and your kitchen remains blissfully un-ionized.
But if the door is damaged, the seal is filthy, or the latches are acting like they’ve clocked out for good, it’s fair to wonder about microwave radiation leakage.
The good news: you can do a smart, evidence-based microwave leak test without falling for internet folklore
(no, a phone call dropping doesn’t prove anything, and your cat’s vibe check is not a calibrated instrument).
Below are three practical ways to check a microwave for leaks, from quick common-sense inspection to proper meter testing and professional verification.
First, What Does “Microwave Leak” Actually Mean?
A “leak” in this context means microwave energy escaping the oven, usually around the door seam, window area, hinges, or ventilation openings.
Microwave ovens use non-ionizing electromagnetic energy to heat food by exciting water moleculesthink “warming,” not “making food radioactive.”
The oven’s metal cabinet and door screen act like a shield, and the door interlock system is designed to stop the oven if the door opens.
In other words: the system is engineered for safety. Most problems come from damage, wear, dirt buildup, rust, or improper servicingnot from everyday use.
Your mission is to spot the conditions that could allow leakage, then confirm with proper measurement if needed.
Way #1: The “No-Gadgets” Safety Check (Door, Seal, Latch, and Interlock)
This is the fastest way to assess risk. It doesn’t directly measure microwave leakage, but it’s the best first screen because most leakage concerns start with
door alignment, sealing surfaces, and latching/interlock issues.
Step 1: Inspect the door like you’re buying a used car
- Door alignment: Does it close squarely, or does it look slightly twisted?
- Hinges: Any wobble when you gently lift the handle? Loose hinges can create gaps.
- Latches: Do you hear/feel a firm “click” when it closes? A mushy latch is a red flag.
- Window mesh: Look for dents, cracks, or separation around the viewing window frame.
- Rust and warping: Especially around the door edge and framerust can compromise fit over time.
Step 2: Clean the sealing surfaces (yes, crumbs matter)
Door seals and sealing surfaces should be clean and free of gunk. A surprising number of “my microwave is leaking” worries are actually “my microwave has
a fossilized lasagna splatter ridge preventing a proper seal.”
- Unplug the microwave.
- Wipe the door edge, frame, and contact surfaces with a damp cloth and mild soap.
- Dry thoroughlymoisture plus grime can become a sticky seal-wrecker.
- Avoid abrasive scrubbers that could scratch or deform sealing surfaces.
Step 3: Check the interlock behavior (without doing anything sketchy)
The federal safety language you’ll often see in manuals is blunt for a reason:
don’t operate a microwave with the door open and don’t tamper with interlocks.
So the safe “check” here is simple:
- If the microwave ever runs with the door open, stop using it immediately and have it serviced or replaced.
- If the door doesn’t close firmly, is bent/warped, or doesn’t latch consistently, treat it as “needs repair,” not “maybe it’s fine.”
Why this works: leakage is most likely when the door system can’t do its job.
A clean, undamaged, properly latching door is your best “no-tools” indicator that you’re operating within normal safety design.
Way #2: Use a Microwave Leakage Detector (The Right Way, Not the TikTok Way)
If you want an actual measurement, the legitimate DIY route is a microwave leakage detector (also called a microwave survey meter).
These devices measure microwave power density near the oven surfaceespecially around the door seam and vents.
Important: this method works best when the meter is decent quality, used correctly, and ideally within calibration.
A bargain-bin “mystery meter” can create more anxiety than accuracy.
Before you test: set up a safe, realistic test condition
- Use a load: Put a microwave-safe cup/bowl with water inside. (Running a microwave empty is hard on the magnetron.)
- Clear the area: Keep kids/pets a step back. Not because the microwave is “radioactive,” but because you don’t need chaos during measurement.
- Remove metal jewelry from your hands/wrists if you’ll be moving around the door seamjust good practice around appliances.
- Follow your meter’s manual for warm-up, range settings, and spacing cone/spacer use (many meters are designed to be used at a set distance).
How to perform a basic microwave leak test with a detector
- Start the microwave on high with the water load inside.
- Hold the meter at the recommended distance (many procedures reference about 5 cm / ~2 inches).
-
Scan slowly around likely leakage points:
- Entire door seam (top, sides, bottom)
- Door window perimeter
- Hinge side and latch side
- Any vents or louvers on the cabinet
- Move at a steady pacedon’t whip the sensor around like you’re detecting ghosts.
- Record the highest reading and where you saw it.
What reading is “too high”?
In the U.S., the long-cited federal performance standard limits leakage to
5 mW/cm² measured close to the oven surface (about 2 inches / ~5 cm) over the oven’s lifetime.
Many modern ovens measure far below that when in good condition.
Practical rule of thumb:
- Very low readings near the seam are normal in many cases.
- A consistent hotspot (especially near a bent corner, damaged seam, or loose hinge) is worth attention.
- Any reading approaching the regulatory limit should be treated as “stop using and verify professionally.”
Common mistakes that create false alarms
- Testing too far away (or too close) compared to the meter’s intended spacing.
- Not using the spacer cone if your meter requires it for accuracy.
- Scanning too fast, which can miss peaks or create noisy readings.
- Ignoring calibration: meters drift, and cheap devices can be inconsistent.
- Confusing “any reading” with “danger”: tiny leakage levels can exist and still be well within safety limits.
Bottom line: a microwave leak detector is the closest thing to a real answer you can do at homeif you treat it like a measuring tool,
not a prop in a suspense movie.
Way #3: Get a Professional Microwave Leakage Test (Especially for Used, Damaged, or Commercial Units)
If your microwave is older, has visible damage, came from a secondhand listing with a mysterious past, or is used heavily (break room, office, café),
the most reliable option is a professional microwave leakage test.
Who can test it?
- Qualified appliance service technicians (especially those experienced with microwave door adjustments and interlock checks)
- Radiation safety offices at universities, hospitals, or industrial sites (some will survey appliances on-site)
- Workplace safety vendors who perform electrical safety inspections and microwave leakage testing for commercial environments
What a pro does that DIY often can’t
- Uses calibrated survey meters and standardized procedures
- Checks door fit and latch tension with proper tools
- Verifies interlock function safely (without risky shortcuts)
- Identifies the root cause (hinge sag, latch wear, door warp, cabinet deformation, previous bad repair)
If you see physical damageor if your DIY meter shows a suspicious hotspotprofessional testing is the “sleep well tonight” solution.
And if repairs cost close to replacement? Congrats, you’ve just met the adult version of “this isn’t worth the drama.”
Signs You Should Stop Using the Microwave Immediately
- The microwave operates with the door open (interlock failure).
- The door is bent, warped, or doesn’t close firmly.
- The door window area is cracked, badly dented, or separating.
- The hinges/latches are loose and the door visibly sags.
- You see burn marks or arcing damage around the door frame.
Myth-Busting Corner: “Can I Check Microwave Leaks With…”
…a smartphone app?
No. Phones don’t measure 2.45 GHz microwave leakage power density in any reliable way. If an app claims it can, it’s basically a mood ring for your kitchen.
…a fluorescent bulb or neon tester?
These old-school demonstrations can react in strong fields, but they’re not a dependable measurement method for safety decisions.
They don’t tell you the leakage level, they’re sensitive to positioning, and they can spark unnecessary panic.
…Wi-Fi interference or “my router slows down”?
Microwaves can cause interference with Wi-Fi (similar frequencies), but that’s not a leakage test.
Interference can happen even when the oven is operating normally and within limits.
How to Reduce Leakage Risk (Even If Your Microwave Is Fine)
- Keep the door and frame cleandon’t let grease and residue build up on sealing surfaces.
- Don’t slam the door like you’re closing a car trunk in an action movie.
- Don’t hang heavy items (like towels) from the handledoor sag is real.
- Don’t operate damaged units; replace or repair promptly.
- Stand a step back while it runs if you’re concernedmicrowave energy drops dramatically with distance.
Conclusion: Leak Checks Without the Drama
Checking a microwave for leaks doesn’t require a hazmat suit or a conspiracy corkboard.
Start with the basics: door condition, cleanliness, and latching.
If you want real data, use a microwave leakage detector properlyslow scan, correct distance, and a water load.
And when the microwave looks damaged or the reading looks suspicious, call a pro.
Your goal isn’t to prove your microwave is “perfect.” It’s to confirm it’s operating as designedkeeping energy in, heating food, and letting you live your life
without side-eyeing your leftover spaghetti like it’s a science experiment.
Real-World Experiences: What People Learn When They Actually Check for Microwave Leaks (500+ Words)
Most people don’t wake up thinking, “Today feels like a great day to measure microwave leakage.”
The motivation usually shows up the same way a weird noise in your car does: suddenly, urgently, and with a little bit of dread.
Here are some common real-life scenariosand what tends to happen when people use the three methods above.
Experience #1: The Used Microwave “Deal” That Came With a Plot Twist
Someone buys a secondhand microwave that “works great” (classic), brings it home, and notices the door doesn’t close with a clean, confident click.
It still runs, the food still heats, but the door looks slightly offlike it lost a small argument with gravity.
The smartest move here is Way #1: inspect hinges and latch alignment, clean the sealing surfaces, and check for door sag.
A lot of the time, the “problem” is grime buildup or a loose mount that makes the door sit unevenly.
But if the door is warped or the hinges are bent, the experience usually ends the same way: the microwave goes back to the seller (or to recycling),
and the buyer learns that “barely used” can mean “used hard, cleaned once.”
Experience #2: The “My Microwave Smells Weird, So It Must Be Leaking Radiation” Moment
A funky odor after heating fish (or, let’s be honest, anything) often gets blamed on “radiation.”
In reality, odors are typically food residue, splatters on the waveguide cover area, or a dirty interior.
Way #1 helps here because cleaning is a legitimate fixand it also improves door sealing by removing residue that can prevent proper contact.
People are often surprised how much anxiety disappears after a deep clean and a quick door inspection.
Bonus: your kitchen stops smelling like yesterday’s seafood experiment.
Experience #3: The DIY Meter That Turns a Calm Person Into a Detective
Some folks buy a microwave leak detector and then do what humans do best: test it like they’re searching for hidden treasure.
The first scan is fast, random, and performed at three different distances while the person leans in like they’re listening for secrets.
Result: inconsistent numbers and immediate panic.
Then they redo the test properly (Way #2): a cup of water inside, meter held at the correct distance with the spacer cone, slow scan around the door seam and vents.
Suddenly the readings become stable, the “hotspot” moves less, and the story becomes boringwhich is exactly what you want from a safety check.
People often learn that good measurement is mostly about patience and consistency, not fancy gear.
Experience #4: The “It Still Heats, So It Must Be Fine” Trap
Heating performance doesn’t guarantee the door system is healthy. A microwave can cook food and still have a door that doesn’t seal well.
This is where Way #3 shines: a technician can confirm whether the issue is a simple door adjustment, a worn latch, or a unit that’s not worth repairing.
In real life, people often choose replacement when the door assembly is expensiveespecially if the microwave is older.
The emotional win is big: you trade ongoing worry for a clean slate (and usually a quieter appliance).
Experience #5: The “Break Room Microwave” That Has Seen Things
Office microwaves are like public park benches: durable, yes, but they also experience daily chaos.
Doors get slammed, handles get yanked, and nobody feels personally responsible for that mysterious sticky edge around the seal.
In workplaces, a periodic professional leak test is common because it removes guesswork and creates a clear maintenance record.
People who manage facilities often discover that a quick clean-and-adjust fixes most concerns, while a small number of units need replacement due to door damage.
The shared lesson across all these experiences is simple:
most “leak fears” are solved by inspection and maintenance, a smaller number are clarified by proper meter testing,
and the truly concerning cases are usually obviousdamaged doors, faulty interlocks, or visible warping.
If you follow the three methods in order, you get answers without spiraling into “Is my kitchen a science fiction plot?” territory.