Table of Contents >> Show >> Hide
- Quick Diagnosis: Why Gutters Sag (And Why It Matters)
- Before You Start: Safety, Tools, and a 5-Minute Reality Check
- Way 1: Replace or Upgrade the Hangers (The “Stop the Flop” Fix)
- Way 2: Re-Set the Pitch and Rehang the Run (The “Make Gravity Do Its Job” Fix)
- Way 3: Fix the Fascia and Any Damaged Sections (The “Don’t Screw Into Rot” Fix)
- Prevent Your Gutters From Sagging Again
- FAQ: Fast Answers to Common Sagging Gutter Questions
- 500+ Words of Real-World “Been There” Lessons DIYers Run Into
- Conclusion
A sagging gutter is basically your house quietly whispering, “Water damage is a hobby now.”
The good news: most sagging gutters can be fixed with a few tools, a little patience, and a healthy respect for ladders.
In this guide, you’ll learn three practical repair methodsplus how to figure out why your gutter is sagging in the first place, so you don’t end up doing this again next month.
We’ll keep it DIY-friendly, but not “duct-tape-and-hope” friendly. Because gravity always collects its rentand it prefers cash (or rainwater) on time.
Quick Diagnosis: Why Gutters Sag (And Why It Matters)
Gutters usually sag for one of four reasons: they’re overloaded, under-supported, incorrectly pitched, or attached to wood that’s no longer wood (hello, fascia rot).
When a gutter dips, water stops flowing smoothly to the downspout. That standing water adds more weight, pulls harder on fasteners, and can overflow behind the gutterright onto fascia, soffit, siding, and your foundation.
Common causes of a sagging gutter
- Clogs and debris (wet leaves are basically rooftop cement).
- Too few hangers or hangers spaced too far apart for your climate.
- Loose spikes/screws that have backed out over time.
- Improper slope that leaves puddles and “low spots.”
- Rotten or split fascia that can’t hold fasteners securely.
- Ice and snow loads (even a well-installed gutter can lose the tug-of-war).
Signs you should fix it sooner, not “someday”
- Water spilling over the back edge of the gutter (between gutter and fascia)
- Visible dips or “waves” along the run
- Standing water after rain
- Gutter pulling away from the house
- Peeling paint, staining, or soft wood on the fascia/soffit
Before You Start: Safety, Tools, and a 5-Minute Reality Check
You’ll be working at the roofline. That means the project is “simple” only if you stay safe.
If you don’t feel steady on a ladder, or your gutters are two stories up, it’s completely reasonable to hire a pro.
Safety basics
- Use a sturdy extension ladder on level ground; follow the 4:1 angle rule (about 1 foot out for every 4 feet up).
- Wear gloves (sheet metal edges are sharper than they look).
- Don’t work in rain, wind, or on icy surfaces.
- If you can, have a helper: one person stabilizes the ladder while the other works.
Tools and supplies you’ll likely need
- Cordless drill/driver + bits
- Level (2–4 ft works well) or a line level
- Chalk line or mason string
- Measuring tape
- Gutter scoop or small trowel + bucket
- Replacement gutter hangers (often “hidden hangers”) and/or gutter screws
- Exterior-grade sealant/caulk (for old holes, joints, and small leaks)
- Optional: fascia repair materials (wood filler/epoxy or replacement board)
Reality check: If the gutter is visibly cracked, badly bent, or the fascia behind it is mushy and crumbling,
you may be looking at partial replacement rather than a simple re-hang. That’s still doablejust don’t try to “anchor” hardware into rot and call it structural.
Way 1: Replace or Upgrade the Hangers (The “Stop the Flop” Fix)
This is the most commonand most satisfyingrepair. Sagging often happens because the gutter doesn’t have enough support,
or the support it has is outdated (like old spike-and-ferrule fasteners) or simply loosened over time.
Best for
- Short or medium sagging sections
- Gutters that look fine but droop between supports
- Loose spikes/screws or missing brackets
- “Low spots” caused by insufficient hanger spacing
Step-by-step
-
Clean the gutter first.
Remove debris so you’re not trying to rehang a waterlogged compost bin. If the downspout is clogged, clear it so your slope test later is meaningful. -
Find solid framing to fasten into.
The strongest attachment is typically through the fascia and into rafter tails (or other solid backing).
Look for patterns of old nails in the fasciaoften that’s where framing is. -
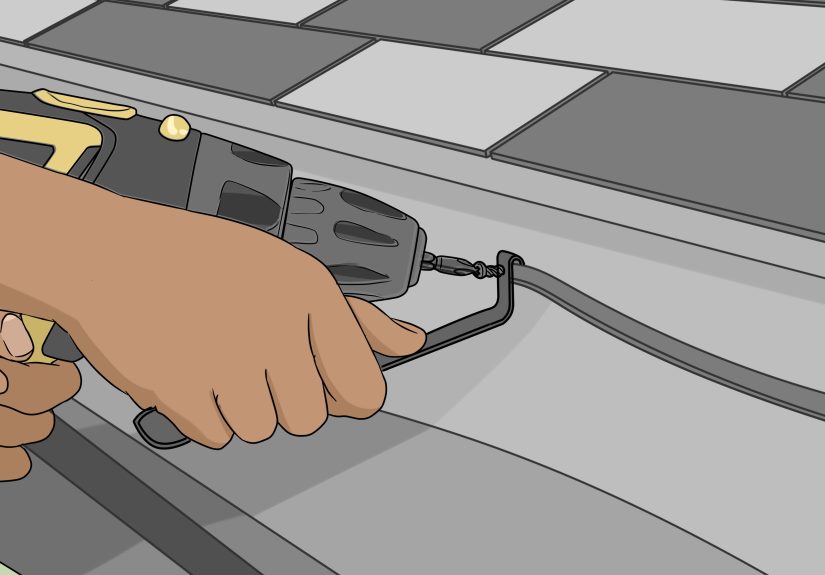
Add hidden hangers (or new brackets) in the sagging zone.
Hidden hangers usually hook under the gutter’s front lip and screw into the fascia from inside the gutter.
Add supports so the gutter can’t dip between attachment points. -
Replace bad hardware.
If you have old spikes backing out, remove them and upgrade to gutter screws or modern hangers.
If a bracket is bent, cracked, or corroded, swap it out rather than “bending it back and praying.” -
Check alignment.
Stand back and sight down the gutter run. The gutter should look straight and consistentno “snake” shape.
Pro tips to make this repair last
- Support the heavy spots. Add hangers near corners, seams, and downspout outletsthose areas carry stress.
- Mind your spacing. Many DIYers do better with “more supports than you think you need,” especially in snow/ice regions.
- Don’t overtighten. Crushing the gutter metal can deform it and create new low spots.
Mini example: If a 10-foot gutter section is sagging in the middle, add one or two hangers between existing supports,
fastening into solid backing. This usually removes the dip instantlylike giving your gutter a better posture.
Way 2: Re-Set the Pitch and Rehang the Run (The “Make Gravity Do Its Job” Fix)
Sometimes the gutter isn’t sagging because it’s weakit’s sagging because it was never pitched correctly,
or it shifted over time. The goal here is to restore a consistent slope toward the downspout,
with no low spots where water can pool.
Best for
- Standing water that lingers after rain
- Overflow during moderate rainfall
- A gutter that “waves” up and down along the run
- Runs that have shifted away from the downspout after settling or movement
What slope should you aim for?
Many homeowner guides recommend about 1/4 inch of drop for every 10 feet toward the downspout.
Some building guidance allows a smaller pitch (as long as there are no low spots),
and some DIY guides suggest a slightly steeper tilt for faster flow.
The practical sweet spot is: enough pitch to drain, not so much that it looks crooked.
Step-by-step
-
Find your downspout “low end.”
Identify where you want water to exit. If your run is very long, it may need downspouts on both ends (or a high point in the middle sloping both ways). -
Mark the slope line.
Use a chalk line or string line on the fascia as your reference.
Start at the high end and mark your planned drop toward the downspout. -
Loosen fasteners in the problem section.
Don’t remove everything at oncekeep the gutter supported.
If needed, have a helper hold the gutter while you adjust. -
Raise low spots and secure hangers to the line.
Move hanger positions (or replace them) so the gutter follows your slope line.
Make sure each hanger is snug and the gutter doesn’t dip between supports. -
Test with water.
Run a garden hose into the gutter at the high end.
Watch the flow: it should move steadily to the downspout without pooling.
If you see a puddle forming, you still have a low spotadjust that section up slightly.
Example slope math (so you don’t “eyeball” your way into a swamp)
Let’s say you have a 30-foot run with a downspout at one end.
Using a common guideline of 1/4 inch drop per 10 feet, the total drop would be:
30 ft ÷ 10 ft = 3, and 3 × 1/4 inch = 3/4 inch.
That’s less than an inchsmall enough to look normal, big enough to help drainage.
Way 3: Fix the Fascia and Any Damaged Sections (The “Don’t Screw Into Rot” Fix)
If the gutter is sagging because the fascia board is damaged, loose, or rotten,
you can install the fanciest hangers on Earth and still lose. The fasteners will keep pulling out because there’s nothing solid to grab.
This repair is about restoring the structure the gutter attaches to.
Best for
- Gutters pulling away from the house
- Fasteners that won’t tighten (they spin, strip, or pop out)
- Soft, stained, peeling, or crumbling fascia behind the gutter
- Long-term overflow that likely soaked the wood
How to check for fascia problems
- Press the fascia gently with a screwdriver handle. If it feels spongy, that’s a bad sign.
- Look for flaking paint, dark staining, or visible gaps between fascia and gutter.
- Check for sagging at the roof edge itself (not just the gutter).
Step-by-step
-
Remove the sagging section (carefully).
If it’s a small area, you may be able to lower the gutter slightly without fully removing it.
For major repairs, take the section down so you can see the fascia clearly. -
Deal with old holes.
If you’re reusing the same area, fill stripped holes with an exterior-grade filler or sealant and let it cure.
Then re-drill new pilot holes slightly above/offset so the new fasteners bite into solid material. -
Repair or replace the fascia.
Small areas of surface damage can sometimes be stabilized with exterior wood repair products.
If the fascia is rotten or structurally compromised, replacement is the smarter, longer-lasting move. -
Reinstall the gutter with upgraded hangers.
Once the backing is sound, attach the gutter using screws/hangers into solid framing when possible.
Re-check pitch and test flow with a hose.
When replacement beats repair
If multiple sections are warped, seams leak constantly, metal is heavily corroded, or the gutter repeatedly pulls away even after reinforcement,
replacing the run (or the whole system) can be more cost-effective than endless patch jobs.
Think of it like repairing a tired shopping cart: you can tighten the wheels, but at some point it still wants to drift into traffic.
Prevent Your Gutters From Sagging Again
The best gutter repair is the one you don’t have to repeat.
After you fix the sag, these habits keep your system working (and keep water away from places it should never be).
Maintenance and prevention checklist
- Clean gutters routinelyespecially after heavy leaf drop and after big storms.
- Flush downspouts so water can exit quickly.
- Check hanger tightness once or twice a year.
- Watch for low spotsstanding water is a warning sign, not a decorative feature.
- Extend downspouts away from the foundation to reduce splashback and erosion.
- Add supports in vulnerable areas (corners, seams, long runs, snow zones).
FAQ: Fast Answers to Common Sagging Gutter Questions
Can I just push the gutter up and tighten the old fasteners?
Sometimesif the fasteners still bite into solid wood and the gutter was under-supported.
But if fasteners are stripping or the fascia is weak, you’ll need new hangers, new screw locations, or fascia repair.
How do I know if the slope is wrong?
If water sits in the gutter after rain, or if water consistently overflows in the middle of a run,
you likely have a low spot or the pitch is drifting away from the downspout.
A hose test is the simplest proof.
What if my gutter is sagging only near the downspout?
That area often carries extra weight and stress.
Add hangers near the downspout outlet and make sure the downspout is clearclogs can cause backups that push water (and weight) right where the gutter is weakest.
When should I call a professional?
If you’re working above one story, the fascia needs major replacement, the roof edge is hard to access safely,
or you suspect widespread rothire help. The cost of professional repair is often less than the cost of one preventable fall (or a soaked foundation).
500+ Words of Real-World “Been There” Lessons DIYers Run Into
If you ask a group of homeowners what surprised them most about fixing a sagging gutter, you’ll hear the same themes pop up again and again:
the “small” sag is never just small, the clogs are always grosser than expected, and gravity has an undefeated record.
Here are the most common experiences people report after tackling this projectso you can skip the frustration part and go straight to the victory lap.
Lesson #1: Cleaning first feels annoying… until it makes everything easier.
Many DIYers start by focusing on hardware: “I’ll just tighten those screws.”
Then they notice the gutter is holding a soggy salad of leaves, seeds, and roof grit.
Once that debris is removed, the gutter often springs partway back toward its original shape.
More importantly, you can actually see what you’re doingwhere the low spot is, which hanger is bent, and whether water is pooling because of pitch or because the downspout is plugged.
Homeowners who skip the cleaning step often “fix” the sag only to watch the gutter sag again after the next rain, because the real problemweightnever left the building.
Lesson #2: The first hanger you add is oddly satisfying.
A common moment: someone installs a hidden hanger in the worst dip, tightens the screw, and the gutter snaps into alignment like it just remembered it has responsibilities.
It’s one of those rare home repairs where the improvement can be immediate and visible.
DIYers often wish they’d added hangers sooner, especially near seams and corners where the gutter tends to flex.
The take-home message: if you’re debating whether you need “one more hanger,” you probably do.
Lesson #3: “Tight” is good. “Crushed metal” is not.
Another classic experience is overtightening fasteners.
People understandably want the gutter to feel rock-solid, but gutters are thin metal.
Overdriving a screw can deform the gutter, create a new dip, or distort the lip where hangers hook on.
The best practice many DIYers adopt after a couple mistakes is to snug fasteners until the gutter is secure, then stop and check the line visually.
A quick sight-down-the-run check can catch problems before you reinstall every hanger.
Lesson #4: Pitch is harder to “eyeball” than you think.
Homeowners often assume a gutter has to slope dramatically to drain.
In reality, the drop across a typical run is smalloften less than an inch over 30 feet.
That subtlety makes it easy to accidentally install a low spot.
The people who have the smoothest success are the ones who use a string line or chalk line and then do a hose test.
The hose test is the moment of truth: water doesn’t care about your confidence.
It only cares about physics.
Lesson #5: Fascia problems are the project’s plot twist.
Plenty of homeowners start with a simple sag and end up discovering soft fascia behind it.
The experience is usually: you remove a screw, and the hole looks too bigor the wood comes out with it.
At that point, the repair shifts from “reattach the gutter” to “repair the surface the gutter attaches to.”
While that’s not as fun as adding a hanger, it’s the difference between a fix that lasts and a fix that fails the next time the gutter fills with water.
DIYers who address fascia early tend to feel relieved later, because once the backing is solid, the rest of the work becomes straightforward.
The overall pattern is consistent: the best outcomes come from treating sagging gutters as a system problemsupport, slope, and structurerather than a single loose screw.
Handle those three, and your gutters stop acting like they’re trying to slide off the house and start doing their actual job: moving water away from everything you care about.
Conclusion
Fixing a sagging gutter isn’t glamorous, but it’s one of those repairs that protects your home quietly, every time it rains.
Start by cleaning and diagnosing the cause. Then choose the right fix:
(1) upgrade hangers and fasteners for stronger support,
(2) re-set pitch so water flows where it should,
and (3) repair fascia or damaged sections so the gutter has something solid to hold onto.
Do it once, do it right, and your gutter can go back to being boringwhich is the highest compliment a gutter can receive.


