Table of Contents >> Show >> Hide
- Before You Start: A Few Safety and Prep Tips
- Method 1: The Freezer Trick (Best for Thick Wax in Jars and Holders)
- Method 2: Hot Water Soak (Great for Jars and Deep Holders)
- Method 3: Gentle Heat & Cleaner (Best for Smears and Spills)
- How to Choose the Right Method for Your Glass
- Extra Tips to Prevent Wax Messes Next Time
- Real-Life Experiences: What It’s Actually Like to Remove Wax from Glass
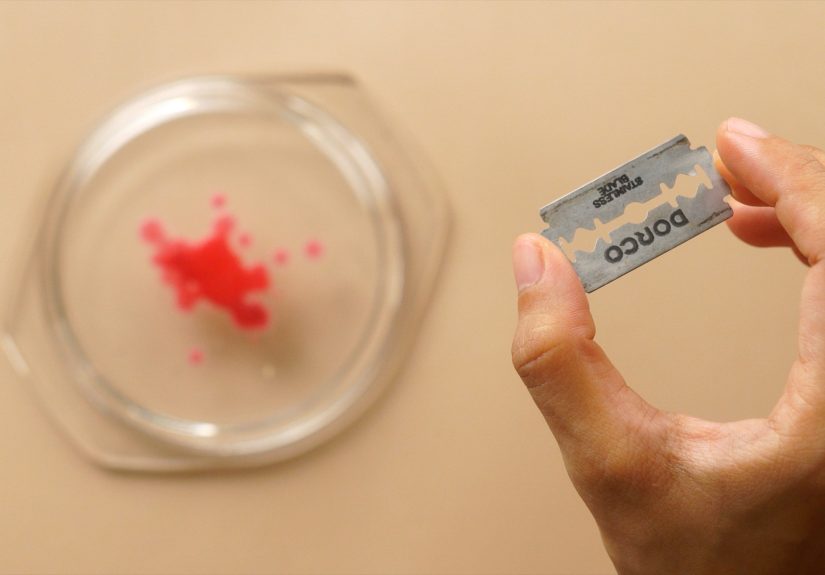
You light a candle for “cozy vibes,” and somehow end up with a crime scene of hardened wax on your favorite glass jar, table, or lantern. The good news? That stubborn wax looks scarier than it is. With a few simple tricks, you can remove wax from glass without scratching, cracking, or losing your patience (okay, maybe just a little).
In true wikiHow style, this guide walks you through three tried-and-true ways to remove wax from glass: using the freezer, using hot water, and using gentle heat plus a cleaner. We’ll break down exactly when to use each method, step-by-step instructions, and pro tips so your glass ends up sparkling instead of smeared and streaky.
Before You Start: A Few Safety and Prep Tips
Wax removal from glass is usually simple, but you still want to protect yourself and your stuff:
- Let the wax cool completely before you touch it or move the glass. Hot wax can burn skin and drip into places you don’t want it.
- Protect your surfaces with an old towel, a baking sheet, or some newspaper while you work.
- Avoid extreme temperature shock. Don’t take a glass container from the freezer and immediately pour in boiling water. That’s how you get cracks instead of clean glass.
- Use plastic tools (like an old credit card or plastic scraper) instead of metal knives to reduce the risk of scratching the glass.
- Test cleaners on a small area first, especially on tinted or decorated glass.
Method 1: The Freezer Trick (Best for Thick Wax in Jars and Holders)
If you’ve burned a candle all the way down and have a thick disk of leftover wax stuck in the bottom of the jar, the freezer is your best friend. When wax gets very cold, it contracts more than glass. That tiny bit of shrinkage helps break the bond so the wax pops out more easily.
What You’ll Need
- Freezer space
- Plastic scraper or old credit card
- Paper towels or a soft cloth
- A little cooking oil or rubbing alcohol (for residue)
- Dish soap and warm water
Step-by-Step: Freezer Method
-
Remove any loose pieces first.
If the wick tab or big chunks of wax are already detached, take those out. This makes the freezing step more effective. -
Place the glass in the freezer.
Set it upright on a flat spot where it won’t tip. Leave it there for about 30 to 60 minutes. Very thick wax may need a bit longer. -
Loosen the edges.
Take the glass out and use a plastic scraper, spoon handle, or credit card to gently pry at the edge of the wax. You’ll often hear or feel a little “pop” as the wax disc releases. -
Turn the jar upside down.
Once loosened, the wax chunk will usually fall out with a gentle tap on a towel-lined surface. -
Wipe away residue.
Add a small amount of cooking oil or rubbing alcohol to a cloth and rub the inside to dissolve any remaining waxy film. -
Wash as usual.
Finish by washing the glass with warm soapy water, then rinse and dry with a lint-free towel.
When the Freezer Method Works Best
- Glass candle jars with a thick layer of leftover wax
- Lanterns and votive holders with wax pooled at the bottom
- Situations where you want to reuse the wax (for melts or new candles)
Pros and Cons of the Freezer Method
Pros:
- Low mess: most of the wax comes out in one solid chunk.
- No strong chemicals or intense scrubbing needed.
- Gentle on decorative or printed glass.
Cons:
- Requires freezer space and a bit of waiting.
- Not ideal for wax that’s spread in a thin film across a large surface (like a glass table).
Method 2: Hot Water Soak (Great for Jars and Deep Holders)
If you want to melt the wax out and let it float up like a tiny lava lamp, the hot water method is for you. This technique uses very warm or near-boiling water to soften and lift the wax so it rises to the top and separates from the glass.
What You’ll Need
- Very hot water (just off the boil is usually enough)
- Heat-safe glass only (no cracks or chips)
- A heat-safe surface or tray
- Strainer or spoon (for removing cooled wax)
- Dish soap and a non-abrasive sponge
Step-by-Step: Hot Water Method
-
Check the glass.
Make sure there are no cracks, chips, or super-thin spots. If the glass looks fragile, skip this method to avoid thermal shock. -
Place the glass on a protected surface.
Set it in a sink, on a baking sheet, or in a bowl to catch spills. -
Pour in hot water.
Fill the glass with very hot water, leaving a bit of room at the top. The heat will start melting the wax so it softens and floats upward. -
Let it sit.
Leave the glass alone until the water cools. As it cools, the melted wax solidifies again at the top in a solid layer or chunks. -
Remove the wax.
Once the water is cool, lift off the wax layer with your fingers or a spoon. Discard it in the trashnever pour wax down the drain. -
Wash and degrease.
Empty the water. Wash the glass with hot, soapy water and a non-abrasive sponge to remove any remaining film.
When the Hot Water Method Works Best
- Thick wax at the bottom of sturdy, heat-safe glass jars
- Removing wax from multiple jars at once (line them up in the sink and fill them together)
- When you don’t have freezer space or don’t want to wait
Pros and Cons of the Hot Water Method
Pros:
- Works quickly on most candle wax types.
- Melts wax out of tight corners and around wick tabs.
- Good for heavily used jars that need a “reset.”
Cons:
- Risk of thermal shock if the glass is thin or already cold.
- More cleanup: you’re dealing with hot water, floating wax, and a sink to clean.
- Not ideal for wax spilled across a flat glass surface like a window or glass table.
Method 3: Gentle Heat & Cleaner (Best for Smears and Spills)
If your problem is less “wax mountain in a jar” and more “streaks and blobs on a glass table or window,” you’ll get the best results by softening the wax with gentle heat and then using a cleaner to break down the residue. Think hair dryer + vinegar or rubbing alcoholsimple but effective.
What You’ll Need
- Hair dryer or heat gun on lowest setting (or very warm, damp cloth)
- Plastic scraper or old credit card
- Glass cleaner, rubbing alcohol, white vinegar solution, or a citrus-based adhesive remover
- Soft cloths or paper towels
- Dish soap and water for final wipe-down
Step-by-Step: Heat & Cleaner Method
-
Soften the wax.
Aim the hair dryer at the wax on low to medium heat, keeping it a few inches away. Move it around so you don’t overheat one spot. The wax should turn glossy and softer, not boiling. -
Scrape gently.
Use a plastic scraper, a store loyalty card, or a plastic putty knife to gently push the softened wax off the surface. Wipe it onto a paper towel as you go. -
Apply a cleaner.
For the remaining thin film, spray glass cleaner or wipe with a cloth dampened with rubbing alcohol or a vinegar-and-water mix (about 1:1). These help dissolve oily residue and restore clarity. -
Buff the glass.
Wipe everything dry with a lint-free cloth or paper towel until the glass is streak-free. -
Repeat if needed.
Stubborn colored wax, fragranced wax, or heavily scented jars may need a second round of cleaner to remove all residue.
When the Heat & Cleaner Method Works Best
- Wax spilled on glass dining tables, coffee tables, or stove tops
- Thin smears of wax left after scraping off thicker chunks
- Colored or scented wax that leaves greasy or dyed streaks behind
Pros and Cons of the Heat & Cleaner Method
Pros:
- Great for large, flat glass surfaces and windows.
- Leaves glass very clear, especially when finished with glass cleaner.
- Fast once you get the hang of it.
Cons:
- More hands-on: you’re actively heating, scraping, and wiping.
- Can spread wax around if you overheat it and don’t scrape quickly.
How to Choose the Right Method for Your Glass
Not sure which method to use? Here’s a quick breakdown:
-
Use the Freezer Method if:
- You’ve got a solid chunk of wax stuck in the bottom of a jar.
- You want a low-mess, low-effort approach.
- There’s room in your freezer and you’re not in a rush.
-
Use the Hot Water Method if:
- Your glass is sturdy, heat-safe, and free of cracks.
- You want to melt out wax from tight corners and around wick tabs.
- You’re okay with washing everything in the sink afterward.
-
Use the Heat & Cleaner Method if:
- Wax is smeared or spilled across a large glass surface.
- You already picked off the big chunks and just need to remove residue.
- You want fast, polished, streak-free results.
Extra Tips to Prevent Wax Messes Next Time
Of course, the easiest wax to remove is the wax that never glued itself to the glass in the first place. A few simple habits can make cleanup way easier:
- Trim candle wicks to about 1/4 inch to reduce soot and uneven pooling.
- Stop burning when only about 1/2 inch of wax remains in the jar. Past that point, the wax gets harder to reclaim and more likely to overheat.
- Use a coaster or tray under candles to catch drips before they hit your table or shelf.
- Choose containers wisely: thick, heat-safe glass is easier to clean and less likely to crack.
- Clean up spills sooner: slightly warm, not fully hardened wax is often easier to lift in one piece.
Real-Life Experiences: What It’s Actually Like to Remove Wax from Glass
Guides are great, but nothing beats hearing what these methods feel like in real life. Removing wax from glass is one of those chores you don’t think about until you’re standing over the sink, staring at a jar that looks like it survived a tiny wax volcano. Here’s what you can expectand a few lessons learned the hard way.
The Freezer Method: Surprisingly Satisfying
The first time you try the freezer trick, it can feel almost magical. You shove a cloudy candle jar into the freezer, forget about it while you scroll your phone or cook dinner, and thenonce you remember itpull it out to find the wax shrunk just enough to break free. A gentle twist with a plastic card or spoon, and the whole thing pops out in one oddly satisfying chunk.
One common surprise is how clean the jar looks afterward. There’s often just a thin ring of residue near the top or bottom where the wax was stuck most tightly. A quick wipe with a bit of cooking oil or rubbing alcohol and a soapy wash, and suddenly that “trash” jar looks like a chic container for cotton pads, spices, or a new DIY candle.
The main downside? Remembering you put the jar in the freezer. If you’re the type to put leftovers in and find them six months later, put a little note on the freezer door or set a reminder so your candle jar doesn’t become a permanent roommate next to the frozen peas.
The Hot Water Method: Messy, but Effective
The hot water method feels a bit like a science experiment. You pour in very hot water and watch the wax slowly melt, rise, and form a soft, cloudy layer on top. It’s oddly soothinguntil you bump the jar and hot water sloshes over the side. That’s why it’s smart to work in a sink or on a tray, not in the middle of your favorite wood table.
Where this method shines is in candle jars that have lots of stuck-on wax around the wick tab or embedded in decorative ridges. The hot water creeps into every corner. When it cools, the wax congeals into a flake or sheet you can peel right off. It’s not the cleanest process, but it’s extremely satisfying if you like visual progress.
The biggest mistake people make here is rushing. Pouring boiling water into a cold, thin glass container can lead to cracks. It’s much safer to either warm the glass slightly first (with lukewarm water) or use water that’s just off the boil instead of full-on rolling bubbles. Your goal is melted wax, not shattered glass.
The Heat & Cleaner Method: Perfect for “Oh No” Spills
If you’ve ever watched a candle drip over the side and thought, “I’ll clean that later,” you already know how stubborn wax on a glass table can be. By the time “later” rolls around, the wax is rock solid and stuck to the glass like it pays rent.
The heat and cleaner method is built for these moments. The hair dryer step feels a little like using a tiny power washer made of warm air: the wax softens, becomes glossy, and starts to move when you push it with a scraper. Once most of it is off, applying glass cleaner, vinegar solution, or rubbing alcohol turns the remaining film into something you can actually remove instead of just smearing around.
People are often surprised that oil-based products can help here too. A tiny bit of cooking oil rubbed into a stubborn wax smear can loosen it enough to wipe awayjust follow up with a degreasing cleaner so your glass doesn’t look greasy. This is especially helpful with fragranced or colored wax that leaves a shiny or tinted residue behind.
What Most People Get Wrong About Wax on Glass
A few common myths and mistakes show up over and over:
- Myth: You have to scrub like crazy. In reality, wax responds best to temperature changes and the right cleaner. Scrubbing with abrasive pads is more likely to scratch the glass than solve the problem.
- Mistake: Using metal tools. A butter knife or metal scraper might feel sturdy, but it’s a fast way to create tiny scratches that catch light forever. Plastic tools are safer and usually just as effective.
- Mistake: Pouring wax down the drain. Even melted wax will harden again, and plumbing bills are much less fun than candles. Always throw wax in the trash.
- Myth: Once wax stains glass, it’s ruined. In most cases, even colored wax residue can be removed with a combination of gentle heat, solvent (like alcohol or vinegar), and a good glass cleaner.
Turning a Chore into a Habit
The more often you remove wax from your glass candle jars and holders, the easier it gets. A quick routinefreezing jars before tossing them, wiping tables the day after a candlelit dinner, or soaking heavily used jars every few monthskeeps buildup from ever becoming a major project.
And once you see how easy it is to restore glass to its original shine, you might find yourself reusing more containers instead of tossing them. Clean jars become storage, mini planters, pen holders, or fresh candles. A little effort scraping and soaking can turn a messy wax situation into a small recycling win and a nicer-looking home.
SEO JSON