Table of Contents >> Show >> Hide
- Why Homemade Warhammer Terrain Is Worth It
- Way #1: Make Fast Cardboard and Foamboard Ruins
- Way #2: Build XPS Foam Hills, Rocks, and Craters
- Way #3: Make Industrial or Gothic Terrain from Kits, MDF, and Kitbashing
- Which Method Should You Choose?
- Experience-Based Lessons From Building Warhammer Terrain
Warhammer battles deserve more than a sad line of soup cans and one lonely hardcover book pretending to be a fortress. Good terrain does more than look cool. It changes movement, creates firing lanes, blocks line of sight, sells the story of the battlefield, and makes the whole game feel less like math with dice and more like a cinematic last stand in a ruined hive city.
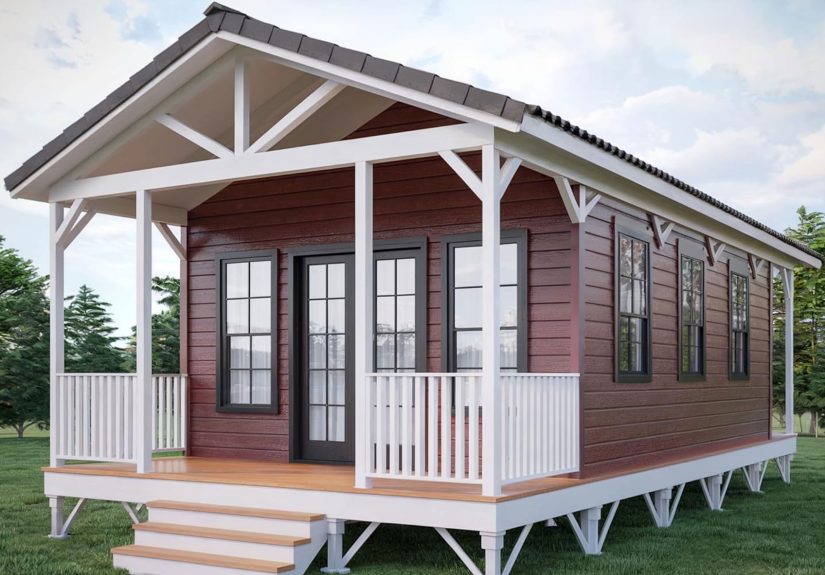
The good news is that you do not need a professional workshop, a giant budget, or the blessing of the Adeptus Mechanicus to build excellent Warhammer terrain. You can make impressive scenery with simple cardboard, upgraded foam builds, or polished industrial terrain that looks ready for a campaign book photo shoot. The trick is choosing the right method for your time, budget, storage space, and patience level.
In this guide, we will cover three practical ways to make Warhammer terrain: fast cardboard ruins, durable XPS foam landscapes, and kitbashed industrial or gothic scenery. Each method has its own strengths. One is cheap and fast. One is flexible and dramatic. One looks like you have your life together, even if your hobby desk currently resembles a small disaster area held together by PVA glue.
Why Homemade Warhammer Terrain Is Worth It
Before we start cutting foam and questioning our life choices over crooked windows, it helps to know why homemade terrain is such a strong option for Warhammer 40,000, Age of Sigmar, Kill Team, Necromunda, and other skirmish games.
You control the battlefield
When you build your own terrain, you decide how dense the board should be, how tall the ruins are, where line-of-sight blockers go, and whether the table feels like a blasted city, frozen wasteland, jungle moon, daemon world, or suspiciously familiar pile of packaging materials from your last online order.
You spend less and get more
Official terrain kits look great, but homemade pieces let you fill a table for far less money. A mix of foam, cardboard, texture paste, sand, scraps, and leftover bits can stretch into a full board much faster than buying every ruined wall and industrial platform separately.
You can match your army
Terrain looks better when it belongs to the same world as your miniatures. If your Space Marines fight through ash wastes, build dusty broken ruins. If your Orks live for junkyard chaos, make ramshackle barricades and scrap piles. If your Stormcast Eternals want divine-looking stone platforms, give them something a little more majestic than a cereal box with a bad attitude.
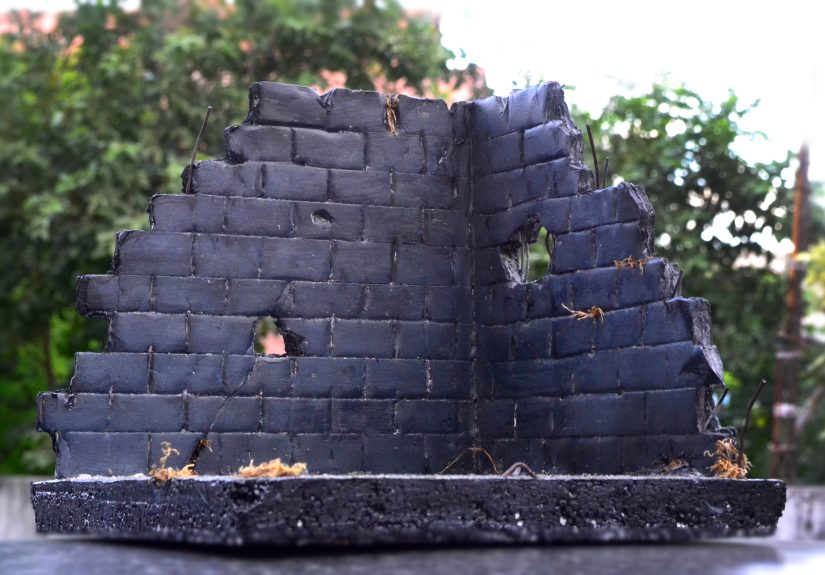
Way #1: Make Fast Cardboard and Foamboard Ruins
If you want a full table quickly, start here. Cardboard and foamboard terrain is the speed-run category of Warhammer scenery. It is cheap, easy to cut, light to store, and perfect for city ruins, barricades, walls, scatter terrain, and basic buildings.
Best for
Beginners, tight budgets, Kill Team boards, temporary tables, test layouts, and hobbyists who want results this weekend rather than next century.
What you need
- Foamboard, corrugated cardboard, or chipboard
- PVA glue or craft glue
- Metal ruler and sharp hobby knife
- Cutting mat
- Sand, grit, coffee stirrers, popsicle sticks, straws, mesh, and leftover sprue
- Acrylic paint, primer, and a large drybrush
- Optional sealer for cardboard before painting
How to build it
Start with simple shapes. A ruined L-shaped wall, shattered floor section, low barricade, or broken two-story shell works better than a complicated cathedral on your first attempt. Draw your wall sections, cut them in multiple light passes, and avoid trying to muscle through the board in one heroic swipe. Clean cuts look better, and your fingers will appreciate your maturity.
Next, rough up the edges. Tear a little paper from corrugated cardboard to expose texture, snap corners, cut out shell holes, and make broken window frames. Warhammer terrain usually looks better with damage. If it is too neat, it starts to resemble a school project. If it is chipped, cracked, and suspiciously unstable, now we are getting somewhere.
Glue your wall sections to a sturdy base. Thin MDF, thick card, or layered cardboard all work. Add support beams from coffee stirrers, floor plates from chipboard, pipes from straws, and rubble from sand, cork, and clipped sprue. A little extra texture goes a long way. Even a plain ruin becomes convincing once the base looks like debris has actually fallen there.
How to paint it
Seal flimsy cardboard first if needed, especially if you are using wet paint or texture products. Then prime the piece and block in your main colors. For urban ruins, start dark: charcoal, brown-black, or deep gray. Drybrush lighter grays over the edges, then pick out details like pipes, hazard stripes, rust patches, posters, or broken masonry.
This is also where homemade terrain starts looking expensive. Sponging on metal, stippling rust, and adding dusty drybrush highlights makes cheap material disappear under the illusion. The goal is not perfection. The goal is for your opponent to say, “Wait, that was cardboard?” while pretending they were not impressed.
Pro tips
- Make several small ruins instead of one giant centerpiece so you can rearrange the board.
- Use bases wide enough to stop walls from tipping over during play.
- Keep floor heights consistent so miniatures can stand on them easily.
- Use rubble to hide ugly joins. Rubble is the hobby version of “fix it in post.”
Why this method works
Cardboard and foamboard ruins are ideal when you need lots of terrain fast. They are especially useful for dense urban boards, narrative missions, and casual groups that want the table to feel immersive without requiring a second mortgage. They also teach the core terrain-building skills you will use later: cutting, layering, texturing, basing, and painting for believable scale.
Way #2: Build XPS Foam Hills, Rocks, and Craters
If cardboard ruins are the quick-and-dirty method, XPS foam is the terrain builder’s playground. Extruded polystyrene foam is excellent for hills, cliffs, trenches, bunker shapes, craters, rocky outcrops, cave entrances, and large line-of-sight blockers. It is light, easy to carve, and flexible enough to build dramatic battlefields with real height and shape.
Best for
Natural terrain, sci-fi wastelands, modular hills, craters, trench lines, alien landscapes, and anyone who likes carving dramatic shapes into foam like a tiny battlefield architect.
What you need
- XPS insulation foam sheets
- Hot wire cutter or hobby knife
- PVA glue or foam-safe glue
- Ball of aluminum foil, wire brush, or rock for texturing
- Texture paste, filler, or foam coat
- Sand, cork, gravel, and tufts
- Acrylic paints and large brushes
How to build it
Layer foam sheets to create height, then glue them together. This is the easiest way to make hills and stepped rock formations. Once the glue sets, carve the foam into irregular slopes, broken cliff faces, or crater lips. Avoid perfect symmetry. Nature rarely builds in straight lines, and even a sci-fi wasteland looks better when it feels battered by time, explosions, or both.
After carving, texture the surface. Crumpling aluminum foil and pressing it into foam gives you a convincing stone pattern. A knife can score cracks and ledges. A rough rock or stiff brush can add irregular surface variation. For craters, carve a shallow depression, then make the outer edges jagged and uneven so the piece looks blasted rather than politely dented.
Once the form is done, seal and strengthen the surface. Some hobbyists use texture paste, filler, or plaster cloth over certain shapes. Others use a hard coat product on exposed foam to make it more durable. Then add sand, cork rubble, or broken debris where natural wear would collect. Tufts, skulls, wires, and shell casings can all help tell the story.
How to paint it
XPS foam terrain loves simple paint recipes. Prime or basecoat it in black, dark brown, or deep gray. Then drybrush progressively lighter tones across the raised texture. This brings out every carve, crack, and rock face with very little effort. Add brown or green washes for dirt, moss, or corruption. Use rust pigments or orange-brown stippling if you want the battlefield to look especially miserable.
For a Martian table, lean into reds and dusty oranges. For an ash waste board, use gray-brown and pale bone tones. For fantasy stone, mix cool grays with mossy green and earth tones. The painting is not complicated. What makes the piece pop is the sculpted texture and the contrast between dark recesses and lighter edges.
Pro tips
- Build terrain in sections that can rotate or combine in different ways.
- Make flat spots for miniatures so gameplay stays practical.
- Seal exposed foam before harsh sprays or rough handling.
- Use cork together with foam for layered rocky terrain with very natural edges.
Why this method works
XPS foam gives you the most visual drama for the least weight. A few stacked pieces can transform a flat table into a proper battlefield with elevations, cover, choke points, and strong visual identity. It also scales beautifully. You can build a tiny crater in one evening or spend weeks creating an entire modular trench network that looks like it has its own tragic history.
Way #3: Make Industrial or Gothic Terrain from Kits, MDF, and Kitbashing
If you want terrain that looks polished, durable, and deeply Warhammer, this is the method to chase. Industrial and gothic pieces are perfect for hive cities, manufactorums, sanctums, necromantic ruins, and grimdark battlefields full of gantries, vents, broken arches, and “absolutely safe” plasma machinery.
Best for
Warhammer 40,000, Necromunda, Kill Team, and anyone who wants terrain with strong verticality, repeated details, and a finished tabletop look.
What you need
- MDF kits, plastic terrain sprues, or scratch-built wall panels
- Plasticard, mesh, straws, tubing, and leftover model bits
- Super glue, PVA, and basing glue
- Texture paste or basing compound
- Primer, metallics, rust tones, washes, and drybrush paints
- Hazard stripe colors and weathering materials
How to build it
Start with a sturdy structure: a platform, tower, ruined chapel wall, pipe cluster, or industrial barricade. MDF is excellent for clean structure. Plastic kits add detail. Scratch-built parts bring personality. The most convincing pieces usually combine all three. A basic tower becomes far more interesting once you add ladders, vents, cables, railings, warning signs, and a panel that looks like it should definitely not be leaking glowing green fluid.
Layering is what sells this style. Large flat surfaces should be broken up with buttresses, trim, rivet strips, vents, doors, access panels, and pipes. Repetition is useful here. Industrial design loves repeating shapes. Gothic design loves arches, pillars, and ornament. Warhammer loves both, then covers them in soot and bad decisions.
Do not forget the base. Industrial terrain without a textured base can look like a display piece floating in another dimension. Add grit, bolts, broken masonry, cable scraps, and little piles of debris so the terrain feels anchored to the board.
How to paint it
Prime dark, then work from large surfaces to fine details. Metal structures look great with heavy drybrushing over black primer, followed by rust effects, grime streaks, and edge highlights. Stone gothic terrain benefits from layered grays, warm bone accents, and dirty recess shading. Hazard stripes, glowing screens, warning labels, and graffiti make the piece feel alive.
This is where restraint matters. You do not need every surface to scream for attention. Pick a few focal details, like a glowing console, red door, or yellow stripe, and let the rest support them. Too many competing details make the terrain noisy. Good terrain should frame the battle, not hijack it like a drama-loving side character.
Pro tips
- Build terrain in repeatable sizes so pieces stack and combine neatly.
- Keep ladders, floors, and platforms practical for miniature placement.
- Use weathering to unify mixed materials into one believable structure.
- Save every spare bit. Today’s random offcut is tomorrow’s sacred reactor housing.
Why this method works
This approach creates the most “finished” Warhammer look. It is ideal for centerpiece terrain, tournament-quality tables, and long-term projects that you want to keep using for years. It also rewards creativity. Once you start seeing every bottle cap, mesh strip, and cable tie as possible terrain detail, you may never look at household junk the same way again.
Which Method Should You Choose?
If you are brand new, start with cardboard and foamboard ruins. You will learn quickly, spend very little, and fill a board fast. If you want dramatic hills and natural terrain, use XPS foam. If your dream table is dense, vertical, and grimdark, move toward industrial or gothic kitbashing.
Realistically, the best Warhammer boards use a mix of all three. A great table might include foam hills, cardboard ruins, and one or two polished centerpiece structures. That blend keeps the board practical, affordable, and visually rich. It also spreads the workload. Not every piece needs to be a masterpiece. Some terrain exists to be beautiful. Some exists to block line of sight. Some exists because you ran out of time and there was a shipping box nearby. All are valid.
Experience-Based Lessons From Building Warhammer Terrain
After a few terrain projects, most hobbyists learn the same thing: the first version is rarely the final version. The ruin you thought was done suddenly needs more rubble. The hill that looked huge becomes oddly tiny once you put a tank next to it. The industrial tower that seemed perfect turns out to have nowhere stable for a squad to stand. Terrain building teaches you by ambush, which is somehow very appropriate for Warhammer.
One of the biggest lessons is that tabletop terrain has to look good and play well. Those are not always the same thing. A spiky gothic ruin can look incredible, but if every ledge is too narrow for a base, players will hate it by round two. A crater with beautiful detail might still be a failure if it slides around the board every time somebody reaches for dice. The best terrain balances style and function. It is dramatic enough to feel immersive, but stable enough that nobody needs tweezers and prayer just to move an infantry model.
Another lesson is that texture does most of the heavy lifting. Early on, many people focus too much on shape alone. They build a wall, a hill, or a bunker and then wonder why it still looks unfinished. Usually the missing ingredient is surface interest. Sand, cork, cracks, chipped edges, little stones, rivets, pipes, scorched patches, and tufts do far more for realism than one more layer of complicated construction. A simple shape with great texture almost always looks better than a complex shape with a flat, lifeless surface.
Scale is another sneaky teacher. What feels large in your hand can look strangely modest once miniatures hit the table. That is why experienced builders often exaggerate terrain a little. Doors become thicker, buttresses chunkier, rocks taller, and platforms wider than strict realism might suggest. On a Warhammer board, slightly oversized details often read better from across the table and feel more satisfying during play.
Storage also becomes part of the craft faster than expected. It is easy to build a glorious battlefield and then realize you have nowhere to put it except on top of a bookshelf, where it will gather dust and develop mysterious structural philosophy. Modular terrain solves this. Stackable ruins, removable platforms, and lightweight foam hills are not just convenient. They are the difference between terrain you admire once and terrain you actually use every month.
And finally, there is the strangely wonderful truth that terrain gets better when it stops trying to be perfect. The best-looking boards usually have a little chaos in them. A cracked stair, a tilted pipe, an uneven rock face, a patch of rust that spread farther than planned, a wall corner that broke and was turned into “battle damage.” Terrain rewards adaptation. When something goes wrong, it often becomes the best detail on the piece. In other words, the hobby occasionally hands you lemons, and you turn them into a bombed-out manufactorum.
Note: This draft is written for web publication and kept to clean HTML body content only, with SEO tags included at the end in JSON format.