Table of Contents >> Show >> Hide
- Why repotting matters (and why your plant cares)
- How to tell it’s time: signs your plant wants a new pot
- The best time to repot houseplants
- What you’ll need (aka your repotting toolkit)
- Choose the right pot: size, drainage, and materials
- Pick the right potting mix (because “dirt” is not a strategy)
- How to repot a plant step-by-step (without the drama)
- Step 1: Prep the plant and the space
- Step 2: Slide the plant out (gently)
- Step 3: Inspect the roots like a plant detective
- Step 4: Remove some old soil (but don’t go overboard)
- Step 5: Clean and prep the new pot
- Step 6: Add a base layer of fresh potting mix
- Step 7: Center the plant and backfill with new mix
- Step 8: Water appropriately
- Step 9: Put it back in the right light (not punishment light)
- Aftercare: the first 2 weeks after repotting
- Common repotting problems (and what they actually mean)
- Special cases: repotting different types of houseplants
- Repotting upgrades for more indoor greenery (without buying 12 new plants)
- Conclusion: repotting is the glow-up your houseplants deserve
- of repotting experiences (so you don’t have to learn the hard way)
Repotting sounds like the kind of chore that belongs in the same category as “cleaning the fridge” and “finding the
missing sock dimension.” But here’s the plot twist: repotting is one of the fastest ways to get more indoor greenery
without buying more plants (which, let’s be honest, you’ll probably still do).
When a houseplant runs out of room, it can’t stretch its roots, store water properly, or access fresh nutrients.
The result is often slower growth, smaller leaves, droopier vibes, and that suspicious “I used to be thriving”
energy. A smart repot gives your plant fresh potting mix, better breathing room, and a sturdier homeso it can push
out new leaves and look like it belongs in a sun-drenched magazine spread instead of “plants I’m trying my best with.”
Why repotting matters (and why your plant cares)
Repotting indoor plants isn’t just about upgrading to a cuter pot. It’s about giving roots what they need:
oxygen, space, consistent moisture, and nutrients. Over time, potting mix breaks down and compacts, which reduces
airflow and drainage. Also, plants use up the good stuff in the soilkind of like you demolishing snacks during a
Netflix binge. Fresh mix helps reset the system.
A well-timed houseplant repotting can lead to:
- More growth: More room for roots often means more leaves up top.
- Better watering: Fresh mix drains and holds moisture more predictably.
- Healthier roots: You can remove dead roots and catch problems early.
- Stability: Tall or top-heavy plants stop doing that dramatic lean.
How to tell it’s time: signs your plant wants a new pot
Plants don’t text you “pls repot,” but they do send signals. Look for these classic “I’m cramped in here” clues:
- Roots escaping: Roots poking out of drainage holes or creeping across the soil surface.
- Water whooshes through: You water, and it rushes out the bottom like the pot is a funnel.
- Frequent thirst: The plant dries out way faster than it used to (even with similar light).
- Stalled growth: New leaves are tiny, scarce, or the plant is basically on “pause.”
- Top-heavy tipping: The plant gets wobbly, especially when the soil is dry.
- Crusty soil: A white, chalky buildup on the surface can mean mineral salts are accumulating.
Quick reality check: some plants don’t mind being a little snug (hello, certain tropicals), so don’t repot just
because it’s been “a while.” Repot because the plant is telling you it’s ready.
The best time to repot houseplants
For most indoor plants, the sweet spot is spring through early summer, when plants are actively
growing and can recover faster. Repotting during low-light seasons can be harder on plants because growth slows, and
wet soil can stay wet longer (which roots do not appreciate).
That said, there are exceptions. If your plant is severely root-bound, falling over, or showing signs of trouble
(like soggy soil that never dries or roots circling like spaghetti), you can repot outside the “ideal” windowjust
be extra gentle and conservative with watering afterward.
What you’ll need (aka your repotting toolkit)
- A new pot (or the same pot if you’re just refreshing soil)
- Fresh potting mix suited to your plant type
- Gloves (optional, unless you’re repotting something poky or dramatic)
- Pruners or scissors for trimming dead roots
- A trowel or spoon for scooping mix
- Newspaper/tray to catch the mess you will definitely make
- A chopstick or pencil to help settle soil around roots
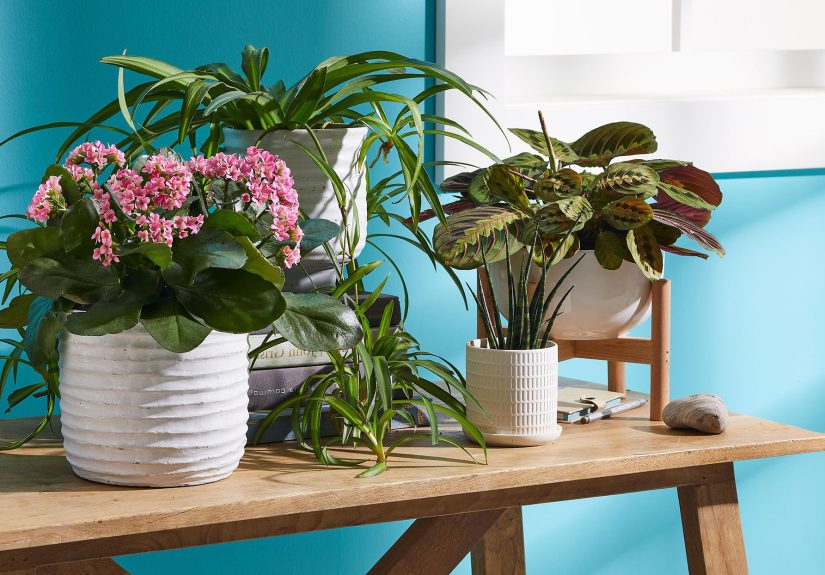
Choose the right pot: size, drainage, and materials
The number one repotting mistake is going too big. A massive pot holds extra soil that stays wet longer, and small
root systems can’t drink it fast enough. That’s how you accidentally create a swamp.
Pot size rule of thumb
For most houseplants, size up by about 1–2 inches wider in diameter (or one “container size” up).
This gives roots room to explore without turning watering into a risky guessing game.
Drainage is not optional (if you like living plants)
A pot with a drainage hole is your best friend. It helps prevent waterlogging and lets you water thoroughly without
fear. If you love a decorative pot without holes, treat it like a cachepot:
keep the plant in a plastic nursery pot (with holes) and set that inside the pretty one. This makes watering and
draining much easierand your plant won’t silently plot your downfall.
Material choices: terracotta vs. plastic vs. ceramic
- Terracotta: Breathable and dries fastergreat if you tend to overwater, less great for plants that hate drying out.
- Plastic: Lightweight and holds moisture longerhelpful for thirsty plants, but be careful not to overwater.
- Ceramic: Often heavier and stable for tall plants; moisture behavior depends on glazing and thickness.
Pick the right potting mix (because “dirt” is not a strategy)
Indoor plants do best with potting mix designed for containers. Garden soil is usually too dense indoors and can
compact, drain poorly, and invite issues. If you want more indoor greenery (and less indoor regret), match the mix
to your plant:
- General houseplant potting mix: Great for pothos, philodendrons, peace lilies, and many common plants.
- Cactus/succulent mix: Fast-draining for aloe, jade, snake plants, and cacti.
- Orchid mix: Chunky bark-based media for orchids (their roots want airflow, not mud).
- Aroid-style mix: For monsteras and similar plants that like chunky aeration (often a blend with bark/perlite).
If you’re unsure, start with a quality indoor potting mix and adjust with perlite or bark depending on whether your
plant likes more drainage or more moisture retention.
How to repot a plant step-by-step (without the drama)
This is the main event: the repotting guide you can actually follow. Put on music, bribe yourself with a snack, and
let’s do it.
Step 1: Prep the plant and the space
Repotting is messy, so work over newspaper, a tray, or outdoors if weather allows. If the soil is bone dry, lightly
moisten it a few hours before repottingjust enough to reduce stress and help the root ball slide out more easily.
Step 2: Slide the plant out (gently)
Tip the pot sideways, support the plant near the base, and tap the pot’s sides or bottom. If it’s stuck, run a
butter knife along the inside edge or squeeze a plastic pot to loosen it. Avoid yanking the stems like you’re
starting a lawn mower.
Step 3: Inspect the roots like a plant detective
Healthy roots are usually firm and lighter in color (white/tan), while unhealthy roots may be mushy, blackened, or
smell… not great. If roots are circling tightly around the pot (classic root-bound behavior), loosen them gently
with your fingers. For very tight root balls, you can tease the outer roots or make a few vertical slicescarefully.
Step 4: Remove some old soil (but don’t go overboard)
Shake or brush away some of the old potting mix, especially the loose stuff around the edges and bottom. You don’t
need to bare-root most houseplants; just remove enough to refresh nutrients and make space for new mix.
Step 5: Clean and prep the new pot
If you’re reusing a pot, wash it first. A simple disinfecting rinse (commonly a diluted bleach solution followed by
thorough rinsing) can help reduce leftover pests or disease issues. Make sure the pot is dry and the drainage hole
is clear.
Step 6: Add a base layer of fresh potting mix
Add a layer of new mix so the plant sits at the right height. You want the plant’s crown (where stems meet roots)
at roughly the same level as beforenot buried like a treasure chest.
Step 7: Center the plant and backfill with new mix
Place the plant in the pot, then add potting mix around the sides. Use a chopstick or your fingers to gently work
soil into air pockets. Firm the mix lightly (think “secure,” not “concrete”). Leave about an inch of space at the
top so watering doesn’t instantly overflow like a tiny indoor waterfall.
Step 8: Water appropriately
After repotting, water enough to help settle the soilespecially if the mix is very dry. Then let the plant drain
fully. From there, return to your normal watering rhythm based on the plant and the light in your home.
Step 9: Put it back in the right light (not punishment light)
Many plants do best returning to their usual spot, but if your plant seems stressed, give it bright indirect light
for a week or two. Avoid blasting it with harsh sun immediately after repotting; it’s already been through enough.
Aftercare: the first 2 weeks after repotting
Repotting can cause mild transplant shockthink of it as your plant needing a day to decompress after moving.
Here’s how to keep the recovery smooth:
- Hold off on fertilizer: Fresh potting mix often contains nutrients, and fertilizing too soon can stress roots.
- Watch watering closely: New soil may hold moisture differently than old soil, so check before you water.
- Keep conditions steady: Avoid big swings in light, temperature, or drafts right after repotting.
- Expect a little drama: A few droopy leaves can happen. Give it time before you panic-repot again.
Common repotting problems (and what they actually mean)
“My plant is wilting right after repotting”
Mild wilting can be normal as the plant adjusts. Make sure it’s not sitting in water, and keep it in bright
indirect light. If the soil is soaked and the plant is limp, you may be overwateringlet it dry appropriately.
“The soil stays wet forever”
This often happens when the pot is too large, the mix is too dense, or the plant is in low light. Move the plant to
brighter light, confirm drainage, and avoid watering until the top portion of the mix dries (plant-dependent).
“Fungus gnats showed up like uninvited guests”
Fungus gnats love consistently moist soil. Let the surface dry more between waterings, use sticky traps to catch
adults, and consider top-dressing with a thin layer of coarse sand or using a gnat control method designed for
houseplants.
“Leaves are yellowing after repotting”
Yellow leaves can be stress, overwatering, or a light mismatch. Check moisture first. Repotting doesn’t “fix”
watering habitsit just gives you a cleaner slate to do it right.
Special cases: repotting different types of houseplants
Succulents and cacti
Use a fast-draining cactus/succulent mix and avoid overwatering after repotting. Many growers wait a short period
before watering heavily so any minor root damage can dry and heal. Most importantly: drainage holes, always.
Orchids
Orchids usually want airy bark-based media, not regular potting mix. Repot when the media breaks down, roots
outgrow the pot, or after flowering for many common orchids. Trim dead roots, keep healthy ones, and use the right
orchid container if possible.
Monsteras and other “big-leaf” plants
Monsteras can grow quickly and appreciate a slightly roomier pot (still, don’t oversize it). A chunkier mix helps
keep oxygen flowing to the roots. If you want more indoor greenery fast, give it a moss pole or support after
repotting so new growth climbs instead of sprawling.
Plants that like being snug
Some plants perform better a bit root-bound. If the plant looks healthy and growth is steady, you might only need
a soil refresh (repot into the same container) instead of sizing up.
Repotting upgrades for more indoor greenery (without buying 12 new plants)
If your goal is a lusher indoor jungle, repotting is also a chance to “level up”:
- Refresh the top layer: If a plant doesn’t need a bigger pot, remove the top inch of soil and replace with fresh mix.
- Divide and multiply: Some plants (like certain ferns or peace lilies) can be divided during repotting to create multiple pots.
- Take cuttings: Pothos and many philodendrons root easily in water or moist mixrepot day is a perfect time to propagate.
- Improve stability: Choose a wider, heavier pot for tall plants so they stand up straight and proud.
- Group plants: After repotting, grouping plants can help create a more humid microclimate for tropical favorites.
Conclusion: repotting is the glow-up your houseplants deserve
Repotting doesn’t have to be complicated. Most of the time, it’s just: choose a pot slightly larger, use the right
potting mix, handle roots gently, don’t bury the stem, and be sensible with watering afterward. Do that, and your
plant has a much better chance of rewarding you with new growthaka more indoor greenery that makes your space feel
alive.
And if you do make a small mess? Congratulations. You’ve officially performed the sacred ritual of houseplant
parenthood. The soil under your fingernails is basically a badge of honor.
of repotting experiences (so you don’t have to learn the hard way)
The first time I repotted a pothos, I did what many well-meaning humans do: I over-loved it. I saw a tiny plant in a
small pot and thought, “You deserve a mansion.” So I jumped it into a pot that was basically a luxury condo.
It looked adorable for about a weekthen the soil stayed wet forever, the leaves got moody, and I learned the hard
truth: oversized pots aren’t generous; they’re chaotic. Since then, I stick to the “one size up” rule and my plants
stopped acting like they were auditioning for a daytime soap opera.
Another time, I repotted a snake plant and expected instant growth like it was going to sprint into a new era of
productivity. Instead, it did what snake plants do best: nothing. For months. I was offended. Then one day it popped
out a new spear like, “Oh, were you waiting?” That experience taught me that repotting isn’t a magic button; it’s
more like setting the stage. Some plants take the hint quickly. Others prefer to think about it for a season.
The messiest lesson came from a peace lily that was root-bound so tightly it could’ve qualified as a wicker basket.
When I finally slid it out, the roots were circling like they were trying to escape the planet. I panicked and
started pulling aggressivelybad move. I tore more roots than I needed to, and the plant sulked afterward. Now I do
the calm approach: loosen the outer roots gradually, trim only what’s dead or damaged, and let the plant keep as
much of its working root system as possible.
My favorite repotting win was with a leggy pothos that looked like it had been through a breakup. During repotting,
I took a few cuttings, rooted them, and planted them back into the same pot to “bulk it up.” Within a couple months,
the plant looked fuller and greenerlike it had started drinking water and minding its business. That little trick
(repot + propagate + replant) is now my go-to for making indoor greenery look lush without buying a whole new plant.
Finally, the most practical takeaway: aftercare matters as much as the repot. I used to fertilize immediately
because I assumed “new pot = buffet time.” But fresh potting mix already supports growth, and newly disturbed roots
can be sensitive. Now I wait a bit, keep the light steady, and treat watering like a thoughtful decision instead of
a reflex. Plants don’t want constant attentionthey want consistent care. And honestly, same.