Table of Contents >> Show >> Hide
- Quick reality check: What an at-home keratin treatment can (and can’t) do
- What a keratin treatment actually is (and why the name is a little misleading)
- Should you DIY a keratin treatment at home?
- Safety first: The ingredient issue you shouldn’t ignore
- What you’ll need (so you’re not flat-ironing with one hand and panic-Googling with the other)
- Step-by-step: How to apply a keratin treatment at home
- Step 1: Set up your space (ventilation is part of the process)
- Step 2: Clarify wash (remove buildup so the treatment can coat evenly)
- Step 3: Pre-dry (only if your kit calls for it)
- Step 4: Section your hair like you mean it
- Step 5: Apply the keratin treatment (thin, even, and off the scalp)
- Step 6: Let it process
- Step 7: Blow-dry completely
- Step 8: Flat iron to seal the treatment (the moment of truth)
- Step 9: Finish based on your kit (two common routes)
- Aftercare: How to make your keratin treatment last
- Troubleshooting: Common DIY keratin problems (and what to do)
- How long does an at-home keratin treatment last?
- FAQ
- Real-world experiences: of “what people wish they knew” before doing DIY keratin
- Conclusion
If your hair has been auditioning for a “frizz documentary” every time humidity hits, an at-home keratin treatment can feel like the cheat code. But let’s be honest: DIY keratin is a little like baking soufflétotally doable, but it rewards preparation and punishes improvisation. This guide walks you through what keratin treatments actually do, how to do them safely at home, and how to avoid the classic mistakes that turn “silky and sleek” into “crispy and confused.”
Quick reality check: What an at-home keratin treatment can (and can’t) do
- Can: Reduce frizz, improve shine, help hair look smoother, and cut blow-dry time.
- Can: Loosen curls and waves (how much depends on your hair type and the product).
- Can’t: Magically “heal” severely damaged hair or permanently change your texture without trade-offs.
- Can’t: Replace professional ventilation, technique, and temperature control if you choose a strong smoothing kit.
What a keratin treatment actually is (and why the name is a little misleading)
Hair is made mostly of keratin, a structural protein that helps give strands strength and shape. Many “keratin” products add conditioning agents and proteins that temporarily coat the hair and make it feel smoother. The long-lasting salon-style “keratin smoothing” services are different: they use a chemical formula plus heat (blow-drying and flat ironing) to create a smoother finish that can last weeks to months.
Translation: keratin can be part of the formula, but the straightening/smoothing power comes from the chemistry + heat-sealing step. That’s why safety and technique matter more than the word “keratin” on the label.
Should you DIY a keratin treatment at home?
At-home keratin treatments fall into two broad categories:
- Keratin masks/“smoothing” conditioners (low risk): rinse-out or leave-in products that reduce frizz temporarily. Great for beginners. Results are subtle and typically last until your next few washes.
- Salon-style keratin smoothing kits (higher risk): step-based systems that require blow-drying and flat ironing to seal the treatment. Results can be stronger and longer-lastingbut so are the risks if the ingredients or heat are mishandled.
Consider skipping DIY (or choosing a gentle option) if:
- You’re pregnant, or you have very sensitive skin, asthma, allergies, or a history of contact dermatitis.
- Your hair is heavily bleached, severely heat-damaged, or breaking easily (high heat + multiple passes can push it over the edge).
- You can’t ventilate your space well (open windows, airflow, and time alone without kids/pets underfoot).
- You’re not comfortable working carefully with sections, timing, and temperature control.
Safety first: The ingredient issue you shouldn’t ignore
Many hair-smoothing/straightening products can release formaldehyde gas when heated, even if the label is confusing or uses alternate names. Formaldehyde exposure can irritate the eyes, nose, and throat, and it’s classified as a human carcinogen by major health authorities. Government agencies have documented concerns about products marketed as “formaldehyde-free” still exposing users to formaldehyde during heat processing.
How to vet a product before you buy it
- Read the label like a detective. Look for formaldehyde and related terms (some examples include formalin and methylene glycol).
- Search for the product’s Safety Data Sheet (SDS). Reputable brands typically provide one.
- Be wary of “formaldehyde-free” claims. Some products have been found to expose users to formaldehyde during use despite labeling.
- If you have respiratory issues, consider sticking to rinse-out keratin masks instead of heat-sealed smoothing kits.
What you’ll need (so you’re not flat-ironing with one hand and panic-Googling with the other)
- Clarifying or anti-residue shampoo (often included in kits)
- Keratin treatment product (choose a reputable brand and follow its instructions exactly)
- Gloves (non-latex if you’re sensitive)
- Applicator brush + bowl (or the bottle applicator provided)
- Fine-tooth comb for distributing product evenly
- Sectioning clips
- Microfiber towel
- Blow dryer
- Flat iron with adjustable temperature (this is non-negotiable)
- Heat protectant (if your kit allows itsome kits specify “no additional products”)
- Timer, old T-shirt, and a well-ventilated setup (open windows + fan)
Step-by-step: How to apply a keratin treatment at home
Important: different products have different “rules” (some are rinse-out same day; some require waiting before washing). Use this as the master roadmap, then match the details to your kit’s instructions.
Step 1: Set up your space (ventilation is part of the process)
- Open windows, turn on a fan, and avoid tiny bathrooms with no airflow.
- Keep pets and kids out of the room. (Curious toddlers + hot flat irons = no.)
- Cover surfaces and wear an old shirt. Some formulas can stain fabric.
Step 2: Clarify wash (remove buildup so the treatment can coat evenly)
- Shampoo with a clarifying/anti-residue shampoo.
- Rinse thoroughly and repeat if your kit instructs (many do).
- Skip conditioner. Conditioner can interfere with how evenly the treatment adheres.
- Towel-dry until dampthink “not dripping,” not “desert-dry.”
Step 3: Pre-dry (only if your kit calls for it)
Some systems require applying the product to damp hair; others want hair 70–100% dry first. Follow your kit. If it doesn’t specify, aim for mostly dry so the product doesn’t dilute and drip everywhere.
Step 4: Section your hair like you mean it
Divide hair into 4–6 sections. If your hair is thick, go smaller. Clean sections are the difference between “even gloss” and “random crunchy streaks.”
Step 5: Apply the keratin treatment (thin, even, and off the scalp)
- Put on gloves.
- Working in small slices, apply product from mid-lengths to ends, then lightly up toward rootsbut leave about ¼ inch off the scalp.
- Comb through each section with a fine-tooth comb to distribute evenly and remove excess.
- Goal: Saturated and coated, not dripping. More product does not equal more sleekness; it often equals more smoke later.
Step 6: Let it process
Processing time varies (often 20–40 minutes, sometimes longer). Use a timer and follow your kit. Over-processing can lead to dryness; under-processing can lead to weak results.
Step 7: Blow-dry completely
- Blow-dry until hair is 100% dry.
- Use a brush to keep strands smooth and aligned.
- If you notice heavy fumes or eye/throat irritation, stop, ventilate, and reassess (and consider not proceeding).
Step 8: Flat iron to seal the treatment (the moment of truth)
This step locks in the smoothing effect. It also carries the most risk if you use too much heat or too many passes. Many professional smoothing processes use high heat (often up to 450°F) with several passes per section.
Temperature guidelines (general, not one-size-fits-all)
- Fine, fragile, bleached, or highlighted hair: start lower (around 330–375°F) and do fewer passes.
- Medium/coarse, healthy hair: moderate heat (around 375–430°F) may be used.
- Very coarse/resistant hair: some systems use up to 450°F, but only if the kit explicitly directs it.
Technique that actually works
- Work in ultra-thin sections (about ½ inch wide or less).
- Move steadilydon’t pause and “toast” one spot.
- Do multiple passes per section only as directed by your kit (commonly 3–7 passes depending on hair type and formula).
- If you see smoke, check your section size, temperature, and whether you applied too much product.
Step 9: Finish based on your kit (two common routes)
Route A: “No wash for 48–72 hours” systems
- Let hair cool and keep it straight and dry.
- Avoid ponytails, clips, tucking behind ears, or tight hats that can crease hair.
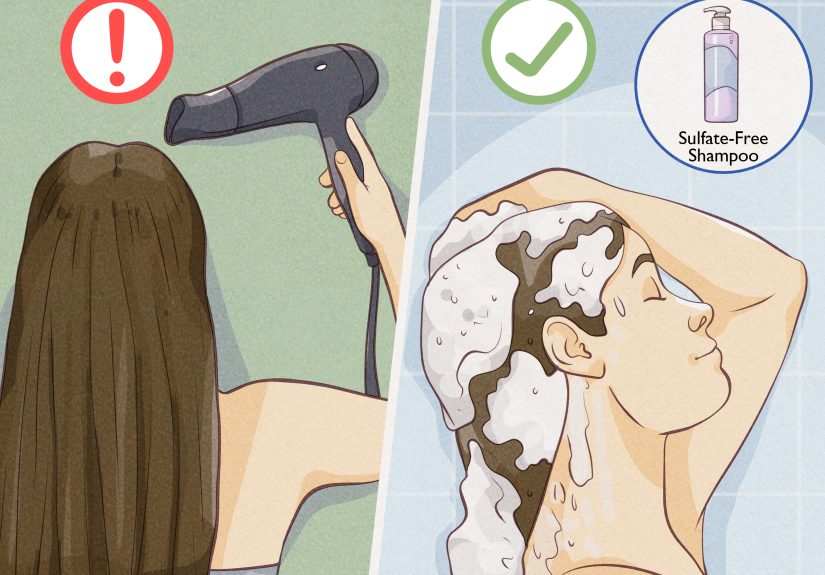
- After the waiting period, wash with a sulfate-free shampoo and condition gently.
Route B: “Same-day rinse” or “express” systems
- Some treatments instruct you to rinse after a set time, apply a mask, and then blow-dry.
- Follow the kit exactlythese systems are designed differently, and mixing rules can weaken results.
Aftercare: How to make your keratin treatment last
The smoothing effect fades mainly through washing, harsh cleansers, and rough handling. Your mission is to be gentle and consistent (like you’re caring for a fancy sweater, not a gym towel).
Do this
- Use sulfate-free shampoo and gentle conditioners.
- Wash less often if you can2–3 times per week helps many people maintain results longer.
- Use a heat protectant for styling (unless your brand advises against additional products).
- Sleep on silk or satin to reduce friction and frizz.
- Rinse after swimming and use a protective conditioner if you’ll be in chlorine or salt water.
Avoid this
- Clarifying shampoos too often (they can strip the smoothing effect faster).
- Tight hairstyles that leave dents during the “setting” window.
- High heat dailykeratin doesn’t grant immunity from heat damage.
Troubleshooting: Common DIY keratin problems (and what to do)
“My hair feels sticky or heavy.”
- Likely causes: too much product, uneven distribution, or not combing out excess.
- Fix: wash once with a gentle sulfate-free shampoo (unless your kit forbids washing yet), then condition lightly and blow-dry smooth.
“It’s smoky when I flat iron.”
- Likely causes: flat iron too hot, sections too thick, hair not fully dry, or excess product left on the hair.
- Fix: lower temp, use smaller sections, ensure hair is bone dry, and reduce product amount next time.
“My curls didn’t loosen much.”
- Likely causes: gentle formula, under-processing, or insufficient heat sealing.
- Fix: don’t crank heat blindly. Follow the kit. Some at-home treatments prioritize frizz control over straightening.
“My hair looks flatter than I wanted.”
- Fix: add volume back with a round brush blowout, root-lift spray, or a looser technique next time (some services can be customized).
How long does an at-home keratin treatment last?
It depends on what you used and how you maintain it. Rinse-out “keratin” masks may last a few washes. Heat-sealed smoothing kits often last several weeks, and salon-style services can last longer. Your wash frequency, product choice, and aftercare routine are the biggest factors.
FAQ
Will a keratin treatment damage my hair?
It can, especially if you use high heat on already fragile hair or do too many passes. Think of it like toast: golden is great; charcoal is… a personality choice. Use the lowest effective temperature and follow the kit instructions.
Can I do a keratin treatment on color-treated hair?
Often yes, but results vary. Some people notice slight color shifts (especially blondes) due to heat. If your hair is freshly bleached or very porous, choose a gentle option and lower heat.
How often can I repeat it?
More is not always better. Repeating a strong heat-sealed treatment too frequently can lead to dryness and breakage. If you love the effect, space treatments out and focus on maintenance in between.
Real-world experiences: of “what people wish they knew” before doing DIY keratin
The most common surprise with an at-home keratin treatment is not the timeit’s the focus it requires. People often start feeling confident around the shampoo step (“I can wash hair. I’m an adult.”) and then get humbled during sectioning (“Why do I suddenly have 400 pounds of hair?”). The biggest difference between great results and meh results is almost always the boring stuff: thin sections, even product distribution, and not rushing.
Another frequent “I did not anticipate this” moment: the texture of hair during the process. Depending on the formula, hair can feel sticky, coated, or strangely stiff before you seal it with heat. That’s normal for many smoothing systems, and it’s exactly why combing out excess matters. DIYers who go heavy-handed because they want “extra smooth” often end up with smoke during flat ironing or hair that feels weighed down afterward. The winning move is usually less product, applied more evenly.
Timing is the third surprise. Many people assume the treatment itself takes 30–45 minutes because that’s the processing time. In reality, the clock includes clarifying washes, drying, applying carefully, blow-drying again, and then flat ironing section by section. On medium-length hair, two hours is common. On thick, long hair, it can easily stretch longerespecially the first time. The “experienced DIY” crowd tends to pick a calm window (no errands, no dinner to cook, no “quick video call” that turns into a meeting), because rushing is how you end up with missed spots and uneven results.
People also commonly report that the first wash after the treatment is a “whoa” moment: hair often feels softer, dries faster, and reacts less dramatically to humidity. But there’s a second lesson hiding in that glow-up: aftercare is what keeps the results from fading fast. DIYers who switch to a gentle, sulfate-free routine and reduce frequent harsh washing tend to keep the smoothness longer than those who go right back to clarifying shampoos and beach-day salt sprays.
Finally, the best “pro tip” that shows up again and again: manage expectations by picking the right category of product. If you mainly want frizz control and shine, a gentle keratin smoothing treatment (or even a high-quality keratin mask) may be perfect and far less stressful. If you want dramatic straightening, that’s when the heat-sealed kits come inand that’s also when technique, ventilation, and caution matter most. The happiest DIY results usually come from choosing a realistic goal, then executing the steps patientlylike you’re assembling IKEA furniture, but with fewer tiny screws and more dramatic hair flips at the end.
Conclusion
Applying a keratin treatment at home can absolutely be worth itif you choose the right product, set up safely, and treat the process like a step-by-step recipe. Clarify first, apply evenly, seal with controlled heat, then protect your results with gentle aftercare. Do it right and you’ll get smoother, shinier, more manageable hair. Do it sloppy and you’ll get… a valuable life lesson and an urgent need for deep conditioning.