Table of Contents >> Show >> Hide
- Why Orange Dressers Look So Dated
- What Farmhouse Style Actually Looks Like on a Dresser
- Best Makeover Options for an Outdated Orange Dresser
- How to Prep an Orange Dresser the Right Way
- The Best Paint Colors for a Farmhouse Dresser Makeover
- Painting Techniques That Make It Look Better, Not Homemade
- Hardware: The Tiny Detail With Big Impact
- Farmhouse Styling Ideas After the Makeover
- Mistakes to Avoid During a Dresser Farmhouse Makeover
- Is It Worth Updating an Outdated Orange Dresser?
- Final Thoughts
- The Experience of Giving an Orange Dresser a Farmhouse Second Life
If you have an old dresser glowing in that unmistakable orange-toned wood finish, first of all: you are not alone. Second: the dresser is not cursed. It is simply stuck in a previous decorating era where honey oak ruled the earth, every bedroom looked a little too shiny, and furniture apparently wanted to resemble a giant bottle of maple syrup. The good news is that an outdated orange dresser is one of the easiest pieces to transform into something charming, fresh, and farmhouse-inspired.
A successful DIY outdated orange dresser farmhouse makeover idea is not just about slapping on white paint and calling it a day. The best results come from understanding what makes farmhouse style work, choosing the right finish for the piece, and following a smart prep-and-paint process. When done well, an orange dresser can become a soft white statement piece, a moody greige storage hero, or a distressed wood-and-paint blend that looks collected over time rather than rescued at 11 p.m. by a panic purchase of chalk paint.
In this guide, you will learn how to turn that overly warm dresser into a farmhouse beauty, what materials actually matter, which design details make the biggest difference, and how to avoid the classic DIY mistakes that leave drawers sticking, paint chipping, and patience evaporating.
Why Orange Dressers Look So Dated
Many older dressers were finished in orange, reddish, or honey-toned stains that emphasized the wood grain but also made the piece feel heavy and visually loud. On their own, these warm finishes are not evil. The problem is that they often clash with today’s lighter interiors, softer neutral palettes, and layered farmhouse looks.
Farmhouse style works best when furniture feels grounded, useful, slightly timeworn, and visually relaxed. That usually means muted finishes, matte or low-sheen paint, natural wood accents, simple hardware, and a look that says, “I belong here,” not “I once lived in a formal dining room under a brass chandelier.”
The orange tone tends to fight that mood. It can make a room feel visually busy, especially next to white walls, linen bedding, black metal accents, or rustic baskets. A makeover helps tone down the saturation and gives the piece a second life without losing its solid construction.
What Farmhouse Style Actually Looks Like on a Dresser
Before picking up a paintbrush, it helps to define the farmhouse goal. A farmhouse dresser does not have to be plain white, and it definitely does not have to look like it survived a dust storm in an antique mall. The best farmhouse makeovers balance softness, simplicity, and texture.
Common farmhouse dresser features include:
- Warm whites, creamy beige, soft gray, sage, putty, greige, or muted blue paint
- Matte, satin, or chalky finishes instead of glossy shine
- Black iron, aged brass, wood, or cup-pull hardware
- Subtle distressing on edges, not chaotic “raccoon attacked the corners” distressing
- Natural wood tops for contrast
- Simple lines, functional styling, and vintage-inspired details
If you want a more current take, aim for modern farmhouse furniture makeover style. That means clean paint lines, restrained distressing, and contrast created with hardware, baskets, framed art, or greenery instead of overdoing faux antique effects.
Best Makeover Options for an Outdated Orange Dresser
Not every dresser needs the exact same treatment. The smartest approach depends on the dresser’s condition, the material, and the room where it will live.
1. Painted Farmhouse Classic
This is the most popular option. Paint the body in warm white, soft taupe, sage green, or greige, then swap the hardware. It instantly makes the dresser feel lighter and more intentional.
2. Two-Tone Farmhouse Look
Paint the base and drawer fronts, but strip or sand the top down to a natural wood finish. This adds warmth and keeps the dresser from looking too flat. It is especially effective in bedrooms, entryways, and dining rooms.
3. Distressed Vintage Finish
Use a chalk-style or matte paint, then lightly distress edges and corners. This works best on dressers with classic detailing, curved feet, or older drawer pulls.
4. Farmhouse with Elevated Details
Add wood trim, fluted molding, cane inserts, label frames, or oversized cup pulls. This is a great route if the dresser shape is basic and needs more personality.
How to Prep an Orange Dresser the Right Way
Prep is the part many DIYers want to skip, and it is also the part that separates a “wow, you made that?” finish from a “why is the paint peeling off in a sheet?” situation. A proper dresser makeover DIY starts with cleaning, sanding, repairing, and priming.
Step 1: Remove hardware and drawers
Take off the knobs or pulls and label the hardware if you plan to reuse it. Remove the drawers so you can work more neatly and reach every edge.
Step 2: Clean like you mean it
Old dressers collect wax, oil, dust, mystery residue, and enough grime to make fresh paint rebel. Use a degreasing cleaner and wipe everything down thoroughly. Let the surface dry completely.
Step 3: Sand the finish
You do not always need to sand to bare wood, but you do need to dull the existing finish so primer and paint can grip. On a wood dresser, a medium grit followed by a finer grit usually works well. If the dresser is laminate, use a lighter hand and focus on scuff sanding rather than aggressive removal.
Step 4: Repair dents and holes
Fill old hardware holes or nicks with wood filler, let it dry, then sand smooth. This is especially important if you are changing handle placement or going from ornate pulls to simple farmhouse knobs.
Step 5: Prime for adhesion
A quality bonding primer is your best friend, especially if you are covering a dark orange stain, working over glossy finish, or painting laminate. Primer helps block bleed-through, improves durability, and gives your topcoat a more even look.
If the piece is very old, be cautious. Furniture from older homes or earlier decades may have finishes that need more careful handling. Work safely, sand with protection, and avoid treating questionable old coatings casually.
The Best Paint Colors for a Farmhouse Dresser Makeover
Choosing the color is where the fun begins. It is also where many people accidentally make the dresser feel colder, flatter, or more “generic flip furniture” than farmhouse.
Top farmhouse-friendly paint colors:
- Warm white: timeless, bright, and classic
- Creamy ivory: softer and less stark than bright white
- Greige: versatile, subtle, and easy to style
- Sage green: earthy and calm without feeling trendy in a bad way
- Dusty blue: charming for cottage farmhouse spaces
- Charcoal or black: dramatic, especially with a wood top
If your room already has a lot of white, a muted greige or soft olive can make the dresser feel more custom. If you want the easiest route to a bright farmhouse look, warm white plus black cup pulls is a foolproof combination.
Painting Techniques That Make It Look Better, Not Homemade
There is a fine line between “handmade charm” and “I painted this in the dark with an emotional support sponge.” To stay on the right side of that line, focus on smooth, thin coats and patience.
Use the right tools
A small foam roller or fine-finish roller is excellent for large flat surfaces. A quality angled brush helps with corners, trim, and detailed drawer fronts. If you use only a brush, keep the coats thin to reduce heavy brush marks.
Paint in light coats
Two to three thin coats usually look better and last longer than one heavy coat. Let each coat dry properly before adding the next. Rushing this stage is how people end up fingerprinting their own furniture like accidental crime scene investigators.
Sand lightly between coats if needed
If the finish feels rough or you notice debris, do a gentle sanding with very fine grit between coats. Wipe away all dust before repainting.
Seal for durability
A dresser is a hardworking piece of furniture. It deals with clothing, hands, drawer friction, forgotten coffee mugs, and random household chaos. A clear topcoat can help protect the finish, especially on the top surface and drawer fronts. Choose a matte or satin sheen if you want to preserve that farmhouse softness.
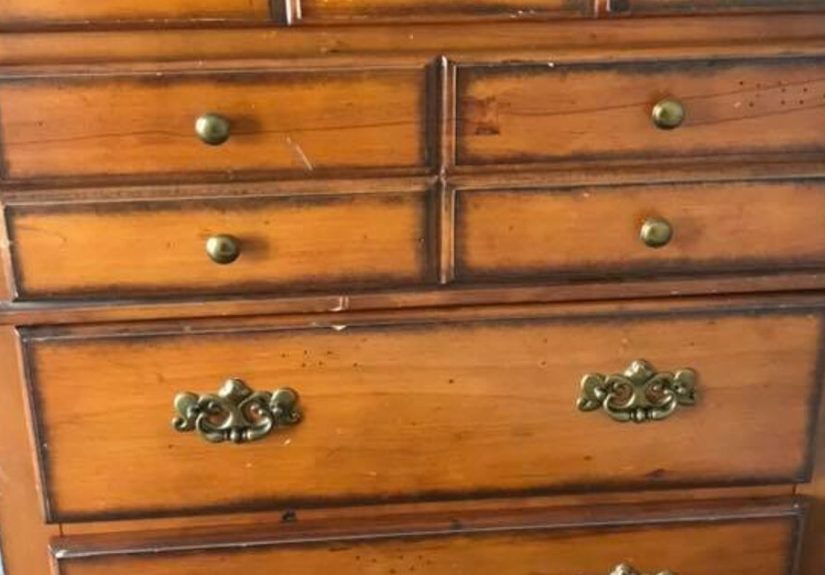
Hardware: The Tiny Detail With Big Impact
New hardware can completely change the character of a dresser. In many cases, it is the difference between “painted old dresser” and “purposeful farmhouse furniture.”
Good farmhouse hardware choices include:
- Black metal cup pulls
- Simple round wood knobs
- Aged brass bin pulls
- Antique pewter handles
- Mixed wood-and-metal combinations
If the dresser has ornate shiny pulls, replacing them with simpler shapes usually modernizes the piece instantly. If the original hardware has vintage charm, consider painting or refinishing it instead of tossing it.
Farmhouse Styling Ideas After the Makeover
Once the dresser is finished, styling helps sell the look. A farmhouse makeover is not only about the paint; it is about the full visual story.
Try these styling ideas:
- A round mirror or vintage-style frame above the dresser
- A ceramic lamp with a linen shade
- A small stack of books tied to a tray or wood riser
- Woven baskets nearby for texture
- Faux or real greenery in a crock, pitcher, or glass vase
- One antique-inspired object, like a clock, bead garland, or candlestick
The goal is balance. You want the dresser to feel warm and collected, not like a farmhouse gift shop exploded on top of it.
Mistakes to Avoid During a Dresser Farmhouse Makeover
Skipping primer
If the old finish is glossy or orange-toned, skipping primer can lead to poor adhesion or bleed-through.
Using the wrong paint for the surface
Wood, laminate, and veneer all behave differently. Match your prep and primer to the actual material.
Over-distressing
Farmhouse does not mean every corner has to be scraped until it looks emotionally exhausted. Subtle wear looks more believable.
Ignoring drawer function
Do not paint the tracks so heavily that the drawers stick. A pretty dresser that opens like a medieval puzzle box is not a win.
Choosing a cold white
Bright, blue-based white can make a farmhouse piece feel sterile. Warmer whites and creamy neutrals are usually more inviting.
Is It Worth Updating an Outdated Orange Dresser?
Absolutely, especially if the dresser is solid wood or well-built veneer furniture. Many older dressers are sturdier than newer budget options, and a makeover lets you customize the color, hardware, and finish for far less than buying new. A thoughtful farmhouse dresser makeover also keeps good furniture out of the landfill, which is both practical and satisfying.
More importantly, a successful makeover changes how a room feels. That dated orange piece that once dragged the whole space backward can become a calm anchor that fits beautifully with modern farmhouse decor, cottage-style bedrooms, or rustic-neutral interiors.
Final Thoughts
The best DIY outdated orange dresser farmhouse makeover idea is the one that respects the structure of the piece while updating the finish for the way you live now. Start with solid prep, choose a warm and livable color, add better hardware, and keep the distressing believable. Whether you go for a creamy white classic, a moody two-tone finish, or a soft sage refresh, the goal is not perfection. It is transformation.
And honestly, that is the magic of furniture makeovers. You take something everyone ignored for years, give it a little patience and a lot less orange, and suddenly it becomes the piece everyone asks about.
The Experience of Giving an Orange Dresser a Farmhouse Second Life
There is a very specific emotional journey that comes with refinishing an outdated orange dresser. It usually starts with denial. You look at the piece and think, “Maybe it’s not that orange.” Then you pull it into better lighting and realize the dresser is, in fact, the exact shade of toasted cheddar. That is the moment the makeover begins.
For many DIYers, the first surprise is how solid these older dressers feel. They are heavy. The drawers are real. The wood has actual substance. Sure, the finish may scream 1997 guest room, but the construction often beats what you would get from a lot of flat-pack furniture today. That realization changes everything. Instead of seeing a problem, you start seeing potential.
Then comes the cleaning phase, which is both gross and weirdly motivating. You wipe off years of dust, furniture polish, and mystery residue, and the dresser starts looking less like a lost cause. Sanding follows, and this is where the emotional arc gets interesting. At first, sanding feels tedious. Five minutes in, you wonder why you ever started. Twenty minutes later, you hit that magical point where the shiny orange finish dulls down and the piece begins to look ready for reinvention. Suddenly, you are invested.
Painting is where confidence and panic like to alternate every ten minutes. The first coat always looks a little suspicious. It can be streaky, uneven, and deeply committed to making you question your life choices. This is normal. The second coat is usually where the makeover stops looking like an experiment and starts looking intentional. By the third coat, the dresser often transforms so dramatically that it feels like you swapped it with a more stylish cousin.
One of the most satisfying moments in the whole process is installing new hardware. This step is tiny compared to sanding and painting, but it changes the personality of the dresser instantly. Simple black cup pulls, wood knobs, or aged brass handles can turn a once-dated piece into something that looks thoughtfully curated. It is the furniture equivalent of getting a great haircut and finally finding the right glasses.
There are, of course, lessons learned along the way. Most people discover that patience matters more than talent. Letting paint dry fully, sanding lightly between coats, and not rushing the topcoat all matter. So does restraint. The first instinct is often to distress everything in sight, but the nicest farmhouse finishes usually use a lighter touch. A little wear on edges feels charming. Too much wear feels like the dresser lost a bar fight.
In the end, the experience is rewarding because the result is bigger than a prettier piece of furniture. You get a room that feels softer, fresher, and more personal. You also get the satisfaction of rescuing something useful instead of replacing it. And every time someone says, “Wait, that used to be orange?” you get to enjoy one of the great pleasures of DIY life: acting modest while feeling completely magnificent.


