Table of Contents >> Show >> Hide
- Why Build a Wooden Nail Polish Rack Instead of Buying One?
- Plan Your Rack (So You Don’t Build It Twice)
- Materials and Tools
- DIY Wood Nail Polish Rack: Step-by-Step Build
- Mounting Your Nail Polish Rack Safely (So It Stays on the Wall)
- Organization Tips That Make It Feel Like a Mini Nail Studio
- Customization Ideas (Make It Yours)
- Troubleshooting (Because Wood Has Opinions)
- Conclusion
- DIY Experiences: What I Learned Building Nail Polish Racks in Real Life
If your nail polish collection currently lives in a drawer where bottles play musical chairs every time you open it, you’re not “messy.” You’re just one drawer-slide away from a tiny, colorful avalanche. The fix? A DIY wood nail polish rack that puts every shade where you can see it, grab it, and (most importantly) stop buying “another one just like it” because you couldn’t find the original.
This guide walks you through building a sturdy, good-looking wooden nail polish organizerthe kind that feels like a salon wall, but built with weekend-warrior tools and a little patience. We’ll cover sizing, shelf spacing, safe mounting, finishing, and a few organization tricks that make your collection look intentionally curated (even if it grew the way houseplants die: slowly, then all at once).
Why Build a Wooden Nail Polish Rack Instead of Buying One?
Store-bought organizers can be greatuntil you realize your bottles are a mix of standard, mini, gel, top coat, base coat, and that one chunky glitter you keep for “special occasions” (also known as “never”). A DIY nail polish shelf lets you customize:
- Capacity (from “I own five polishes” to “I could paint a small car”).
- Spacing for different bottle heights.
- Style that matches your vanity, bathroom, or studio.
- Safety with a proper front lip, so bottles don’t swan-dive to freedom.
Plan Your Rack (So You Don’t Build It Twice)
Step 1: Know Your Bottle Basics
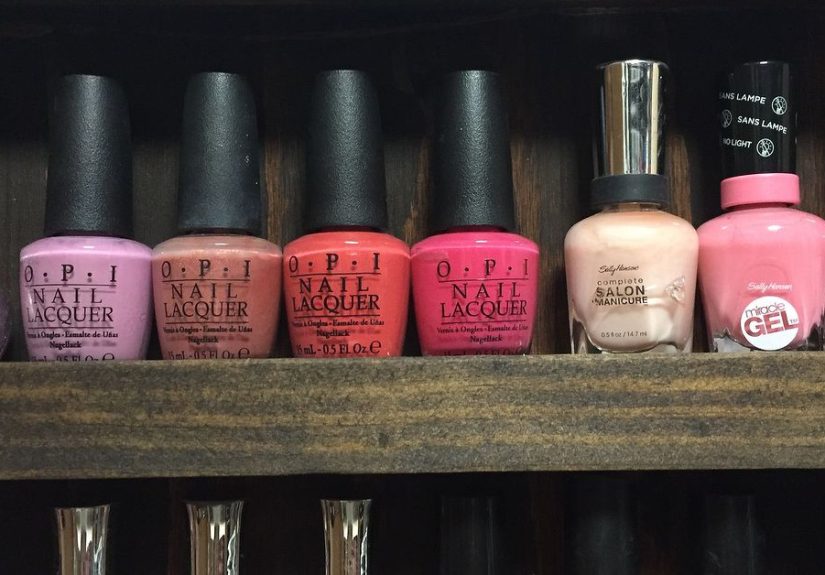
Most everyday polishes are around the standard 0.5 oz (15 mL) size. But shapes varysquare, round, tall, short, “why is this cap the size of a lighthouse?”so build with a little wiggle room. A good rule: plan each bottle space at about 1.25–1.5 inches wide.
Step 2: Choose Rack Style
For most homes, two designs win:
- Wall-mounted tiered shelves (best visibility; looks like a mini nail bar).
- Countertop “stadium” organizer (portable; no wall holes; great for renters).
This tutorial focuses on a wall-mounted wooden nail polish rack because it saves space and shows off colors beautifully. We’ll also share easy tweaks for a countertop version.
Step 3: Pick a Practical Size (With a Simple Formula)
Decide how many bottles you want visible (not “technically stored somewhere behind other bottles like a secret society”). Estimate using:
Rack width (in inches) ÷ 1.5 = bottles per row (approx.)
Example: A 24-inch-wide shelf holds roughly 16 bottles (24 ÷ 1.5 = 16). If you build 5 rows, that’s about 80 bottles. If you own 80 bottles, congratulationsyou are now the curator of a very shiny museum.
Materials and Tools
Wood Options
- Pine: affordable, easy to cut, takes paint well.
- Poplar: smoother, paints beautifully, slightly pricier.
- Birch plywood: stable and clean-looking (great if you prefer crisp lines).
Suggested Lumber (Beginner-Friendly)
- 1×3 boards (for shelves) or 1/2″ to 3/4″ plywood strips
- 1×2 boards (for side rails and front lips) or 1/2″ square dowel
- Wood glue
- Brads/finish nails or wood screws (depending on your tools)
- Sandpaper (120 and 220 grit)
- Finish: paint, stain + clear coat, or water-based polyurethane
- Mounting hardware: screws into studs or quality wall anchors
Tools
- Measuring tape, pencil, and a square
- Miter saw, circular saw, or handsaw (use what you have)
- Drill/driver + bits
- Clamps (helpful, not mandatory)
- Stud finder and level (strongly recommended for wall mounting)
- Nail gun (optional), hammer (works fine)
DIY Wood Nail Polish Rack: Step-by-Step Build
1) Decide Shelf Depth and Spacing
The “sweet spot” for a nail polish display shelf is usually 2 to 3 inches deep. Deep enough for bottle bases, shallow enough that bottles don’t hide behind each other. For vertical spacing between shelves, aim for 3 to 4 inches to fit most caps.
If you have tall gel bottles or top coats with skyscraper caps, go closer to 4 inches for at least one row.
2) Cut Your Parts
Here’s a straightforward plan for a rack that’s about 24 inches wide with 5 shelves:
- 5 shelf boards: 24″ long (cut from 1×3)
- 2 side rails: about 24–28″ long (depends on spacing and number of shelves)
- 5 front lips: 24″ long (thin strip or 1/2″ square dowel)
The side rails act like the frame holding each shelf level. You can also build this as separate mini-shelves stacked vertically, but a single framed unit is easier to mount and looks more polished.
3) Add a Front Lip (The “No Polish Left Behind” Feature)
This matters more than people think. The front lip stops bottles from slipping forward when someone walks by, slams a door, or simply exists in a world with gravity.
- Use a 1/2″ square dowel for a clean, minimal look.
- Or cut a thin strip from a 1×2 (about 1/2″ to 3/4″ tall).
- Glue + brad nails make this fast and sturdy.
4) Assemble the Frame
Lay the two side rails on a flat surface. Mark shelf positions (measure twicebecause wood does not magically stretch when you’re short by 1/4″). Place shelf boards between the rails and clamp if possible.
Attach each shelf using wood glue and either:
- Brad nails through the rails into the shelf ends, or
- Pre-drilled screws (pilot holes prevent splitting).
Then attach each front lip along the shelf’s front edge with glue + brads (or small screws). Wipe away glue squeeze-out while it’s wet. Future-you will be grateful.
5) Sand Like You Mean It (But Not Like You’re Erasing Evidence)
Start with 120 grit to smooth edges and joints, then finish with 220 grit for a hand-friendly surface. Pay attention to corners and shelf fronts where your fingers will grab bottles.
6) Finish for Real-Life Use
Nail polish racks live near bathrooms, vanities, and the general humidity of human life. A protective finish helps:
- Paint: great for matching decor; hides wood grain.
- Stain + clear coat: classic, warm, furniture vibe.
- Water-based polyurethane: clear protection with easier cleanup and typically lower odor than oil-based finishes.
Pro comfort tip: whichever finish you choose, apply thin coats and let them cure properly before loading bottles. “It feels dry” is not the same as “it’s ready for 60 glass bottles to sit on it.”
Mounting Your Nail Polish Rack Safely (So It Stays on the Wall)
A fully loaded wall-mounted nail polish organizer can get heavy, especially with glass bottles. The strongest option is to fasten into wall studs. Use a stud finder and a level, mark your screw points, and anchor the rack securely.
- Best: screws into studs.
- If studs don’t line up: use high-quality drywall anchors rated for the load (and follow the package limits).
- Always: keep the rack levelcrooked shelves turn your display into a slow-motion bottle migration.
If you’re a renter, consider a smaller rack mounted with appropriate anchors, or build a countertop version (same shelf design, but with a base and angled tiers).
Organization Tips That Make It Feel Like a Mini Nail Studio
Sort by “How Your Brain Actually Searches”
Some people love sorting by brand. Others sort by color family. The best system is the one that helps you find “that warm nude that isn’t too pink” in under 10 seconds.
- By color: nude → pink → red → orange → yellow → green → blue → purple → glitter
- By finish: creme, shimmer, metallic, glitter, toppers
- By season: “summer brights,” “fall moody,” “holiday sparkle,” “existential taupe”
Keep “Workhorses” on the Easiest Shelf
Put base coat, top coat, quick-dry, remover, cuticle oil, and your 3 most-used shades on the middle shelveseye level and easy reach. Save the once-a-year glitter explosion for the top row.
Label the Shelf, Not Every Bottle
If you want labels, keep it simple: a tiny label under each shelf section (like “reds” or “neutrals”). Labeling every bottle is a hobby. A respectable hobby. But still a hobby.
Customization Ideas (Make It Yours)
- Add a bottom tray for files, buffers, cotton pads, and tools.
- Install a small LED strip under shelves for a salon-style glow.
- Create a mixed organizer: half shelves for polish, half cubbies for tools.
- Use reclaimed wood for character (and bragging rights).
- Make it modular: two smaller racks are easier to mount than one giant unit.
Troubleshooting (Because Wood Has Opinions)
My shelves aren’t level
Check your work surface first. If your “flat” table is secretly a ski slope, your rack will inherit that energy. Use a level during assembly and mounting.
The wood split near a screw
Pilot holes are your best friend. If a split happens, back out the screw, add wood glue into the crack, clamp, let dry, then re-drill.
The rack wiggles on the wall
Tighten mounting screws, confirm you’re hitting studs (or that anchors are installed correctly), and consider adding a second mounting point at the bottom to prevent rocking.
Conclusion
A DIY wood nail polish rack is one of those projects that’s small enough to finish in a weekend, but satisfying every single day afterward. You get a cleaner space, faster color picks, fewer duplicates, and a display that makes your collection look like a choicenot a cry for drawer help. Build it sturdy, mount it smart, finish it well, and enjoy the tiny joy of seeing every shade lined up like it’s ready for its close-up.
DIY Experiences: What I Learned Building Nail Polish Racks in Real Life
The first time I built a nail polish rack, I treated it like a simple shelf project. “It’s just wood,” I told myself, with the confidence of a person who has never watched 40 glass bottles try to escape at once. I made the shelves, sanded them beautifully, painted them a crisp white, and mounted the rack. It looked amazing… for about ten minutes. Then I loaded the polish and realized two things: bottle shapes vary wildly, and my front lip was more of a “gentle suggestion” than an actual barrier.
That’s lesson one: the front lip is not optional. If the lip is too short, bottles wobble. If it’s too tall, you can’t grab bottles comfortably. The sweet spot for me ended up being a low-profile dowel or a thin strip that hits just above the bottle’s widest part. That way it prevents sliding without making your fingers do yoga every time you reach for a shade.
Lesson two: spacing is everything. I originally spaced shelves based on the most common bottle I owned. Then I remembered I also owned tall top coats, oddly shaped indie bottles, and at least one novelty polish that looked like it came with its own zip code. The fix was easy: I dedicated one “tall shelf” row and kept the rest at standard spacing. Not every shelf has to be identicalyour rack should match your collection, not the other way around.
Lesson three: finishing is not just about looks. I once skipped a protective topcoat because the paint “felt durable enough.” Then a tiny drip of polish remover landed on the shelf, and the paint softened like it was auditioning for a melted-candle commercial. A clear protective finish (or a durable paint + proper curing time) matters, especially if your rack lives near remover, acetone, or humidity. Now I assume anything near a nail station will eventually meet a chemical it doesn’t likeso I finish accordingly.
Lesson four: mounting deserves respect. It’s tempting to slap the rack up with whatever anchors are in the junk drawer, but a loaded rack is heavier than it looks. The most reliable setup I’ve found is anchoring into studs whenever possible, and using quality anchors only when studs won’t cooperate. Also: levels are not decorative tools. I once mounted a rack slightly off, thought “no one will notice,” and then watched every bottle slowly migrate toward the low end like a colorful, silent protest.
Lesson five: organization systems should match your habits. I tried sorting by brand, then by season, then by “vibes,” which was basically just me making up categories to justify keeping glitter polishes. The system that stuck was simple: neutrals together, brights together, darks together, and sparkle in its own designated zone (because sparkle has main character energy and will take over if you let it).
Finally, the best unexpected benefit: a rack makes you more likely to use what you already own. When bottles are visible, you rediscover shades you forgot existed. It’s like shopping your own stashwithout the awkward moment at checkout where you realize you just bought your fifth “soft blush pink” and you are, once again, the problem. If you’re on the fence about building one, this is your sign: your drawer has suffered enough, and your nail polish deserves a better stage.