Table of Contents >> Show >> Hide
- Understanding Invisible Zippers (So You Know What You’re Fixing)
- Tools and Materials You May Need
- 13-Step Guide: Easy Ways to Repair an Invisible Zipper
- Step 1: Diagnose the Problem (Picture 1: Close-up of the zipper issue)
- Step 2: Gently Free Any Trapped Fabric (Picture 2: Fingers easing fabric from teeth)
- Step 3: Lubricate a Stiff or Sticky Zipper (Picture 3: Rubbing wax along zipper)
- Step 4: Realign Teeth That Won’t Stay Closed (Picture 4: Slider clamping teeth together)
- Step 5: Tighten the Back of the Slider (Picture 5: Pliers adjusting back of slider)
- Step 6: Replace a Broken or Missing Slider (Picture 6: New slider being installed)
- Step 7: Fix a Gap at the Bottom of the Zipper (Picture 7: Bottom of zipper with stitching)
- Step 8: Reattach Zipper Tape That’s Pulling Away (Picture 8: Hand-sewing tape back to seam)
- Step 9: Reinforce a Wavy or Distorted Invisible Zipper (Picture 9: Interfacing strip behind zipper)
- Step 10: Secure the Top of the Zipper (Picture 10: Hand-stitching around top of pull)
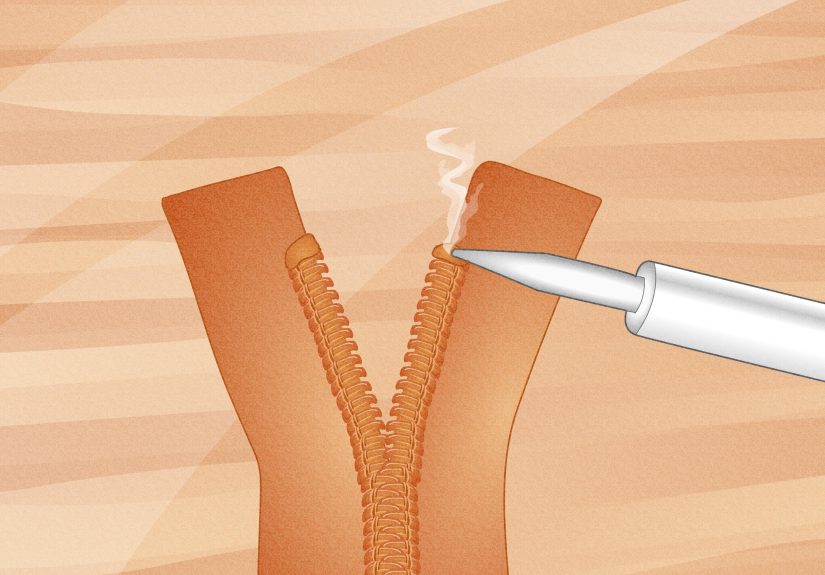
- Step 11: Seal Fraying Edges (Picture 11: Applying clear polish or fray check)
- Step 12: Test the Repair Gently (Picture 12: Hands slowly zipping garment)
- Step 13: Prevent Future Invisible Zipper Problems (Picture 13: Garment hung properly on hanger)
- When You Should Replace the Invisible Zipper Instead
- Extra Tips & Real-Life Experiences with Invisible Zipper Repair
- Conclusion
You’re halfway out the door when it happens: your dress won’t zip, your skirt zipper splits open,
or the zipper pull just pops right off. Invisible zippers are magical until they stop
workingthen they feel like a tiny plastic betrayal running up your back seam.
The good news? Most invisible zipper problems can be fixed at home with basic tools and a little
patience. In many cases, you don’t need to replace the entire zipper. You can often repair the
invisible zipper right where it is by adjusting the slider, realigning the teeth, or stitching a
small section back in place.
In this guide, we’ll walk through 13 simple, step-by-step ways to repair an invisible zipper,
with clear descriptions of what you’d see “in the pictures” at each stage. Whether the issue is
a stuck zipper, misaligned teeth, a broken slider, or a gap at the bottom, you’ll learn how to
troubleshoot and fix it like a pro.
Understanding Invisible Zippers (So You Know What You’re Fixing)
An invisible zipper is a type of coil zipper where the teeth are hidden behind
the fabric tape. When sewn correctly into a seam, all you see is a neat line of stitching and a
small pull tab at the top. The zipper coil sits on the back side of the tape, which is
why it disappears into the seam.
Because the coil is delicate and the tape is usually lightweight, invisible zippers can be more
finicky than chunky jean zippers. Common problems include:
- Slider moves but the teeth don’t stay closed
- Zipper stuck halfway, often with fabric caught in the teeth
- A little “open gap” at the bottom of the zipper
- Zipper tape ripping away from the garment seam
- Slider or pull tab breaking or falling off
Most of those issues can be resolved with basic tools like small pliers, a seam ripper,
hand-sewing needle, and sometimes a replacement slider or zipper repair kit.
Tools and Materials You May Need
- Small needle-nose pliers (or jewelry pliers)
- Hand-sewing needle and matching thread
- Seam ripper
- Scissors
- Clear nail polish or fray check
- Candle wax, zipper lubricant, or a bar of soap
- Replacement invisible zipper slider or zipper repair kit (optional)
- Iron and ironing board (for stubborn or wavy zippers)
- Scrap interfacing (optional, for strengthening loose seams)
You won’t necessarily use every item for every repair, but it’s nice to have a little “zipper
emergency kit” ready. Now let’s get into the 13 steps.
13-Step Guide: Easy Ways to Repair an Invisible Zipper
Step 1: Diagnose the Problem (Picture 1: Close-up of the zipper issue)
Before you tug, yank, or threaten the garment with scissors, pause and look closely:
- Is the zipper stuck and won’t move?
- Does the zipper move but leave an opening behind it?
- Are the teeth misaligned or pulled away from the tape?
- Did the slider or pull tab break or fall off?
Identifying exactly what’s wrong will keep you from doing extra damage. Most fixes fall into one
of four categories: stuck, splitting, broken slider, or loose seam.
Step 2: Gently Free Any Trapped Fabric (Picture 2: Fingers easing fabric from teeth)
If the invisible zipper is stuck, the most common culprit is fabric caught in the coil.
- Lay the garment on a flat surface, zipper facing up.
- Use your fingers to gently wiggle the slider back in the direction it came from.
-
Look for fabric or lining caught in the teeth. Use a seam ripper or a blunt pin to tease the
threads out carefully.
Never yank the slider through the trapped fabricthat’s how teeth get bent and sliders break.
Step 3: Lubricate a Stiff or Sticky Zipper (Picture 3: Rubbing wax along zipper)
Once the fabric is free, you can help the invisible zipper glide more smoothly:
- Rub a little candle wax, bar soap, or zipper lubricant along the coils.
- Move the slider up and down gently to distribute the lubricant.
- Wipe away any visible residue so it doesn’t stain the garment.
Invisible zippers are often sewn into fitted garments, so sweat, body oils, and makeup can make
the slider drag over time. A bit of lubrication goes a long way.
Step 4: Realign Teeth That Won’t Stay Closed (Picture 4: Slider clamping teeth together)
If the slider moves but the zipper keeps splitting open behind it, the problem is usually the
slider, not the coil. Over time, the slider flares open slightly and can’t clamp
the teeth together firmly.
Try this quick fix:
- Zip the invisible zipper up as far as it will go.
-
Using small pliers, gently squeeze the flat sides of the slider together,
just a tiny bit. - Test the zipper. If it still splits, repeat with very small adjustments until the teeth hold.
Be careful not to crush the slider. You’re giving it a small “hug,” not a complete personality
change.
Step 5: Tighten the Back of the Slider (Picture 5: Pliers adjusting back of slider)
On some invisible zippers, you may see a small gap at the back of the slider where the coil
passes through. If that gap is too wide, it can’t pull the teeth close enough to lock.
Use pliers to gently pinch the back of the slider together, then test by zipping up and down. If
the zipper now closes smoothly, you’ve fixed the main issue without replacing any parts.
Step 6: Replace a Broken or Missing Slider (Picture 6: New slider being installed)
If the slider is broken, cracked, or completely missing, you’ll need a replacement
invisible zipper slider of the correct size.
-
Use small pliers to remove the top stop (the little metal or plastic piece at
the top of the zipper tape) on the side where you’ll slide the new slider on. -
Carefully feed the new invisible slider onto the coil, matching the orientation so it will zip
from bottom to top like the original. -
Once it’s on and functioning, clamp a new top stop in place or stitch a few tight bar tacks at
the top to prevent the slider from coming off again.
Many zipper repair kits include sliders sized specifically for invisible or waterproof zippers,
so double-check that you’re using the right type.
Step 7: Fix a Gap at the Bottom of the Zipper (Picture 7: Bottom of zipper with stitching)
Sometimes the zipper coils look fine, but there’s a small opening at the bottom where the two
sides should be joined. This is usually a stitching issue, not a coil problem.
- Turn the garment inside out and locate the bottom of the zipper where it meets the seam.
-
If the stitching has come loose, resew that section by machine or by hand using a tight,
strong stitch. - Add a few extra backstitches or a bar tack right at the base of the zipper to reinforce it.
This keeps the two sides from separating again the next time you zip up quickly.
Step 8: Reattach Zipper Tape That’s Pulling Away (Picture 8: Hand-sewing tape back to seam)
On fitted garments, the seam next to the invisible zipper can stretch over time. When that
happens, the zipper tape may pull away or look wobbly.
- Turn the garment inside out and flatten the zipper area on your ironing board or table.
- If the tape has separated from the seam, gently press it back into place and pin it.
-
Hand stitch or machine stitch the tape back to the seam allowance, staying very close to the
existing stitching line.
For lightweight or stretchy fabrics, you can add a narrow strip of lightweight interfacing along
the seam to stabilize it before reattaching the zipper tape.
Step 9: Reinforce a Wavy or Distorted Invisible Zipper (Picture 9: Interfacing strip behind zipper)
If your invisible zipper looks wavy or rippled instead of laying flat, the fabric may have
stretched when the zipper was first sewn in. While this is technically a sewing issue, you can
repair the look:
- Carefully press the zipper area with a warm iron, avoiding direct heat on the coil.
- If the ripples are severe, you may need to unpick part of the seam and zipper stitching.
-
Fuse a narrow strip of lightweight interfacing along the seam line, then resew the zipper,
keeping the fabric flat and relaxed.
This is more of a “surgery” fix, but it can save an otherwise beautiful garment from looking
homemade in the wrong way.
Step 10: Secure the Top of the Zipper (Picture 10: Hand-stitching around top of pull)
If the slider tends to ride up too high and threaten to come off, you can create a
thread stop at the top.
- Zip the zipper all the way up.
-
Using a strong thread, sew several tight stitches around the coil just below the top edge on
both sides. -
Knot securely and trim the thread ends. This acts like a soft stop and keeps the slider from
flying off.
Step 11: Seal Fraying Edges (Picture 11: Applying clear polish or fray check)
If the zipper tape or the fabric near the zipper is starting to fray, it can eventually interfere
with the zipper’s movement.
- Trim any loose threads carefully with small scissors.
- Apply fray check or a tiny amount of clear nail polish to the cut edges.
- Let it dry completely before zipping up again.
This helps prolong the life of both the zipper and the seam, especially on delicate fabrics
like chiffon or rayon.
Step 12: Test the Repair Gently (Picture 12: Hands slowly zipping garment)
After any adjustment, always test the zipper slowly from bottom to top:
- Zip it up with the garment laying flat at first.
- Then try it on your body to make sure it works under tension.
- If it still sticks or splits, repeat the small slider adjustments rather than forcing it.
Invisible zippers don’t like drama. Gentle testing helps you catch minor issues before they
become major ones.
Step 13: Prevent Future Invisible Zipper Problems (Picture 13: Garment hung properly on hanger)
Once you’ve repaired your invisible zipper, a few small habits can help it last longer:
- Always fully unzip fitted garments before putting them on or taking them off.
- Avoid pulling the zipper if the fabric feels overly tightadjust the garment first.
- Store garments on hangers so the zipper isn’t creased or folded sharply at the waist.
- Every so often, clean and lightly lubricate zippers on frequently worn pieces.
A little care up front means fewer “wardrobe malfunctions” right before big events.
When You Should Replace the Invisible Zipper Instead
Sometimes, even the best repair efforts can’t save a zipper. It’s usually time to replace the
invisible zipper when:
- Multiple teeth are broken or crushed.
- The coil is separating from the tape along a long section.
- The fabric around the zipper is badly torn or stretched out.
Replacing an invisible zipper means unpicking the old stitching, aligning a new zipper in the
seam, and sewing it in with an invisible zipper foot. It’s more work, but it often saves a
favorite dress, jumpsuit, or skirt that fits perfectly everywhere else.
Extra Tips & Real-Life Experiences with Invisible Zipper Repair
Invisible zipper repair is one of those skills you don’t think you needuntil you really,
really do. The first time many people tackle it is right before an important event: a wedding, a
graduation, or a job interview. That’s when you discover that learning how to fix an invisible
zipper is a lot cheaper (and faster) than buying a new outfit at the last minute.
One common story: someone’s cocktail dress zipper splits open the moment they sit down. It zips
up just fine while standing in front of the mirror, but as soon as they bend or twist, the teeth
separate behind the slider. This is classic “tired slider” behavior. In practice, gently
tightening the slider with pliers and reinforcing the area with a few extra bar tacks near the
stress points can turn a disaster into a minor hiccupand the dress lives to see another party.
Another frequent experience involves bridesmaids’ dresses. These often have delicate fabrics and
very long invisible zippers that run from the neckline down to the lower back or hip. Because
the dress is fitted and the zipper is long, the strain is significant. If a bridesmaid has to
have her dress altered at the last minute, an untrained hand may accidentally stretch the fabric
along the zipper line, leading to that wavy, rippled look. The “fix” usually means unpicking
part of the zipper, adding a thin strip of interfacing, and carefully reinstalling it so the
seam lays flat again. It’s more time-consuming, but the payoff is a polished, professional look
in photos.
Many home sewers also learn the hard way that forcing a stuck invisible zipper rarely ends well.
The slider can crack, the coil can tear, or the fabric can rip at the most visible point of the
garment. With experience, you start to recognize that a resistant zipper is a signal to stop and
investigate: Is there lining or seam allowance caught in the teeth? Did a thread wrap itself
around the slider? Is the zipper curved too sharply at the waistline? Once you learn to pause
and problem-solve instead of forcing things, you save yourself a lot of frustration (and a lot
of unpicking).
People who sew regularly also tend to keep a small stash of replacement invisible zipper sliders
and zipper repair kits on hand. That way, if a pull breaks or the slider has lost its grip, you
can swap in a new one without removing the entire zipper. It’s a surprisingly satisfying fix:
you remove a tiny top stop, slide off the old piece, slide on the new one, clamp everything
back, and suddenly the zipper works like new. For those who like practical, low-cost solutions,
this kind of repair feels like a superpower.
Over time, you’ll also get a sense of when an invisible zipper is truly beyond saving. If the
coils are shredded, the tape is torn, and there are multiple weak spots, you won’t feel guilty
about replacing the whole thing. In fact, replacing one zipper can be an excuse to upgrade to a
slightly stronger one or to reinforce the seam with interfacing so the new zipper lasts longer
than the original.
Ultimately, learning easy ways to repair an invisible zipper changes how you shop and how you
care for clothes. Instead of treating a broken zipper as the end of a garment’s life, you see it
as a manageable maintenance tasklike sewing on a button or hemming a pair of pants. The more
you practice, the more confident you’ll feel tackling zipper issues on dresses, skirts,
jumpsuits, and even home decor items like cushions and slipcovers. And the next time a zipper
misbehaves five minutes before you leave the house, you’ll have a plan (and a pair of pliers)
ready to go.
Conclusion
Invisible zippers don’t have to be mysterious or intimidating. With a clear understanding of how
they work and a handful of simple techniques, you can diagnose and repair most problems at home.
From freeing trapped fabric and lubricating sticky sliders to tightening a loose slider or
replacing it entirely, these 13 steps give you options long before “buy a new outfit” needs to
appear on the list.
By taking a few minutes to stabilize seams, seal fraying edges, and treat your zippers gently,
you’ll keep your favorite garments closing smoothly and looking polished. Think of invisible
zipper repair as one more practical, money-saving skill in your home sewing toolkita small
effort that pays off every time you zip up and walk out the door with confidence.