Table of Contents >> Show >> Hide
- Know your orchid before you “fix” it
- Light: the reason your orchid won’t bloom
- Watering orchids: less schedule, more observation
- Humidity and airflow: orchids like moisture, not swamp life
- Potting mix and pots: orchids are not soil people
- Fertilizer: feed lightly, not like you’re marinating a steak
- How to get an orchid to rebloom
- The most common orchid care mistakes, all in one place
- 1. You are overwatering
- 2. You are using the wrong potting medium
- 3. You are giving too little light
- 4. You are keeping the orchid in standing water
- 5. You never repot
- 6. You repot at the worst possible time
- 7. You assume misting fixes everything
- 8. You cut healthy aerial roots
- 9. You overfertilize in search of more blooms
- 10. You think the orchid is dead when it is merely offended
- Real-world experiences: what orchid owners learn the hard way
- Conclusion
If orchids had a slogan, it would probably be: “Please stop loving me so aggressively.” That is the secret most beginners miss. Orchids are not impossible, snobby, or plotting your emotional downfall from the windowsill. They just don’t want to be treated like a thirsty fern, a cactus, and a bouquet of grocery-store tulips all at once.
The good news is that learning how to care for orchids is much simpler than the internet sometimes makes it sound. The bad news is that many common orchid care mistakes come from good intentions: watering too often, planting in regular potting soil, giving weak light, overfeeding, or leaving the roots stewing in decorative pots like they’re in a tiny spa they never asked for.
This guide focuses mainly on phalaenopsis orchids, also called moth orchids, because they are the kind most people bring home from supermarkets, garden centers, and “I was just buying paper towels” retail accidents. They’re also among the easiest orchids to grow indoors. Once you understand their basic needs, orchid care becomes less mysterious and a lot less tragic.
Know your orchid before you “fix” it
Here is the first truth bomb: not every orchid wants the same care. Some need more light, some want a drier rest period, and some are much fussier than the beginner-friendly phalaenopsis. So before you start changing everything, identify what you have.
If your orchid has broad, fleshy leaves, arching flower spikes, and came in a clear plastic pot stuffed with bark, you probably own a moth orchid. That matters, because phalaenopsis orchids prefer warm household temperatures, bright indirect light, a loose bark-based mix, and a watering routine that allows the roots to breathe between soakings.
In other words, your orchid is not asking for miracles. It is asking you to stop guessing.
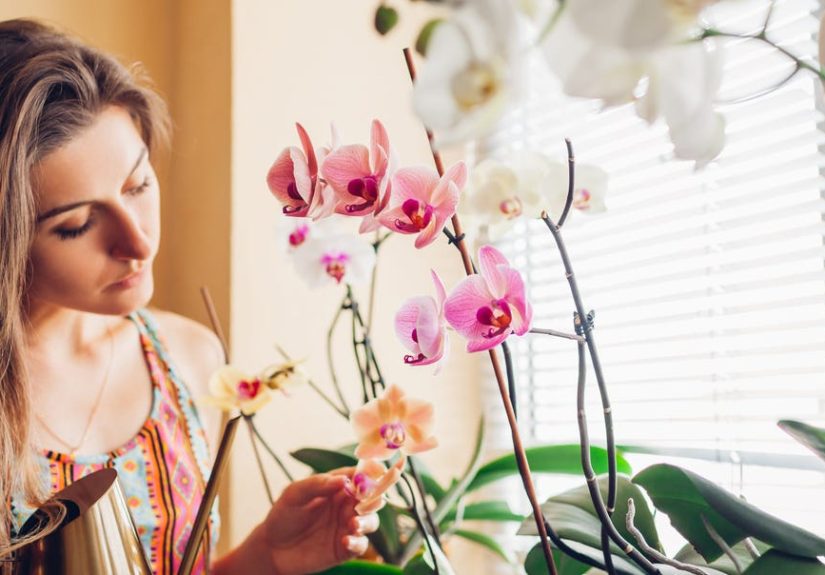
Light: the reason your orchid won’t bloom
If your orchid is alive but refusing to flower, light is usually the first suspect. Many people tuck orchids into dim corners because they think “tropical plant” means “vampire with leaves.” Not quite.
Most indoor orchids, especially phalaenopsis, do best in bright, indirect light. An east-facing window is often ideal. A shaded south or west window can also work. What usually fails is placing the plant far from a window, where it survives but never really thrives. That is classic low-light houseplant limbo: the botanical version of living off crackers and caffeine.
Your orchid’s leaves can tell you a lot. Very dark green leaves often suggest too little light. Pale yellow-green or reddish leaf edges can mean too much. Healthy phalaenopsis leaves are usually a medium to light green. If you want blooms, aim for bright light without harsh, direct midday sun that can scorch the leaves.
What you’re doing wrong with light
You are probably making one of these mistakes:
Putting the orchid in a dark room because it “looks decorative there.” Keeping it inches from hot afternoon sun. Forgetting that winter and summer light levels are different. Or assuming leaves are fine because they are still green, even though the plant has been bloom-free for a year and a half.
If your orchid hasn’t rebloomed, move it closer to better filtered light before you buy fertilizer, gadgets, crystals, or whatever the algorithm is selling this week.
Watering orchids: less schedule, more observation
The biggest orchid care mistake is overwatering. Not bad luck. Not the moon phase. Not because orchids are “temperamental.” Overwatering is the repeat offender.
Orchids are often grown in bark, not soil, because their roots need air. In nature, many orchids grow attached to trees, where water moves through quickly. That means orchid roots hate staying soggy. Water should flow through the pot, soak the bark, and drain fully. Then the mix should approach dryness before you water again.
A good beginner method is to take the orchid to the sink and run lukewarm water through the pot thoroughly, letting it drain completely before returning it to its spot. If the plant is in a clear pot, the roots help you read moisture levels. Silvery or whitish roots usually mean it is getting dry. Green roots mean moisture is still present.
Do not water by calendar alone. “Every Saturday” sounds responsible, but orchids do not own watches. Temperature, season, pot type, bark size, humidity, and light all affect how fast the medium dries. In summer, your orchid may dry faster. In winter, especially in a cooler room, it may need less.
What you’re doing wrong with watering
You water because the top looks dry, even though the center is still wet. You leave water trapped in the decorative outer pot. You let the crown stay wet for hours. You confuse a thirsty orchid with a drowning orchid because both can look limp. You use regular potting soil. Or you treat one dry leaf like a five-alarm fire and flood the poor thing.
Here’s the tricky part: overwatered orchids and underwatered orchids can both look miserable. That is why roots matter. Firm, healthy roots are a better clue than dramatic leaves.
And yes, some labels still recommend watering with ice cubes. Many gardeners have used that trick without disaster. But room-temperature water is a better long-term habit for a tropical plant, and it gives you more control over a full soak.
Humidity and airflow: orchids like moisture, not swamp life
Orchids generally appreciate humidity, but humidity is not the same thing as constant wetness. That distinction saves plants.
Most homes, especially during winter, are drier than orchids would naturally prefer. That can lead to wrinkled leaves, bud blast, and sluggish growth. To help, place the orchid on a pebble tray with water below the pot level, group houseplants together, or use a humidifier nearby. Kitchens and bathrooms with good light can sometimes be surprisingly good orchid zones.
What does not help much? Random misting once or twice a day, followed by zero changes in the actual room humidity. Misting may briefly dampen the air, but it is rarely enough on its own to create stable humidity. Worse, if water sits in the crown or between leaves without airflow, you can invite rot.
Air movement matters because orchid roots and leaves do better when the air is not stagnant. You do not need to recreate a tropical wind tunnel. You just need gentle circulation and a potting setup that dries reasonably between waterings.
What you’re doing wrong with humidity
You’re trying to solve dry air by overwatering the roots. You’re misting constantly but keeping the plant in a stale corner. Or you are letting the pot sit directly in water, which is less “humidity boost” and more “root suffocation chamber.”
Potting mix and pots: orchids are not soil people
If there is one thing orchids would print on a protest sign, it is this: Stop planting us in regular potting soil.
Most common indoor orchids need a chunky, fast-draining mix that lets air reach the roots. Bark-based orchid mixes are popular for a reason. Depending on the mix, you may also see charcoal, sponge rock, moss, tree fern fiber, or other coarse materials designed to prevent compaction.
The pot matters too. A pot with drainage holes is non-negotiable. Many growers also like clear orchid pots because they help monitor roots and moisture. The container should fit the root system fairly snugly. Going too large is a common beginner mistake because people think “more room” means “more growth.” For orchids, a pot that is too large usually means too much retained moisture and a greater chance of root rot.
What you’re doing wrong with potting
You buy an orchid, keep it in the same broken-down medium for years, and wonder why it declines. Or you repot into a huge container “so it can grow.” Or you cut off aerial roots because they look messy. News flash: aerial roots are not a cry for help. They are normal.
Repotting is usually needed every one to three years, or sooner if the medium is breaking down, the roots are rotting, or the plant has clearly outgrown the pot. Bark does not last forever. Once it starts decomposing, it holds too much moisture, which is bad news for roots.
Fertilizer: feed lightly, not like you’re marinating a steak
Orchids do need nutrients, but more fertilizer is not more love. Overfeeding often produces lush leafy growth with fewer flowers, and fertilizer salts can build up in the pot if you go heavy-handed.
A weak, balanced fertilizer applied lightly during active growth is usually enough for a home grower. Many experienced orchid owners follow some version of “weakly, weekly,” meaning a diluted fertilizer rather than a strong dose all at once. If your orchid is resting, growing slowly, or sitting in lower winter light, it generally needs less fertilizer, not more.
It also helps to flush the pot occasionally with plain water to reduce salt buildup. Think of fertilizer as seasoning, not the whole meal.
What you’re doing wrong with fertilizer
You fertilize every time you panic. You use full strength because the label exists and you trust labels more than plants. Or you keep feeding a stressed orchid with rotting roots, even though nutrients are not much use when the root system is barely functioning.
How to get an orchid to rebloom
Once the flowers fall, many people assume the show is over forever. It isn’t. A healthy phalaenopsis can bloom again, but it needs the right conditions after flowering.
First, keep caring for the leaves and roots. No blooms does not mean no maintenance. Continue giving bright indirect light, appropriate water, and light feeding. Second, understand that cooler nights can help trigger new spikes. A modest drop between daytime and nighttime temperatures often encourages reblooming. That is one reason orchids sometimes perk up after spending warm months outside in bright shade and then moving indoors before cold weather.
After blooming, spike care varies by orchid type and by the condition of the spike. With phalaenopsis, some growers cut above a node on a still-green spike to encourage another bloom branch, while others cut the spike lower and let the plant focus on recovery and future flowering. If the spike is brown and dried, it is done. No pep talk will fix that.
What you’re doing wrong after flowering
You stop caring for the plant because the flowers are gone. You keep it in poor light for months. You repot it while it is still in full bloom. Or you expect an instant encore from a tired orchid that has spent the year surviving your radiator, your overwatering, and your heroic but confusing fertilizer schedule.
The most common orchid care mistakes, all in one place
1. You are overwatering
This is still the heavyweight champion of orchid problems. If the roots stay wet, they rot. When roots rot, the plant cannot take up water, which leads many people to add even more water. Congratulations, you have invented the orchid doom loop.
2. You are using the wrong potting medium
Regular houseplant soil holds too much moisture and too little air for many orchids. Use an orchid mix designed for airflow and drainage.
3. You are giving too little light
Many orchids survive dim rooms but do not bloom there. If you want flowers, increase bright indirect light.
4. You are keeping the orchid in standing water
Always empty excess water from saucers or decorative outer containers. A pot that drains into a hidden puddle is not truly draining.
5. You never repot
Old bark breaks down. Decomposed media stays wetter longer. Wet media causes root problems. That timeline is not mysterious.
6. You repot at the worst possible time
Repotting while the orchid is blooming can shorten the flower display and stress the plant. Wait until flowering is finished when possible.
7. You assume misting fixes everything
Misting is not a magic solution for low humidity, poor airflow, bad roots, weak light, or neglected repotting. It is a side note, not a rescue plan.
8. You cut healthy aerial roots
Please stop. They are not ugly mistakes. They are how orchids orchid.
9. You overfertilize in search of more blooms
Excess fertilizer can hurt roots and reduce flowering. Go easy.
10. You think the orchid is dead when it is merely offended
If the leaves are still firm and some roots are alive, the plant may recover. Orchids are tougher than their reputation suggests.
Real-world experiences: what orchid owners learn the hard way
Ask a room full of orchid owners about their first plant, and you will hear a lot of the same stories. Someone watered faithfully every three days because they were trying to be responsible. Someone else set the orchid in a dark bathroom with no real window because it looked tropical there. Another person left the clear nursery pot sitting inside a ceramic cachepot full of old water and only discovered the swamp months later. The details change, but the lesson is always the same: orchid problems usually start with care that is too enthusiastic, too automatic, or too disconnected from what the plant is actually doing.
A very common experience is the “false thirst” panic. The leaves wrinkle a little, so the owner waters more often. But when they finally inspect the roots, they find rot caused by the original overwatering. That moment teaches an important orchid lesson: leaves tell part of the story, but roots tell the truth. Experienced growers get into the habit of lifting the pot, looking at root color, checking bark texture, and paying attention to how quickly the medium dries in that exact room at that exact time of year.
Another lesson people learn is that orchids hate stale routines. A watering schedule that works in July may fail in January. A windowsill that is perfect in winter may be too intense in late summer. A bark mix that worked beautifully the first year may become dense and soggy by year three. People who succeed with orchids usually stop treating care as a fixed recipe and start treating it as observation. They notice whether the plant is actively growing, whether the roots are plump, whether the leaves are the right color, and whether the pot still drains as quickly as it should.
Many growers also learn that reblooming feels less like a trick and more like a reward for steady care. The first time a new spike appears, it usually comes after months of what felt like boring maintenance: proper light, careful watering, modest feeding, and patience. No dramatic rescue, no miracle tonic, no late-night inspirational speech aimed at the leaves. Just consistency. That experience changes how people see orchids. They stop viewing them as fragile decorations and start seeing them as long-term plants with rhythms.
Perhaps the biggest experience-based lesson is this: orchid growing gets easier when ego leaves the room. The plant does not care that you bought an expensive pot, watched twelve videos, or named it Princess Bloomington. It cares about roots, light, air, temperature, and timing. Once growers accept that, they usually become calmer, more observant, and much more successful. And that is when orchids stop being “difficult” and start being deeply satisfying.
Conclusion
If you want to know how to care for orchids successfully, focus on the basics: bright indirect light, thorough but not constant watering, airy potting media, good drainage, moderate humidity, light feeding, and timely repotting. That is the formula. Everything else is detail.
If your orchid is struggling, do not assume it is doomed. Check the roots. Check the light. Check whether the potting mix is old. Check whether water is getting trapped where it should not. In most cases, the problem is not that orchids are impossible. It is that they are being treated like ordinary potted plants when they are anything but ordinary.
Once you stop making the most common orchid care mistakes, these plants become much easier to grow, rebloom, and enjoy for years. And that is when orchid ownership stops feeling like a hostage situation and starts feeling like a hobby.