Table of Contents >> Show >> Hide
- Why Cleaning a Cool Mist Humidifier Matters (More Than You Think)
- Know Your Cool Mist Humidifier Type (It Changes the Cleaning Details)
- What You’ll Need (Simple Supplies, No Mad Scientist Lab Required)
- Before You Start: 60-Second Safety Check
- The “Daily” Routine (2 Minutes That Prevent 80% of Problems)
- The Full Clean (Every 3 Days): Step-by-Step Method
- Step 1: Disassemble the Humidifier
- Step 2: Descale Mineral Buildup with Vinegar (The “Crust Buster”)
- Step 3: Scrub the Details (Where Grime Likes to Hide)
- Step 4: Rinse Thoroughly (Yes, Thoroughly Means “More Than Once”)
- Step 5: Disinfect (Choose ONE Option)
- Step 6: Air-Dry Completely (Dry = Less Growth)
- Filter/Wick Care (Evaporative Models)
- Extra Tips for Keeping It Clean Longer (Less Work, More Fresh Mist)
- Troubleshooting: Common Problems and Quick Fixes
- End-of-Season Storage (Because Next Year You Will Thank You)
- FAQ: Quick Answers People Actually Need
- Real-World Experiences: of “Yep, That Happened” Humidifier Moments
- Conclusion
Cool mist humidifiers are basically tiny indoor weather machines: they turn a tank of water into comfy air that helps your skin, your sinuses, and your houseplants feel less like they live in a desert. The catch? If you don’t clean them, they can also turn into a science fair project with bonus “mystery smell.” (Spoiler: the mystery is usually minerals, mold, or bacteria.)
This guide walks you through a simple, repeatable cleaning routine for cool mist humidifiersespecially ultrasonic and evaporative modelsusing methods recommended by major U.S. health and consumer authorities and common manufacturer instructions. You’ll learn what to do daily, what to do every three days, and how to do a deeper clean when you’ve been “too busy” (aka you forgot).
Why Cleaning a Cool Mist Humidifier Matters (More Than You Think)
A humidifier’s job is to push moisture into your air. If the inside of the unit is dirty, it may also push microscopic hitchhikers (like microorganisms) and mineral particles into the air along with the mist. That’s why reputable guidance emphasizes frequent cleaning, using low-mineral water, and rinsing well after any disinfecting agent.
Common “Uh-Oh” Signs Your Humidifier Needs Attention
- White dust on furniture (often from minerals in tap water, especially in ultrasonic units)
- Pink slime (biofilm that loves damp surfaces)
- Musty smell or “wet towel” vibes
- Reduced mist output or crusty buildup around vents
- Visible scale (chalky, rough mineral deposits)
Know Your Cool Mist Humidifier Type (It Changes the Cleaning Details)
Most cool mist humidifiers fall into two camps:
- Ultrasonic / impeller: Very quiet, often easy to use, but can aerosolize minerals (hello, white dust) if you use hard tap water.
- Evaporative (wick/filter): Uses a wick filter to add moisture naturally. Often less white dust, but you must clean the base and replace/maintain the wick.
The core cleaning steps are similar, but filters/wicks and small parts need extra attention on evaporative models, and mineral scale tends to be a bigger issue on ultrasonic units.
What You’ll Need (Simple Supplies, No Mad Scientist Lab Required)
Cleaning tools
- Soft bottle brush or soft toothbrush (for crevices and valves)
- Microfiber cloth or clean paper towels
- Small bowl or measuring cup
- Optional: cotton swabs for tight corners
Cleaning solutions
- White distilled vinegar (for descaling/mineral buildup)
- 3% hydrogen peroxide (common recommendation for cleaning/disinfecting surfaces that contact water)
- Bleach (only if your manual allows it, and always diluted)
Two “Don’ts” that matter
- Don’t mix vinegar and bleach. Ever. Not even “just a splash.”
- Don’t run the humidifier with cleaning chemicals inside. Cleaning happens with the unit off, unplugged, and fully rinsed afterward.
Before You Start: 60-Second Safety Check
- Unplug the humidifier. Always. Water + electricity is not a productivity hack.
- Read your owner’s manual. Some parts are dishwasher-safe; others absolutely are not.
- Move to a sink. Cleaning is easier when you can rinse thoroughly.
- Protect the motor/electronics. Only wash parts that are meant to be washednever submerge the base if it contains electrical components.
The “Daily” Routine (2 Minutes That Prevent 80% of Problems)
If you do nothing else, do this. Daily habits are what keep humidifiers from turning into swamp décor.
- Power off and unplug.
- Empty the tank and base. Dump any remaining water. Standing water is the party venue for microorganisms.
- Quick rinse. Swish clean water through the tank; rinse the base (if your model allows).
- Wipe and air-dry. Wipe accessible surfaces and leave the tank open to dry.
- Refill with fresh water. Ideally distilled or low-mineral water if you’re using an ultrasonic/impeller unit.
Pro tip: If your humidifier has a tiny valve or cap with hard-to-reach crevices, a quick swipe with a soft toothbrush once a day makes a big difference.
The Full Clean (Every 3 Days): Step-by-Step Method
Many respected sources recommend cleaning portable humidifiers about every three days when in regular use. This routine tackles both scale (minerals) and microbes without turning your kitchen into a chemistry set.
Step 1: Disassemble the Humidifier
- Unplug and remove the tank.
- Remove the tank cap, mist nozzle, and any removable trays or covers.
- If you have an evaporative model, remove the wick/filter and set it aside (most wicks shouldn’t be soaked in harsh disinfectantsfollow your manual).
Step 2: Descale Mineral Buildup with Vinegar (The “Crust Buster”)
Vinegar is great at loosening mineral deposits. It’s the bouncer that escorts scale out of the building.
- Tank: Pour 1–2 cups of undiluted white distilled vinegar into the empty tank (or use a vinegar/water mix if your manual specifies dilution). Swish to coat the interior.
- Base/reservoir: If your model allows, let vinegar drain into the base and sit in the reservoir area.
- Soak time: Let it sit for 15–20 minutes. If you have heavy buildup, you can extend the soak (without turning the unit on).
Step 3: Scrub the Details (Where Grime Likes to Hide)
- Use a soft toothbrush or small brush to scrub corners, seams, and around the valve.
- For tight spaces, use cotton swabs.
- If you see stubborn scale, do a second short vinegar soak and scrub again.
Step 4: Rinse Thoroughly (Yes, Thoroughly Means “More Than Once”)
- Empty the vinegar.
- Rinse the tank and any washable parts with clean water.
- Repeat until you no longer smell vinegar strongly.
Step 5: Disinfect (Choose ONE Option)
Descaling removes minerals; disinfecting reduces germs. Some people skip disinfecting and wonder why the humidifier still smells weird. Don’t be that plotline.
Option A: 3% Hydrogen Peroxide (Common, Simple, No Chlorine Smell)
- Add enough 3% hydrogen peroxide to coat the bottom of the tank or the water-contact surfaces (you can also use it on a clean cloth for wiping).
- Let it sit for about 15–20 minutes (or per manufacturer guidance).
- Empty and rinse thoroughly with clean water.
Option B: Diluted Bleach Solution (Only If Your Manual Allows It)
Many manufacturer directions and cleaning guides use a very weak bleach solutioncommonly 1 teaspoon of liquid chlorine bleach per 1 gallon of waterfollowed by thorough rinsing until the bleach smell is gone.
- Mix 1 teaspoon bleach with 1 gallon of water in a container. (If you’re doing a smaller batch: ½ teaspoon bleach in ½ gallon works.)
- Pour some solution into the tank, swish to coat interior surfaces, and allow it to sit 15–20 minutes.
- Let a bit drain into the base (if that’s how your model disinfects) and allow contact time.
- Empty the solution and rinse repeatedly until there’s no bleach odor.
Important: Never disinfect with bleach right after vinegar without fully rinsing first. Keep them separate, rinse between, and ventilate your cleaning area.
Step 6: Air-Dry Completely (Dry = Less Growth)
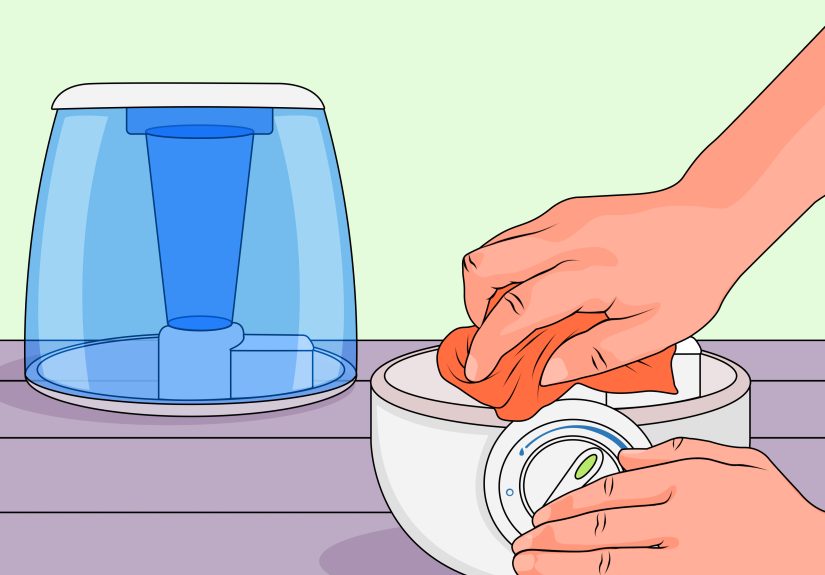
- Wipe accessible surfaces with a clean cloth.
- Let all parts air-dry fully before reassembly.
- Reassemble only when dry, then refill with fresh water.
Filter/Wick Care (Evaporative Models)
If your cool mist humidifier uses a wick filter, treat it like a “replaceable sponge.” It’s doing real work, and it can collect minerals and microbes over time.
- Follow the manual for replacement timing. Many wicks need replacing every 30–60 days depending on use and water hardness.
- Don’t “revive” a crusty wick forever. If it’s stiff, smelly, or discolored, replace it.
- Keep the base clean. Even with a wick, the reservoir still needs regular cleaning.
Extra Tips for Keeping It Clean Longer (Less Work, More Fresh Mist)
Use better water
Distilled or demineralized water reduces scale and can cut down on white dustespecially in ultrasonic units.
Keep humidity in the “Goldilocks zone”
Too low is uncomfortable; too high can encourage mold growth in your home. Aim for comfortable indoor humidity and avoid consistently exceeding about 50% relative humidity. A basic hygrometer is cheap and surprisingly satisfying to watch (like a tiny weather app that lives on your bookshelf).
Don’t let water sit when not in use
If you’re not running it, empty it. Standing water is where problems begin.
Place it smartly
- Set it on a water-resistant surface.
- Keep it away from walls and fabric (damp curtains are basically an invitation).
- Don’t aim mist directly at windows; condensation is a clue you’re overdoing it.
Troubleshooting: Common Problems and Quick Fixes
“My humidifier smells weird.”
- Do the full clean (descale + disinfect).
- Replace filters/wicks if applicable.
- Make sure everything fully dries between cleanings.
“I’m getting white dust everywhere.”
- Switch to distilled/demineralized water.
- Clean scale more frequently.
- Consider a model with demineralization cartridges if your unit supports them.
“There’s pink slime in the tank.”
- Scrub thoroughly (biofilm clings).
- Increase cleaning frequency.
- Make drying non-negotiable.
“Can I add essential oils?”
Only if your humidifier is specifically designed for it. Oils can coat internal parts, trap gunk, and make cleaning harder (and sometimes damage plastics). If you want scent, use the method your manufacturer recommendsmany do not recommend oils in the tank.
End-of-Season Storage (Because Next Year You Will Thank You)
- Do a full clean (descale + disinfect if allowed), then rinse thoroughly.
- Let all parts dry completely for at least a day.
- Replace or discard used filters, cartridges, and wicks as directed.
- Store in a dry place, ideally in its original box or a breathable bag.
- When you pull it out next season: clean it again before use (dust happens).
FAQ: Quick Answers People Actually Need
How often should I clean a cool mist humidifier?
Do a quick empty/rinse/dry daily. Plan a more thorough cleaning about every three days when using it regularly, and do a deeper clean if you see buildup or smell anything off.
Is vinegar enough?
Vinegar is excellent for removing mineral scale. For germ reduction, many reputable sources recommend hydrogen peroxide or a manufacturer-approved disinfectant method. Think: vinegar = descaling, disinfectant = germ control.
Do I really need to rinse that much after disinfecting?
Yes. If any disinfectant residue remains, it can become airborne with the mist. Rinse until there’s no chemical smell and parts are clean.
Real-World Experiences: of “Yep, That Happened” Humidifier Moments
People’s relationship with humidifiers tends to follow a classic three-act story: (1) “Wow, my skin feels great,” (2) “Why is there white dust on my nightstand?” and (3) “Okay, fine, I’ll clean it.” If you’ve ever felt personally attacked by a crusty tank corner, you’re not alone.
One of the most common experiences is the white dust mystery. Someone buys a whisper-quiet ultrasonic cool mist humidifier, fills it with tap water, and wakes up to what looks like a light snowfall on the dresser. It’s not your house shedding; it’s minerals being carried into the air. Switching to distilled water often feels like flipping a magic switchsuddenly the humidifier goes back to being a cozy helper instead of a tiny mineral cannon.
Then there’s the “I refilled it, so I maintained it” phase. Many households top off the tank for days, assuming fresh water on top cancels out old water in the base. Unfortunately, lingering water is exactly what encourages slimy buildup. The first time someone actually empties the base and sees cloudy residue, it’s a genuine plot twist. The good news is that once you start doing the daily dump-and-dry routine, the unit stays noticeably fresher with less effortlike brushing your teeth versus scheduling a root canal.
Another classic: the “vacation funk.” A humidifier left half-full while you’re away can develop a stubborn odor that doesn’t vanish with a casual rinse. That’s when the step-by-step method shines: vinegar to loosen scale and film, followed by a disinfecting option, followed by a real rinse. People often report that the smell disappears only after they let parts fully air-drybecause moisture is the sequel nobody asked for.
And yes, we should talk about the essential oil experiment. Someone adds a few drops for “spa vibes,” and the next cleaning session becomes a slippery scavenger hunt. Oils can cling to plastic surfaces and trap grime, making the humidifier harder to maintain. Many people end up switching to a diffuser or choosing a humidifier model with a dedicated aroma tray (if the manufacturer supports it) to avoid turning routine cleaning into an obstacle course.
The most encouraging experience, though, is what happens after you build the habit: the humidifier runs better, smells neutral, and doesn’t develop that “wet basement” personality. The routine becomes quickdump, rinse, dry daily; full clean every three daysand suddenly you’re not fighting buildup. You’re just… owning a humidifier like an adult. A slightly more comfortable adult with fewer mystery odors. That’s a win.
Conclusion
Cleaning a cool mist humidifier isn’t about being perfectit’s about being consistent. If you empty, rinse, and dry daily, and do a full clean every three days (descale + disinfect + rinse), you dramatically reduce mineral buildup, funky smells, and unwanted microbial growth. Use low-mineral water when you can, keep indoor humidity reasonable, and follow your model’s manual for filters and parts. Your reward is the kind of clean, comfortable air you bought the humidifier for in the first placewithout the side quest of cleaning “humidifier gunk” off your conscience.