Table of Contents >> Show >> Hide
- Before You Start: 5 Smart Rules
- Why Irons Get Dirty in the First Place
- How to Clean an Iron: 12 Ways Using Household Products
- 1. Dish Soap and Warm Water for Everyday Grime
- 2. White Vinegar on a Cloth for Mineral Haze
- 3. A Vinegar-Soaked Towel for Stubborn Buildup
- 4. Baking Soda Paste for Brown Marks and Burnt Residue
- 5. Baking Soda on Paper for a Hot-Iron Reset
- 6. Salt on Paper for Sticky Residue
- 7. A Dry Cotton Towel with a Hot, Steam-Free Iron
- 8. Cotton Swabs for Steam Holes
- 9. A Soft Toothbrush for Edges and Tight Spots
- 10. Distilled Water or Manual-Approved Water for a Steam Flush
- 11. Vinegar or Lemon Juice for a Removable Anti-Calc Valve
- 12. A Damp Sponge While the Plate Is Slightly Warm
- Mistakes to Avoid When Cleaning an Iron
- How to Keep Your Iron Cleaner Longer
- Experience: What Actually Happens When You Try These Methods at Home
- Conclusion
- SEO Tags
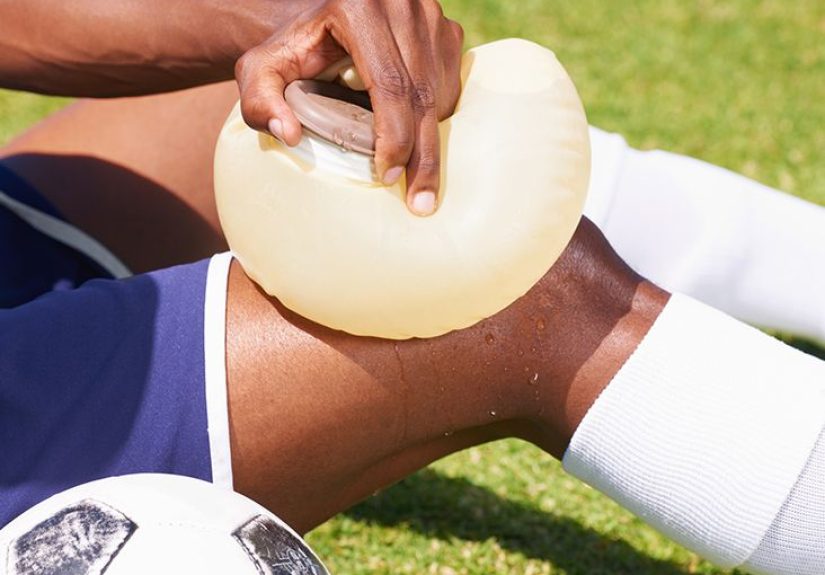
If your iron has started dragging across fabric like it’s emotionally exhausted, leaving brown streaks, white flakes, or mysterious crunchy bits behind, it’s probably begging for a cleanup. The good news is that you usually do not need a fancy specialty cleaner to rescue it. A surprising number of iron problems can be handled with simple household products you already have in the kitchen, laundry room, or that one junk drawer where rubber bands go to retire.
The trick is using the right cleaner in the right way. Some methods are great for sticky starch residue. Others are better for mineral buildup from hard water. And some are only safe if your iron’s manual allows them. In other words, this is less “wild internet hack hour” and more “smart, practical cleaning that won’t turn your iron into a regrettable science project.”
Below, you’ll find 12 ways to clean an iron using household products, plus what to avoid, how to keep buildup from coming back, and a longer section at the end with real-life experiences and lessons that make the advice easier to apply at home.
Before You Start: 5 Smart Rules
Before trying any method, unplug the iron and let it cool completely unless the step specifically says to use a warm or hot iron. Empty the water reservoir first. Work on an old towel or protected surface. Use soft cloths, paper towels, cotton swabs, or non-scratch sponges instead of metal scrubbers. And most important, check your owner’s manual if your iron has a nonstick, ceramic, or specialty soleplate, because some surfaces are fussier than others.
One more thing: do not pour vinegar, bleach, hydrogen peroxide, or random cleaning liquids into the water tank unless your manufacturer specifically says that is safe. Some irons tolerate certain descaling steps, and others absolutely do not. Your iron should not become a chemistry experiment just because it offended you with a scorch mark.
Why Irons Get Dirty in the First Place
Iron residue usually comes from one of four culprits: scorched fabric fibers, melted synthetic material, starch buildup, or mineral deposits from water. Steam vents can also trap lint and scale, which means the iron may spit on your shirt right before a meeting, a wedding, or any event where you were hoping to look like a functioning adult.
Once you know what kind of mess you’re dealing with, cleaning becomes much easier. A smooth, dull film usually responds to soap or vinegar. Chalky white flakes point to minerals. Sticky black gunk often needs heat plus a gentle abrasive or repeated wiping. Burned-on plastic usually needs patience, not brute force.
How to Clean an Iron: 12 Ways Using Household Products
1. Dish Soap and Warm Water for Everyday Grime
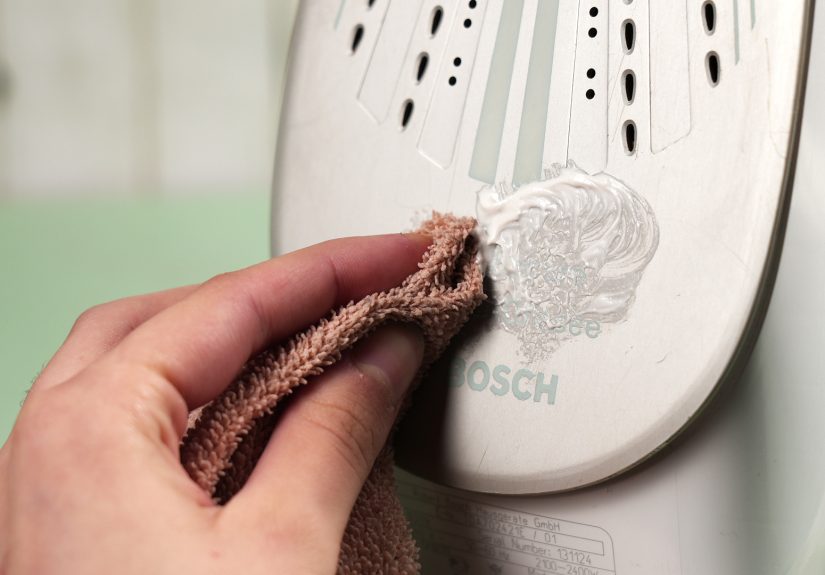
If the soleplate looks dingy but not dramatic, start simple. Mix a few drops of mild dish soap into warm water. Dip a soft cloth or paper towel into the sudsy mixture, wring it out well, and wipe the cooled soleplate. This is one of the safest ways to clean an iron, especially if the plate has a nonstick coating.
Dish soap works best for light residue, oily film, and general laundry-room grime. It is not flashy, but it is dependable, like the friend who always brings extra napkins. After wiping, go over the soleplate again with a clean damp cloth, then dry thoroughly.
2. White Vinegar on a Cloth for Mineral Haze
When the bottom of the iron looks cloudy or slightly crusty, distilled white vinegar can help loosen mineral residue. Dampen a soft cloth with vinegar and rub the cooled soleplate gently. Do not soak the iron itself, and do not pour vinegar directly onto a hot plate.
This method is especially helpful for light hard-water stains. Follow with a clean damp cloth to remove any remaining vinegar, then dry the plate. If your iron has a delicate finish, test a small area first. Vinegar is helpful, but it should not act like it owns the place.
3. A Vinegar-Soaked Towel for Stubborn Buildup
If a quick vinegar wipe does not cut it, lay a towel or thick paper towels flat, dampen them with white vinegar, and rest the cooled soleplate on top for 15 to 30 minutes. This gives the residue time to soften without turning the whole iron into a wet mess.
After the soak, wipe the plate clean with a soft cloth. This method is useful for stuck-on gunk that laughs at gentle wiping. Just make sure moisture stays on the cloth, not inside the iron.
4. Baking Soda Paste for Brown Marks and Burnt Residue
Baking soda is the classic household cleanup hero for a reason. Mix two tablespoons of baking soda with enough water to make a thick paste. Spread it lightly over the cooled soleplate, avoiding excess paste in the steam holes. Let it sit for a few minutes, then wipe it away with a damp cloth.
This method works well for scorch marks, starch residue, and general “what happened here?” buildup. Use a light hand. Baking soda is gentle, but it is still mildly abrasive. If your soleplate is highly polished or has a delicate coating, stick to soap first and escalate only if needed.
5. Baking Soda on Paper for a Hot-Iron Reset
For sticky buildup on the bottom of the iron, sprinkle a small amount of baking soda onto a sheet of paper, wax paper, or a dry cotton towel, then run a warm iron with the steam turned off over it. This can help loosen grime that does not want to leave politely.
Use this carefully and only on irons that can tolerate a mild abrasive. The goal is to let the surface glide over the baking soda, not grind it in like you are sanding a deck. Finish by wiping the soleplate clean once the iron cools.
6. Salt on Paper for Sticky Residue
Salt is another old-school option for irons with sticky residue. Sprinkle a tablespoon of coarse or table salt onto newspaper, a paper towel, or a dry cotton towel. Set the iron to a warm or hot setting with the steam off, then move it back and forth over the salt.
This method can be surprisingly effective for tacky buildup, but it is best used with caution. Salt is more abrasive than baking soda, so skip it on delicate coated soleplates unless the manual suggests otherwise. Think of it as the strong coffee of iron cleaning: useful, but not the first thing for every situation.
7. A Dry Cotton Towel with a Hot, Steam-Free Iron
Sometimes the simplest move works: heat the iron, switch the steam off, and run it over a clean dry cotton towel. This can lift fresh residue before it becomes a full-time resident on the soleplate.
It is especially helpful right after you notice stickiness from starch or synthetic fabric. The towel method is also a good follow-up step after other cleaning treatments because it helps remove loosened residue without adding more products.
8. Cotton Swabs for Steam Holes
Steam vents love collecting mineral dust and leftover gunk. Dip cotton swabs in water or a little white vinegar and gently clean around each steam hole. Rotate the swab as it gets dirty so you are lifting the grime out instead of smearing it around.
This takes a few minutes, but it is worth it. Clean vents mean smoother steam flow and fewer surprise flakes on clothing. Resist the urge to dig around with pins, knives, or anything sharp. Your iron is not a pumpkin, and the vents do not need carving.
9. A Soft Toothbrush for Edges and Tight Spots
An old soft toothbrush is handy for cleaning the lip around the soleplate, the grooves near steam holes, and stubborn crust that a cloth cannot reach. Use it with soapy water or a baking soda paste, then wipe everything clean.
This is less about scrubbing hard and more about getting into awkward corners. A toothbrush is great when the iron looks clean from a distance but still has a suspicious ring of grime around the edges.
10. Distilled Water or Manual-Approved Water for a Steam Flush
If the iron spits mineral flakes, fill the reservoir with the type of water your manual recommends and run a steam flush over an old towel or over a sink. Many models also have a self-clean feature that pushes steam and water through the vents to clear scale.
This method targets internal buildup rather than the surface. If your manual says to use tap water, use tap water. If it recommends a mix or distilled water in hard-water areas, follow that guidance. The most effective cleaning product in this case is not vinegar. It is obedience.
11. Vinegar or Lemon Juice for a Removable Anti-Calc Valve
Some steam irons include a removable anti-calc or anti-scale valve. If yours does, and the manual allows it, you may be able to soak that removable part in white vinegar or plain lemon juice for a few hours to dissolve scale. Rinse well before reinstalling it.
This method is only for the removable component, not the entire iron tank. It is a great example of why reading the manual matters. On the right model, it is smart maintenance. On the wrong model, it is a customer service call waiting to happen.
12. A Damp Sponge While the Plate Is Slightly Warm
For fresh residue, a damp non-scratch sponge used on a slightly warm soleplate can remove buildup before it hardens. The plate should be warm, not blazing hot, and the sponge should be damp, not dripping.
This works well for quick maintenance after ironing something with spray starch or after a tiny fabric melt disaster. Catching residue early is one of the easiest ways to avoid a deep-cleaning session later.
Mistakes to Avoid When Cleaning an Iron
Even a good cleaning plan can go sideways if you use the wrong tools. Avoid steel wool, metal scrubbers, abrasive powders not meant for the surface, and sharp objects in steam holes. Do not use bleach. Do not mix random cleaners together. And do not assume every internet trick belongs inside your water reservoir.
Also, do not ignore the fabric setting when ironing. Many sticky soleplates are not caused by a dirty iron at all. They are caused by ironing synthetic fabric at a temperature better suited for grilling cheese.
How to Keep Your Iron Cleaner Longer
Prevention is less exciting than dramatic rescue methods, but it is a lot easier. Empty the tank after each use if your manufacturer recommends it. Store the iron upright. Use the water type specified in the manual. Wipe the soleplate regularly before residue hardens. And if you use spray starch, apply it to the fabric carefully rather than flooding every square inch like you are shellacking a picnic table.
Running the self-clean function on schedule can also help prevent steam vents from clogging. If you live in a hard-water area, regular maintenance matters even more. Mineral deposits do not care that you are busy.
Experience: What Actually Happens When You Try These Methods at Home
Here is the part most quick cleaning guides skip: cleaning an iron is rarely a one-pass miracle. In real life, the first method you try may remove only half the problem, and that does not mean you failed. It usually means the buildup has more than one cause. For example, a soleplate can have both starch residue and hard-water scale at the same time. In that situation, dish soap may remove the sticky film while a vinegar wipe helps with the cloudy mineral spots. That layered approach is often what works best at home.
A lot of people also learn, usually the hard way, that “more scrubbing” is not the same thing as “better cleaning.” One of the most common mistakes is getting impatient and reaching for whatever seems toughest: a knife tip, a scouring pad, the rough side of a sponge, or enough pressure to qualify as revenge. That is how a small residue problem turns into scratches, damaged coatings, or steam holes packed with even more debris. Gentle cleaning repeated two or three times usually beats one dramatic attack.
Another real-life lesson is that fresh residue is wildly easier to remove than old residue. If you notice the iron dragging after you accidentally hit a synthetic blend with too much heat, deal with it that day. A slightly warm soleplate, a damp cloth, and a little dish soap may solve the problem in five minutes. Leave it for a month, and now you are dealing with a hardened, baked-on souvenir from your laundry mistake. The iron remembers everything.
People also tend to underestimate the steam vents. The soleplate gets all the attention because it is visible, but clogged vents are often the reason an iron starts spitting white flakes or leaving marks on fabric even after the bottom looks clean. Taking a few extra minutes with cotton swabs, a soft brush, and a steam flush can make an iron feel almost new again. It is not glamorous work, but it is satisfying in a very specific “I have defeated the tiny household nuisance” kind of way.
Finally, the biggest experience-based takeaway is this: the owner’s manual matters more than cleaning folklore. Some irons handle vinegar on a cloth just fine. Some have removable anti-calc parts that can be soaked. Some manufacturers want tap water, some prefer a mix in hard-water areas, and some warn against additives in the tank entirely. The best cleaning result usually comes from combining common-sense household products with the directions for your exact model. That may not be as thrilling as a viral hack involving six ingredients and a dramatic before-and-after photo, but it is much more likely to leave you with a clean iron instead of a new reason to shop for one.
Conclusion
If you want to know how to clean an iron without buying specialty products, start with the gentlest household options first: dish soap, water, a soft cloth, and a careful wipe-down. Move up to white vinegar or baking soda when you need more muscle, and use heat-based methods like a dry towel, salt, or paper only when they suit your iron’s surface. For steam issues, clean the vents and use the self-clean or steam-flush function the manual recommends.
The best method depends on the mess, but the overall strategy stays the same: be gentle, be patient, and do not pour mystery substances into the tank just because the internet seemed confident. A clean iron glides better, steams better, and is far less likely to turn your favorite shirt into a sad cautionary tale.