Table of Contents >> Show >> Hide
- Before You Start: Pick the “Short” You Actually Mean
- Tools You’ll Need (No, Not Kitchen Scissors)
- Wet or Dry? The Quick Rule
- The 14 Steps
- Step 1: Choose your target length with a “landing pad”
- Step 2: Do a 60-second “fake bob” test
- Step 3: Set up your station like you’re about to perform surgery
- Step 4: Start with clean, detangled hair (skip the “snarl surprise”)
- Step 5: Decide your baseline shape: blunt, softly blunt, or textured
- Step 6: Section your hair into four quadrants
- Step 7: Create a small guide section at the nape
- Step 8: Make your first cut longer than you want (seriously)
- Step 9: Work upward in thin layers, using the guide to stay even
- Step 10: Move to the sides and match the back
- Step 11: Shape the front (the part everyone actually looks at)
- Step 12: Cross-check for symmetry (the “I swear they matched” audit)
- Step 13: Refine the ends with point cutting (your best friend)
- Step 14: Style-check, then do a final micro-pass
- Texture Notes: Straight, Wavy, Curly, and Coily
- Common Mistakes (So You Can Skip the Drama)
- When to Call a Pro (No Shame, Only Wisdom)
- Quick FAQ
- Conclusion
- Extra: of Real-World Experience (What People Learn After the Chop)
You can absolutely cut long hair short at homeas long as you treat the scissors like a power tool, not a vibe. The goal is a clean, wearable short haircut (think lob, bob, or “I can still put it in a tiny ponytail” short), not a surprise audition for a medieval pageboy.
This guide walks you through a beginner-friendly approach that stylists commonly recommend for DIY trims and cautious chops: use the right tools, work in sections, cut less than you think, and “soften” mistakes with point cutting instead of hacking a blunt line across. You’ll also get texture-specific tips (straight vs. curly), plus a reality check on when to pause and book a pro.
Before You Start: Pick the “Short” You Actually Mean
“Short” is a whole ecosystem. Before you cut, decide which neighborhood you’re moving to:
- Long bob (lob): Collarbone-ish. Safest first chop because it’s forgiving and still ties back.
- Bob: Chin to jaw. Looks sharp… and reveals every uneven millimeter, so go slow.
- Short-short (pixie territory): High risk at home unless you’re experienced or using clippers with guards.
Pro tip: If you’re going from waist-length to chin-length, do it in two stages. First cut to a lob, then refine shorter. Your future self will thank you (and stop stress-googling “how to fix an accidental triangle bob”).
Tools You’ll Need (No, Not Kitchen Scissors)
- Hair-cutting shears (sharp, clean)
- Fine-tooth comb + wide-tooth comb (detangling matters)
- Sectioning clips (the more, the merrier)
- Hair ties (helpful for “cut lines” and checkpoints)
- Spray bottle (for dampening straight/wavy hair)
- Two mirrors (or a mirror + phone camera for the back)
- Towel/cape + good lighting
Wet or Dry? The Quick Rule
Straight to wavy hair: Lightly damp hair can help you get cleaner, more even linesjust remember hair can look slightly longer when wet, so don’t cut to the “final” length on your first pass.
Curly/coily hair: Cutting when fully dry and in its natural curl pattern helps you see true length and shape (because shrinkage is real and ruthless).
The 14 Steps
-
Step 1: Choose your target length with a “landing pad”
Pick a final length, then pick a first length that’s 1–2 inches longer. Example: if you want a chin bob, first cut to a long bob. This gives you room to adjust shape without panic-texting your group chat.
-
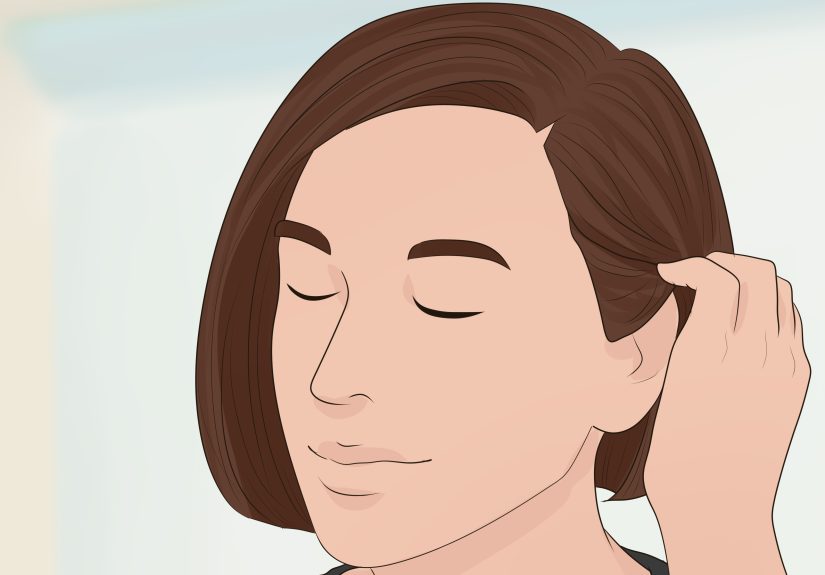
Step 2: Do a 60-second “fake bob” test
Tuck your hair under and pin it (or use a claw clip) to preview how short hair frames your face. Check the front and side profile. If you hate it pinned up, you may hate it cut off. Science!
-
Step 3: Set up your station like you’re about to perform surgery
Good lighting, a clean counter, and mirrors positioned so you can see the back of your head. Wear a button-up shirt so you don’t have to pull a sweater over fresh, pokey hair clippings (instant regret confetti).
-
Step 4: Start with clean, detangled hair (skip the “snarl surprise”)
Detangle thoroughly with a wide-tooth comb first, then refine with a fine-tooth comb. Knots make you cut unevenly because tension changes from section to section.
-
Step 5: Decide your baseline shape: blunt, softly blunt, or textured
Blunt: crisp, graphic, least forgiving.
Softly blunt: mostly one length, but ends are softened with point cutting (best DIY option).
Textured: more movement, but easy to overdo at home. -
Step 6: Section your hair into four quadrants
Part down the middle (forehead to nape). Then part ear to ear across the crown. Clip each quadrant. This keeps you from “freehanding” your way into a lopsided situation.
-
Step 7: Create a small guide section at the nape
Release a thin horizontal section at the very bottom of the back (nape). Comb it straight down. This is your “ruler” for everything else.
-
Step 8: Make your first cut longer than you want (seriously)
Cut the nape guide section above where you ultimately want the hemline to land. If you’re nervous, use a hair tie as a visual checkpoint: tie it where you plan to cut, then cut slightly below the tie first.
-
Step 9: Work upward in thin layers, using the guide to stay even
Release the next thin horizontal section above the nape. Comb it down over your guide. Cut to match the guide. Repeat up the back of the head. Thin sections prevent “stairs” (that choppy shelf look).
-
Step 10: Move to the sides and match the back
Release one side quadrant. Comb hair down and slightly back to connect with the back length. Cut to match. Repeat on the other side. Keep your head leveltilting your chin can make one side magically become shorter.
-
Step 11: Shape the front (the part everyone actually looks at)
Decide if you want the front slightly longer (a subtle A-line) or the same length as the back. For a gentle A-line bob, keep the front about 1/4–1/2 inch longer than the back, then blend softly. Go tiny snip by tiny snip.
-
Step 12: Cross-check for symmetry (the “I swear they matched” audit)
Comb all hair down naturally. Then do a cross-check: comb sections in the opposite direction you cut them (e.g., forward instead of down) to reveal uneven spots. Fix with micro-trims only. If you remove big chunks during “fixing,” you’ll chase mistakes like a dog chasing its tailcute, but not productive.
-
Step 13: Refine the ends with point cutting (your best friend)
Instead of cutting straight across again, hold scissors vertically and make small snips into the ends. This softens bluntness, disguises tiny unevenness, and makes the cut look more professional. Don’t “saw” the hairjust light, controlled points.
-
Step 14: Style-check, then do a final micro-pass
Dry and style your hair the way you normally wear it (air-dry, blowout, waves, whatever). Short hair can look different when dry, especially around the face. Do a final micro-pass only after you see the real shape. If you’re unsure, stop. You can always cut more tomorrow; you can’t paste it back today.
Texture Notes: Straight, Wavy, Curly, and Coily
Straight hair
Evenness is everything because straight hair shows every wobble. Work in smaller sections and rely on point cutting to soften the edge so minor inconsistencies don’t scream in HD.
Wavy hair
Waves can hide small uneven bits, but they also “spring” when dry. Cut conservatively, style it, then refine.
Curly/coily hair
Cut dry in your natural curl pattern when possible. Think “shape first,” not “perfectly even line.” Curly bobs can look amazing with a soft perimeter and subtle face framingbut shrinkage means you should leave extra length until you’ve seen it fully dry.
Common Mistakes (So You Can Skip the Drama)
- Cutting too much at once: the #1 DIY regret. Make the first chop longer.
- Using dull scissors: causes frayed ends and makes hair look rougher.
- Not sectioning: results in “random length roulette.”
- Fixing in a frenzy: step away, breathe, re-comb, then micro-trim.
- Cutting curly hair wet: can lead to surprise-short results once it dries.
When to Call a Pro (No Shame, Only Wisdom)
Consider a salon visit if you want a precision blunt bob, a dramatic undercut, heavy layering, or a big transformation from very long hair to very short hair in one leap. A stylist can balance weight distribution, neckline shape, and face framing with fewer “oops” moments.
Quick FAQ
Does cutting your hair make it grow faster?
Nope. Hair grows from the scalp, not the ends. Trimming can help it look healthier by removing split ends and reducing breakage.
How often should you trim short hair?
Short styles show growth faster. Many people refresh every 4–8 weeks depending on the cut and how crisp they want the shape.
What’s the safest “short haircut” for beginners?
A long bob (lob) or a softly blunt bob. Both give you structure without demanding perfection from a bathroom mirror.
Conclusion
Cutting long hair short at home is equal parts technique and self-control. If you remember nothing else, remember this: use proper shears, section your hair, cut less than you think, and refine with point cutting. Do it in stages, style-check before finalizing, and treat “just one more inch” like a suspicious late-night text from an ex: pause and think first.
Extra: of Real-World Experience (What People Learn After the Chop)
The first time most people cut long hair short at home, the emotional journey is basically a three-act play: Act 1: Confidence. Act 2: Confusion. Act 3: “Why is the left side doing that?” The good news is that almost every DIY haircut lesson has a simple fix: slow down, re-comb, and make smaller decisions.
One common experience is the “too-blunt surprise.” You make a clean straight cut, step back, and realize the ends look a little… heavy. Not necessarily badjust very “I cut this myself at 11:47 PM.” That’s where point cutting becomes the hero. A few careful vertical snips into the ends can turn “helmet edge” into “softly blunt,” which is a polite way of saying “on purpose.” The trick is to keep those snips tiny. If you point cut like you’re trying to open a bag of chips with scissors, you’ll end up with airy, uneven ends that look thinner than you wanted.
Another classic: the “wet hair optimism.” Damp hair lies. It lies in a calm, cooperative way that makes you feel like a competent professional… right up until it dries and springs up like it remembered a secret. People with waves often discover their hair shortens more than expected around the face, while curly and coily hair can shrink dramatically once fully dry. The lived lesson here is simple: when in doubt, cut longer, dry it, then decide. Your mirror will still be there later. Your length will not.
There’s also the “symmetry illusion.” You cut one side, then match the other, and it still looks uneven. Usually it’s posture: a tilted chin, one shoulder higher, or your head angled like you’re listening for gossip through the wall. Real-life fix: stand straight, keep your gaze level, and cross-check by combing hair in different directions. Many DIY cutters also swear by a quick photoyour phone camera reveals what your brain politely edits out in real time.
Finally, most people discover that the biggest win isn’t a flawless bobit’s confidence with maintenance. Even if you decide to leave major shape changes to a stylist, knowing how to do a tiny end trim, soften the perimeter, or refresh face-framing pieces can stretch your salon cut longer and keep your hair looking intentional. And if you do mess up? Hats are stylish. Headbands are back. And hair growsslowly, yes, but faithfully.