Table of Contents >> Show >> Hide
- Can You Dye Black Hair Brown at Home?
- Choose the Right Brown Shade First (This Matters More Than the Box Photo)
- What You’ll Need to Dye Black Hair Brown
- Before You Dye: The Prep Steps That Save You From Regret
- How to Dye Black Hair Brown: Step-by-Step
- What If Your Hair Turns Brassy or Too Warm?
- Common Mistakes When Dyeing Black Hair Brown
- How to Keep Brown Hair Color Looking Good
- When to See a Professional Colorist Instead
- Final Thoughts
- Experiences Related to “How to Dye Black Hair Brown” (Extended Section)
- Experience #1: “I wanted a subtle change, and dark chocolate brown was perfect”
- Experience #2: “I dyed over black box dye and nothing happened”
- Experience #3: “It turned warm/orange, but it wasn’t ruined”
- Experience #4: “Doing a strand test saved me from a disaster”
- Experience #5: “The second session worked better than the first”
- Experience #6: “Aftercare made the color look expensive”
Going from black hair to brown hair sounds simple in theory: pick a pretty brunette shade, apply dye, take selfies, live happily ever after. In reality? It can be a little more “science experiment meets spa night.”
The good news is that black hair can absolutely be dyed brown at home in many cases. The trick is knowing what kind of black hair you’re starting with (natural black vs. previously dyed black), choosing a realistic target shade, and not trying to force a dramatic transformation in one session. If you do it right, you can get a rich chocolate, chestnut, espresso, or soft medium brown result without frying your hair into a crunchy cautionary tale.
This guide breaks down exactly how to dye black hair brown, step by step, with practical tips for shade selection, prep, application, damage control, and aftercare. It’s written for real people with real bathrooms, real budgets, and at least one towel they don’t mind ruining.
Can You Dye Black Hair Brown at Home?
Yesbut the answer depends on your starting point.
1) If your hair is naturally black (virgin hair)
You usually have the best chance of success at home. A permanent hair color can often lift natural black hair a little and deposit brown pigment, especially if you’re aiming for a dark brown or medium brown rather than a light caramel brown.
2) If your hair is dyed black (artificial color)
This is where many DIY plans go sideways. Hair color generally doesn’t lift previously applied dark dye very well. If your hair has been colored black before, you may need a color remover or lightening step before applying brown dye. Trying to place a lighter brown dye directly over dyed black hair can leave you with patchy results or barely any visible change.
3) If your hair is black and heavily damaged
Pause the dye mission. Focus on repair first. Brown hair looks best when the hair is healthy enough to reflect light. If your ends are snapping, stretchy, or already overprocessed, a salon consultation is the smarter move.
Choose the Right Brown Shade First (This Matters More Than the Box Photo)
Before you even open a dye kit, decide what kind of brown you actually want. “Brown” is a whole universe. If you skip this step, you may end up with a color that technically is brown… but emotionally feels wrong.
Popular brown shades for black hair
- Dark brown / espresso brown: Easiest and lowest-risk transition from black.
- Chocolate brown: Rich, balanced brunette with soft warmth.
- Chestnut brown: Warm brown with red or golden undertones.
- Ash brown: Cooler brown that helps reduce orange/brassy tones.
- Medium brown: Noticeable change from black, but may need some lift first.
- Light brown / caramel brown: Usually requires more lightening, especially from true black.
Match undertones to your skin tone
A flattering brunette shade usually comes down to undertone, not just “light vs. dark.”
- Warm undertones: golden brown, caramel, chestnut, honey-brown
- Cool undertones: ash brown, mushroom brown, mocha
- Neutral undertones: you can usually wear both warm and cool browns well
Pro tip: If you’re nervous, start with a dark neutral brown. It’s the most forgiving and still gives that “I changed my hair but kept my life together” look.
What You’ll Need to Dye Black Hair Brown
- Permanent brown hair dye (or a brown dye kit designed for your hair type)
- Optional: hair color remover or lightener (if hair is dyed black or you need more lift)
- Developer (if using professional color + separate developer)
- Gloves
- Mixing bowl and tint brush (non-metal)
- Hair clips for sectioning
- Wide-tooth comb
- Old towel and old shirt
- Petroleum jelly or barrier cream for hairline protection
- Timer (your phone is fine; your memory is not)
- Color-safe shampoo and conditioner
- Toning shampoo (blue or purple) if your hair tends to go brassy
Before You Dye: The Prep Steps That Save You From Regret
Do a patch test (seriously)
Hair dye can trigger allergic reactions. Do the allergy/patch test according to the product instructionsusually 48 hours before coloring. This is not an optional “extra credit” step. It’s the part that keeps your DIY night from turning into a medical problem.
Do a strand test
A strand test tells you:
- How the color will actually look on your hair
- How long it should process
- Whether your hair pulls warm (orange/red) or cool
- Whether you need a darker or ashier brown than you thought
Don’t shampoo right before coloring
In many cases, it’s best to color hair that is dry and not freshly washed. Natural oils can help protect your scalp from irritation. If your hair is coated in heavy styling product, wash it earlier (such as the day before), then let it dry fully before coloring.
Figure out if you need one step or two
Ask yourself:
- Is my hair natural black, or has it been dyed black?
- Do I want dark brown (subtle) or light/medium brown (bigger change)?
- Is my hair healthy enough for lightening?
If your goal is dark brown from natural black hair, one step may work. If you want a significantly lighter brownor if your hair is previously dyed black plan for a multi-step process and more patience.
How to Dye Black Hair Brown: Step-by-Step
Step 1: Protect your space and your skin
Put on an old shirt. Cover your sink or counter. Apply petroleum jelly around your hairline, ears, and neck (but not on the hair itself). This helps prevent staining and makes cleanup much easier.
Step 2: Section your hair
Divide your hair into four sections (front-left, front-right, back-left, back-right). Clip each section. This improves coverage and helps prevent the classic DIY issue: one side looking rich mocha and the other side looking “missed spot.”
Step 3: Mix the color exactly as directed
Follow the instructions in your kit or formula. If you’re using separate color and developer, use the correct ratio and the developer strength recommended for your goal. More developer does not automatically mean better results. It can mean more lift, more warmth, and more damagesometimes all at once.
Step 4: Apply strategically based on your hair history
If your hair is natural black (virgin hair)
Apply color evenly from roots to ends (unless your instructions say otherwise). Work in small subsections so every strand is saturated. Uneven saturation = uneven color.
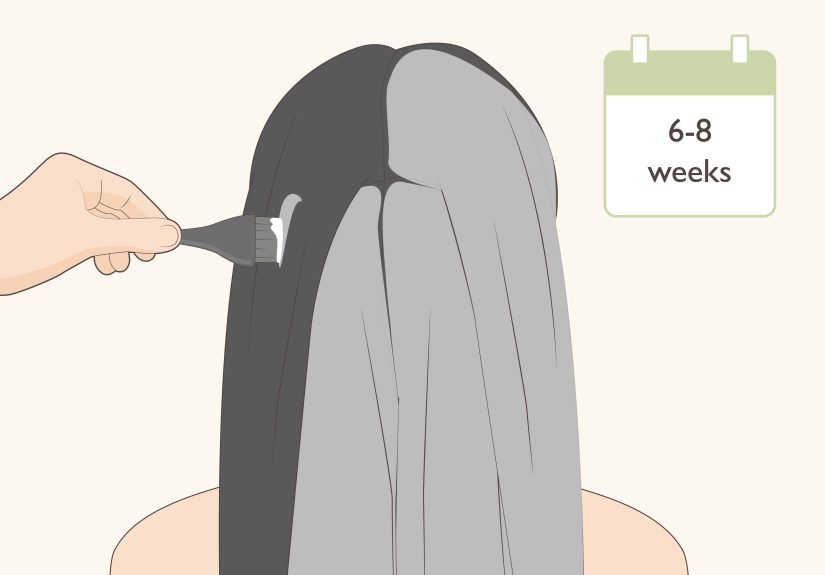
If your hair is previously dyed and you’re doing a root touch-up + refresh
Apply color to the roots/new growth first and avoid overlapping too much onto previously colored hair. Overlapping can create uneven bands and unnecessary damage.
If your hair is dyed black and you’re trying to go lighter brown
You may need to remove or lighten some of the black dye first, then apply your brown color afterward (sometimes in a separate session). Don’t force a dramatic jump in one sitting if your hair starts feeling compromised.
Step 5: Process for the recommended time
Set a timer and follow the exact timing on the box or instructions. Leaving color on longer won’t always make it prettierit can make it darker, duller, or harsher on your hair. Timing matters.
Step 6: Rinse, condition, and assess in good lighting
Rinse until the water runs mostly clear. Use the included conditioner or a color-safe conditioner. Then check the result in natural light (not just bathroom lighting, which can be weirdly flattering or weirdly rude).
What If Your Hair Turns Brassy or Too Warm?
This is common when lifting black hair toward brown. Dark hair often reveals warm underlying pigments (red/orange/gold) as it lightens. That doesn’t mean you failed. It means your hair is doing hair chemistry.
How to fix warmth/brassiness
- Use a blue shampoo for orange tones (common in brunettes)
- Use an ash brown gloss or toner to cool down warmth
- Choose a cooler brown shade next time if you consistently pull warm
- Avoid over-washing, which can strip tone and expose warmth faster
If the brassiness is intense after a major lift, wait and condition before doing another chemical process. Healthy hair first, corrections second.
Common Mistakes When Dyeing Black Hair Brown
1) Expecting light brown in one session from dyed black hair
This is the big one. A lot of “box dye disasters” start with unrealistic expectations. Going slowly usually gives better color and healthier hair.
2) Skipping the strand test
The strand test is your preview trailer. Skip it, and you’re buying a ticket to a movie you may not like.
3) Choosing a shade based only on the model on the box
The result depends on your starting color, hair porosity, previous color history, and undertones. The box image is inspiration, not a legally binding promise.
4) Overlapping color on already processed hair
This can cause banding, dryness, and uneven tone. Be especially careful during touch-ups.
5) Using bleach casually
Bleach is effective, but it’s also the fastest way to damage hair if used incorrectly. If your goal is a subtle brown shift, you may not need bleach at all. If your goal is much lighter brown from very dark hair, consider a professional.
How to Keep Brown Hair Color Looking Good
You did the hard part. Now let’s keep your new brown hair from fading into a mystery color.
Aftercare tips for dyed brown hair
- Use color-safe shampoo and conditioner
- Shampoo less often (2–3 times per week if that works for your hair/scalp)
- Rinse with lukewarm or cool water
- Use heat protectant before blow-drying or hot tools
- Add a hydrating mask weekly to support color-treated hair
- Use a gloss or tone-refreshing product if your brown fades warm
- Protect hair from prolonged sun exposure when possible (hat or UV-protective hair products)
When to See a Professional Colorist Instead
DIY is greatuntil it isn’t. Book a salon visit if:
- Your hair is previously dyed black and you want a much lighter brown
- Your hair is damaged, breaking, or chemically processed
- You have uneven bands from past color jobs
- You want balayage, highlights, or dimensional brunette in one session
- You used henna or metallic dyes and aren’t sure how your hair will react
A pro can lift and tone more preciselyand more safelythan a rushed bathroom session at 11:47 p.m.
Final Thoughts
Dyeing black hair brown at home is totally doable when you treat it like a process, not a magic trick. Start with a realistic shade, understand your hair history, patch test, strand test, and work in sections. If your hair needs a gradual transition, let it be gradual. Brown hair looks gorgeous when it has shine, depth, and healthy textureand none of those things benefit from impatience.
In short: aim for progress, not drama. Unless drama is the look you’re going for. In that case, at least make it glossy.
Experiences Related to “How to Dye Black Hair Brown” (Extended Section)
To make this guide more practical, here are some common real-life experiences people report when trying to dye black hair brown at home. These are composite examples based on common outcomes and mistakes, and they can help you predict what your own process may look like.
Experience #1: “I wanted a subtle change, and dark chocolate brown was perfect”
Someone with natural black hair chose a dark chocolate brown permanent dye and followed the instructions carefully. They didn’t bleach, and the change looked subtle indoors but much more visible in sunlight. This is a very common (and usually happy) result. The hair still looked dark overall, but with warm brown dimension and shine. The biggest win? Minimal damage and easy upkeep.
Experience #2: “I dyed over black box dye and nothing happened”
This is probably the most common frustration. A person with previously dyed black hair applied a medium brown box dye expecting a noticeable change. After rinsing, the hair still looked black, with maybe a slight brown tint in bright light. This happens because color does not reliably lift old dark dye. The lesson: if your hair is already dyed black, you often need color removal or lightening before brown dye can show properly.
Experience #3: “It turned warm/orange, but it wasn’t ruined”
Another common scenario: someone lightened dark hair and then applied brown dye, but the result looked warmer than expectedmore coppery brown than cool brunette. This can feel alarming at first, but it’s often fixable. Using a blue shampoo, an ash-brown gloss, or a cooler toner can calm the warmth. The key lesson is that warm undertones are normal when lifting dark hair, not proof that the whole process failed.
Experience #4: “Doing a strand test saved me from a disaster”
One person tested a strand underneath first and discovered the chosen shade processed much darker than expected. They switched to a lighter or more neutral brown before doing the full head. This tiny extra step saved time, money, and a week of wearing hats. Strand tests are boring right up until they save your hair.
Experience #5: “The second session worked better than the first”
People often expect a one-day transformation, but many of the best outcomes happen over two sessions. In the first session, the goal is gentle lift and condition recovery. In the second, the color is refined and toned. The result is usually more even, shinier, and healthier-looking than trying to push everything into one long process. Patience may not be glamorous, but it photographs extremely well.
Experience #6: “Aftercare made the color look expensive”
A lot of DIY color results look better after the person improves their routine: less frequent washing, color-safe products, weekly masks, and heat protection. Brown shades especially can look rich and salon-like when the cuticle is smoother and the hair is hydrated. In other words, your post-color routine can make a “pretty good” DIY dye job look surprisingly professional.
The biggest shared experience across all these examples? The people who got the best results treated hair dye like a plan, not a dare.