Table of Contents >> Show >> Hide
- Before You Edit: A 3-Minute Prep Checklist
- How to Edit Your LinkedIn Profile on Desktop
- Step 1: Open your profile editing view
- Step 2: Edit the Introduction section (photo, headline, location, and basics)
- Step 3: Update your About section (your “human summary”)
- Step 4: Edit Experience (and make it scanner-friendly)
- Step 5: Add or edit Education (and optional skills/media)
- Step 6: Clean up Skills (and reorder your top skills)
- Step 7: Use the Featured section to show proof (not just vibes)
- Step 8: Edit Contact info and customize your public profile URL
- How to Edit Your LinkedIn Profile on Mobile (LinkedIn App)
- What About Editing on a Mobile Browser?
- Edits That Actually Improve Your Profile (Not Just “Update for Updating’s Sake”)
- Common Editing Problems (and Quick Fixes)
- A Practical Editing Routine: 15 Minutes vs. 60 Minutes
- Real-World Experiences: What Editing Your LinkedIn Profile Feels Like (and What Usually Happens)
- 1) The “Recruiter messaged mepanic editing in the parking lot” moment
- 2) The “I changed roles, but my profile still tells the old story” experience
- 3) The “I’m unemployeddo I remove my last job?” debate
- 4) The “I added new skills… and nothing changed” experience
- 5) The “I have great work, but my profile looks empty” experience
- 6) The “I updated my profile and my network got spammed” experience
- Conclusion
- SEO Tags
LinkedIn profiles are like haircuts: you don’t notice yours until you see a photo from two years ago and suddenly you’re
asking, “Why does my headline still say ‘Aspiring Something-or-Other’?” The good news: editing your LinkedIn profile is
quick once you know where LinkedIn hides the tiny pencil icons (spoiler: they’re everywhere, like professional confetti).
This guide walks you through exact steps to update your LinkedIn profile on desktop and on the mobile app,
plus smart, recruiter-friendly tweaks (keywords, formatting, and section order) so your updates don’t just look nicerthey
work harder.
Before You Edit: A 3-Minute Prep Checklist
Editing is easy. Editing well is easier when you decide what you want your profile to do. Before you start clicking
pencils like you’re playing whack-a-mole, do this:
- Pick one goal: job search, client leads, networking, speaking gigs, or “please stop calling me a ‘recent graduate’.”
-
Choose 5–10 target keywords: job titles, tools, industries, and specialties you want to be found for (example:
“product marketing,” “Salesforce,” “clinical operations,” “paid search,” “ICU nurse”). -
Decide what to announce: Some edits let you notify your network. Great for promotions and certifications;
maybe not for fixing a typo in your internship title. - Gather proof: links, media, portfolio pieces, metrics, and dates. Your future self will thank you.
Once you have your goal and keywords, you’re ready to edit with purposenot panic.
How to Edit Your LinkedIn Profile on Desktop
On desktop, LinkedIn gives you the most control. You’ll edit section-by-section using the pencil icon beside each area.
Think of your profile like a house: the intro is the front door, the About is the living room, Experience is the kitchen,
and Skills is that closet everyone peeks into.
Step 1: Open your profile editing view
- Log in on a desktop browser.
- Click Me (your profile photo/icon near the top).
- Select View Profile.
- Scroll to the section you want to edit and click the pencil (Edit) icon.
Step 2: Edit the Introduction section (photo, headline, location, and basics)
Your Introduction section is prime real estate: it’s the part people see before they decide whether to scroll. On desktop,
click the pencil icon in the top card to edit things like your name, pronouns (optional), headline, current role,
location, and industry.
Headline tip: If your headline is just your job title, you’re leaving attention (and search visibility) on the table.
Try a simple value-forward format:
- Role + niche + outcome: “Data Analyst | Customer Retention | Turning churn into charts (the helpful kind)”
- Function + tools + industry: “UX Designer | Figma + Accessibility | Fintech & Consumer Apps”
- Helping statement: “I help SMBs grow with email automation + lifecycle marketing”
Keep it readable. Sprinkle keywords naturally. Avoid turning your headline into alphabet soup.
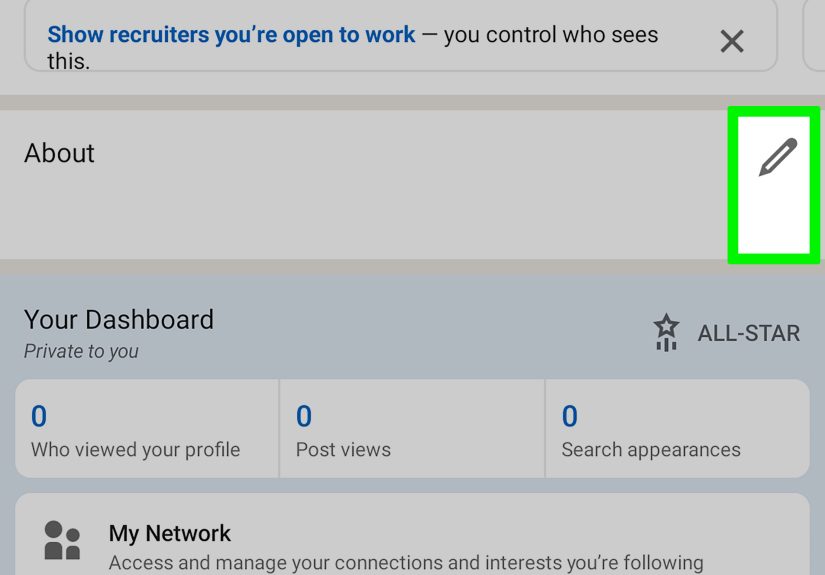
Step 3: Update your About section (your “human summary”)
Your About section is where you connect the dots: what you do, who you help, what you’re known for, and what you want next.
On desktop, scroll to About, click the pencil, and write in a voice that sounds like a competent humannot a corporate toaster.
A strong About often includes:
- 1–2 sentence opener that makes someone want to keep reading
- Your specialty and the problems you solve
- Proof (metrics, results, recognizable projects)
- Keywords that match roles you want
- A clear next step (connect, message, portfolio link, email)
Example (short):
“I’m a project coordinator who keeps cross-functional teams moving and deadlines from bursting into flames. Over the past year,
I’ve supported 12 product launches, tightened workflows, and helped cut turnaround time by 18%. I’m especially strong in Jira,
stakeholder updates, and process cleanup. If you’re building calmer projects and better systems, let’s connect.”
Step 4: Edit Experience (and make it scanner-friendly)
Scroll to Experience and use the add (+) or pencil icons to add, edit, or remove roles. Each role is a chance
to show impactnot just duties.
Upgrade your bullets using a simple pattern: action + scope + result.
- “Led weekly reporting for 6 stakeholders, improving on-time updates from 70% to 95%.”
- “Built a content calendar and cut production bottlenecks by 2 days per campaign.”
- “Handled 30+ customer tickets/day; improved first-response time by 22%.”
If you hold more than one current role, LinkedIn may let you adjust the display order of current positions. Use that to keep
your most relevant current work visible first.
Step 5: Add or edit Education (and optional skills/media)
In Education, you can add entries, edit details, and often attach supporting skills or media. This is useful if you’re a student,
a career changer, or you’ve completed a program that matters for your target roles (bootcamps, certifications, specialized training).
Pro move: include relevant coursework only when it supports your goal (example: “Data Structures,” “Organic Chemistry,”
“Copywriting Lab”). Nobody needs your “Intro to Walking to Class” credit.
Step 6: Clean up Skills (and reorder your top skills)
Skills are a major keyword engine. Add skills you actually use, then make sure your top skills match what you want to be hired for.
On desktop, you can reorder skills so the most important ones show up first.
Quick strategy: pick 3–5 “identity skills” (the ones you want associated with your name) and move them to the top.
Then add supporting skills that back up your experience.
Step 7: Use the Featured section to show proof (not just vibes)
Featured is where you can highlight portfolio items, posts, articles, media, or links. If your work can be shown, Featured is
your highlight reel. Great candidates don’t just say “I’m good”they bring receipts.
- Designers: case studies, prototypes, before/after
- Marketers: campaign results, landing pages, writing samples
- Engineers: demos, GitHub links, talks
- Students: capstone projects, presentations, publications
Step 8: Edit Contact info and customize your public profile URL
Click the contact info area in your introduction section to update details like email, websites, or other ways to reach you
(keep it professionalLinkedIn is not the place for your “funny” email from middle school).
Also consider customizing your public profile URL (example: linkedin.com/in/yourname) so it looks clean on resumes and email signatures.
Choose something simple and consistent, usually a name variant.
How to Edit Your LinkedIn Profile on Mobile (LinkedIn App)
The LinkedIn mobile app uses the same basic logic: go to your profile, tap the pencil icon next to a section, update fields, and save.
The difference is navigationeverything is stacked, and your thumb is in charge now.
Step 1: Open your profile
- Open the LinkedIn app.
- Tap your profile photo (often in the top corner).
- Tap your photo again or tap View Profile to open your full profile.
Step 2: Edit a specific section
- Scroll to the section you want to change (Intro, About, Experience, Education, Skills, etc.).
- Tap the pencil (Edit) icon beside the section.
- Edit the details you need.
- Tap Save.
On mobile, you’ll often see an additional edit option next to individual entries (like a specific job under Experience). Tap the pencil next to the exact item you want.
Mobile editing tips that save frustration
- Edit big text elsewhere first: Draft your About section in Notes, then paste it in. Less risk of accidental “oops, I deleted everything.”
- Watch formatting: Some line breaks render differently on mobile vs desktop. Keep paragraphs short and scannable.
- Be careful with toggles: Some updates may offer a “notify network” option. Use it intentionally.
- Featured is powerful: If you’re applying actively, add one or two strong samplesnot fifteen.
What About Editing on a Mobile Browser?
If you’re using LinkedIn in a mobile browser (not the app), editing can be more limited. In many cases, you can update core sections
like photo, name, headline, location, About, experience, education, skills, accomplishments, and contact infobut not every feature is available
the same way as desktop.
If you can’t find a setting on mobile web, switch to the app or desktop for that edit. LinkedIn’s rule of thumb seems to be:
“If it’s complicated, we’ll make you use a bigger screen.”
Edits That Actually Improve Your Profile (Not Just “Update for Updating’s Sake”)
LinkedIn editing isn’t only about correctness. It’s about clarity and searchability. Here are the changes that usually make the biggest difference:
1) Align your headline + About + Experience around the same story
If your headline screams “Data Analyst,” but your About reads like “aspiring entrepreneur,” and your Experience is mostly retail,
the reader gets mixed signals. Build a coherent narrative:
- Headline: what you do (and where you’re headed)
- About: how you do it + proof + what you want
- Experience: evidence with outcomes
2) Add keywords where LinkedIn (and humans) actually look
Put target keywords in natural places: headline, About, job titles (when accurate), role descriptions, and skills.
Don’t dump a “keyword list” into About like you’re stuffing a suitcase five minutes before checkout.
3) Reorder Skills and Featured to match your goals
Your top skills and Featured items should match the roles you want next. If you’re pivoting to project management,
move PM-relevant skills up (Agile, stakeholder management, Jira) and feature a project plan, case study, or portfolio piece.
4) Use measurable results in Experience
Numbers aren’t mandatory, but they help. Even simple scope signals add credibility:
“managed 12 accounts,” “supported 4-person team,” “reduced time by 15%,” “trained 20 new hires.”
Common Editing Problems (and Quick Fixes)
Problem: “My changes aren’t showing up.”
- Refresh the page or close/reopen the app.
- Check if you edited the correct language version of your profile (LinkedIn can have multiple language profiles).
- Try another device (desktop vs mobile app) if a feature seems missing.
Problem: “I can’t edit that section on mobile.”
Some profile settings and edits are easier (or only possible) on desktop. Switch to desktop for deeper changes like public profile settings.
Problem: “My custom LinkedIn URL keeps changing or I can’t change it again.”
Choose your custom URL carefully and don’t treat it like a mood ring. If you change it repeatedly, people may have trouble finding you,
and LinkedIn limits how often you can update it.
A Practical Editing Routine: 15 Minutes vs. 60 Minutes
If you have 15 minutes
- Update your headline with a clear role + specialty + keyword.
- Tighten the first 2–3 lines of your About section (make them compelling).
- Reorder your top skills to match your target role.
- Add one Featured item that proves your best work.
If you have 60 minutes
- Rewrite About with proof, keywords, and a clear call-to-action.
- Refresh the last 2–3 roles in Experience with impact bullets.
- Check Education, certifications, projects, and add missing sections.
- Clean up Skills: remove fluff, add role-relevant skills, reorder top items.
- Update contact info and customize your URL for a clean share link.
Real-World Experiences: What Editing Your LinkedIn Profile Feels Like (and What Usually Happens)
Most people don’t edit their LinkedIn profile because they love it. They edit it because something happensan interview pops up,
a recruiter messages, a project finishes, a layoff lands, or they suddenly notice their profile photo looks like it was taken on
a flip phone during a solar eclipse. Here are common “real life” LinkedIn editing experiences and how to handle them without spiraling.
1) The “Recruiter messaged mepanic editing in the parking lot” moment
This is classic. You get a message, your brain goes into game-show mode, and you start speed-editing your headline while walking into a store.
The best move is to focus on the top of your profile first: headline, About opener, and your most recent role.
Recruiters typically skim quickly. If those areas clearly match the role, you’ve already improved your oddsno marathon rewrite needed.
2) The “I changed roles, but my profile still tells the old story” experience
Promotions, pivots, and new jobs often create a mismatch: your title updates, but your About and Skills still point to your previous lane.
What works best is a “story alignment pass.” Update the headline to match your new direction, then adjust the About section to explain your new focus.
Finally, reorder your Skills so the top skills reinforce that shift. It’s less about rewriting everything and more about making the profile coherent.
3) The “I’m unemployeddo I remove my last job?” debate
Many job seekers worry that leaving a previous role visible makes them look “behind,” but removing it erases proof. A common, effective approach is to
keep your experience and edit your headline to highlight your skills and target role (instead of emphasizing the gap).
In About, you can briefly share what you’re aiming for and what you’re actively doing (projects, learning, volunteering), without oversharing.
The goal is to look capable and current, not like you’re living inside a calendar.
4) The “I added new skills… and nothing changed” experience
Adding skills helps, but skills work best when they show up in multiple places. People often experience better results when they:
(1) add skills, (2) reorder the top skills to match their target role, and (3) reinforce those skills inside Experience bullets or project descriptions.
That way, your profile reads like a consistent proof trail, not a wish list.
5) The “I have great work, but my profile looks empty” experience
This is where Featured becomes a game-changer. Adding one strong samplea portfolio link, a case study, a presentation, a published articleoften
makes the profile feel instantly more “real.” Even if your job titles are straightforward, Featured can show depth: how you think, what you build,
and what you’ve accomplished. It’s the difference between “trust me” and “here’s the evidence.”
6) The “I updated my profile and my network got spammed” experience
Sometimes people update multiple sections and accidentally broadcast every tiny change. The fix is simple: be intentional about when you share updates.
Announce big wins (new role, certification, major project). Quietly fix typos, formatting, and minor tweaks. Editing your profile should improve your visibility,
not trigger a “why is LinkedIn yelling at me again?” group chat.
The common thread in all these experiences: the best LinkedIn profile edits are goal-driven, keyword-aware, and
proof-backed. You don’t need a “perfect” profile. You need a clear one that matches where you’re going next.