Table of Contents >> Show >> Hide
- Why Nail Polish Stains Are So Stubborn
- Before You Start: Your 2-Minute “Don’t Make It Worse” Checklist
- The Tools You’ll Want Nearby
- How to Get Nail Polish out of Clothes in 12 Steps
- Step 1: Act fast (but don’t panic-rub)
- Step 2: Lift off excess polish (gently)
- Step 3: Put a barrier under the stain
- Step 4: Choose the right solvent for your fabric
- Step 5: Spot test like a responsible adult
- Step 6: Apply solvent from the back (when possible)
- Step 7: Blot, rotate, repeat
- Step 8: Rinse with cold water to flush residue
- Step 9: Pretreat with dish soap or laundry detergent
- Step 10: Wash according to the care label
- Step 11: Check before drying (this is non-negotiable)
- Step 12: Air dry, then reassess (and celebrate quietly)
- Fabric-Specific Tips (Because Clothes Are Not All the Same Species)
- Common Mistakes That Make Nail Polish Stains Worse
- Quick FAQ
- Wrap-Up: The Most Reliable Strategy
- Real-Life Experiences and Lessons Learned (Laundry Diaries)
Nail polish has one job: stick. So when it lands on your shirt, jeans, or that “dry clean only” blouse you wore exactly once,
it does what it was born to dobond like it pays rent. The good news? Most nail polish stains can come out of clothes if you
move quickly, use the right solvent for the fabric, and follow a smart, no-drama process.
This guide walks you through 12 practical steps to remove fresh or dried nail polish from clothingplus fabric-specific
cautions (because some materials will literally melt if you choose the wrong remover). You’ll also get common mistakes to avoid,
quick examples, and a “real-life laundry diary” section at the end so you can learn from other people’s oops momentswithout
sacrificing your own wardrobe to science.
Why Nail Polish Stains Are So Stubborn
Nail polish is basically a fast-drying film made with strong binders and pigments. Once it sets, it forms a tough layer that clings
to fibersespecially on textured fabrics like denim and knits where it can lodge between threads. That’s why the best strategy is
to remove what’s sitting on top first, then dissolve what’s embedded, then wash away leftover residue.
Before You Start: Your 2-Minute “Don’t Make It Worse” Checklist
- Check the care label. If it says “Dry Clean Only,” skip to the section on delicates and consider a professional cleaner.
- Identify the fabric. If the garment contains acetate, triacetate, or modacrylic, avoid acetone (more on this below).
- Work in a ventilated area. Many stain-fighters (acetone, alcohol) are flammable and strong-smelling.
- Do a spot test. Always test any solvent on an inside seam or hem to check for color loss or fabric damage.
- Don’t use heat yet. No hot water, no dryer, no ironing. Heat can set residue or damage fabric after solvents.
The Tools You’ll Want Nearby
- Paper towels or clean white cloths (white = no dye transfer)
- A dull edge (spoon, old credit card, or butter knife)
- Cotton swabs or cotton balls
- Cold running water
- Dish soap (degreasing type is great)
- Laundry detergent
- One solvent option: acetone-based remover, non-acetone remover, or rubbing alcohol
- Optional: stain remover spray/gel, soft toothbrush
How to Get Nail Polish out of Clothes in 12 Steps
Follow these steps in order. If the polish is still wet, you’ll move faster through Steps 1–6. If it’s dried, Steps 2–7 matter most.
-
Step 1: Act fast (but don’t panic-rub)
If the polish is wet, your first instinct might be to rub it like you’re trying to erase a mistake from existence. Don’t.
Rubbing pushes pigment deeper into fibers and spreads the stain. Instead, blot around the spill gently to pick up excess
without smearing. -
Step 2: Lift off excess polish (gently)
Use a dull edge (spoon or credit card) to lift and scrape off any polish sitting on top of the fabric. Work from the outside
toward the center. If the polish is wet, lift carefully; if it’s dry, you can chip off flakes. The goal is to remove as much
“bulk” as possible before you introduce solvent.Example: On denim, dried polish often sits like a tiny painted crust. Chip it off before treatingdon’t try to dissolve a whole blob at once.
-
Step 3: Put a barrier under the stain
Slide a thick paper towel or an old white towel under the stained area (inside the garment). This barrier absorbs dissolved polish
and prevents it from transferring to the back layer of fabric. If you skip this, you risk creating a “two-sided” stain. -
Step 4: Choose the right solvent for your fabric
Here’s a simple rule: use the mildest thing that works, and upgrade only if needed.
- Sturdy fabrics (cotton, denim, many poly blends): acetone-based remover often works fastest.
- Delicates or unknown fabric: start with non-acetone remover or rubbing alcohol.
- Avoid acetone on acetate/triacetate/modacrylic: it can damage or dissolve the fibers.
If you’re not sure what your fabric is, treat it like it’s expensive (because it is, emotionally).
-
Step 5: Spot test like a responsible adult
Dab a small amount of your chosen solvent on an inside seam or hem using a cotton swab. Wait a minute. Blot with a white towel.
If color transfers, the fabric distorts, or the area gets weirdly tacky, stop and switch strategies (or go pro). -
Step 6: Apply solvent from the back (when possible)
If the stain is accessible, apply solvent to the back of the stained area so it pushes polish outward into your paper towel barrier.
This reduces spreading on the visible side.Use a cotton swab/cotton ball lightly moistened (not dripping). You’re dissolving polish, not baptizing your shirt.
-
Step 7: Blot, rotate, repeat
Press (blot) with a clean section of cloth or paper towel. You should see color transfer. Keep rotating to a clean area and reapplying
small amounts of solvent. Work from the outside edge toward the center so you don’t create a giant tie-dye halo.Tip: Glitter polish may take longer because it contains particles that hang on like they’ve signed a lease.
-
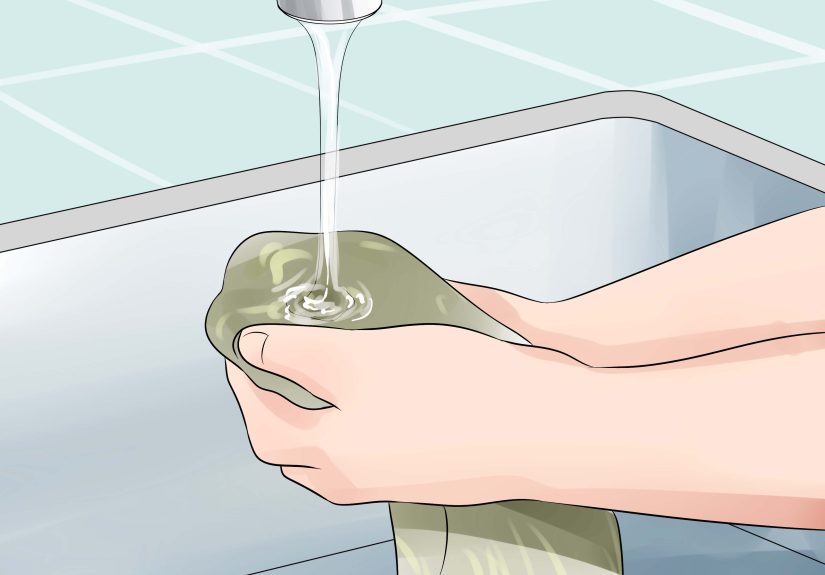
Step 8: Rinse with cold water to flush residue
Once most of the color is gone, rinse the treated area under cold running water. This helps remove loosened pigment and remaining solvent.
Keep the stained area facing down so the rinse water carries residue away instead of back through the fabric. -
Step 9: Pretreat with dish soap or laundry detergent
Solvents dissolve polish, but they can leave behind oily or sticky residue. Work a small amount of dish soap or liquid laundry detergent into the area.
Use your fingers or a soft toothbrush (gently) and let it sit for 5–10 minutes.Example: After acetone treatment on a cotton tee, a few minutes of dish soap pretreat often removes the last faint “shadow” of stain.
-
Step 10: Wash according to the care label
Wash the garment using the warmest water that’s safe per the label (often cold or warm). Use a good detergent. If you’re treating a white cotton
item and the stain is stubborn, an oxygen-based bleach may helpfollow product directions and fabric guidance. -
Step 11: Check before drying (this is non-negotiable)
When the wash cycle ends, inspect the stain in good light. If any polish remains, do not machine dry.
Heat can set what’s left and make removal dramatically harder. Repeat Steps 6–10 as needed. -
Step 12: Air dry, then reassess (and celebrate quietly)
Air dry the garment and check again. If you still see a faint tint, you can do another short round of solvent + detergent pretreat.
If the fabric is delicate or the stain won’t budge after a couple of cycles, it may be time for professional cleaningor a strategic patch,
embroidery, or “this was always my painting shirt” rebrand.
Fabric-Specific Tips (Because Clothes Are Not All the Same Species)
Cotton and Denim
These usually tolerate acetone-based remover well (after spot testing). Scrape first, then solvent-blot, then detergent pretreat.
Denim may hold pigment longer, so expect extra rounds.
Polyester and Nylon Blends
Often okay with non-acetone remover or small amounts of acetone, but they can be sensitive to heat. Avoid aggressive scrubbing.
Blot patiently and rinse thoroughly.
Wool, Silk, Rayon, and “Dry Clean Only” Items
Start with the gentlest approach: blot with water first, then try a tiny amount of non-acetone remover or rubbing alcohol after spot testing.
If the label says dry clean only, a professional cleaner is often the safest pathespecially for structured garments or anything lined.
Acetate, Triacetate, Modacrylic
Treat these as “solvent-sensitive.” Avoid acetone, which can damage these fibers. Consider professional cleaning, and if you must try at home,
use a non-acetone method with extreme caution and testing.
Common Mistakes That Make Nail Polish Stains Worse
- Rubbing instead of blotting: spreads pigment and grinds it into fibers.
- Skipping the towel underneath: transfers stain to the back side of the garment.
- Soaking the area in remover: can spread stain and damage dyes/fibers.
- Using hot water too early: can set residue or distort fabric after solvent use.
- Throwing it in the dryer “to see”: the dryer is a stain’s best friend.
Quick FAQ
Will nail polish remover always work?
It often helps, but success depends on the fabric, how long the stain has set, and whether the dye/pigment has bonded deeply.
Some stains lighten significantly but may leave a faint shadowespecially bright reds, neons, and glitter formulas.
What if I don’t have nail polish remover?
Rubbing alcohol can work for lighter stains or traces of pigment. Dish soap + patience can help, tooespecially after you’ve scraped off the bulk.
If it’s a large spill, remover (acetone or non-acetone) is usually the most effective first step.
How many rounds should I try before giving up?
Two to three careful rounds is a reasonable limit for most garments. If you’re seeing improvement each time, keep going.
If nothing changes after repeated blotting and washing, the stain may be permanentor the fabric may be too delicate for stronger treatment.
Wrap-Up: The Most Reliable Strategy
If you remember nothing else, remember this: scrape, protect, blot with the right solvent, rinse cold, pretreat, wash, and don’t dry until it’s gone.
That sequence removes nail polish stains more reliably than any “miracle hack,” and it protects your fabric while you do it.
Real-Life Experiences and Lessons Learned (Laundry Diaries)
I’ve read enough stain-removal stories to know that nail polish accidents rarely happen in a calm, controlled environment. They happen when you’re
balancing a bottle on your knee, doing a “quick touch-up,” and feeling wildly confidentright up until gravity files a complaint. Here are a few
experience-based lessons people keep learning the hard way (so you don’t have to).
1) The “I’ll just wipe it” trap. One of the most common stories goes like this: someone spills polish on a cotton shirt, grabs the nearest
towel, and wipes. The stain spreads into a larger, hazier patch that looks like the shirt lost a fight with a highlighter. The fix, almost every time,
is switching from wiping to blotting. When people slow down, place a barrier underneath, and dab with a controlled amount of remover, they usually
recover most (or all) of the fabric. The emotional arc here is predictable: panic → wipe → regret → methodical blotting → relief.
2) Denim is brave… but also stubborn. Jeans can handle a lot, which makes them a popular “I’ll risk it” garment. But denim’s thick weave
can hold onto pigment. Several rounds of blotting may be needed, especially for dark polish colors. A common success pattern is: chip off dried polish,
do a careful acetone blot, rinse cold, then follow with dish soap pretreat before laundering. People who succeed tend to treat it like a process,
not a single magical moment.
3) Delicates teach patience (and humility). A frequent cautionary tale: someone uses acetone on a delicate blend without testing,
and the fabric changes texture or loses dye. The “experience lesson” is to start gentler on silk-like or dry-clean-only pieces: non-acetone remover
or rubbing alcohol with a cotton swab, very light dabbing, and lots of restraint. Many people ultimately choose professional cleaning for delicates,
especially if the garment is structured, lined, or sentimental. In other words: sometimes the smartest stain removal tool is knowing when to stop.
4) The dryer is where hope goes to evaporate. The biggest regret story is tossing the garment into the dryer “just to see” and then
discovering the faint stain became a permanent stain. When people air dry and check in bright light first, they keep options open. The win here is
boring but powerful: inspect before heat, every time.
5) Small wins count. Not every stain disappears completely in one session. A lot of real-life successes look like this: the stain goes
from “obvious” to “faint shadow,” then improves after a second gentle round. People who get the best outcomes tend to take breaks between rounds,
rinse well, and avoid over-scrubbing (which can rough up the fabric and make the area look worn even if the color is gone).
6) Sometimes the best “removal” is a creative pivot. When all else fails, people get surprisingly clever: a small embroidered patch,
a fabric marker design, a pocket added over the spot, or turning a stained tee into a cleaning rag with dignity. It’s not the ending anyone wants,
but it is the ending that keeps a garment from going straight to the trash. And honestly, giving a “ruined” item a second job is a pretty satisfying
plot twist.
The big takeaway from all these experiences is reassuring: nail polish stains feel dramatic, but the solution is usually calm and repeatable.
If you keep the stain from spreading, use the right solvent for the fabric, and refuse to let the dryer have the final word, you’ve got a strong
chance of saving your clothesand your mood.