Table of Contents >> Show >> Hide
- Why This DIY Sand Timer Is Worth Making
- What You Need
- Step-by-Step: How to Make a Sand Timer from Recycled Plastic Bottles
- How to Make Your Sand Timer More Accurate
- Common Problems and Easy Fixes
- Best Ways to Use a DIY Bottle Sand Timer
- Why Recycled Plastic Bottles Work So Well for This Project
- Final Thoughts
- Experiences and Practical Lessons from Making a Sand Timer from Recycled Plastic Bottles
- SEO Tags
If your recycling bin has been giving you side-eye lately, this project is your redemption arc. Making a sand timer from recycled plastic bottles is one of those rare DIY ideas that checks every box: it is cheap, useful, eco-friendly, surprisingly educational, and just fun enough to make you feel like a crafty genius without requiring a workshop, a power tool collection, or a mysterious “craft drawer” that looks like a tornado hit a stationery store.
A homemade sand timer, also called a sandglass or hourglass, turns simple materials into a practical object you can actually use. It can help kids visualize time, make homework sprints less painful, add a hands-on STEM twist to a craft afternoon, or give your desk a quirky little decoration that says, “Yes, I recycle, but I also have style.” Even better, plastic bottles are light, easy to decorate, and perfect for beginner-friendly upcycling projects.
In this guide, you will learn how to make a sand timer from recycled plastic bottles step by step, how to adjust the flow so it actually works, what mistakes to avoid, and how to make the final project look less “science fair emergency” and more “intentionally charming.”
Why This DIY Sand Timer Is Worth Making
A recycled bottle hourglass is more than a cute craft. It is also a practical little lesson in reuse, design, and physics. The basic idea is simple: two bottles are joined at the neck, dry sand moves from the top bottle to the bottom one, and the opening between them controls the timing.
That means this project naturally teaches cause and effect. Change the hole size, and the sand moves differently. Change the sand texture, and the timer speeds up or slows down. Add more sand, and the duration changes again. Suddenly, a humble bottle craft becomes a mini lab experiment disguised as décor.
It is also a smart upcycling choice. Reusing a bottle before recycling it gives the material a second life, which is a practical win for households trying to create less waste. And unlike complicated Pinterest projects that require seventeen “optional” supplies that somehow cost $48, this one can be made with common materials already sitting around the house.
What You Need
- 2 clean, dry plastic bottles of the same size, ideally small water or soda bottles
- 2 bottle caps
- Fine, dry sand
- Tape, strong glue, or hot glue
- Scissors
- A push pin, nail, small drill, or heated skewer for making the hole in the caps
- A funnel or a rolled paper cone
- Markers, paint, stickers, ribbon, or paper for decoration
For the easiest build, choose two matching bottles with the same neck size. Smaller bottles are easier to handle and usually make more compact timers. Clear bottles are best because you want to see the sand move. That is the whole show.
If kids are helping, an adult should handle the hole-making step and any hot glue. Crafting is fun. Emergency room paperwork is not.
Step-by-Step: How to Make a Sand Timer from Recycled Plastic Bottles
1. Wash and Dry the Bottles
Start by rinsing the bottles thoroughly and removing any labels if you want a cleaner look. Let them dry completely inside and out. This part matters more than people think. A little leftover moisture can make sand clump, slow the flow, or stop the timer completely. In other words, your sand timer becomes a sand nap.
2. Make the Connector
Take the two bottle caps and place them flat sides together. Glue them firmly together. Once they are secure, make a hole through the center of both caps. This hole is the “neck” of your sand timer, and it controls how fast the sand flows.
Start small. That is the golden rule. A tiny opening is easy to widen if needed. A giant opening is much harder to un-giant. A hole around the width of a thick nail is often a good starting point for fine sand, but the exact size depends on your sand texture and bottle shape.
3. Prepare the Sand
Use fine, dry sand for the smoothest flow. Craft sand, play sand that has been sifted, or very dry beach sand can work. If your sand is damp, spread it on a tray and let it air-dry fully before using it. You can also strain out pebbles or larger grains with a kitchen sieve that you are not emotionally attached to.
Want a colorful timer? Mix the sand with a little powdered chalk or use colored craft sand. You can even layer different colors for a striped effect, although once you flip it a few times, those layers may decide to become abstract art.
4. Fill One Bottle
Use a funnel to pour sand into one bottle. Do not fill it to the top. Start with about one-third to one-half full. This gives the sand room to move and lets you test the timing more easily.
5. Assemble the Timer
Screw the glued double-cap connector onto the bottle filled with sand. Then screw the second empty bottle onto the other side of the connector. You should now have two bottles joined at the neck, like a homemade hourglass built by someone who respects recycling and refuses to be boring.
If the connection feels loose, wrap strong tape around the center seam where the caps meet. This adds stability and helps prevent leaks.
6. Test the Flow
Flip the timer and watch what happens. If the sand pours smoothly, congratulations: you are already ahead of many first attempts. If the sand barely moves, the hole may be too small or the sand may be too coarse or damp. If the sand rushes through like it is trying to catch a train, the hole may be too large or there may simply be too little sand.
Use a stopwatch on your phone to measure how long the sand takes to fall. This lets you calibrate the timer for one minute, two minutes, five minutes, or whatever timing goal you want.
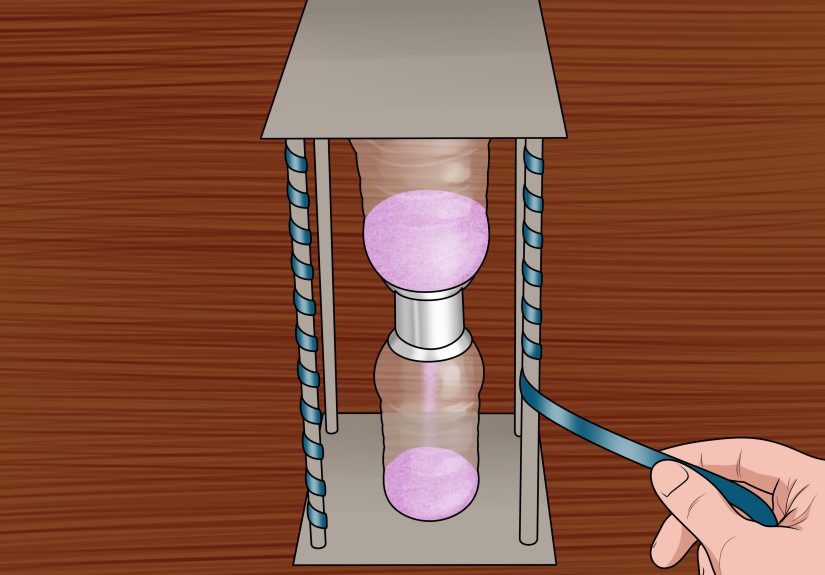
7. Seal and Decorate
Once you are happy with the timing, seal the middle connection with sturdy tape or glue. Then decorate the bottles however you like. You can paint the outside, wrap the center with ribbon, add labels like “Reading Sprint” or “Screen Break,” or keep it minimalist and let the moving sand do all the talking.
How to Make Your Sand Timer More Accurate
A homemade hourglass is not going to replace your phone clock, your smartwatch, or your microwave’s suspiciously aggressive timer. But you can make it pretty consistent with a few adjustments.
Use Fine, Even Sand
Uniform sand flows more smoothly than a mix of chunky and powdery grains. If your sand contains pebbles, shell bits, or debris, sift it before use.
Keep Everything Dry
Moisture is the sworn enemy of a good sand timer. Even slightly damp sand can clump and clog the opening. Dry bottles and dry sand are non-negotiable.
Adjust the Hole Size Gradually
If your timer is too slow, carefully enlarge the hole a little at a time. Tiny changes can make a big difference. If it is too fast, try using slightly coarser sand, adding a small paper washer between the caps, or rebuilding the connector with a smaller hole.
Test More Than Once
Flip the timer several times and record the results. If it lands close to the same time each round, you have a reliable homemade timer. That repeatability is what matters most.
Common Problems and Easy Fixes
The Sand Gets Stuck
This is usually caused by damp sand, an opening that is too narrow, or grains that are too uneven. Dry the sand again, sift it, or widen the hole slightly.
The Bottles Leak Sand at the Center
The caps may not be glued tightly enough, or the middle seam needs extra tape. Reinforce the connector before decorating.
The Timer Runs Too Fast
Use less fine sand, reduce the hole size, or add more sand to increase the timing length. You can also switch to a taller bottle shape if you want a longer run.
The Timer Runs Too Slow
Use finer sand, make the hole a little bigger, and make sure the inside of the bottle neck is not obstructed.
The Timer Looks a Little… Homemade
Yes. That is because it is homemade. But if you want a cleaner finish, remove the labels fully, use matching bottles, trim decoration neatly, and wrap the center seam with decorative tape or fabric. Suddenly it goes from “garage experiment” to “upcycled design choice.”
Best Ways to Use a DIY Bottle Sand Timer
Once you make one, you will find excuses to use it everywhere.
- Homework sessions: Set short focus blocks for reading, writing, or math practice.
- Toothbrushing time: A two-minute timer makes routines more visual and less naggy.
- Mindfulness breaks: Watching sand fall can be calming and helps make quiet time feel concrete.
- Game nights: Use it for charades, trivia rounds, or quick drawing challenges.
- Classroom activities: Teachers and parents can use sand timers to signal transition times.
- Desk décor: A handmade timer looks surprisingly good on a shelf, especially when decorated well.
Why Recycled Plastic Bottles Work So Well for This Project
Plastic bottles are ideal for a beginner hourglass because they are lightweight, transparent, easy to cut or handle, and usually easy to find. They also come with ready-made screw tops, which make connecting the two chambers much simpler than building a timer from scratch with jars or custom parts.
And from a sustainability angle, this project makes sense. Instead of tossing a bottle immediately, you are extending its life in a useful way. That does not solve the world’s waste problem, of course, but it does turn one disposable item into something educational and reusable. Small projects like this also help kids and adults think differently about everyday materials. A bottle stops being trash and starts becoming raw material. That shift is a big deal.
Final Thoughts
Learning how to make a sand timer from recycled plastic bottles is one of those low-cost, high-reward projects that actually delivers. It is simple enough for a weekend craft, smart enough for a STEM activity, and useful enough that it will not end up forgotten in a drawer next to three dead markers and a mystery rubber band.
The beauty of this DIY sand timer is that it invites experimentation. You can tweak the hole size, test different sands, decorate it to match your space, or make several timers with different durations. One project becomes many. And along the way, you get a better understanding of time, materials, flow, and reuse all from two bottles that were probably headed for the bin.
So the next time you finish a bottle of water or soda, do not just recycle it. Pause. Look at it. See the potential. Then turn it into something that literally makes time visible. That is a pretty neat trick for a piece of plastic.
Experiences and Practical Lessons from Making a Sand Timer from Recycled Plastic Bottles
One of the most interesting things about this project is how often people assume it will be effortless, then discover it is delightfully fussy in the best way. On paper, the craft sounds almost suspiciously simple: two bottles, some sand, one hole, done. In real life, the first test flip is usually the truth-telling moment. Sometimes the sand flows beautifully and everyone feels like a genius. Sometimes nothing happens, and the timer just sits there like it is on strike. That tiny moment is where the real learning begins.
Many people find that the most memorable part is not the decorating but the adjusting. They start to notice how small details change everything. Sand that looked perfectly fine turns out to be too damp. A hole that seemed large enough behaves like a traffic jam. A bottle shape that looked cute on the table turns out to create awkward airflow. Those little surprises are exactly why this project is so useful in classrooms, family craft sessions, and weekend maker projects. It teaches patience without announcing itself as a lesson.
Another common experience is that the project quickly becomes more social than expected. One person holds the funnel, another measures the time, someone else argues passionately that blue sand is faster than white sand because it “looks quicker,” which is scientifically questionable but emotionally powerful. In homes and classrooms, bottle sand timers often create natural teamwork. Even people who claim they are “not crafty” usually end up contributing ideas once the testing starts.
There is also a satisfying shift in the way people look at discarded materials after making one. A used bottle is no longer just packaging. It becomes a possible container, a building piece, or a design material. That mindset carries into other projects too. Once someone has turned a bottle into a timer, it is not a huge leap to turn another into a planter, a sensory bottle, a game prop, or a storage container. Upcycling has a funny way of making your recycling bin look less like waste and more like a supply shelf with commitment issues.
And then there is the practical experience of actually using the finished timer. People often make it as a craft and then keep it because it turns out to be genuinely handy. It gets used during reading practice, screen-time breaks, mindfulness activities, family board games, and quick clean-up challenges. That is the hidden strength of the project: it does not just sit there looking clever. It earns its spot.
In the end, the experience of making a sand timer from recycled plastic bottles is not really about achieving factory-perfect precision. It is about experimenting, improving, and seeing everyday materials in a new way. The slightly crooked tape seam, the hand-decorated bottle, the test notes scribbled on scrap paper those things are not flaws. They are proof that something useful was made by hand, with thought, curiosity, and a little trial and error. Honestly, that is a much better story than buying a timer off a shelf.