Table of Contents >> Show >> Hide
- Why a Spice Drawer Organizer Is Worth Making
- Before You Build: Decide What Kind of Organizer You Want
- What You Need to Make a Spice Drawer Organizer
- Step 1: Empty the Drawer and Audit Your Spice Collection
- Step 2: Measure Your Drawer and Your Spice Jars
- Step 3: Sketch a Layout That Matches How You Cook
- Step 4: Build the Base of the Organizer
- Step 5: Add Raised Rows or Dividers
- Step 6: Test Fit Before Finishing
- Step 7: Transfer, Label, and Load Your Spices
- Smart Tips to Make Your Spice Drawer Organizer Work Better
- Common Mistakes to Avoid
- Conclusion
- Real-Life Experiences With Making a Spice Drawer Organizer
If your spice situation currently looks like a tiny glass avalanche every time you open a kitchen drawer, welcome. You are among friends. One second you are calmly reaching for paprika, and the next you are holding cumin, cinnamon, taco seasoning, and one mysterious jar labeled only “blend???” in increasingly emotional succession.
The good news is that a spice drawer organizer is one of the most satisfying kitchen projects you can make in an afternoon. It is practical, affordable, and just dramatic enough to make you feel like the kind of person who owns matching containers and says things like, “Everything has a system.” Better yet, a well-designed spice drawer organizer saves space, keeps labels easy to read, and makes cooking faster because you are not digging through a cabinet like an archaeologist in search of oregano.
In this guide, you will learn exactly how to make a spice drawer organizer that fits your drawer, your cooking habits, and your budget. We will cover materials, measurements, design ideas, step-by-step instructions, common mistakes to avoid, and smart ways to keep your spices fresher for longer. Consider this your friendly blueprint for turning one chaotic drawer into the MVP of your kitchen.
Why a Spice Drawer Organizer Is Worth Making
A spice drawer organizer works because it turns visual clutter into instant visibility. Instead of stacking random jars in a cabinet where the garlic powder hides behind the allspice like a guilty suspect, you can lay spices flat or at a slight angle so every label is easy to spot from above.
That simple change improves your workflow in a big way. When spices are organized in a single drawer, meal prep moves faster, duplicates are easier to spot, and you stop buying your third bottle of chili powder because you thought you were out. A drawer system also gets spice bottles off the counter, frees up cabinet shelves, and keeps the kitchen looking cleaner overall.
There is another practical bonus: spices store best in a cool, dry, dark place. A drawer away from the stove, sink, dishwasher, and direct sunlight is often a better home than a shelf near heat and steam. In other words, your spice drawer organizer is not just a pretty face. It is a little freshness bodyguard.
Before You Build: Decide What Kind of Organizer You Want
Not every spice drawer organizer looks the same, and that is actually great news for your drawer. The best design depends on your drawer dimensions, the size of your spice jars, and whether you want a custom built-in look or a quick DIY solution.
Option 1: Flat Lay Organizer
This is the simplest approach. Spices lie flat in rows with the labels on top. It works best in shallow drawers and with uniform jars. It is easy to build and easy to clean, which makes it ideal for beginners.
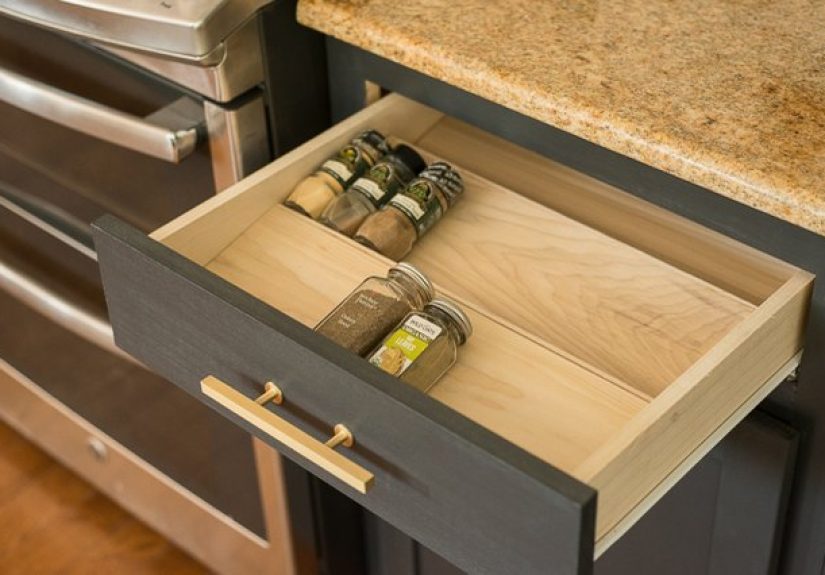
Option 2: Angled or Tiered Organizer
This style lifts each row slightly so the jars sit at an angle. It makes labels even easier to read and prevents rolling. If you want that polished, “I suddenly have my life together” look, this is usually the winner.
Option 3: Divided Compartments
If your spice collection includes odd-shaped bottles, seasoning packets, baking spices, and little tins, compartment dividers may work better than tiered rows. This design is flexible and great for mixed containers.
Option 4: Liner-Based DIY
If power tools are not your thing, no shame. Cut-to-fit foam or drawer liner systems can create grooves that hold jars in place without building a full wooden insert. It is the low-commitment, high-reward version of the project.
What You Need to Make a Spice Drawer Organizer
You can make this project as simple or as custom as you want. For a classic DIY organizer, gather the following:
- A tape measure
- Pencil and notepad
- Thin plywood, hobby board, or lightweight wood slats
- Wood glue or strong construction adhesive
- Drawer liner or non-slip mat
- Sandpaper
- A saw or utility cutter, depending on material
- Optional paint or wood finish
- Uniform spice jars with top labels
- Label maker or waterproof labels
If you want a faster version, swap the wood for foam board, acrylic risers, or a ready-to-trim drawer insert base. If you want the custom look without full cabinet-shop drama, thin wood strips glued over a flat base work beautifully.
Step 1: Empty the Drawer and Audit Your Spice Collection
Start by pulling every spice jar, tin, packet, and mystery container out of the drawer or cabinet. Yes, every single one. This is not the moment to be sentimental about the pumpkin pie spice you bought during a holiday baking phase in 2021.
Group your spices into categories such as everyday cooking, baking, heat and chili blends, international seasoning mixes, and duplicates. Throw away anything empty, stale, unlabeled, or suspiciously fossilized. As a practical rule, dried herbs and spices hold best flavor for a limited time, so if something smells weak or dusty instead of aromatic, it is probably time to let it go.
This audit does two important things. First, it tells you how much organizer space you actually need. Second, it prevents you from designing a beautiful drawer for 48 spices when you only use 22 of them on purpose.
Step 2: Measure Your Drawer and Your Spice Jars
This step matters more than people think. A spice drawer organizer that is off by even half an inch can turn into a very attractive rectangle of regret.
Measure the inside length, width, and depth of the drawer. Do not measure the outside. Cabinet drawers love a technicality. Then measure your spice jars, especially height and diameter. If the jars are too tall for the drawer, no clever organizing strategy will save you from the heartbreak of a drawer that will not close.
Write down these numbers:
- Inside drawer width
- Inside drawer depth from front to back
- Usable drawer height
- Jar diameter
- Jar height with lid
If you are buying new jars, do that before building the organizer. Building around mixed containers is possible, but building around uniform jars is much easier and gives a cleaner final result.
Step 3: Sketch a Layout That Matches How You Cook
Here is where function beats fantasy. Yes, alphabetical order is lovely. It also falls apart quickly if you cook with garlic powder, black pepper, cumin, and paprika five times a week but tuck them into separate corners because the alphabet said so.
A better approach is to create zones. Put daily-use spices near the front or center. Group baking spices together. Keep grill rubs and seasoning blends in another section. If you want maximum visual calm, use uniform jars and line the labels up on top. If you want maximum speed, group spices by how often you reach for them.
For example, a 24-inch-wide drawer might have four angled rows: everyday savory spices in the front two rows, baking spices in the third row, and special blends in the back row. That layout feels intuitive in real life, not just in a photo.
Step 4: Build the Base of the Organizer
Cut a flat base panel to fit the bottom of the drawer, leaving just a little breathing room so it can slide in easily. Sand the edges so nothing catches on the drawer interior.
If you are making a simple flat organizer, stop here and add dividers later. If you are making an angled organizer, this base becomes the platform for the raised rows.
Line the drawer or the underside of the base with non-slip material. This helps keep the organizer stable and makes cleanup easier if a jar leaks or a lid loosens. Because spices and kitchen steam are not exactly known for restraint, planning for easy cleaning is smart.
Step 5: Add Raised Rows or Dividers
For an angled organizer, glue narrow wood strips across the base to create stepped tiers. Each row should be tall enough to lift the next row slightly, but not so steep that jars slide backward like tiny spice bobsleds. Gentle angles work best.
A common setup is to use progressively taller strips from front to back. For instance, the front row stays flat, the second row gets a low riser, the third gets a slightly taller one, and so on. Then add stopper strips or shallow grooves where the jars rest. This keeps round bottles from rolling every time someone closes the drawer like they are starting a lawn mower.
If you prefer dividers, create narrow channels sized to your jars. You can do this with thin wood slats, acrylic strips, or even strong foam board. The goal is simple: each bottle gets a defined home, and nothing flops around when the drawer opens.
Step 6: Test Fit Before Finishing
Before painting, staining, or congratulating yourself too enthusiastically, place the organizer into the drawer and do a test fit. Add a few jars and gently open and close the drawer. Check for rubbing, wobbling, or jars hitting the upper frame.
This is the moment to make small adjustments. Trim a row. Shift a divider. Reduce the angle. It is much easier to tweak the design now than after everything is glued, labeled, and emotionally committed.
Step 7: Transfer, Label, and Load Your Spices
Once the organizer fits, transfer spices into matching jars if needed. This is not mandatory, but it makes a huge difference in both space efficiency and readability. Uniform containers also create that calm, intentional look that makes opening the drawer weirdly satisfying.
Label the tops clearly using a large, readable font. Top labels are essential for drawer storage because you are viewing everything from above. If you want to be extra organized, add a small date label on the bottom or side so you know when you filled or replaced each spice.
Now load the drawer based on your chosen system: alphabetical, by cuisine, by use frequency, or by category. There is no kitchen police. Pick the method that makes cooking easier for you.
Smart Tips to Make Your Spice Drawer Organizer Work Better
Keep the jars consistent
Matching jars maximize space and make the whole drawer easier to scan quickly.
Use clear labels
Tiny cursive labels may look cute for twelve seconds, but they are less charming when you accidentally use cayenne instead of cinnamon.
Store the drawer away from heat
A cool, dry drawer is better than one next to the stove, sink, or dishwasher, where heat and moisture can shorten spice quality.
Do a quick reset every few months
Check for duplicates, wipe spills, and replace anything that smells weak. This keeps the system useful instead of turning into a fancy-looking spice graveyard.
Leave a little extra room
Do not design the drawer to be packed at 100 percent capacity. Spices multiply when you are not looking. A little buffer space makes the organizer easier to maintain.
Common Mistakes to Avoid
The biggest mistake is building for the drawer before building for the jars. Always measure both. Another common error is choosing a drawer that is technically available but located in the hottest part of the kitchen. If the drawer lives beside the oven or directly under the cooktop, consider another spot.
People also tend to overcomplicate the layout. You do not need sixteen categories, color coding, and a spreadsheet unless that genuinely brings you joy. Most cooks do best with a simple system they can maintain without needing a committee meeting.
Finally, avoid labels that are too small, rows that are too steep, and materials that are hard to wipe clean. Kitchens are high-use spaces. Your organizer should be sturdy, low-maintenance, and forgiving on busy weeknights.
Conclusion
Learning how to make a spice drawer organizer is one of those home projects that delivers instant payoff. It is affordable, beginner-friendly, and makes your kitchen feel more functional the very same day. With the right measurements, a smart layout, and clear top labels, you can turn one messy drawer into an organized cooking station that actually saves time.
The best part is that this project is flexible. You can build a simple flat organizer from budget materials, create a polished tiered insert from wood, or customize compartments to fit your favorite jars. Whatever style you choose, the real goal is the same: make spices easier to see, easier to grab, and easier to keep fresh.
So yes, you absolutely can keep your cinnamon from hiding behind the smoked paprika. You can stop the spice chaos. You can become the person who opens a kitchen drawer and feels peace instead of confusion. That is not just organization. That is character development.
Real-Life Experiences With Making a Spice Drawer Organizer
The funniest thing about making a spice drawer organizer is that it often starts as a small project and ends as a full personality shift. At first, the goal is innocent: stop the jars from rattling around like maracas every time the drawer opens. Then suddenly you are standing in the kitchen with a tape measure, matching jars, a label maker, and the kind of focus usually reserved for mission control.
One of the most common experiences people have is realizing they owned far more spices than they thought. Not more useful spices, mind you. Just more spices. Half-used poultry seasoning. Two bottles of oregano. Three cinnamons for reasons nobody can explain. A homemade taco blend from an ambitious meal-prep era. The organizing process becomes less about storage and more about a gentle kitchen intervention.
Another relatable moment is the measurement phase, where confidence meets reality. You think, “This drawer is huge.” Then you actually measure it and discover your jars are just a little too tall, your dream layout needs one less row, and the drawer that seemed perfect is apparently built for napkins and broken hopes. Oddly enough, this is also the point where the project becomes fun, because solving those little design problems makes the final result feel custom instead of generic.
There is also a surprising amount of satisfaction in choosing how the spices will be arranged. Some people go alphabetical because it feels neat and logical. Others group by cooking style, keeping baking spices together and savory spices up front. A lot of cooks end up creating an “everyday all-stars” zone with garlic powder, onion powder, paprika, black pepper, cumin, and Italian seasoning right where their hand naturally reaches. That practical approach tends to win because it reflects how real kitchens work on real Tuesday nights.
Then comes the labeling, which is where the organizer starts to feel less like a storage fix and more like a reward. There is something absurdly pleasing about seeing a drawer full of clean jars with crisp top labels all facing the same direction. It does not just look better. It reduces tiny daily annoyances. You stop opening three jars to find the right one. You stop buying duplicates. You stop muttering, “Where did I put the chili flakes?” with the intensity of a detective in the final act.
What people often notice after the project is how much calmer cooking feels. A good spice drawer organizer removes friction from meal prep. Dinner moves faster. Cleanup is easier. The drawer wipes out in seconds. Even guests notice it, which is both flattering and mildly hilarious because you never expect a drawer full of cumin to become a conversation piece.
Most of all, the experience proves that useful home projects do not have to be flashy to feel transformative. A spice drawer organizer will not renovate your whole kitchen, but it will improve one of the most repeated actions in daily life: opening a drawer, finding what you need, and getting on with dinner. That is a pretty great return for one small project, a handful of materials, and a couple of hours of focused effort.