Table of Contents >> Show >> Hide
When a hurricane hits, your roof is the first line of defense… and sometimes the first thing to fly off and land three houses away.
If you live in a coastal or high-wind area, strengthening your roof sheathing (the wood panels under the shingles) is one of the
smartest, highest-ROI upgrades you can make to protect your home, your stuff, and your sanity.
The good news: you don’t have to rebuild your whole house to get a tougher roof deck. Many upgrades can be added when you replace
your roof, and some can even be done from inside the attic. In this guide, we’ll walk through what roof sheathing does, why it fails
in hurricanes, and step-by-step ways to make it stronger using real-world recommendations from engineers, building researchers, and
hurricane-hardened building standards in the United States.
What Roof Sheathing Actually Does in a Hurricane
Meet the Unsung Hero Under Your Shingles
Roof sheathing is usually made of plywood or oriented strand board (OSB) panels fastened to your rafters or trusses. In normal
weather, it quietly supports the roofing, keeps things flat and solid, and gives your house that nice, finished look.
In a hurricane, though, those panels become structural heroes. They:
- Help your roof work like a single, connected diaphragm instead of a bunch of loose boards.
- Transfer wind loads through the rafters and walls down to the foundation.
- Keep wind from peeling off shingles and underlayment like a giant, very expensive sticker.
- Slow down or stop wind-driven rain from blasting into your attic if the roof covering fails.
Why Roof Sheathing Fails in High Winds
Hurricane winds don’t just blow across your roof. They create suction, like a giant hand trying to pull the roof straight off the
house. The highest uplift forces hit at corners, edges, and along ridges, where wind speeds and turbulence are greatest. If the
sheathing isn’t well attached, panels can start to lift, nails pull out, and suddenly you’re looking at blue sky where your ceiling
used to be.
Common weak links include:
- Staples or undersized nails that don’t have enough withdrawal resistance.
- Wide nail spacing (like 12 inches on center) that leaves too much panel edge unsupported.
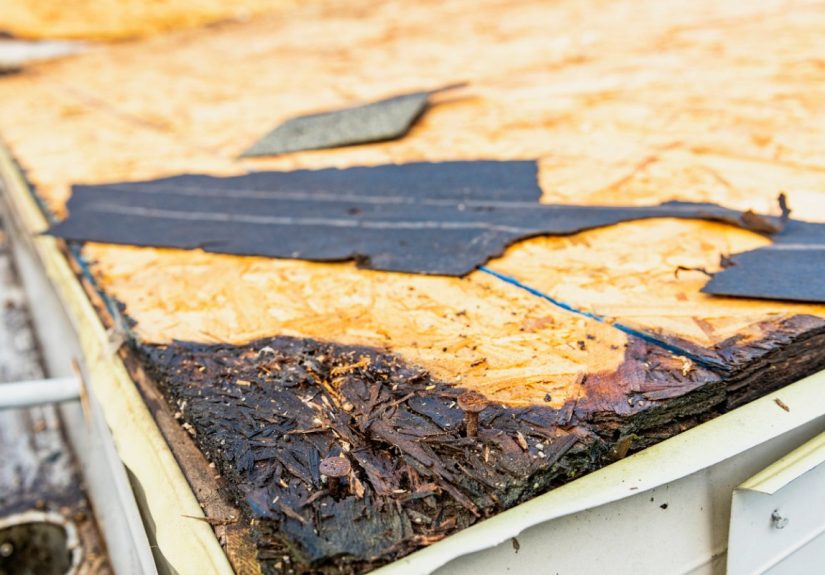
- Thin or damaged panels that are more likely to crack, delaminate, or fail along seams.
- Unsealed seams that let water pour into the attic if shingles or tiles blow off.
Post-storm investigations consistently show that when roof sheathing lets go, interior damage skyrockets. That’s why modern
high-wind guidance and programs like the FORTIFIED Roof standard focus heavily on stronger sheathing attachment and sealed decks.
Know Your Roof: Key Components to Check
Plywood vs. OSB
Most modern homes use either plywood or OSB sheathing:
- Plywood is made of thin wood veneers glued in layers. It’s strong, stiff, and handles short-term wetting reasonably well.
-
OSB is made of wood strands and resin pressed into panels. It’s widely used, code-approved, and performs well when
properly installed and protected from long-term moisture.
In hurricane zones, building guides and research groups often recommend a minimum of about 7/16-inch structural sheathing and, in
many cases, thicker panels in exposed locations, depending on your local building code and design wind speeds.
Fasteners: Nails Matter More Than You Think
The type, length, and spacing of nails are a huge deal for hurricane resistance. Testing and field experience show that:
-
Ring-shank nails provide much higher pull-out resistance than smooth-shank nails. Those little ridges along the shaft
act like barbs, helping the nail grip the wood. -
8d ring-shank nails (commonly around 0.113″ diameter and roughly 2⅜” long) are often recommended in high-wind guidance
and prescriptive standards for roof deck attachment. -
Closer spacingsuch as 4 to 6 inches on center along panel edges and 6 to 12 inches in the fieldcan dramatically
increase uplift resistance compared with wider spacing.
The takeaway: even if your sheathing panels are fine, upgrading the nails and the nail pattern during a re-roof can significantly
improve your roof’s chances in a hurricane.
Step-by-Step: How to Strengthen Roof Sheathing for Hurricanes
Every house is different, and you’ll always want to confirm requirements with local building codes and a qualified contractor or
structural engineer. But broadly, here’s how strengthening your roof deck usually works.
1. Start With an Inspection
Before you start swinging hammers, figure out what you’ve already got:
-
Check from the attic: Look up at the underside of the roof deck. You may be able to see the panel thickness stamped
on the wood, nail patterns, and whether nails are properly embedded into rafters or trusses. -
Look for trouble signs: missing or backed-out nails, rusted fasteners, cracked or delaminated panels, dark stains
from past leaks, or areas that flex more than others. -
Confirm framing spacing: Knowing whether your rafters/trusses are 16″, 19.2″, or 24″ on center helps determine
appropriate panel thickness and nail schedule.
2. Upgrade Fasteners When Re-Roofing
The best time to seriously upgrade roof sheathing is when the old roof covering comes off. With the shingles or tiles removed, your
contractor can access the deck from above and:
-
Re-nail the deck: Add 8d ring-shank nails so that every panel is attached to each framing member with a high-wind
nail patternoften something like 4–6 inches on center along panel edges and tighter spacing where the forces are strongest, such
as corners and eaves (exact numbers depend on code and design wind speed). -
Replace damaged panels: Any sheathing that’s soft, rotted, or delaminated should be replaced with properly rated
structural panels of adequate thickness. -
Avoid staples: For hurricane resistance, nails are typically preferred over staples because of better withdrawal
performance in uplift conditions.
Think of this as converting your roof from “meets bare minimum code” to “I’d like this thing to stay put when the wind goes sideways.”
3. Add Structural Adhesive (Where Allowed)
In some retrofit guides and engineering documents, applying construction adhesive along the top of rafters or trusses before
re-sheathingor foam/adhesive along joints from below in the atticcan provide extra bonding between the deck and framing.
Important notes:
- Follow product instructions: Not all adhesives are rated for structural use, and some may not be allowed in your local code.
- Don’t substitute adhesive for nails: It’s a supplement, not a replacement for a proper high-wind nail schedule.
-
When in doubt, ask a pro: A licensed engineer or experienced hurricane-region contractor can tell you whether adhesive
is appropriate for your situation.
4. Create a Sealed Roof Deck
Even a well-nailed roof deck can’t stop water if your shingles are gone and the seams between panels are open to the sky. That’s where
a sealed roof deck comes in. Testing by resilience researchers has shown that sealing the seams between panels and adding
continuous underlayment can reduce water entry by up to about 95% compared with an unsealed deck when the roof covering is damaged.
Common sealed deck approaches (used in modern high-wind standards) include:
-
Taping seams + underlayment: Using specialized roof-deck tape over every panel joint, followed by a layer of
underlayment over the entire deck. -
Self-adhered membrane: Installing a peel-and-stick, self-adhered membrane over the entire deck for a continuous
water-resistive barrier (often used in coastal hurricane zones). -
Double-layer felt: In some cases, two staggered layers of roofing felt can serve as a sealed deck solution when
properly installed. -
Spray foam from below: Sealing panel seams from the attic side with closed-cell foam at each joint (where allowed and
inspected) can act as a backup water and air barrier.
The goal is simple: if the shingles lose the fight, your deck still keeps most of the water out of your house.
5. Don’t Forget Roof-to-Wall Connections
Strengthening roof sheathing is powerful, but it’s even more effective when tied into a complete load path from roof to foundation.
In high-wind guidance, that often includes:
- Hurricane clips or straps that connect rafters or trusses directly to wall top plates.
- Properly anchored wall framing tied down to the foundation with straps, anchor bolts, or hold-downs.
- Bracing for gable ends so those big triangular walls don’t buckle and take part of the roof with them.
If your sheathing is strong but the roof-to-wall connection is weak, the wind will find that weak link. Think of your house like a
chainevery link matters.
6. Consider Upgrading to a High-Resilience Roof Standard
Several voluntary standards and programs in the United Statesoften referred to as “fortified” or high-wind roof standardsbundle
these best practices into a verified package. They typically require:
- Minimum sheathing thickness and quality.
- 8d ring-shank nails in enhanced patterns for roof deck attachment.
- A sealed roof deck with approved methods.
- Improved edge details, drip edge, and starter strips.
- Upgraded vents, flashing, and often impact-resistant shingles.
In some states, meeting such standards can qualify you for insurance premium discounts or grant programs to offset upgrade costs.
It’s worth asking your roofer and insurer if these options are available where you live.
Practical Tips Before You Strengthen Your Roof Sheathing
Work With the Right Contractor
Not every roofing contractor is experienced in high-wind retrofits. When you’re interviewing pros, ask:
- Have you worked on hurricane-resistant or fortified roof upgrades before?
- Are you familiar with local wind design requirements and current building codes?
- Will you provide photos or documentation of deck renailing and sealed deck installation?
A good contractor will welcome these questions. They may already be following many of these practicesespecially in hurricane-prone areas.
Budgeting and Cost Expectations
Strengthening roof sheathing usually costs less if done during a scheduled roof replacement rather than as a one-off project. You’re
already paying for tear-off, access, and new shingles, so adding:
- Upgraded nails and closer spacing.
- Sealed deck methods (tape + underlayment, self-adhered membrane, etc.).
- Spot replacement of damaged panels.
…tends to be a relatively modest add-on compared with the total roofing bill. And compared with the cost of gutting water-damaged
drywall, flooring, and insulation after a storm, the math is usually very friendly.
Code Compliance and Permits
Always:
- Check your local building code for required nail sizes, spacing, sheathing thickness, and underlayment requirements in your wind zone.
- Pull permits where requiredmany jurisdictions inspect re-roofing and structural upgrades, especially in coastal counties.
- Ask your local building department about any available high-wind retrofit guidelines or incentives.
Building codes evolve. What passed inspection in 1993 might not be enough for design winds today.
Extra : Real-World Experiences and Lessons Learned
It’s one thing to talk about nail spacing and sealed decks in theory. It’s another to see how those details play out during real
hurricanes. While every storm is different, patterns emerge again and again from post-storm surveys, lab testing, and homeowners’
stories.
Ring-Shank Nails vs. “Builder-Grade” Fasteners
Imagine two homes on the same street in a Gulf Coast town. They were built within a year of each other, and both recently got new
roofs. One roofer reused the original nail pattern with smooth-shank nails spaced fairly wide. The other followed a high-wind retrofit
guide, re-nailing the sheathing with 8d ring-shank nails in a tighter pattern and documenting the work with photos.
When the next big hurricane rolled through, both homes lost some shingles. But the first home had sections where the sheathing
itself started to lift, especially at corners and eaves. Once panels loosened, wind and rain poured into the attic, soaking
insulation and drywall. The second home still needed shingle repairs, but the deck stayed put. The roof structure held together,
limiting damage mostly to the exterior.
That kind of “same-street, different outcome” scenario is exactly what engineers see over and over. Stronger nails and proper
spacing don’t make a roof invincible, but they dramatically improve its odds of staying attached when the wind cranks up.
How a Sealed Roof Deck Changes the Story
Another powerful lesson comes from sealed roof decks. In lab test chambers, researchers have literally blasted full-size test homes
with hurricane-strength wind and rain. In one side-by-side comparison, two nearly identical structures were built. One had a
conventional roof deck; the other had panel seams sealed and continuous underlayment as required in modern resilience standards.
When the roof coverings were intentionally compromised, the unsealed deck allowed water to gush through the seams. Within minutes,
collection tubs filled, insulation drenched, and interior finishes were ruined. On the sealed deck side, water still reached the
roof surfacebut instead of pouring through into the attic, most of it drained harmlessly off the roof edge. Follow-up analysis
showed that the sealed deck reduced water intrusion by the vast majority compared with the unsealed system, turning what could
have been a major gut-and-rebuild into a minor repair job.
For a homeowner, this difference isn’t just about comfort. It can be the difference between staying in your home after a storm or
moving into a hotel for months while crews rip out soggy drywall and replace wiring, cabinets, and flooring.
Insurance, Resale, and Peace of Mind
Beyond the structural and water-resistance benefits, strengthened roof sheathing has some quiet financial perks. In hurricane-prone
states, insurers increasingly recognize high-wind roof upgrades. They may offer:
- Premium discounts for roofs verified to meet certain high-wind standards.
- Lower wind or hurricane deductibles for fortified homes.
- Eligibility for special “stronger roof” programs and grants when re-roofing.
Realtors in coastal regions are also starting to talk about fortified roofs in listings, because buyers like knowing the house
they’re considering has a roof that’s been upgraded beyond bare minimum code. A documented high-wind roof retrofit can be a
selling point, much like impact-rated windows or a whole-house generator.
Small Decisions, Big Difference
Strengthening roof sheathing isn’t about buying some exotic building product. It’s mostly about making smarter decisions with
everyday materials:
- Choose ring-shank nails instead of smooth-shank nails.
- Use nail spacing that matches high-wind guidance, not just the loosest allowed minimum.
- Take time to seal the roof deck seams instead of relying on a single layer of felt.
- Replace damaged panels instead of “hoping for the best.”
None of these moves are flashy. Your roof won’t look different from the street. But the payoff shows up when the radar turns ugly
and weather alerts light up your phone. Strengthening roof sheathing is one of those quiet, unglamorous upgrades that can pay off
in the most dramatic way: your roof stays where it belongs.
If you’re planning a re-roof in a hurricane or high-wind region, talk with your contractor early about upgraded sheathing attachment
and sealed deck options. Bring up stronger nails, tighter spacing, sealed seams, and load-path details. The storm that tests your
roof isn’t on your calendarbut the chance to make your roof stronger absolutely is.
Conclusion
Strengthening roof sheathing to withstand hurricanes comes down to a few key ideas: use adequately thick structural panels, attach
them with strong fasteners in a high-wind nail pattern, seal the deck against wind-driven rain, and connect the roof into a
continuous load path down to the foundation. When you combine those movesideally during a roof replacementyou turn your roof
from “just OK” into a serious defense system against high winds and heavy rain.
It’s not about making your house a bunker; it’s about making smart, science-backed upgrades that keep the roof on, the water out,
and your life as normal as possible after the storm passes.