Table of Contents >> Show >> Hide
- Quick Jump
- What a Clothes Steamer Does (and Doesn’t)
- Steamer vs. Iron: When Each Wins
- Before You Start: Setup Checklist
- Step-by-Step: How to Steam Clothes
- Fabric Guide: What to Steam (and What to Baby)
- Safety Rules That Actually Matter
- Troubleshooting: Drips, Spots, and “Why Isn’t This Working?”
- Maintenance: Cleaning, Descaling, and Storage
- Beyond Clothing: Smart Everyday Uses
- Real-World Steaming Experiences (What Beginners Notice)
- 1) The “Why is it spitting?” phase
- 2) The “hanger matters more than I expected” revelation
- 3) The “inside-out saves delicate fabrics” win
- 4) The travel moment: hotel lighting + wrinkled clothes = panic
- 5) The “steam makes clothes look expensive again” effect
- 6) The maintenance lesson: water quality shows up eventually
- 7) The confidence moment: steaming becomes a 3-minute habit
- Wrap-Up
A clothes steamer is basically a tiny, portable weather system: it makes warm steam, relaxes fabric fibers, and
convinces wrinkles to leave the premises. If ironing feels like doing origami with heat, steaming is the “let’s
just smooth this out” approachfaster, gentler on many fabrics, and way less likely to end in a crooked crease
you’ll have to pretend was intentional.
This beginner-friendly guide walks you through choosing the right setup, steaming safely, handling tricky
fabrics, fixing common mistakes (hello, sputtering water), and keeping your garment steamer running like new.
What a Clothes Steamer Does (and Doesn’t)
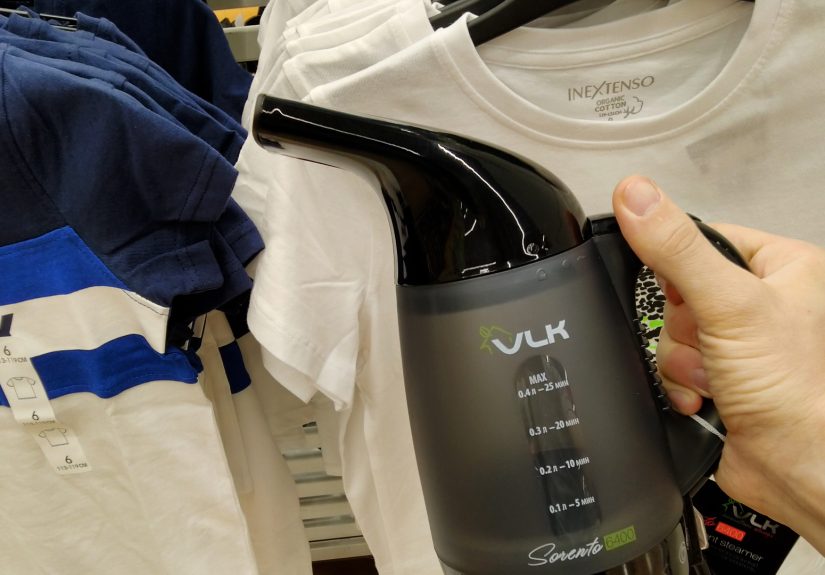
A clothes steamer (also called a garment steamer or fabric steamer) releases
hot steam through a nozzle or steam head. That moisture + heat relaxes fibers so wrinkles soften and fall out.
You don’t need an ironing board, and you don’t have to clamp fabric under a hot plate.
What it does well:
- De-wrinkling everyday clothing fast (shirts, dresses, blouses, trousers).
- Refreshing fabrics that feel stale after being stored (think: closet vibes).
- Gentle finishing on items that are awkward to iron flat (jackets, beaded pieces, knits).
What it doesn’t do (without extra effort):
- Sharp creases and crisp pleats (that’s iron territory).
- Heavy-duty wrinkle surgery on thick denim or deep-set linen folds (it can help, but it’ll take patience).
- Miracles on fabrics labeled “No steam” (yes, that label can existmore on that later).
Steamer vs. Iron: When Each Wins
If you’ve ever asked, “Do I need both?” the honest answer is: not always, but it depends on your wardrobe.
Choose a clothes steamer when you want:
- A quick, natural-looking smooth finish (not pressed-flat).
- To work on hanging garments (no board, no flipping, no drama).
- To handle delicate trims like sequins, beads, and structured jackets that don’t want to lie flat.
Choose an iron when you need:
- Crisp collars and sharp creases (dress shirts, uniform pants, pleats).
- Maximum “polished” look with pressure, heat, and controlled steam.
In real life, many people steam for speed and save ironing for “I have to look like I own a briefcase” moments.
Before You Start: Setup Checklist
1) Pick a good steaming spot
- Ventilation helps: crack a window or keep airflow moving so steam doesn’t turn your room into a mini sauna.
- Mind the moisture: don’t steam right next to a delicate wall, wood furniture, or anything that hates humidity.
- Hang space: a sturdy hanger + door hook, shower rod, garment rack, or wall hook works great.
2) Use the right water (without overthinking it)
Many steamers work with tap water, but mineral-heavy water can create buildup over time and cause sputtering.
If you have hard water or you want less maintenance, distilled water is the low-drama choice.
Whatever you do, don’t overfill the tanksteamers have fill lines for a reason.
3) Gather your “supporting cast”
- Sturdy hanger (thin wire hangers are the villains of smooth steaming).
- Lint roller or brush (steam can loosen lintremove it so it doesn’t redeposit).
- Heat-protection glove (optional but very nice for beginners).
- Accessory attachments (brush head for thicker fabrics, creaser clip if included, fabric guard if needed).
Step-by-Step: How to Steam Clothes
Step 1: Fill the tank (and keep it simple)
- Unplug the steamer if it’s been used recently and let it cool first.
- Remove the water tank (if detachable), fill to the max line, and secure it back in place.
- Wipe any drips off the exterior so your grip stays non-slip.
Step 2: Plug in and let it fully heat
Give your steamer time to reach full steam. Beginners often start too early and get sputteringlittle hot water
droplets that can leave marks on some fabrics. Waiting for consistent steam is a tiny patience tax that pays off.
Step 3: Hang the garment and create tension
- Hang your item so it can fall naturally (gravity is your unpaid assistant).
- Gently hold the hem or side seam to keep the fabric tautdon’t yank, just stabilize.
Step 4: Steam in slow, controlled passes
- Distance: hover the steam head about 1–2 inches from the fabric for most garments.
- Direction: use smooth vertical strokes. Many people start at the bottom and work upward.
- Focus: give extra attention to high-wrinkle zones: under buttons, cuffs, hems, waistbands, and the back yoke of shirts.
- Keep it upright: most handheld steamers behave best when held straight up-and-down to reduce dripping.
Step 5: Flip or rotate for a full finish
Rotate the hanger to reach the back and sides. For dresses, steam in sections: bodice first, then skirt panels.
For jackets, steam the lining lightly (if appropriate) and then the outer shell.
Step 6: Let it dry before wearing or storing
Steamed fabric can feel warm and slightly damp. Leave it hanging for a few minutes until it’s fully dry and cool.
This helps prevent new wrinkles and avoids that “why does my shirt feel like a warm tortilla” moment.
Beginner technique: The “steam + smooth” combo
For stubborn wrinkles, hover the steamer close (still not touching delicate fabric), then use your free hand to
lightly smooth the fabric downward from a safe distance. The point is tension, not tug-of-war.
Fabric Guide: What to Steam (and What to Baby)
Generally steamer-friendly fabrics
- Cotton: steams well; thicker cotton may need slower passes.
- Wool: light steaming can refresh and relax wrinkles; avoid soaking it with steam.
- Polyester/synthetics: usually steam-friendly, but watch heat sensitivity and shine.
- Blends: typically fineuse the care label as your referee.
Delicate fabrics (use caution)
- Silk, chiffon, velvet: steam from the inside/underside when possible and keep the nozzle slightly away to avoid watermarks or crushing texture.
- Rayon/viscose: can spot or warp if over-steamed; test a hidden area first.
- Embellished items: steam carefully around beads and sequins; don’t press the head into the trim.
Check the care labelseriously
Clothing labels exist to keep you from turning your favorite piece into an expensive cleaning rag. If the label
includes warnings like “Do not iron” or “No steam,” treat that like a stop sign, not a suggestion.
Quick fabric test (when you’re unsure)
- Test steam on an inside seam or hem.
- Wait 1–2 minutes and check for spotting, shine, or texture changes.
- If anything looks off, stop and consider professional care.
Safety Rules That Actually Matter
- Never steam clothes while someone is wearing them. Steam burns happen fast.
- Keep steam away from skin and eyes. This is not a facial steamerdifferent hobby.
- Use the stand/rest when hot. Don’t park a hot nozzle on a table, the cord, or your patience.
- Unplug before filling or emptying. Water + electricity is a terrible duo.
- Keep kids and pets out of the zone. Curious hands and wagging tails are magnetized by danger.
If your steamer comes with model-specific instructions (it does), follow those first. Manufacturers write those
warnings because enough people did the opposite.
Troubleshooting: Drips, Spots, and “Why Isn’t This Working?”
Problem: Water is dripping or spitting
- Likely cause: overfilled tank or starting before it’s fully heated.
- Fix: reduce water slightly, keep the steamer upright, and wait for steady steam before starting.
Problem: White flakes or reduced steam output
- Likely cause: mineral buildup (especially with hard water).
- Fix: switch to distilled water and clean/descale per your manufacturer’s instructions.
Problem: Water spots on delicate fabric
- Likely cause: nozzle too close, fabric too delicate, or steam applied from the wrong side.
- Fix: increase distance, steam from the inside, and test on a hidden area first.
Problem: Wrinkles aren’t going away
- Likely cause: moving too fast, not enough tension, or fabric is heavy/thick.
- Fix: slow down, hold fabric taut, and steam in shorter sections with repeat passes.
Problem: Your room feels like a tropical rainforest
- Likely cause: steaming in a small, closed space.
- Fix: ventilateopen a door/window or run a fan to disperse steam.
Maintenance: Cleaning, Descaling, and Storage
A steamer is low maintenance, not no maintenance. A few simple habits prevent clogs, sputtering, and that sad
“it used to work better” feeling.
After every use
- Turn off, unplug, cool down.
- Empty the reservoir (standing water can cause odor and buildup).
- Air-dry before storing and store upright if possible.
Use distilled water (especially if you have hard water)
Distilled water reduces mineral deposits that clog steam vents. It’s the easiest “future you” favor you can do.
Descale/decalcify on a schedule
How often depends on usage and water hardness. Some manufacturers recommend a routine decalcification cycle
every month or two; others have specific “when performance drops” guidance. Follow your manual.
Important note: not every brand agrees on cleaning methods. Some recommend vinegar-based decalcification mixes,
while others warn against additives. So treat “internet cleaning hacks” like you treat mystery leftovers: proceed
only if the label (manual) says it’s safe.
Beyond Clothing: Smart Everyday Uses
Clothes steamers are best known for de-wrinkling, but they can also help freshen and smooth fabric items around
the homeespecially pieces you can’t toss in the wash on a whim.
Popular “extra” uses
- Drapes and curtains: steam top-to-bottom in sections and test for colorfastness first.
- Upholstery touch-ups: light steaming can help reduce wrinkles and refresh fabric surfaces (avoid soaking).
- Quick refresh for coats: gentle steam can improve appearanceespecially when followed by light brushing for some textiles.
Beginner boundary line
Stick to fabrics and items that tolerate moisture and heat. Avoid aiming steam at electronics, delicate wall
finishes, or anything that could warp. Your steamer is a fabric tool firstnot a “steam everything” wand.
Real-World Steaming Experiences (What Beginners Notice)
Here’s the part nobody tells you in the tiny folded instruction booklet: learning to use a clothes steamer is
less like mastering a complex appliance and more like learning a new rhythm. The first time, you’ll probably
hover the nozzle like you’re defusing a bomb. By week two, you’ll be steaming a shirt five minutes before leaving
the house, fueled by confidence and questionable time management.
1) The “Why is it spitting?” phase
Most beginners hit the sputter problem early. It’s usually not the steamer being dramatic; it’s either not fully
heated yet, it’s being tilted like a watering can, or it’s overfilled. The fix is boring but effective: wait for
consistent steam, keep it upright, and don’t fill past the line. Once you do that, the steamer stops acting like
it’s trying to mist your outfit with tiny hot water balloons.
2) The “hanger matters more than I expected” revelation
A flimsy hanger makes the garment twist and bunch, so you chase wrinkles in circles. A sturdy hanger (or even a
door hook with a solid hanger) makes steaming feel like you unlocked an upgrade. Gravity pulls the fabric down,
you add a little gentle tension at the hem, and suddenly wrinkles stop putting up a fight.
3) The “inside-out saves delicate fabrics” win
With delicate materials, beginners often learn the hard way that getting too close can leave watermarks or mess
with texture. The practical workaround is to steam from the inside/underside and keep a small gap between nozzle
and fabric. It feels slower at first, but it’s way faster than trying to fix a mark on silk at 7:42 a.m.
4) The travel moment: hotel lighting + wrinkled clothes = panic
If you’ve ever opened a suitcase and found your “nice outfit” looking like it slept in the bag and lost, you
understand why steamers are beloved. Beginners quickly discover a simple travel routine: hang the garment in the
bathroom (not too close to walls), steam in sections, and then let it dry while you get ready. That last step is
keyputting a warm, damp shirt on your body feels like wearing a motivational poster: technically fine, deeply
uncomfortable.
5) The “steam makes clothes look expensive again” effect
A quick steam can revive the shape of a blouse, smooth the front of a dress, and relax a jacket that’s holding
onto closet creases like a grudge. Beginners often notice that steaming isn’t just about wrinklesit’s about
restoring drape. Clothes hang better. Seams look cleaner. You look more put-together with less effort, which is
basically the dream.
6) The maintenance lesson: water quality shows up eventually
Many people start with tap water and get away with ituntil they don’t. If your steam output weakens, you see
little mineral specks, or the nozzle seems clogged, that’s your cue. Switching to distilled water can reduce
future buildup, and cleaning/descaling (according to your manufacturer’s directions) usually brings performance
back. This is where being “lazy in a smart way” pays off: better water now means less scraping and soaking later.
7) The confidence moment: steaming becomes a 3-minute habit
Once you find your flow, steaming becomes the quickest finishing step in your routine. You steam the front of a
shirt, flip the hanger, steam the back, hit the collar and sleeves, and you’re done. You learn which fabrics need
slow passes, which ones relax instantly, and which ones (looking at you, heavy linen) require patience and maybe
a second cup of coffee.
The biggest takeaway from real-world use is this: a clothes steamer rewards calm, steady technique. You don’t
need strength or perfectionjust consistent steam, gentle tension, and a little time for the fabric to dry. Once
you’ve done it a few times, you’ll wonder why you ever tried to iron a flowing dress on a tiny board like it was
a reasonable life choice.
Wrap-Up
If you’re new to steaming, remember the beginner trifecta: steady steam (let it heat up),
gentle tension (hold the hem), and patience for drying (don’t wear it damp).
Add basic safety habitsnever steam clothes while they’re being worn, keep the steamer upright, unplug before
fillingand you’ll get smooth results fast.
A garment steamer won’t replace an iron for crisp creases, but for everyday wrinkle removal, delicate items, and
quick refreshes, it’s one of the easiest upgrades you can make to your clothing-care routine.