Table of Contents >> Show >> Hide
- What Is Markup (and When Should You Use It)?
- Where to Find Markup on iPhone
- Meet the Markup Toolbar: What the Buttons Actually Do
- How to Use Markup on a Screenshot (Fastest Method)
- How to Mark Up a Photo in the Photos App
- How to Use Markup on a PDF in the Files App
- How to Add a Signature with Markup
- How to Use Markup in Mail (Annotate Attachments Before Sending)
- How to Use Markup in Messages (Send Better Explanations)
- Tips That Make Markup Feel Like a Superpower
- How to “Hide” Personal Info the Safer Way
- Troubleshooting: Markup Not Showing Up?
- Quick Cheat Sheet: The Most Useful Markup Workflows
- Conclusion: Markup Is Small, Mighty, and (Honestly) Underrated
- Real-World Experiences: How Markup Actually Helps Day-to-Day (500+ Words)
You know that moment when you take a screenshot to prove a pointthen realize you need to circle the thing,
point an arrow at the thing, label the thing, and maybe (just maybe) cover up your credit card number
before you send it to your group chat? That’s exactly what Markup is for.
Markup is Apple’s built-in annotation tool on iPhone. It lets you draw, highlight, add text, drop shapes,
zoom in with a magnifier, and even slap a signature onto a PDFwithout installing anything. Think of it as
“sticky notes + highlighters + doodles,” but for screenshots, photos, and documents.
What Is Markup (and When Should You Use It)?
Markup is a set of editing tools that appears inside many Apple appslike Photos, Files, Mail, Notes, and
Messages. Use it when you want to:
- Explain something quickly (arrows, circles, labels on a screenshot)
- Highlight details on receipts, forms, or PDFs
- Sign a document without printing it (a modern miracle)
- Give feedback on design mockups or homework pages
- Hide private info before sharing (more on doing this safely later)
Where to Find Markup on iPhone
Markup doesn’t live in one single app like a shy little hermit. It shows up wherever images and documents
show up. Here are the most common places you’ll see it:
- After taking a screenshot (the fastest way)
- Photos (edit an image, then open Markup tools)
- Files (PDFs and images open with Markup options)
- Mail (markup an attachment before sending or replying)
- Notes (annotate scanned docs and images)
- Messages (markup a photo before you send it)
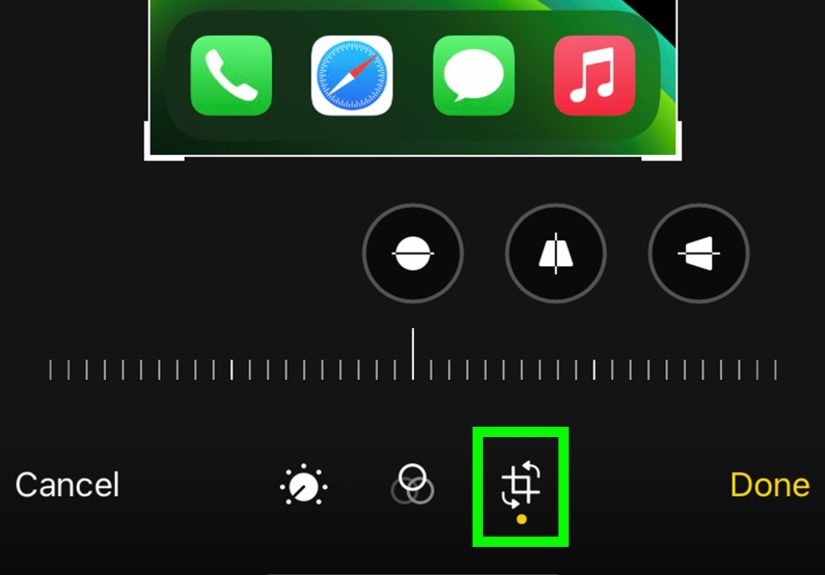
Meet the Markup Toolbar: What the Buttons Actually Do
The toolbar can vary slightly depending on the app and iOS version, but the core tools are usually the same.
Here’s what you’ll typically find:
Drawing Tools
- Pen / Marker / Pencil: Draw different styles of strokes.
- Color picker: Choose a color (yes, neon green is a valid choice).
- Thickness & opacity: Tap the selected tool again to adjust line weight and transparency.
Fix-it Tools
- Eraser: Usually offers a pixel eraser (rub out parts) or object eraser (remove whole strokes).
- Undo / Redo: Your best friends when your finger draws a “circle” shaped like a potato.
Precision Tools
- Lasso: Select and move a drawing or object you added.
- Ruler: Great for straight lines and neat arrows.
- Magnifier: Creates a zoom bubble to emphasize tiny text or details.
Add-Ons (the “Plus” Menu)
- Text box: Type labels like “CLICK HERE” in a calmer tone than all caps, if you prefer.
- Shapes: Arrows, speech bubbles, rectangles, circleshandy for clean annotations.
- Signature: Draw and reuse your signature for PDFs and forms.
- Stickers (in supported apps): Add stickers for fun or emphasis.
How to Use Markup on a Screenshot (Fastest Method)
If you only learn one Markup trick, make it this one. Screenshots are Markup’s natural habitat.
- Take a screenshot (Side button + Volume Up on Face ID iPhones; Side/Top + Home on older models).
- Tap the screenshot thumbnail that appears briefly in the corner.
- Use Markup tools to draw, highlight, add text, or drop shapes.
- Tap Done, then choose Save to Photos, Save to Files, or share.
Pro Move: Screenshot “Mini Tutorial” for Someone Else
Need to show your friend where a setting is? Take a screenshot, add:
1 arrow, 1 circle, and a short label like “Tap this.”
Congratulationsyou just became Tech Support without the headset.
How to Mark Up a Photo in the Photos App
Markup isn’t only for screenshots. You can annotate any photolike circling an item on a receipt photo or
labeling plants in your garden pics (because yes, your basil deserves proper identification).
- Open Photos and select the image.
- Tap Edit.
- Find and tap Markup (often shown as a pen tip icon, or inside an additional options menu).
- Add your annotations, then tap Done to save.
Tip: If you’re marking up a photo you want to keep “clean,” consider duplicating it first
(so you keep an unedited original).
How to Use Markup on a PDF in the Files App
PDFs are where Markup becomes genuinely usefulespecially for signing, filling, and returning documents.
- Open Files and navigate to your PDF (Downloads is a common hideout).
- Tap the PDF to open it.
- Tap the Markup button (usually a pen tip icon).
- Use tools to highlight, add text, insert shapes, or add your signature.
- Tap Done to save your changes.
Example: Signing a Rental Form in 60 Seconds
Your landlord emails a PDF. You save it to Files, open Markup, add your signature, and send it backno printer,
no scanner, and no frantic “Where did I put that ink cartridge in 2019?” moment.
How to Add a Signature with Markup
Markup can store signatures so you don’t have to redraw your name every timeunless you enjoy practicing cursive
like it’s a competitive sport.
- Open an image or PDF in a supported app and open Markup.
- Tap the Add (plus) button.
- Select Signature (or Add Signature).
- Sign with your finger, then tap Done.
- Drag/resize the signature to place it where it belongs.
Practical note: A Markup signature is usually a quick electronic signature (e-sign).
Some legal or financial forms may require a different signing method or identity verification.
How to Use Markup in Mail (Annotate Attachments Before Sending)
Markup inside Mail is perfect for “Here’s the PDF, and here’s exactly what I mean” moments.
- Open Mail and create a new message or reply.
- Add or open the attachment (photo or PDF).
- Tap the attachment, then choose Markup.
- Annotate it, tap Done, then send.
Example: Approving a Draft
Your coworker sends a PDF draft. You circle a headline, add “Change this to Title Case,” draw an arrow to the
correct image, and send it back. You look efficient, decisive, and possibly magical.
How to Use Markup in Messages (Send Better Explanations)
Messages Markup is great when words alone won’t do. (“It’s the button… no the other button… okay I’m screenshotting.”)
- Open Messages and pick a conversation.
- Tap the + button (or Photos option) and select a photo.
- Tap the photo preview, then choose Markup.
- Annotate, tap Save / Done, and send.
Tips That Make Markup Feel Like a Superpower
1) Use the Ruler for Clean Lines
Want an arrow that looks intentional instead of “drawn during mild turbulence”? Use the ruler tool and draw along it.
You can reposition it, rotate it, and keep your lines straight.
2) Adjust Thickness and Opacity for Better Readability
A thick marker can cover text you’re trying to show. A thin pen might disappear. Tap the drawing tool again and adjust
thickness/opacity until your annotations pop without bulldozing the content underneath.
3) Lasso = Move Things Without Redoing Them
Drew a perfect circle… around the wrong thing? Use the lasso tool to select the object you drew and drag it to the right spot.
This saves time and preserves your dignity.
4) Prefer Shapes for “Professional-Looking” Markups
If you’re sending something to a client or coworker, clean shapes (arrows, rectangles, speech bubbles) often look more polished
than freehand drawings. Your finger can relax; the shapes will carry the team.
5) Use the Magnifier When Details Are Tiny
The magnifier tool creates a zoom bubbleideal for highlighting tiny serial numbers, small UI icons, or fine print.
It’s like saying, “Look here,” but with an actual zoom lens instead of shouting.
How to “Hide” Personal Info the Safer Way
Many people try to “redact” information by drawing over it. That can work visually, but be careful:
if you use a semi-transparent highlighter or a thin pen, the text may still be readable.
- Use an opaque shape (like a filled rectangle) to cover sensitive info.
- Make sure the shape’s opacity is 100% and covers the entire line of text.
- When sharing, consider exporting as a flattened image (a screenshot of the edited version) if you’re unsure.
If you’re dealing with highly sensitive documents (IDs, medical info, financial statements), specialized redaction tools
may be safer than casual Markup.
Troubleshooting: Markup Not Showing Up?
If Markup is playing hide-and-seek, try these quick fixes:
- Make sure the file type is supported: PDFs and images work best. Some formats don’t show Markup tools.
- Look for the pen tip icon: It may be tucked in an overflow menu (three dots or a share/options button).
- Update iOS: Markup features evolve over time, and newer versions may place buttons differently.
- Try Files: If an attachment won’t markup in Mail, save it to Files and edit it there.
Quick Cheat Sheet: The Most Useful Markup Workflows
- Need fast annotation? Screenshot → tap thumbnail → Markup → Done.
- Need to sign a PDF? Save to Files → open PDF → Markup → Signature → Done.
- Need to explain a setting? Screenshot → arrow + circle + short label → share.
- Need cleaner notes? Use shapes + text instead of freehand writing.
Conclusion: Markup Is Small, Mighty, and (Honestly) Underrated
Markup is one of those iPhone tools that doesn’t scream for attentionbut once you start using it,
it quietly upgrades your everyday life. It helps you communicate faster, sign documents without drama,
and turn messy “Wait, what do you mean?” conversations into crystal-clear visuals.
Start with the screenshot workflow (it’s the easiest win), then graduate to PDFs in Files when you’re ready.
And the next time someone asks you where to find a setting, you can respond with a beautifully annotated
screenshot like a calm, capable wizard of modern technology.
Real-World Experiences: How Markup Actually Helps Day-to-Day (500+ Words)
People don’t fall in love with Markup because it’s flashythey fall in love with it because it saves time in
slightly chaotic, very human moments. One common experience: you’re helping a parent (or a friend who acts like
technology is haunted) change a setting on their iPhone. You could type a paragraph of instructions, but that often
turns into a back-and-forth of “I don’t see it.” A quick screenshot with one arrow and the words “Tap here” ends the
confusion instantly. The relief is real on both sides: the other person feels guided, and you feel like you didn’t
just lose 45 minutes to a mystery menu.
Another everyday scenario is work approvals. Imagine you’re reviewing a PDF draftan invoice, a contract, a brochure,
or even a school permission form. Without Markup, you might have to email a list of corrections and hope the other person
interprets them correctly. With Markup, you can circle the exact line, add a short note (“Please update date to 02/20”),
and send it back. That “seeing is understanding” moment makes feedback easier to follow and harder to misread. Even better,
it keeps your message short and clear, which is a productivity win and also a sanity win.
Markup also shows up in family life more than you’d expect. Someone snaps a photo of a packing list for a trip or a recipe
card from a relative. Instead of rewriting the whole thing, you can highlight what matters (“buy THESE ingredients”) and add
one or two notes (“swap milk for oat milk”). It’s the digital version of handing someone a paper with helpful scribblesexcept
you’re doing it from the grocery aisle while trying to remember whether you already have garlic powder.
Then there’s the “privacy panic” experience: you’re about to share a screenshot, and you suddenly notice your email address,
a tracking number, or a payment confirmation number sitting right there like it owns the place. Markup gives you a quick way
to cover it with an opaque shape, so you can share the useful part without broadcasting your personal details. It’s not just
convenientit’s confidence-building. You stop hesitating every time you want to share something helpful, because you have an
easy cleanup tool.
Finally, Markup is surprisingly satisfying for creative micro-moments. Maybe you’re planning a room update and you screenshot a
furniture layout. You can draw approximate measurements, label “sofa,” “rug,” and “don’t put plant here (cat will destroy it),”
and send it to a partner. Or you’re helping a friend choose between two outfits and you add playful arrows and ratings. These tiny
interactions feel more personal and more clear than plain text. In the end, that’s the real “experience” of Markup: it helps you
communicate visuallyquickly, casually, and with just enough personality to make the message land.