Table of Contents >> Show >> Hide
- What a Mudroom Should Do (Besides Judge Your Shoes)
- Plan First, Renovate Second (Your Future Self Will Thank You)
- Materials That Don’t Panic When They See Mud
- Storage That Stays Organized (Even With Humans Involved)
- Layouts for Every Kind of Home (Big Mudroom Energy, Small Space Reality)
- Comfort and Convenience Upgrades That Feel Fancy (But Are Actually Practical)
- A Step-by-Step Mud Room Renovation Game Plan
- Mudroom Mistakes to Avoid (Because We’ve All Lived Them)
- How to Keep Your Renovated Mudroom From Sliding Back Into Chaos
- What Mud Room Renovations Feel Like: Real-World Experiences and Lessons (Extra )
- Experience #1: The Day Everyone Discovers the Bench
- Experience #2: Hooks Are a Lifestyle, Not an Accessory
- Experience #3: The Flooring Choice Shows Its True Colors in Week Two
- Experience #4: Closed Cabinets Save Your Sanity Before Guests Arrive
- Experience #5: The Best Mudroom Is the One Your Family Will Actually Use
- Wrap-Up: Your Mudroom Can Be Functional and Good-Looking
A mudroom is basically your home’s bouncer: it decides what gets in, what stays out, and which pair of muddy cleats needs to “talk to management.” If your entryway currently looks like a lost-and-found exploded (shoes, backpacks, dog leashes, one mystery mitten), a mud room renovation can turn that chaos into a clean, organized, actually pleasant landing zone.
This guide breaks down how to plan a mudroom remodel that survives real lifewet boots, paw prints, sports gear, and that one family member who swears they’ll “put it away later.” You’ll get practical layouts, durable materials, storage that doesn’t collapse into clutter, and a step-by-step renovation sequence that keeps your project moving.
What a Mudroom Should Do (Besides Judge Your Shoes)
The best mudrooms are designed around a simple mission: stop dirt at the door and make leaving the house faster. That means your mudroom should:
- Create a drop zone for daily items (keys, bags, coats, shoes).
- Handle moisture (snow melt, rain, wet umbrellas, damp dog).
- Store “grab-and-go” gear without blocking traffic flow.
- Be easy to cleanbecause you’ll clean it. You will. (Right?)
If your current space fails any of those tests, that’s not a personal flaw. It’s a design problemand design problems are delightfully fixable.
Plan First, Renovate Second (Your Future Self Will Thank You)
1) Follow the Traffic Pattern
Stand at the door you use most. Now imagine five people arriving at once: coats half-on, shoes half-off, dog doing zoomies. That’s your real “design load.” Plan around how people move and where items naturally land.
- Entry side: a mat + boot tray zone for the wet mess.
- Middle: a bench for shoes and quick resets.
- Storage wall: hooks, cubbies, lockers, and closed cabinets for the stuff you don’t want to see.
2) Choose Renovation Type: Convert or Add On
Most mudroom projects fall into two buckets:
- Conversion: turning existing space (a closet, hallway, laundry corner, garage entry) into a mudroom.
- Addition: building new square footage for a dedicated mudroom.
Conversions typically cost less because the walls, roofline, and foundation already exist; additions cost more because you’re building structure from scratch. Your best option depends on your home’s layout, climate, and how “all-in” you want to go.
3) Set a Realistic Budget (With a Cushion for “Surprises”)
Mud room renovation budgets vary widely based on whether you’re converting or adding on, plus what you’re installing (custom cabinetry, tile, plumbing for a sink, etc.). A smart approach: decide your “must-haves” first, then add “nice-to-haves” only if the budget stays happy.
- Must-haves: durable flooring, hooks, shoe storage, a bench, lighting.
- Nice-to-haves: lockers, built-in cabinetry, a sink, heated floors, pet wash station.
4) Nail the Measurements That Make a Mudroom Comfortable
You don’t need a giant room to make a mudroom workbut you do need sensible clearances. Key comfort details:
- Bench height: around chair height so it’s easy to sit and stand.
- Bench depth: deep enough to sit comfortably, not so deep it blocks the walkway.
- Hook placement: include kid-height hooks if backpacks and jackets belong to actual children (and not just the floor).
- Door swings: make sure doors don’t crash into benches, baskets, or your dignity.
Materials That Don’t Panic When They See Mud
Flooring: Waterproof, Grippy, and Forgiving
Mudroom floors get attacked daily: grit, water, salt, pet claws, and the occasional dropped water bottle that somehow finds the only crack in the universe. The most popular mudroom flooring choices are materials that shrug off moisture and clean easily.
- Porcelain or ceramic tile: durable, water-resistant, and easy to mop. Choose textured or matte finishes for slip resistance.
- Luxury vinyl plank (LVP/LVT): comfortable underfoot, water-resistant (often waterproof), and generally kinder on feet than tile.
- Sealed concrete: tough and modern, but choose a finish that won’t show every streak and scuff.
One underrated trick: pick a finish that hides daily grime. Super glossy or ultra-light surfaces can look amazing… and also look dirty approximately seven seconds after cleaning.
Walls: The Splash Zone Is Real
You don’t need to tile your walls like a subway station (unless you want to). But you do want protection where boots, bags, and wet coats brush the surface.
- Wainscoting or beadboard: adds durability and makes scuffs less tragic.
- Satin or semi-gloss paint: easier to wipe down than flat paint.
- Washable wall coverings: pattern can help disguise wearespecially in family entryways.
Hardware: Buy Once, Cry Once
Hooks and rails take real weight. Coats, backpacks, and tote bags don’t politely weigh two pounds. Use sturdy hooks, install into studs or proper anchors, and choose finishes that handle moisture (brushed metal finishes are often more forgiving than high-polish).
Storage That Stays Organized (Even With Humans Involved)
Build Around a “One-Stop Drop”
The most effective mudroom storage gives each person a home base. Whether that’s a locker, a cubby, or a simple hook-and-basket combo, the key is this: everyone needs a designated spot. Otherwise, your mudroom becomes a “communal pile” with strong opinions and no accountability.
Mix Open and Closed Storage
Open storage is fast (hooks, cubbies, baskets). Closed storage is calming (cabinets that hide the chaos). The sweet spot is a mix:
- Open: daily coats, frequently used shoes, dog leash, keys.
- Closed: off-season gear, sports equipment, cleaning supplies, the 47 reusable bags you swear you use.
Bench + Shoe Storage: The Mudroom MVP
A bench gives you a place to sit, a place to set bags, and a place to add shoe storage. Common configurations:
- Open cubbies under the bench: quick access, easy to assign one per person.
- Drawers under the bench: hides clutter and keeps dust off shoes.
- Lift-up bench top: great for bulky items like seasonal gear.
Don’t Forget the Tiny Stuff
The tiny stuff is what makes a mudroom feel “messy” even when you technically cleaned it. Add a small catch-all tray for keys, a wall-mounted mail sorter, and a labeled bin for gloves/hat chaos.
Layouts for Every Kind of Home (Big Mudroom Energy, Small Space Reality)
Small Space “Fake Mudroom”
No dedicated room? No problem. You can create a mudroom zone in:
- A coat closet: add hooks, narrow shelving, and a boot tray on the floor.
- A hallway corner: slim bench + vertical hooks + wall shelf.
- Under stairs: built-ins or cubbies turn awkward space into storage gold.
A “micro mudroom” works best when it’s vertical: hooks up top, storage below, and a clear walking path through the middle.
Garage Entry Workhorse Mudroom
If your family enters through the garage, treat that door like the main entrance. Focus on durability: waterproof flooring, heavy-duty hooks, and closed cabinets for tools, sports gear, and cleaning supplies.
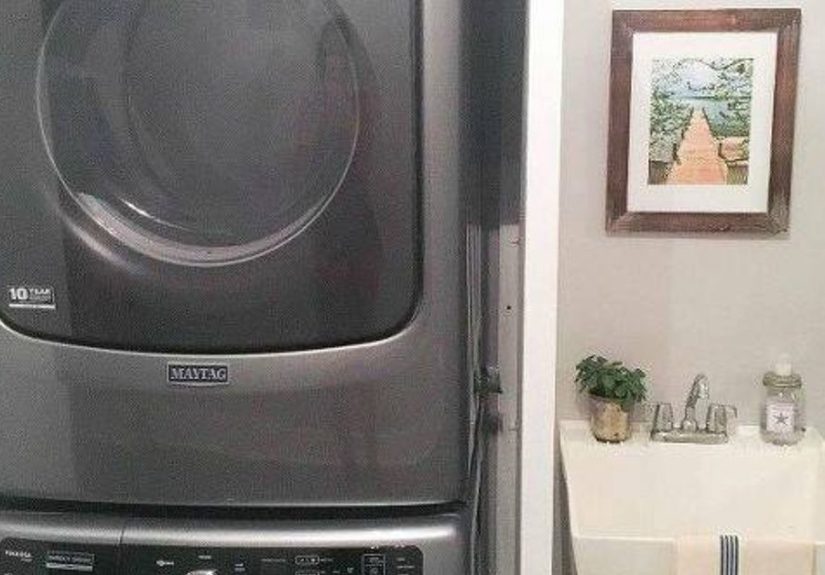
Mudroom + Laundry Room Combo
Combining laundry and mudroom functions can be incredibly efficientespecially if you stack appliances and use the freed-up wall space for a bench and hooks. Keep “clean” and “dirty” zones distinct: wet boots and coats on one end, laundry workflow on the other.
Kid- and Pet-Friendly Upgrades
- Lower hooks: kids can hang their own backpacks (miracles do happen).
- Boot tray + towel hooks: makes rainy-day cleanup less dramatic.
- Durable mats: choose ones that can be shaken, rinsed, and forgiven.
Comfort and Convenience Upgrades That Feel Fancy (But Are Actually Practical)
Lighting That Helps You Find the Missing Shoe
Mudrooms are often tucked away with limited natural light. Aim for layered lighting:
- Overhead ambient light: bright enough for the whole space.
- Task lighting: under-cabinet or sconce lighting near the bench/lockers.
- Motion sensors: great when your hands are full of groceries and regret.
Outlets and Charging
If your mudroom is the family launchpad, consider adding a small charging station inside a cabinet (so cords don’t become wall art). Also handy: an outlet near the floor for a boot dryer or vacuum.
Moisture Control
Even without a full “hose-down” setup, you can reduce damp funk with smart choices: quick-dry rugs, a boot tray, and enough airflow (a vented door, a small exhaust fan, or simply not trapping wet coats in a sealed cabinet).
A Step-by-Step Mud Room Renovation Game Plan
Step 1: Clear, Measure, and Mark
Empty the space completely. Measure walls, ceiling height, door swings, and any obstacles (vents, panels, windows). Then tape your “future layout” on the floor. If the taped walkway feels tight now, it’ll feel tight-tight when the bench and baskets show up.
Step 2: Demo (If Needed)
Remove what’s changing: old shelves, trim, damaged flooring, or outdated cabinetry. Keep an eye out for hidden issueswater damage near exterior doors is common.
Step 3: Rough-In Electrical/Plumbing
Add outlets, move light fixtures, or rough-in plumbing for a sink only if you need it. This is the moment for pros if the scope touches wiring or supply lines.
Step 4: Floors First
Install mudroom flooring before built-ins when possible (unless you’re doing cabinetry-first with flooring-toe-kick transitions). Make sure transitions to adjacent rooms are safe and smoothespecially if you’re going from tile to hardwood.
Step 5: Walls, Trim, and Built-Ins
Install wall treatments (wainscoting, beadboard), then build or install storage. If you’re doing custom lockers, measure twice and remember that walls in old houses have a long-standing hobby of being not-straight.
Step 6: Finish Work
Paint, install hooks, add shelves, place baskets and labels, and set up your “drop zone” accessories (tray, mail sorter, calendar board). The final 10% is where mudrooms become usable, not just pretty.
Mudroom Mistakes to Avoid (Because We’ve All Lived Them)
- Not enough hooks: You think you have enough. You don’t. Add moreor add a hook rail so you can expand later.
- Bench too deep: A bulky bench can choke the walkway and turn your mudroom into a sideways shuffle.
- No “wet zone” plan: Without a tray/mat area, water migrates into the house like it pays rent.
- Everything open: Open storage is great until the day you host guests and your mudroom becomes a museum exhibit titled “Modern Life in Piles.”
- Ignoring cleaning reality: If it’s hard to wipe or sweep, it won’t stay tidy. Design for easy cleanup.
How to Keep Your Renovated Mudroom From Sliding Back Into Chaos
The secret isn’t heroic weekend cleaning. It’s tiny habits built into the space.
- Daily: shoes on the tray, coats on hooks, keys in the tray.
- Weekly: quick sweep + wipe hooks/bench.
- Seasonally: rotate gear (winter boots out, sandals in), donate what nobody wears, and reset bins.
What Mud Room Renovations Feel Like: Real-World Experiences and Lessons (Extra )
You can read all the mudroom inspiration in the world, but the “aha” moments usually happen mid-renovationwhen your household meets your design choices in real time. Here are a few common, experience-based lessons homeowners tend to run into (and how they solve them) once the paint dries and the first rainy day hits.
Experience #1: The Day Everyone Discovers the Bench
A lot of people think the bench is just a nice-to-have… until it’s installed. Then it becomes the most-used “furniture” in the house. One family described it as the moment mornings stopped being a balancing act of hopping on one foot while hunting for a sock. The lesson: if you’re short on space, prioritize a bench over extra décor. Even a slim bench with shoe cubbies can change daily routines. Bonus lesson: leave a small “parking spot” next to the bench for backpacks and sports bags so they aren’t thrown onto the seating area.
Experience #2: Hooks Are a Lifestyle, Not an Accessory
Hooks look deceptively simple, but they’re the difference between “organized” and “why is your coat on the doorknob?” After living with a renovated mudroom for a few weeks, many homeowners add more hooks than they planned: a row for adults, a lower row for kids, and a couple “float” hooks for guests or the jacket that’s damp and needs airflow. The lesson: install a hook rail or plan for expansion. It’s much easier to add hooks than to retrain a household.
Experience #3: The Flooring Choice Shows Its True Colors in Week Two
The first week, everything looks perfect. The second week, it’s rainy. The third week, the dog gets involved. That’s when the “pretty but precious” flooring reveals itself. Some homeowners learn the hard way that ultra-glossy finishes show every footprint and streak, which can make a space feel messy even when it’s clean. Meanwhile, textured tile or a forgiving vinyl finish makes the room feel calmer day-to-day. The lesson: for a mudroom remodel, choose floors that look good dirty-ishbecause they will be, at least sometimes. Pair that with a boot tray and you’ll reduce the mess before it spreads.
Experience #4: Closed Cabinets Save Your Sanity Before Guests Arrive
Open cubbies are great for speed, but a fully open mudroom can start to feel visually loudespecially in busy seasons (school, sports, holidays). A common “wish we did this sooner” upgrade is adding at least one closed cabinet for the overflow: reusable bags, extra paper towels, pet supplies, spare hats, and the random collection of items that doesn’t belong anywhere else. The lesson: mix open and closed storage so your mudroom can be both functional and peaceful. Think of cabinets as your “reset button” when life gets hectic.
Experience #5: The Best Mudroom Is the One Your Family Will Actually Use
This is the big one. The most beautiful mudroom won’t stay organized if it’s inconvenient. Homeowners who feel happiest with their renovation often follow a simple rule: “Make the right choice the easy choice.” Put hooks where hands naturally reach. Put the shoe tray where shoes naturally land. Label bins if multiple people use them. Add a key tray at eye level near the door. And if kids are involved, give them storage that matches their height and habits. The lesson: design for real life, not the version of life where everyone gently folds their jacket and places it in a basket like a catalog photo.
If you take nothing else from these lived-in lessons, take this: a successful mud room renovation isn’t about having more spaceit’s about using space better. When the layout matches your routines, the mudroom becomes the quiet hero of the house: less mess, faster mornings, and fewer “WHO LEFT THIS HERE?” moments.
Wrap-Up: Your Mudroom Can Be Functional and Good-Looking
A smart mudroom renovation focuses on what the space must handle: dirt, moisture, daily traffic, and clutter. Start with durable floors, build storage around your household’s routines, mix open and closed zones, and add small upgrades (lighting, outlets, wet zone protection) that make the room easier to use every day. Do that, and your mudroom won’t just look betterit’ll make the whole house feel cleaner and more organized.


