Table of Contents >> Show >> Hide
- Why a Stenciled Throw Pillow Is Such a Big Deal (For Such a Small Project)
- Materials and Tools
- Step 1: Choose the Right Pillow Base (Fabric Matters More Than You Think)
- Step 2: Pick a Stencil Design That Won’t Betray You
- Paint Options: Fabric Paint vs. Acrylic + Fabric Medium
- Stencil Pillow DIY: Step-by-Step Tutorial
- Freezer Paper Stencils: The Crisp-Line “Cheat Code”
- Design Ideas With Specific Examples
- Pro Tips to Prevent Paint Bleed (and Emotional Bleed)
- Troubleshooting: Quick Fixes for Common Problems
- Care and Cleaning: Make Your Stenciled Pillow Last
- Time and Cost Breakdown
- Conclusion
- Experiences: What It Really Feels Like to Do a Stencil Pillow DIY (500+ Words)
A great throw pillow can make a couch look “designer.” A bad throw pillow can make a couch look like it just lost a fight
with a clearance aisle. The good news? A stencil pillow DIY is one of the fastest ways to get a custom look
without paying custom pricesor learning to sew like you’re auditioning for a period drama.
In this guide, you’ll learn how to stencil a pillow cover with crisp lines, durable paint, and zero “why is it bleeding?!”
panic. We’ll cover materials, paint choices, freezer-paper stencils, pro techniques, troubleshooting, and careplus a
longer “real-life experience” section at the end so you know what to expect when your project starts acting like it has
a personality.
Why a Stenciled Throw Pillow Is Such a Big Deal (For Such a Small Project)
Pillows are visual magnets. Swap them, and the whole room looks differenteven if the rest of your decor hasn’t moved since
last winter. A stenciled throw pillow also lets you:
- Match your exact color palette (not the “close enough” version you find in stores).
- Add patterns to plain pillows without buying new fabric by the yard.
- Personalize with monograms, quotes, icons, or seasonal designs.
- Upcycle older pillow covers that are structurally fine but aesthetically… tired.
Materials and Tools
Here’s what you’ll want on hand for a clean, professional-looking stencil pillow cover.
(Substitutions includedbecause not everyone has a craft closet that doubles as a small retail store.)
Essentials
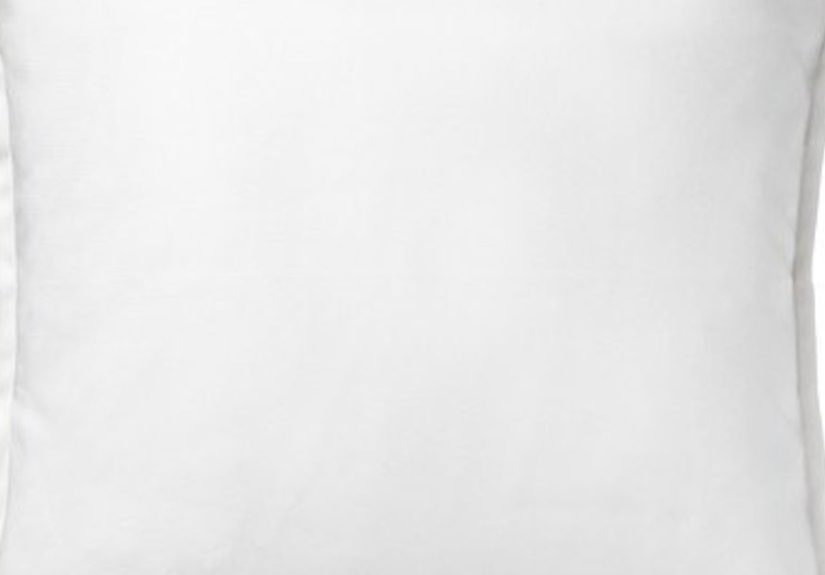
- Pillow cover (store-bought or DIY-sewn). Light colors show stencil detail best.
- Pillow insert (optional until the endkeep it out of the paint zone).
- Stencil (mylar, plastic stencil sheet, or freezer paper stencil).
- Fabric paint or acrylic paint + fabric medium.
- Stencil brush or foam pouncer/sponge dauber (stenciling loves dabbing, not brushing).
- Painter’s tape (for positioning and keeping the stencil from shifting).
- Cardboard insert (slip it inside the cover so paint won’t bleed through to the back).
- Paper towels (for offloading paintthis is the secret handshake of crisp stenciling).
Nice-to-Have Upgrades
- Repositionable spray adhesive (light tack) to keep edges tight, especially on textured fabric.
- Ruler + fabric-safe pencil/chalk for alignment lines.
- Heat-setting setup: iron + pressing cloth (or dryer if your paint instructions allow).
- Stencil film + craft knife if you want to cut your own design.
Step 1: Choose the Right Pillow Base (Fabric Matters More Than You Think)
For beginners, pick a pillow cover made from cotton, linen, or a cotton-linen blend.
These fabrics accept paint well and show crisp edges. Very stretchy knits can shift, and super-textured weaves can invite
paint to sneak under the stencil like it pays rent.
Quick fabric checklist
- Pre-wash if possible (removes factory finishes and helps paint adhere).
- Iron flat so your stencil lays smoothly.
- Test a scrap (or a hidden spot) to see how the paint behaves.
Step 2: Pick a Stencil Design That Won’t Betray You
Stencil success is mostly about choosing a design that matches your patience level.
Intricate patterns look amazing, but they also have more little openings where paint can blur.
Beginner-friendly stencil ideas
- Bold geometrics: stripes, chevrons, grids, diamonds.
- Simple botanicals: leaves, branches, large florals.
- Monograms: one big letter or a clean 2–3 letter set.
- Icons: stars, moons, hearts, snowflakes (seasonal pillows are always a win).
Tip: Scale is everything. A stencil that’s too small can look “busy” fast. A larger motif (or a repeating pattern with
breathing room) reads more like high-end home decor.
Paint Options: Fabric Paint vs. Acrylic + Fabric Medium
You’ve got two reliable routes:
Option A: Fabric paint
Fabric paint is formulated to stay flexible and wash-friendly once properly set. It’s usually the easiest choice for
beginners because it’s designed for textiles from the start.
Option B: Acrylic paint + fabric medium
If you already have acrylic craft paint, mixing in a fabric medium helps the paint remain flexible and
reduces cracking. Follow the fabric medium label for ratios (they vary), and always test first.
Whichever you choose, read the label for drying, curing, and heat set instructions. Different products
vary on timing, heat level, and whether a dryer is acceptable.
Stencil Pillow DIY: Step-by-Step Tutorial
1) Prep your workspace
- Cover your surface with a drop cloth or kraft paper.
- Lay the pillow cover flat and smooth it out.
- Insert cardboard (and optionally wax paper) inside the cover so paint won’t transfer through.
2) Position and secure the stencil
Measure your pillow cover to find the center (or decide on an offset design for a modern look). Tape the stencil in place
with painter’s tape. If your fabric is textured, a light tack adhesive can help the stencil hug the fabric.
3) Load your brush the “correct but annoying” way
Put a small amount of paint on a palette or paper plate. Dab the brush or foam pouncer lightly into paint, then dab most
of it off on a paper towel. Yes, really. You want a “dry brush” effectthin layers beat thick globs every time.
4) Pounce, don’t paint
Hold the brush straight up and down and use a gentle up-and-down dabbing motion. Brushing sideways pushes paint under
stencil edges. Work from the outer edges inward to reduce accidental smears.
5) Build color with light layers
Expect to do 2–4 light passes for solid coverage. Let paint get touch-dry between layers if it feels wet. Patience here
equals crisp edges later.
6) Remove the stencil carefully
Peel slowly. If you see any wet spots, pause and let them dry before the stencil flops back down and ruins your day.
7) Dry, heat-set, and cure (aka: the part people skip and regret)
Let the design dry thoroughly. Many fabric paint systems recommend drying about a day before heat-setting; heat-setting
might involve pressing with a dry iron (no steam) using a pressing cloth, sometimes for anywhere from short repeated presses
to a few minutes total depending on the paint brand. Then allow additional cure time before washingoften 2–3 days.
Always follow your paint label for best durability.
Freezer Paper Stencils: The Crisp-Line “Cheat Code”
If you want sharp edges and minimal bleed, freezer paper is a fan favorite. The shiny side bonds temporarily to fabric
with heat, creating a tight seal at the edges.
How it works
- Draw or print your design and trace it onto freezer paper.
- Cut out the design with a craft knife.
- Place freezer paper shiny side down on the fabric.
- Iron it to adhere (use a dry iron and keep the fabric flat).
- Stencil with light dabbing coats, then peel once dry.
Freezer paper is especially great for one-off designs (like a name, quote, or icon) where you don’t need a reusable stencil.
Design Ideas With Specific Examples
Modern minimalist
- Look: Big geometric shape centered (circle, arch, half-moon).
- Colors: Black on oatmeal linen, or warm terracotta on cream cotton.
- Pro move: Use painter’s tape to create a clean “frame” border around the stencil.
Classic stripes (that look expensive)
- Look: Two or three wide stripes across the front.
- How: Stencil stripe sections or tape them off and pounce paint lightly.
- Tip: Slightly imperfect stripes can look artisanaljust keep spacing consistent.
Boho pattern mix
- Look: Mandala or block-print style pattern, repeated 2–3 times.
- Colors: Deep navy, olive, clay, or mustardmuted tones hide tiny “oops” moments.
Seasonal swap pillow
- Winter: Snowflakes or pine branches.
- Fall: Leaves or simple harvest shapes.
- Spring: Florals, bees, or a light gingham-style stencil pattern.
Pro Tips to Prevent Paint Bleed (and Emotional Bleed)
- Use less paint than you think. Then use even less than that.
- Secure the stencil tightly with tape, and consider light tack adhesive on textured fabric.
- Work in light layers. Thick paint is the #1 cause of seepage.
- Keep your tool vertical. Dabbing straight up-and-down helps prevent pushing paint under edges.
- Don’t rush removal. If paint is wet, let it set before peeling the stencil away.
- Do a practice run on scrap fabric to test color, texture, and technique.
Troubleshooting: Quick Fixes for Common Problems
“My paint bled under the stencil.”
Usually caused by too much paint or stencil movement. For next time: offload paint, secure edges better, and dab lightly.
If the bleed is small, you can often “clean up” edges with a tiny brush and the background color once dry.
“My coverage looks patchy.”
Add another light layer. Patchiness is normal after the first passstenciling is a build, not a blast.
“The stencil shifted mid-project.”
Tape down more than you think you need, especially on corners. If you’re repeating a pattern, mark alignment points with
chalk so repositioning stays consistent.
“The paint feels stiff.”
That can happen if paint is applied too thickly or if you used acrylic without fabric medium. Thin layers and the right
paint system help maintain softness.
Care and Cleaning: Make Your Stenciled Pillow Last
A stenciled pillow is home decor, not a disposable craft. Treat it right:
- Let paint dry and cure fully before washing (follow your paint’s label).
- Heat-set if required (often with a dry iron and a pressing cloth).
- Wash pillow covers inside out on a gentle cycle in cool water.
- Avoid harsh detergents and skip high heat drying when possible.
Time and Cost Breakdown
- Time: 30–90 minutes active crafting + drying/curing time (often 1–3 days total before “wash-ready”).
- Cost: Typically budget-friendlyespecially if you already own paint and brushes. Store-bought covers and reusable stencils keep it simple.
Conclusion
A stencil pillow DIY is the sweet spot of home decor: low commitment, high impact, and wildly customizable.
Pick a good base fabric, secure your stencil like it’s guarding a secret, apply paint in light layers, and don’t skip the
dry/heat-set/cure steps. Do that, and you’ll end up with a pillow that looks boutiquewithout the boutique price tag.
Experiences: What It Really Feels Like to Do a Stencil Pillow DIY (500+ Words)
Let’s talk about the part most tutorials don’t say out loud: stenciling a pillow is equal parts “this is so easy” and
“why is my brush doing that?” The overall process is beginner-friendly, but there are a few common experiences that pop up
for almost everyoneespecially on your first stenciled throw pillow.
First, you’ll probably underestimate how much prep matters. Many DIYers start thinking the magic is in the stencil
design, when the real magic is in the boring stuff: ironing the cover flat, adding cardboard inside, and making sure the
fabric isn’t bunching. The second you skip those steps, your stencil edges start looking fuzzy, and suddenly you’re
negotiating with your pillow like it’s a coworker who “forgot” to do their part.
Next comes the “paint shock.” Almost everyone loads their brush with too much paint on the first trybecause our brains
associate painting with coverage. But stenciling is the opposite: it rewards restraint. The moment you start dabbing most
of the paint onto a paper towel (and you’ll think, “This feels wasteful”), you’ll see the difference immediately. The
coverage builds slowly, but your edges stay clean. It’s one of those rare life lessons where patience actually pays off
within minutes, which is honestly suspicious.
Another very normal experience is the “alignment spiral.” If you’re doing a repeating pattern, you may find yourself
measuring, re-measuring, and then measuring again, convinced your eyes are lying to you. Here’s what usually helps:
lightly marking guide points with chalk, and stepping back every so often. Up close, you’ll obsess over a 1/8-inch drift.
From the couch (aka the pillow’s final performance venue), that tiny shift often disappears completely. In other words:
don’t let perfection bully you out of finishing the project.
If you try freezer paper stencils, the experience is typically: “This is genius” followed by “Why didn’t I buy extra
freezer paper?” People love it because the ironed-on edge reduces bleed, but it also teaches you to plan your cuts. The
first time, you might cut a design that’s too delicate and accidentally tear a thin section. That’s not a failure; it’s
the universe’s way of saying: choose chunkier shapes until you’ve got a feel for it.
The drying/curing stage is where enthusiasm goes to take a nap. DIYers often finish the paint, admire it for 30 seconds,
then immediately want to zip the cover onto an insert and throw it on the sofa like a trophy. The better experience is to
treat drying like part of the craft. Let it dry thoroughly, heat-set if your paint requires it, and allow the recommended
cure time before washing. This is how your design stays crisp and doesn’t fade the first time someone spills coffee and
pretends it didn’t happen.
Finally, the best part: the moment you put the finished pillow in your space. This is where people usually say, “Wait,
I made that?” A stenciled pillow has a way of looking far more expensive than it is, especially if you choose a modern
palette (think black + linen, navy + cream, or clay + white) and keep the design simple. And once you make one, you’ll
start eyeing every plain textile in your hometea towels, tote bags, curtainslike they’re next in line. Congratulations.
Your house is now a craft opportunity.