Table of Contents >> Show >> Hide
- Choose Your Style: Leaning Ladder vs. Freestanding A-Frame
- Design “Math” Without the Headache: What Makes a Ladder Stand Stable?
- Materials and Tools
- Build Plan: A Practical Size That Works in Real Homes
- Step-by-Step: How to Build the Ladder Plant Stand
- Safety and Stability: Don’t Skip This Part
- Finishing Options: Make It Pretty and Practical
- Customization Ideas That Actually Improve the Stand
- Common Mistakes (and Easy Fixes)
- How to Style Your Ladder Plant Stand (So It Looks Intentional)
- Real-World Build Experiences: What It’s Like to Make (and Live With) a Ladder Plant Stand
- Sources Consulted (No Links)
If your plants have started “making friends” and multiplying in every sunny corner of your home, you have two options: (1) buy a bigger house, or (2) build up instead of out. A ladder plant stand is the space-saving, good-looking middle groundpart shelf, part sculpture, part polite confession that yes, you own too many pothos.
This tutorial walks you through building a sturdy ladder-style plant stand (the classic “leaning ladder” look) with beginner-friendly joinery, smart stability upgrades, and finish options for indoor or outdoor use. Along the way, we’ll talk through the design choices that actually matterlike why your bottom shelf should be the strongest (and why your top shelf shouldn’t hold a watering can the size of a small dog).
Choose Your Style: Leaning Ladder vs. Freestanding A-Frame
Before you cut wood, pick the style that fits your space and your comfort level:
Option A: Leaning Ladder Plant Stand (Most Popular)
- Pros: Slim footprint, easy build, looks modern, great for tight corners and apartments.
- Cons: Best when anchored to the wall (recommended), and weight must be managed (heavy pots down low).
Option B: Freestanding A-Frame Plant Stand
- Pros: Doesn’t rely on a wall, can sit in the middle of a room or patio, naturally stable.
- Cons: More parts, typically heavier, takes up more floor space.
This tutorial focuses on Option A (leaning ladder), with a quick conversion tip later if you want to make it freestanding.
Design “Math” Without the Headache: What Makes a Ladder Stand Stable?
A ladder plant stand is basically a controlled balancing act. To keep it from wobbling or tipping, you want these three things working together:
- A wide, grippy base: The bottom needs solid contact with the floorrubber feet or felt pads help.
- A reasonable lean angle: Around 10–15 degrees is common for leaning ladder shelvesenough to feel secure against a wall without sticking way out into the room.
- Low center of gravity: Put heavier pots on the lower shelves, lighter plants up top. Your monstera doesn’t need the penthouse.
Pro tip: If kids, pets, or energetic vacuum cleaners live in your home, treat wall anchoring like a seatbelt: you hope you never “need” it, but you’ll be glad it’s there.
Materials and Tools
Recommended Wood
- Pine: Affordable, easy to cut and sand, great for indoor stands (paint or stain beautifully).
- Poplar: Slightly pricier, paints very smoothly (great for a “built-in” look).
- Cedar: A smart choice for outdoor or humid spaces (naturally rot resistant), and it smells like you know what you’re doing.
Skip pressure-treated lumber for an indoor plant stand. It’s designed for outdoor structural use and can be messy to work with in enclosed spaces. If you’re building for outdoors, cedar or an exterior-rated wood plus a good finish is usually the nicer route.
Hardware and Supplies
- Wood screws (1 1/4″ and 2″ are common sizes)
- Wood glue
- Sandpaper (120 and 220 grit)
- Optional: pocket hole screws + pocket hole jig (makes clean, strong joints)
- Optional: brad nails (for quick assembly of tray-style shelves)
- Optional: wall anchoring strap kit (highly recommended for leaning designs)
- Finish of choice (paint, stain + topcoat, or clear coat)
- Waterproof plant trays / drip trays (highly recommended indoors)
Tools
- Miter saw or circular saw (a handsaw works, just slower)
- Drill/driver + bits
- Measuring tape, pencil, square
- Clamps (helpful, not mandatory)
- Sander or sanding block
- Stud finder (if anchoring to wall studs)
- Level (optional but helpful)
Build Plan: A Practical Size That Works in Real Homes
Here’s a proven, living-room-friendly size for a 4-shelf leaning ladder plant stand:
- Overall height: ~64″
- Overall width: ~19–20″
- Overall depth (floor footprint): ~19–20″
- Shelf count: 4 (easy to scale to 3 or 5)
- Lean angle: ~15° cut on the bottom and top ends of the legs
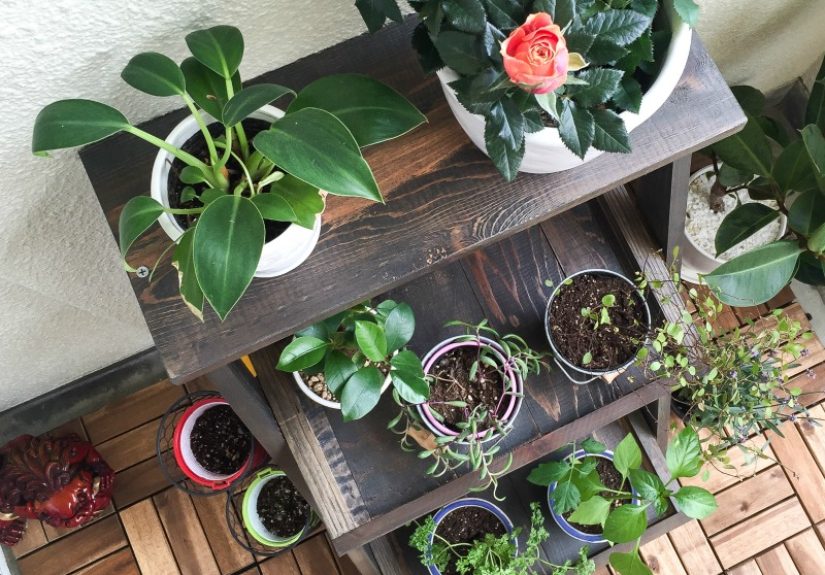
Instead of making flat shelves that things can slide off of, we’ll build tray-style shelves with a low lipgreat for pots, drip trays, and that one plant that always leans like it’s posing for a photo shoot.
Cut List (Example: 4-Shelf Tray Ladder Stand)
Legs (choose one lumber option):
- Option 1 (sturdier): 2 legs from 2x2s, each cut to 64″ with 15° cuts at both ends
- Option 2 (sleeker): 2 legs from 1x3s, each cut to 64″ with 15° cuts at both ends
Tray Shelves (4 trays, identical size for simplicity):
- Tray bottoms: (4) pieces of 1×6 cut to 17 1/2″
- Tray sides (depth): (8) pieces of 1×3 cut to 7″
- Tray front/back (width): (8) pieces of 1×3 cut to 17 1/2″
Shelf Supports (rails that hold the trays):
- (8) 1×2 support cleats cut to 7″ (two per tray: left and right)
Note: Lumber sizes are “nominal.” A 1×3 isn’t exactly 1″ x 3″. Measure your actual boards and adjust if you’re aiming for a perfect fit.
Step-by-Step: How to Build the Ladder Plant Stand
Step 1: Cut the Legs and Set the Lean
- Cut your two legs to length (about 64″).
- Set your saw to 15° and cut the bottom end of each leg so it sits flat on the floor while leaning back.
- Cut the top end at the same angle so it sits flush against the wall.
Quick check: Lay both legs on the floor and line them up. The angles should mirror each other so the legs lean the same direction. If one looks like it’s auditioning for a different project, re-check your cuts.
Step 2: Build the Tray Shelves (Strong + Water-Friendly)
- For each tray: place the 1×6 bottom on a flat surface.
- Glue and attach the 1×3 sides around the perimeter to create a shallow box (about 2 1/2″ tall if using 1x3s).
- Fasten with brad nails or screws. If using screws, pre-drill to avoid splitting.
- Lightly sand the tray edges and corners (plants deserve smooth housing too).
Why trays? They help contain drip trays, prevent pots from sliding, and make the whole stand feel more “built” than “stacked boards daring gravity to do something funny.”
Step 3: Mark Shelf Locations on the Legs
With the legs leaning against a wall (or propped up in the correct angle), mark where each tray will sit. A common spacing is 10–12″ between trays, but you can customize based on your pots.
- Start the bottom tray about 8–10″ above the floor (to avoid bumping baseboards and to keep heavy plants low).
- Mark the remaining tray heights working upward.
Plant reality check: If you own tall plants, leave extra clearance on one shelf so you’re not pruning just to make your stand “look symmetrical.”
Step 4: Attach Shelf Support Cleats
- At each shelf height, attach a 1×2 cleat to the inside face of each leg (one on the left leg and one on the right leg).
- Use glue and screws, and keep cleats level with each other so the tray doesn’t rock.
- Pre-drill your screw holes to prevent splittingespecially near the ends.
Strength tip: Two screws per cleat (staggered) is usually plenty. If you’re planning for heavier pots, consider thicker legs (2x2s) and longer screws where appropriate.
Step 5: Set the Trays and Secure Them
- Place each tray on its pair of cleats.
- Check that trays sit square and level. Adjust if needed.
- Fasten trays from underneath into the tray bottom (or from the inside lip down into the cleats) so hardware is less visible.
Optional upgrade: Add a slim back stop (a thin strip along the back edge of each tray) if your wall is slightly uneven or you want extra insurance against pots shifting.
Step 6: Sand Like You Mean It
Start with 120 grit to smooth rough spots and edges, then finish with 220 grit for a touch-friendly surface. Pay special attention to tray lips and cornersthose are the places you’ll bump while watering.
Safety and Stability: Don’t Skip This Part
Leaning furniture can tip if weight is high or if it’s bumped. Make your stand safer with these practical steps:
- Anchor it: Use a furniture strap kit and attach into a wall stud when possible.
- Weight discipline: Heavy pots on the bottom shelf. Light plants up top.
- Footing: Add rubber pads (for grip) or felt pads (for floors) to prevent sliding.
- Don’t overload: If a pot feels like a kettlebell, it probably belongs on the flooror at least on shelf #1.
Finishing Options: Make It Pretty and Practical
For Indoor Use
- Paint: Great for poplar or pine. Use primer for smooth coverage.
- Stain + water-based topcoat: Keeps the wood look but adds protection. Water-based finishes tend to dry faster and smell less than many oil-based products.
- Clear coat only: Perfect if you used cedar or a nice piece of pine and want a natural vibe.
For Outdoor Use (or Humid Sunrooms)
- Exterior-rated clear coat: Look for finishes designed to handle moisture and UV exposure.
- Paint + exterior topcoat: A solid exterior paint system can be very durable.
- Seal the end grain: The cut ends soak up moisture first, so give them extra attention.
Plant-specific tip: Even indoors, water happens. Use drip trays and consider a protective finish on the tray bottoms and lipsthose areas get splashed the most.
Customization Ideas That Actually Improve the Stand
Make One Shelf “Tall-Plant Friendly”
Instead of evenly spacing all trays, leave a larger gap in the middle for a taller plant. Your fiddle-leaf fig will appreciate the legroom.
Add Grow Light Clips (Indoor Winter Mode)
If you’re building an indoor plant corner, add a small crossbar near the top for clip-on grow lights. This keeps cords tidy and prevents the “sad plant in January” situation.
Convert to a Freestanding A-Frame
Build a second matching ladder side, connect them at the top with hinges, and add a chain or back brace to limit how far the legs spread. Now it stands on its owngreat for patios or as a room divider.
Upgrade the Trays for Drainage
If you want to water plants in place, drill small drainage holes in each tray bottom and place a removable waterproof liner or catch tray beneath. (Or keep it simple and always use saucersyour floors will vote “yes.”)
Common Mistakes (and Easy Fixes)
- Wobble: Check that the legs are the same length, the angle cuts match, and the feet sit flat. Add pads or trim the longer leg slightly.
- Splitting wood: Pre-drill, especially near ends. Switch to thinner screws if needed.
- Trays don’t sit level: Your cleats may be off by a hair. Shim under one tray side or re-seat the cleat.
- Top feels “tippy”: Reduce top load, move heavier pots down, and add an anchor strap.
How to Style Your Ladder Plant Stand (So It Looks Intentional)
A ladder plant stand is functional, but it also becomes part of your decor. A few quick styling rules keep it looking curated instead of chaotic:
- Repeat one element: Match pot colors, or repeat a material (terracotta, white ceramic, woven baskets).
- Vary heights: Mix trailing plants with upright ones so every shelf has movement.
- Give plants breathing room: It’s okay to leave one “empty” spot for visual balance (and future plant acquisitions you’ll swear are “the last one”).
Real-World Build Experiences: What It’s Like to Make (and Live With) a Ladder Plant Stand
Let’s talk about the part no cut list can capture: the experience of building a ladder plant stand and what you learn once it’s actually holding plants in your home. Because the first time you step back and see your greenery arranged vertically, it feels like you just unlocked a new level in the game of “adulting with houseplants.”
The first surprise is how quickly it comes together. Compared with big furniture builds, a ladder plant stand is satisfying because the project moves fast: two legs, a few trays, and suddenly there’s something standing. It’s the kind of DIY that rewards you before you get tired of sanding (though, yes, you’ll still sandyour hands and your sleeves will thank you later).
The second surprise is that the angle matters more than you think. On paper, 10–15 degrees sounds tiny. In real life, that lean controls everything: footprint, stability, and how close your stand hugs the wall. Many DIYers realize mid-build that they don’t want the stand sticking too far into the roomespecially in narrow spaces. The good news: you can tweak the angle a little by adjusting how the feet sit and how high the top contacts the wall, but it’s best to commit to a clean, consistent angle cut early so both legs behave the same way.
The third surprise is “plant weight reality.” Empty pots look harmless. Add wet soil, and suddenly that cute ceramic planter becomes a serious object with opinions. Once your stand is loaded, you’ll learn a simple truth: heavy plants belong low. A ladder stand looks best when the arrangement is balanced, but it behaves best when the mass is at the bottom. The upside is that this rule also makes your life easieryour most-watered plants end up closer to waist height instead of perched above your head like a leafy chandelier.
Water management becomes your new best habit. Even careful waterers spill a little. Trays, saucers, and wipeable finishes are what make the stand feel “real-life friendly.” Many people end up adding a small towel-hook nearby or keeping a microfiber cloth tucked into a basket on the bottom shelf. It’s not glamorous, but it’s the difference between “cozy plant corner” and “why is my floor warping?”
And then there’s the fun part: styling. Once the stand is built, you’ll probably rearrange plants three times in the first hour. Trailing plants look amazing up higher where they can cascade. Upright plants anchor the lower shelves. And the stand will quietly encourage you to edit your collectionmoving a few plants off windowsills, freeing up table space, and making the room feel calmer. It’s like a tiny home makeover powered by chlorophyll.
Finally, the ladder plant stand has a sneaky side effect: it makes you feel capable. You look at it and think, “I built that.” And then you start eyeing other corners of your home like they’re auditioning for DIY upgrades. Consider yourself warned. This is how it starts.
Sources Consulted (No Links)
- BobVila.com (DIY ladder plant stand methods and measurements)
- ThisOldHouse.com (leaning ladder bookcase construction approaches)
- FamilyHandyman.com (leaning ladder shelf build considerations)
- Lowes.com (ladder shelf project planning and diagrams)
- HomeDepot.com (DIY ladder-style shelving concepts and materials guidance)
- HGTV.com (ladder shelf DIY approaches and finishing ideas)
- TheSpruce.com (DIY plant stand ideas and indoor styling considerations)
- TheSpruceCrafts.com (small ladder plant stand plan concepts)
- Ana-White.com (budget-friendly plant ladder and planter-style builds)
- ConsumerReports.org (anti-tip considerations and anchor kit performance context)
- CPSC.gov / AnchorIt.gov (tip-over awareness and anchoring education)
- EPA.gov (general indoor air guidance related to low/zero-VOC coatings)
- Minwax.com (exterior spar urethane features and protection claims)
- GeneralFinishes.com (exterior clear topcoat characteristics)