Table of Contents >> Show >> Hide
- First: What “saving” a stream actually means (and why that matters)
- Way #1: Use official offline downloads (easy, boring, and that’s a compliment)
- Way #2: Record streaming video you have rights to (meetings, webinars, and your own content)
- Way #3: Use built-in screen recording (best for short clips and personal reference)
- Organize what you save (so Future You doesn’t hate Present You)
- Conclusion
- Experiences People Commonly Have When Saving Streaming Video (What Works and What Surprises You)
Streaming is greatuntil you’re on a plane, your Wi-Fi is doing its best impression of a potato, or a “must-watch” episode disappears from a service
like it’s in witness protection. That’s when people start searching for how to save streaming video.
Quick (but important) note before we jump in: “save” can mean different things. Sometimes it means downloading a show for offline viewing inside an app.
Sometimes it means recording a meeting or webinar you have permission to keep. And sometimes it means screen recording a short clip for personal reference.
What it shouldn’t mean is “break encryption, bypass DRM, and build a bootleg library.” Besides the legal mess, most streaming platforms actively block that anyway.
First: What “saving” a stream actually means (and why that matters)
If you’re trying to download streaming video the “normal” waylike ending up with an MP4 file you can play anywheremany major platforms won’t allow it.
Instead, they offer offline downloads that stay protected inside the app and may expire. That’s not a bug; it’s the point.
So the smartest approach is to match the method to the situation. Here are three reliable, legal-ish (read: permission-based) ways people save streaming video,
plus tips to keep your storage from turning into a chaotic junk drawer.
| Method | Best for | What you actually “get” |
|---|---|---|
| Official offline downloads | Movies/TV in supported apps | Playable inside the app (often time-limited) |
| Platform recording tools | Meetings, webinars, your own streams | A real file (often MP4) you can archive |
| Device screen recording | Short clips, tutorials, personal notes | A video capture (may be blocked by DRM) |
Way #1: Use official offline downloads (easy, boring, and that’s a compliment)
The cleanest way to save streaming video is the method streaming companies actually want you to use: download for offline viewing.
It’s usually a couple of taps, it preserves quality, and it won’t end with your account getting a “we need to talk” email.
What to expect from offline downloads
- You usually won’t get a shareable file. Downloads often play only inside the service’s app.
- Not every title is downloadable. Licensing rules vary by show and region.
- Downloads may expire. Some services remove unwatched downloads after a set number of days or when content leaves the platform.
- Plan/device restrictions exist. Some features require specific subscription tiers or supported devices.
Practical examples across popular services
While each app looks a little different, the pattern is the same: find a title, look for a download icon, choose quality if available, then manage your saved videos
in a Downloads section.
-
Netflix-style approach: You browse for downloadable titles inside the mobile app (or supported devices) and tap the download icon on a movie or episode.
Some plans may limit features like auto-download recommendations. - Disney+/family travel approach: Downloads are geared toward phones/tablets for tripsthink “load up before the holiday drive” so you’re not relying on spotty hotel Wi-Fi.
- Hulu-style approach: You download “select titles” and manage them in the Downloads hub. Keep an eye on time limitsunwatched downloads may expire after a set window.
-
Prime Video-style approach: Offline downloads are supported through the Prime Video app on certain platforms (including mobile and some desktop environments),
but the supported device list matters. - YouTube Premium-style approach: Offline video downloads are tied to membership and are meant for watching later without using data, not for building a local file collection.
Tips that prevent the classic “I downloaded it… why won’t it play?” moment
- Download on Wi-Fi, then open the app once before you go offline. Some apps want a quick license check before they’ll play downloads.
- Pick a quality setting that matches your storage. If you’re trying to save streaming video on a 64GB phone, “Best quality everything” is a trap.
- Keep one “offline” profile clean. If multiple people use the same device, create a simple rule: downloaded videos live in one profile so they don’t get deleted accidentally.
- Know the expiration rules. If you’re saving videos for a trip next month, download closer to departureotherwise, the app may remove them when the clock runs out.
Bottom line: if your goal is watching streaming video offline (not owning the file), this method wins on simplicity and safety.
Way #2: Record streaming video you have rights to (meetings, webinars, and your own content)
When the “stream” is something you created (or something you’re explicitly allowed to keep), the best way to save it is often built right into the platform.
This is especially true for video meetings, online classes, webinars, and creator livestreams.
Unlike entertainment apps, these recordings typically become real files you can archive, share with a team, or upload to a knowledge base.
Meeting and webinar recordings (the professional way to “save a stream”)
-
Zoom recordings: You can record locally, choose where files are stored, and typically end up with common formats like MP4 (plus audio-only and captions/transcripts depending on settings).
This is great for training libraries and “send it to people who missed the call” workflows. - Google Meet recordings: Recordings are saved to the organizer’s Google Drive in a dedicated Meet Recordings folder, which makes it easy to find and share later.
- Microsoft Teams recordings: Meeting recordings are processed and saved to the organizer’s OneDrive (and appear in the meeting chat/channel), which helps keep ownership and access clear.
Creators saving their own livestreams
If you stream games, events, or tutorials, saving the video is part of the jobnot an afterthought. Platforms often keep past broadcasts for a limited time,
so creators who want a long-term archive should download/export within that window.
- Twitch VODs: Past broadcasts can be time-limited, so you’ll want to download or export before they expire if you’re building a content library.
- Vimeo (when downloads are enabled): If you own the video or the creator allows it, Vimeo provides legitimate download options that are meant for proper offline access.
A quick permission checklist (because “record” is a social verb)
- Get consent. Many workplaces and schools require disclosure before recording.
- Respect private content. If a webinar is paid or restricted, don’t redistribute the recording unless you have explicit rights.
- Store responsibly. Meeting recordings can contain personal infotreat them like documents, not like memes.
This method is the best choice when you’re saving streaming video for work, school, or content creationbecause you end up with an actual file you can manage.
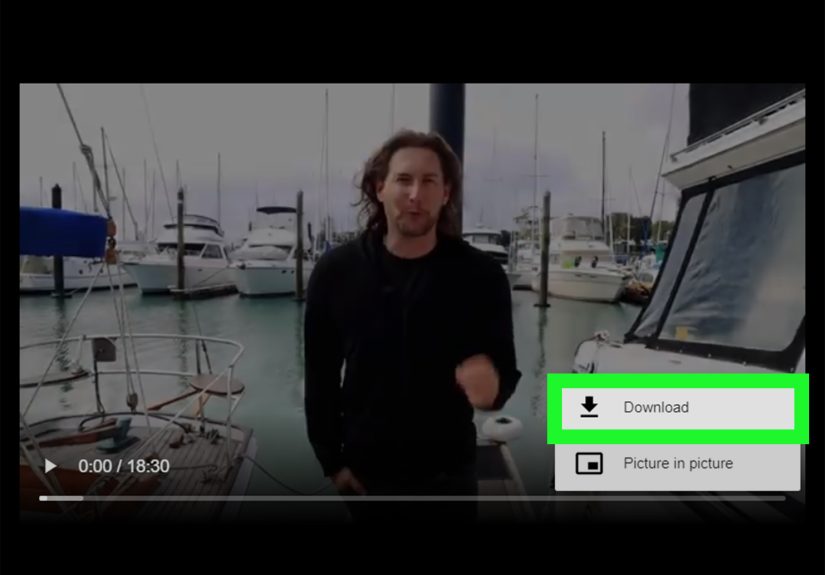
Way #3: Use built-in screen recording (best for short clips and personal reference)
Sometimes you don’t need a full offline download. You just need to capture a quick tutorial segment, a settings walkthrough, a bug you’re reporting,
or a short snippet from a stream you have permission to reference. That’s where screen recording shines.
One reality check: many entertainment streaming apps use protection that can cause screen recordings to show a black screen or muted audio.
If that happens, the answer is not “find a hack.” The answer is “use official downloads” or “get permission and use a platform recording tool.”
How to screen record on iPhone and iPad
- Open Control Center.
- Tap the Screen Record button and wait for the countdown.
- Stop the recording when finished; it saves to Photos.
Pro tip: if you don’t see the Screen Record button, add it in Control Center settings first.
How to screen record on Android
- Swipe down twice to open Quick Settings.
- Tap Screen record (you may need to add it via Edit).
- Choose audio/touch options, then start and stop when done.
How to screen record on Windows 11
- Open the app or browser tab you want to capture.
- Press Win + Alt + R to start/stop recording using Xbox Game Bar.
- Find your clip in the Captures location (you can adjust capture settings in Windows/Xbox settings).
How to screen record on Mac
- Press Shift + Command + 5 to open the Screenshot toolbar.
- Choose Record Entire Screen or Record Selected Portion.
- Click Record, then stop when finished.
You can also initiate screen recording through QuickTime Player (File > New Screen Recording), which routes into the same recording tools on modern macOS.
Organize what you save (so Future You doesn’t hate Present You)
Saving streaming video is only half the battle. The other half is being able to find it later.
Try this simple system:
- Folder by purpose: “Offline Trips,” “Work Webinars,” “Tutorial Clips,” “Creator Archive.”
- File naming: YYYY-MM-DD_topic_source (example: 2026-02-01_onboarding_teams-recording.mp4)
- Backups: Keep important recordings in cloud storage you control (especially if it’s a one-time webinar).
- Storage hygiene: Delete duplicates and old “just in case” clips monthlyyour phone will thank you.
Conclusion
If your goal is to save streaming video without stress, start with official offline downloads. If you need a real file for work, school, or content creation,
use built-in platform recording tools. And if you only need a short reference clip, screen recording is the quickest tooljust don’t fight DRM or ignore permissions.
Experiences People Commonly Have When Saving Streaming Video (What Works and What Surprises You)
In the real world, saving streaming video tends to be less about “Which button do I press?” and more about “Why did this work yesterday but not today?”
Here are a few common experiences people run intoand how they usually solve them without spiraling into 37 open tabs and mild despair.
1) The pre-trip scramble: A lot of people only remember offline downloads when they’re already at the airport. The pattern is classic:
they download a season the night before, feel proud, then discover at boarding that half the episodes didn’t finish downloading because the phone switched to cellular,
Low Power Mode kicked in, or storage ran out at 98%. The “win” move is boring but effective: download earlier than you think, keep the app open for a minute
to confirm everything appears in the Downloads list, and grab one short “test play” while you still have Wi-Fi.
2) The “I thought downloads meant I owned it” moment: People often assume “download” equals “MP4 file.” Then they try to find the video
in Files or Windows Explorer and… nothing. That’s when it clicks that many platforms store downloads inside the app, protected and not transferable.
The practical shift is to reframe success: if your goal is offline watching, app downloads are perfect. If your goal is a keep-forever file,
you probably need a recording workflow for content you actually have rights to keep (like meetings, your own streams, or content with download permissions).
3) The meeting-recording glow-up: Teams that start recording trainings or recurring calls usually go through a short awkward phase:
someone forgets to hit Record, someone else hits it late, and everybody agrees the recording is “somewhere.” Then they discover the magic of a consistent routine:
one person owns recording, the file is saved where everyone expects it (Drive/OneDrive), and the title includes the date and topic. Suddenly,
onboarding gets faster, “Can you repeat that?” questions drop, and nobody has to take frantic notes like they’re decoding ancient scrolls.
4) Screen recording as a problem-solver: Screen recordings are often used for practical, non-entertainment reasons:
reporting a streaming bug, capturing a tutorial step-by-step, saving a moment in a live class, or showing a family member how to change a setting
without writing a novel in text messages. People love it because it’s fast. The surprise is that audio settings matter: you may capture system audio,
microphone audio, both, or neither depending on device options. The best habit is to do a five-second test recording firstespecially if the clip is important.
5) The “black screen” reality check: One of the most common frustrations is when screen recording shows a black screen on certain streaming content.
People typically assume they did something wrong. In many cases, it’s simply content protection doing what it’s designed to do. The experience is annoying,
but it’s also a useful signpost: for entertainment platforms, switch to official offline downloads. For work/school content, use platform recording tools.
And if you’re saving your own livestreams, make sure you download/export within the platform’s retention window. The “fix” isn’t a hackit’s choosing the right lane.
When you put it all together, most people end up with a simple rule: Downloads for watching, recordings for archiving, screen capture for quick reference.
Once that clicks, saving streaming video stops feeling like a mystery and starts feeling like a checklist.