Table of Contents >> Show >> Hide
- Why Cleaning a Microwave With Lemon Actually Works
- What You Need Before You Start
- How to Clean a Microwave With Lemon in 5 Simple Steps
- What to Do if the Mess Is Really Stubborn
- Mistakes to Avoid When Cleaning a Microwave With Lemon
- How Often Should You Clean Your Microwave?
- Can You Use Bottled Lemon Juice?
- Why This Is One of the Best Natural Microwave Cleaning Methods
- Real-Life Experiences: What Cleaning a Microwave With Lemon Actually Feels Like
- Final Thoughts
- SEO Tags
If your microwave currently smells like popcorn, pizza, yesterday’s soup, and one mysterious event no one in the house wants to claim, take heart: a lemon can help. Cleaning a microwave with lemon is one of those rare household tricks that feels almost suspiciously easy. You slice a lemon, add water, press a few buttons, and suddenly the crusty splatter that looked welded to the ceiling of the microwave starts wiping away like it has regrets.
The real charm of this method is that it is simple, affordable, and refreshingly low-drama. You do not need a cabinet full of harsh cleaners, a hazmat suit, or the upper-body strength of a gym teacher. What you do need is a microwave-safe bowl, a little water, one lemon, and five minutes of patience. Well, maybe seven if your microwave has been through some things.
In this guide, you will learn exactly how to clean a microwave with lemon in five simple steps, why the method works, what mistakes to avoid, and how to deal with the kind of splatter that seems to have achieved permanent residency. By the end, your microwave can go from “crime scene adjacent” to “respectably sparkling” with very little elbow grease.
Why Cleaning a Microwave With Lemon Actually Works
This is not just a cute Pinterest trick. It works because of two practical forces: steam and mild acidity. When you heat water and lemon together, the steam builds up inside the microwave and softens dried food splatters, grease, and stubborn residue. The lemon adds a fresh scent and a little extra cleaning power, which helps cut through old odors that have made themselves far too comfortable.
In other words, you are not scrubbing grime off a cold, dry surface. You are loosening it first. That matters. A lot. Once the mess softens, wiping the inside becomes much easier, which means less scrubbing and less risk of damaging the interior with aggressive cleaning tools.
It is also one of the easiest ways to freshen the microwave without leaving behind a strong chemical smell. So instead of opening the door and getting hit with “burned leftovers, vintage edition,” you get a cleaner, brighter citrus scent. That is a major emotional upgrade for an appliance you probably use every day.
What You Need Before You Start
- 1 fresh lemon
- 1 cup of water
- 1 microwave-safe bowl or glass measuring cup
- 1 soft microfiber cloth, sponge, or paper towels
- Oven mitts or a thick kitchen towel for handling the hot bowl
- Mild dish soap for the turntable if needed
That is it. No complicated shopping list. No fancy tools. No “activate the special cleaning mode hidden on page 47 of the manual” situation. If your microwave has a removable turntable, you may also want to clear a little sink space so you can wash it while the interior cools down.
How to Clean a Microwave With Lemon in 5 Simple Steps
Step 1: Make Your Lemon Cleaning Solution
Fill a microwave-safe bowl with about 1 cup of water. Then cut a lemon in half. Squeeze the juice into the bowl and toss the lemon halves in as well. If you prefer, you can slice the lemon instead. Either approach works. The goal is to get lemon juice into the water and let the peel join the party for extra citrus power.
If your microwave is only mildly messy, this amount is plenty. If it looks like spaghetti exploded in there during a thunderstorm, you can use a slightly larger bowl with a bit more water, just as long as it is still safe to heat and has enough room to avoid boiling over.
Use a glass or microwave-safe container rather than anything metal or decorative that makes you nervous. This is not the moment to test whether Grandma’s mystery bowl is “probably fine.” Pick something sturdy and clearly microwave-safe, place it in the center of the turntable, and move on to the fun part.
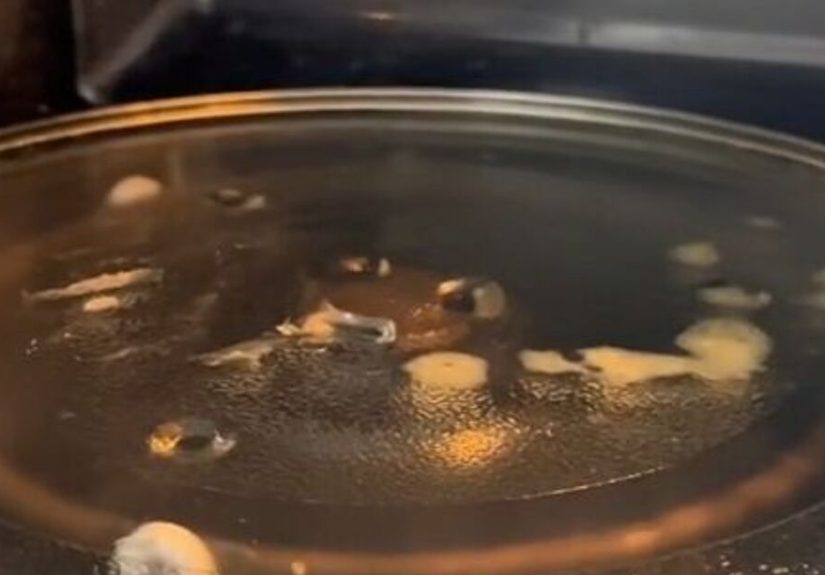
Step 2: Heat It Until the Microwave Gets Steamy
Microwave the lemon-water mixture on high for about 3 to 5 minutes, or until the liquid is visibly steaming and the microwave window fogs up. The exact time depends on your microwave’s wattage. Some heat up quickly. Some move at the pace of a sleepy sloth. That is normal.
You are looking for a nice steamy interior, not a dramatic volcanic boil-over. If the bowl starts bubbling aggressively, stop the microwave early. The point is to create steam that loosens food splatter on the walls, ceiling, floor, and door. Once the inside looks humid and foggy, the method is doing its job.
This step is where the magic happens. The steam softens dried sauce, grease, and mysterious spots from snacks past. If you have ever tried scrubbing a dry microwave ceiling while sauce flakes fall directly toward your face, you already understand why softening the mess first is a superior life choice.
Step 3: Keep the Door Closed for 5 Minutes
When the microwave stops, do not fling the door open like you are unveiling a game show prize. Let it sit closed for about 5 minutes. This waiting period gives the steam more time to cling to the interior and keep loosening stuck-on residue.
This is a small step that makes a big difference. If you open the door too soon, all that helpful steam escapes into your kitchen, where it will do absolutely nothing for the microwave mess you are trying to remove. Let the steam stay trapped inside and finish the job.
Think of it as marinating the grime in its own consequences. Five minutes later, the interior should be much easier to wipe clean, and the citrus smell will already be doing damage to any lingering odors.
Step 4: Carefully Remove the Bowl and Wipe Down the Inside
Open the door carefully. The bowl and the steam will be hot, so use oven mitts or a folded kitchen towel to remove the container safely. Set it aside on a heat-safe surface. Then take your microfiber cloth, sponge, or paper towel and begin wiping the inside of the microwave.
Start with the ceiling. It is the part people forget most often, which is impressive considering it is also where sauce tends to launch itself during reheating. Next, wipe the sides, back wall, floor, and interior of the door. Pay extra attention to the edges and corners where splatter likes to hide and dry into weird, crunchy sculptures.
Most of the mess should come off with very little effort. If a stubborn spot remains, dip the cloth into the warm lemon water and press it against the area for a few seconds before wiping again. Do not attack the surface with steel wool, abrasive scrubbers, or enough force to sand down the finish. Gentle wins here.
Step 5: Clean the Turntable, Dry Everything, and Reassemble
If your microwave has a removable glass turntable, take it out once it is cool enough to handle. Wash it in warm, soapy water, rinse it well, and dry it before placing it back inside. The roller ring underneath may also need a quick wipe, especially if crumbs or splashes made their way underneath.
Before you reassemble everything, give the inside one final dry wipe. This helps remove any leftover moisture and keeps the microwave from looking streaky. It also prevents tiny damp spots from grabbing new crumbs five minutes later, which would be rude.
Once the turntable is back in place, close the door and admire your work. Your microwave should look cleaner, smell fresher, and no longer resemble a neglected science experiment. That is a pretty strong return on one lemon.
What to Do if the Mess Is Really Stubborn
Sometimes microwave grime is not just splatter. Sometimes it is a hardened, fossilized reminder of chili night from who-knows-when. If the lemon method does not remove every last bit on the first try, do not panic and do not escalate directly to wild scrubbing.
Instead, repeat the steaming process once more. A second round often loosens the remaining mess. You can also soak a cloth in the warm lemon water and lay it over a tough spot for a minute or two before wiping. That extra contact time can help break down stubborn residue without scratching the interior.
If needed, use a tiny amount of mild dish soap on your cloth after the steaming step, then wipe again with plain water and dry thoroughly. The lemon trick does most of the heavy lifting, but there is no shame in calling in a little backup when the microwave has clearly been living recklessly.
Mistakes to Avoid When Cleaning a Microwave With Lemon
Using the Wrong Bowl
Always use a microwave-safe bowl or glass measuring cup. Metal is a hard no. Delicate containers with metallic trim are also a no. If the container is questionable, save yourself the suspense and choose something you trust.
Opening the Door Too Fast
If you skip the waiting period, the steam escapes and the mess stays tougher. Letting the microwave sit closed for a few minutes is one of the easiest ways to make the cleaning job easier.
Scrubbing With Abrasive Tools
Steel wool, rough scouring pads, and aggressive powders can damage the interior. A soft cloth or sponge is usually all you need after steaming. The whole point of this method is to avoid hard scrubbing, so do not undo the advantage.
Forgetting the Turntable and Door Edges
Many people wipe the big visible surfaces and call it a day, but crumbs and grease love to collect around the turntable support and around the door frame. Give those spots a little attention so your “clean microwave” is actually clean.
Using Harsh Chemical Cleaners Inside
Strong cleaners, bleach, and direct sprays inside the microwave are generally not the best plan. If you need more than lemon and water, stick with mild dish soap and a soft cloth, and always wipe away residue afterward.
How Often Should You Clean Your Microwave?
If you use your microwave every day, a quick wipe once a week is a smart routine. If something splatters, clean it sooner rather than later. Fresh messes wipe up in seconds. Old messes become little crusty monuments to procrastination.
A good habit is to give the microwave a fast check every few days. If the interior looks clean, great. If you see spots starting to build up, do the lemon method before the grime settles in for a long-term lease. It is much easier to spend five minutes now than twenty minutes later wondering whether that stain is sauce, cheese, or an entirely new substance.
Can You Use Bottled Lemon Juice?
Yes, bottled lemon juice can work if that is what you have. Fresh lemon tends to smell better and gives you the bonus of using the peel, but bottled juice is still useful for creating the acidic steam that helps loosen residue. If your fridge contains a lonely bottle of lemon juice and no actual lemons, you are still in business.
That said, a fresh lemon often feels more satisfying. It smells brighter, looks charmingly domestic, and gives the whole task a “look at me, I clean like a competent adult” vibe. But the microwave will not judge either way.
Why This Is One of the Best Natural Microwave Cleaning Methods
Cleaning a microwave with lemon is popular for good reason. It is inexpensive, fast, and easy enough to do even when you are not in a cleaning mood. It also helps freshen odors while loosening grime, which makes it feel like a two-for-one win.
It is especially helpful for people who want a simpler kitchen-cleaning routine. Instead of buying a dedicated microwave cleaner, remembering where you put it, and wondering whether you are supposed to rinse three times afterward, you can use something you probably already have in the kitchen.
Most of all, it lowers the barrier to actually cleaning the microwave. And that matters. The easier a task is, the more likely you are to do it before your appliance starts looking like a forgotten break-room relic.
Real-Life Experiences: What Cleaning a Microwave With Lemon Actually Feels Like
The first time many people try this method, there is a real sense of skepticism. You put a bowl of lemon water in the microwave and think, “Surely it cannot be this easy.” Then the window fogs up, the inside starts steaming, and five minutes later you wipe off splatter that previously looked permanent. It feels a little like cheating, in the best possible way.
One of the most common real-life microwave disasters is the oatmeal overflow. It starts innocently: a bowl of oats, maybe a distracted scroll through your phone, maybe one extra minute because “it will be fine.” It is never fine. The oatmeal rises like it has personal ambitions, spills over, and dries into a gluey ring that clings to the bowl, the plate, and somehow the ceiling of the microwave. Lemon steam is especially satisfying here because it softens that starchy mess fast. Instead of chiseling dried oatmeal off the turntable like an archaeologist, you wipe it away with a cloth and move on with your dignity mostly intact.
Then there is the leftover pasta incident. Tomato sauce has a special talent for exploding in tiny red dots that reach every possible surface. You open the microwave later and discover a Jackson Pollock painting in marinara. This is where the lemon method shines, because the steam loosens those splatters on the walls and door without requiring you to scrub each dot individually. It turns a task that feels maddening into one that feels manageable. Also, the lemon scent does a lot to erase the emotional memory of burnt red sauce.
Another relatable experience is the office microwave problem. At home, at least you know your own messes. In a shared kitchen, the microwave can become a rotating exhibit of questionable choices: fish, curry, melted cheese, popcorn pushed beyond reason. A lemon-cleaning session in that setting feels almost heroic. You are not just cleaning. You are restoring order. You are giving the appliance a second chance at respectability.
People also tend to love this method because it makes them more likely to clean regularly. Once you realize you can do a quick steam-clean with one lemon and a cup of water, the task stops feeling like a major project. It becomes something you can do while unloading the dishwasher, wiping the counter, or waiting for your coffee to cool enough to drink without injuring yourself. That shift matters. Small routines beat dramatic deep cleans that happen twice a year and require motivational speeches.
There is also something oddly pleasant about the after-effect. The microwave looks brighter, the glass turntable feels less grimy, and the whole kitchen smells fresher. It does not smell like a chemical lab. It smells clean in a subtle, citrusy way. You close the microwave door and feel a tiny, ridiculous burst of satisfaction. This may not be glamorous, but it is real.
And perhaps that is the best part of all. Cleaning a microwave with lemon feels achievable. It works for everyday messes, it rescues you after reheating accidents, and it does not require special equipment or a weekend commitment. It is one of those rare household habits that earns its reputation because it truly makes life a little easier. Not dramatically. Not magically. Just enough to make you think, “Well, that was smarter than scrubbing cold spaghetti sauce off the ceiling with a paper towel.”
Final Thoughts
If you want a simple, effective way to clean your microwave, lemon is one of the best places to start. The method is easy: make a lemon-water mixture, heat it, let the steam sit, wipe the interior, and clean the turntable. That is it. Five steps, one lemon, and a much nicer experience every time you open the door.
Best of all, this trick works with real life, not against it. It is fast enough for busy weekdays, gentle enough for routine care, and satisfying enough that you may even start cleaning the microwave before it reaches “why is the ceiling crunchy?” status. That alone is worth celebrating.