Table of Contents >> Show >> Hide
- What “Transferring Photos Onto Canvas” Actually Means
- Before You Start: Choose the Right Photo and Canvas
- Method 1: Photo Transfer Medium (Beginner-Friendly, Consistent Results)
- Method 2: Acrylic Gel Medium Transfer (Artist-Approved, Beautiful Texture)
- Method 3: Packing Tape Transfer (Fun Hack, Best for Text/Graphics)
- Method 4: Inkjet Canvas Sheets (Print at Home, Cleaner Look)
- Method 5: Order a Canvas Print (The “I Have a Life” Option)
- How to Get Cleaner Transfers: Troubleshooting Like a Pro
- How to Seal and Protect Your Canvas (So It Lasts)
- Quick Project Ideas (Because You’ll Want to Do This Again)
- Frequently Asked Questions
- Conclusion: Pick Your Method and Make It Yours
- of Experience: What It’s Really Like to Transfer Photos Onto Canvas
- SEO Tags
Turning a favorite photo into canvas art sounds fancylike something you’d pay a gallery to do while you sip an overpriced latte.
But here’s the fun part: you can transfer photos onto canvas at home with a few basic supplies, a little patience, and the willingness
to accept that your first try might look “artsy” in a way you didn’t plan. (Don’t worry. “Artsy” is still a win.)
This guide walks you through multiple reliable ways to transfer photos onto canvaseverything from classic gel-medium transfers and
Mod Podge-style transfer mediums to quick hacks like packing tape, plus the “no mess, all wow” option: ordering a canvas print online
or at a local photo counter. You’ll learn what works best, why certain prints fail, and how to get crisp results without shredding your
image during the paper-removal stage (a.k.a. the part where many people whisper, “I regret everything”).
What “Transferring Photos Onto Canvas” Actually Means
People use the phrase “transfer photos onto canvas” in two main ways:
-
DIY image transfer: You take a printed photo (or photocopy) and use a medium to move the ink/toner image onto the canvas.
This creates a slightly vintage, textured look where the canvas weave can show through. -
Printing on canvas: You upload a digital photo to a print service (or print onto canvas sheets at home) so the image is
printed directly onto canvas material. This usually looks cleaner and more “store-bought.”
Both are valid. Your best choice depends on whether you want handcrafted character (DIY transfer) or clean, high-resolution polish (printing).
Before You Start: Choose the Right Photo and Canvas
Pick an image that will survive the “canvas texture effect”
Canvas has a weave. That weave is cute and artsy, but it can also soften tiny details. Photos that transfer best usually have:
- Strong contrast (clear lights and darks)
- Simple backgrounds (busy patterns can get muddy)
- Medium-to-large subjects (faces, pets, bold shapes)
Choose the canvas finish
A smooth, pre-primed canvas is easiest for beginners. Deep gallery-wrap canvases look impressive on walls, but they also mean your image may wrap
around the sides (which is either cool or annoying, depending on your design).
Always mirror your image (most of the time)
Most DIY transfer methods require placing the image face-down. That means the final result will be reversed unless you mirror the file before printing.
For landscapes, you might not care. For text, signs, or anything with letters? Mirror it, unless you want your canvas to say “emocleW.”
Method 1: Photo Transfer Medium (Beginner-Friendly, Consistent Results)
A dedicated photo transfer medium (including popular craft-brand transfer mediums) is one of the easiest ways to transfer photos onto canvas.
You brush it on, press your image down, let it dry, then remove the paper with waterleaving the image behind.
Best for
- Beginners who want predictable results
- Canvas, wood, and other porous surfaces
- Photos, graphics, and simple text designs
What you’ll need
- Pre-primed canvas
- Photo transfer medium
- Laser print or photocopy (often recommended for best reliability)
- Foam brush or soft flat brush
- Brayer, scraper, or old gift card
- Water + sponge/soft cloth
Step-by-step
-
Prep the canvas: Make sure it’s clean and dry. If the canvas texture is very rough, you can lightly brush on a thin coat of gesso
to smooth it a bit (optional, but helpful for detail). -
Apply transfer medium: Brush an even layer onto the canvas where the photo will go. Be generous enough to fully cover the areathin,
stingy coats lead to patchy transfers. - Place the image face-down: Carefully lay the print onto the medium. Try not to slide it around once it touches.
-
Press out bubbles: Use a brayer or card to smooth the paper from the center outward. Bubbles become blank spots later, and blank spots
have a talent for appearing right on someone’s nose. - Let it dry completely: Don’t rush. Full dry time matters more than your optimism.
-
Remove paper with water: Dampen the paper and gently rub to remove it in layers. Go slow. You’re peeling away paper fibers, not scrubbing
a frying pan. - Dry and seal: Once satisfied, let it dry thoroughly, then seal with acrylic spray sealer or brush-on varnish (details later).
Common mistakes (and quick fixes)
- Patchy transfer: Usually from uneven medium coverage or weak pressure. Next time, apply medium more evenly and burnish thoroughly.
- Milky haze: That’s leftover paper fiber. Re-wet lightly and rub gently againdon’t overdo it or you’ll lift the image.
- Smudging: Often from inkjet prints that don’t behave with your medium. Try a laser print or photocopy for better consistency.
Method 2: Acrylic Gel Medium Transfer (Artist-Approved, Beautiful Texture)
Acrylic gel medium transfers are popular in mixed media and fine art because they can look gorgeouslike your photo is embedded into the canvas.
The trade-off? It’s slightly fussier. But the results are worth it when you want that handmade, gallery-meets-memory-lane vibe.
Best for
- Artists, crafters, and detail lovers
- Vintage or textured effects
- Layered collage-style projects
What you’ll need
- Canvas (pre-primed)
- Acrylic gel medium (gloss or matte; many artists prefer gloss for clarity)
- Laser print or photocopy (recommended for reliability)
- Foam brush or soft brush
- Water + sponge + patience
Step-by-step
-
Apply gel medium: Brush an even layer onto the canvas where your image will go (or onto the front of the print, depending on your preferred workflow).
Aim for full coverage without dry patches. - Press image face-down: Lay the print onto the wet gel medium. Smooth firmly with a brayer/card to ensure full contact.
- Dry fully: Let it dry thoroughly before you attempt paper removal. This is where people get impatient and accidentally invent modern abstract art.
- Remove paper: Dampen the paper with water, let it soften, then rub gently to lift paper fibers. Work in slow rounds.
- Let it dry and inspect: When dry, missed paper fibers show up as a haze. You can do another gentle removal pass.
- Seal it: Finish with an acrylic varnish or sealer to protect the surface.
Pro-level tip: embrace the canvas weave
Gel transfers naturally reveal the canvas texture. If you want a smoother, more photo-like look, pre-smooth the canvas with gesso or use a smoother surface
(like a canvas panel) instead of a heavily textured stretched canvas.
Method 3: Packing Tape Transfer (Fun Hack, Best for Text/Graphics)
Packing tape transfers are a crafty favorite because they feel like magic. You stick tape over a printed image, rub it down, soak/rub away paper,
and end up with a transparent image stuck to tape. Then you apply that tape “decal” to canvas (often as part of mixed media).
Best for
- Words, quotes, bold graphics
- Collages, journaling, layered art
- Projects where a slightly distressed look is a feature, not a bug
Heads up
This method is typically most reliable with toner-based prints/photocopies. It also tends to produce a more translucent, distressed result than gel or transfer-medium methods.
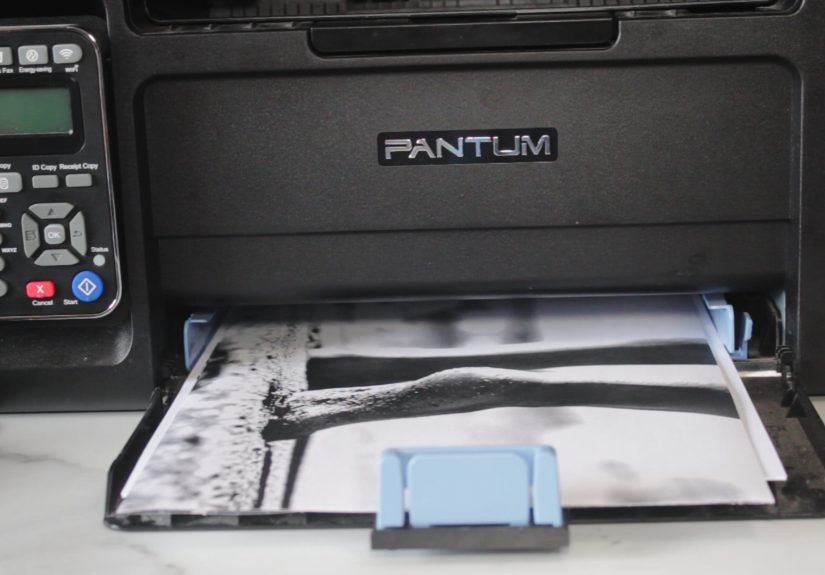
Method 4: Inkjet Canvas Sheets (Print at Home, Cleaner Look)
If you want a more “printed” finish without ordering a professional canvas print, you can buy inkjet canvas sheetscanvas-textured paper designed to run through home printers.
After printing, you mount it to a canvas (often with adhesive or decoupage medium), then seal it.
Best for
- Sharper, more photo-like results at home
- People who don’t want to rub paper fibers off anything, ever
- Projects that need readable text or crisp detail
Basic workflow
- Print on inkjet canvas sheets using your printer’s best quality setting.
- Let ink dry completely (important).
- Trim and mount to canvas using an adhesive suitable for canvas/paper.
- Seal with an acrylic spray sealer or brush-on varnish designed for prints.
Method 5: Order a Canvas Print (The “I Have a Life” Option)
If you want the cleanest, most consistent lookespecially for gifts, weddings, baby photos, or high-resolution portraitsordering a canvas print from a photo lab is hard to beat.
You upload a digital file, choose a size and wrap style, and the image arrives printed directly onto canvas and stretched (or mounted).
Best for
- High-resolution family photos and portraits
- Gifts and professional-looking home décor
- Anyone who wants predictable color and sharpness
How to prep your file for a canvas print
- Use the highest-resolution file you have: Avoid tiny images pulled from old texts or social media thumbnails.
- Crop to the right aspect ratio: Canvas sizes follow certain proportions. If you don’t crop, the print service may crop for yousometimes in rude ways.
- Plan for wrap: Gallery wrap means the image extends around the sides. Keep important faces and text away from the edges.
- Choose finish thoughtfully: Matte reduces glare; satin/gloss can make colors pop but reflect more light.
How to Get Cleaner Transfers: Troubleshooting Like a Pro
Problem: The image looks faded
Faded transfers can happen when the medium layer is too thin, the paper wasn’t fully bonded, or the print type didn’t cooperate. Try:
- Using a laser print/photocopy for stronger transfers
- Applying a more even, fully opaque layer of transfer medium
- Burnishing with firmer pressure (without wrinkling the paper)
Problem: The paper won’t rub off (or you’re rubbing off the image too)
Paper removal is a balancing act: enough water to soften paper fibers, but not so much scrubbing that you lift the transfer. Tips:
- Rub in light passes and let it dry between rounds to spot haze
- Use a soft cloth or sponge rather than abrasive pads at first
- Be patientthis step is more “spa day” than “power wash”
Problem: Bubbles or blank spots
Bubbles are usually trapped air. Prevent them by:
- Smoothing from the center outward with a brayer or card
- Working on a flat, firm surface
- Avoiding shifting the paper once it touches the medium
Problem: The transfer looks cloudy
Cloudiness is typically leftover paper fiber. Gently re-wet and rub again. A little “ghosting” can look intentionally vintageso if it’s subtle, you might decide it’s a feature.
How to Seal and Protect Your Canvas (So It Lasts)
After you’ve transferred your image, sealing is the difference between “handmade heirloom” and “why is this peeling when I look at it?”
A good sealer protects against moisture, scuffs, fingerprints, and UV fading.
Sealing options
- Acrylic spray sealer: Fast and even, especially good for protecting printed images without brush strokes.
- Brush-on acrylic varnish: Great coverage, available in matte/satin/gloss, but apply gently to avoid lifting delicate areas.
- Clear topcoat medium: Some crafters use a final coat of the same brand system used for the transfer.
Finish choices
Matte looks modern and cuts glare. Satin is a crowd-pleaser. Gloss makes colors pop and looks dramaticalso great if you enjoy seeing your ceiling lights reflected in your artwork.
Quick Project Ideas (Because You’ll Want to Do This Again)
- Family memory wall: Transfer black-and-white portraits onto small canvases for a cohesive gallery.
- Pet tribute canvas: Use a high-contrast photo and add a painted name underneath.
- Travel canvas series: Transfer one photo from each trip and hang them in a grid.
- Wedding/anniversary gift: Order a canvas print for maximum polish, or DIY-transfer for a handmade feel.
- Kids’ art mashup: Transfer a photo background and let kids paint over it (messy, adorable, frame-worthy).
Frequently Asked Questions
Do inkjet prints work for photo transfers?
Sometimes. Inkjet results vary by ink type, paper type, and transfer product. If you want fewer surprises, laser prints or photocopies are often more reliable for classic transfer mediums and gel transfers.
Can I transfer real photographs (photo paper prints)?
Many transfer methods work best with plain paper prints (laser/photocopy). Traditional photo paper can resist bonding and behaves differently with water and mediums. If you want to use photo paper, test firstor consider printing on canvas sheets or ordering a canvas print.
Do I have to remove every bit of paper?
Ideally, you remove most of it. But many DIY transfers look better with a slight texture or faint hazeit reads as vintage and handmade. If it looks intentional, it is intentional.
Conclusion: Pick Your Method and Make It Yours
If you want a straightforward DIY method with a high success rate, start with a dedicated photo transfer medium. If you love mixed-media texture and don’t mind taking your time, acrylic gel medium transfers can look stunning.
If you’re craving quick results, inkjet canvas sheets skip the “paper rub” drama. And if you want the cleanest, most giftable outcomeorder a canvas print and enjoy your evening doing literally anything else.
No matter which route you choose, remember the real secret of transferring photos onto canvas: the best results come from even coverage, firm burnishing, full dry time, gentle paper removal, and sealing like you mean it.
Do a small test first, learn your materials, and then go make wall art that looks like it came from a boutiquewithout paying boutique prices.
of Experience: What It’s Really Like to Transfer Photos Onto Canvas
The first time I tried transferring a photo onto canvas, I thought it would be a neat little craft projectsomething I’d finish in under an hour, wipe my hands, and casually reveal like a home décor wizard.
That confidence lasted right up until I realized “dry time” is not a suggestion. It’s a law of the universe. I did what many beginners do: I poked it, I checked it, and I decided it was “probably fine.”
Spoiler: it was not fine. When I started rubbing the paper off too early, the image lifted in little patches, and the face in my photo suddenly looked like it had been teleported through a mild sandstorm.
Attempt number two went better because I embraced three truths. First, even coats matter. If you brush medium on like you’re buttering toast in a hurry, you’ll get thin spots. Thin spots become missing chunks.
Missing chunks become “rustic distressing,” but only if you say it with confidence. Second, pressure is your friendgentle but firm burnishing, like you’re trying to convince the paper to commit to the relationship.
Air bubbles are sneaky. They hide while everything is wet, then show up later as blank circles right where you least want them: eyeballs, smiles, and the one important word in your quote.
The third truth is that paper removal is a marathon, not a wrestling match. The best results happened when I used water in small rounds, rubbed lightly, and let things dry between passes so I could actually see what was left.
When the canvas dried, leftover paper fibers looked like a foggy film. That was my cue to do another gentle pass instead of scrubbing like I was cleaning tile grout. Once I stopped trying to “win” the paper-removal step, my transfers got dramatically cleaner.
I also learned that choosing the right image saves you. Highly detailed photos can look softer on canvas, especially with gel transfers where the weave shows through.
But bold, high-contrast images? Those look incredibleeven when the transfer isn’t perfect. In fact, a tiny bit of texture can make portraits and landscapes feel more like art and less like a printout.
It’s one of the few times “slightly imperfect” can actually feel expensive.
Finally, sealing is non-negotiable. The first unsealed transfer I made looked great… until someone picked it up with slightly damp hands.
After that, I started sealing everything like it was heading into a museum gift shop. A light seal coat, a second coat if needed, and suddenly the canvas felt finished and durable.
The biggest surprise? Once you get the hang of the process, you start looking at every photo like a potential canvas. Family vacations, pets, old black-and-white portraitseverything becomes wall art.
That’s when you know you’ve crossed from “trying a craft” to “owning a craft.” And yes, it’s as satisfying as it sounds.