Table of Contents >> Show >> Hide
- Why grow flowers from seed instead of buying seedlings?
- Step 1: Choose the right seeds (and read the packet like it’s the plot)
- Step 2: Timing is everythingcount backward from your last frost date
- Step 3: Get your seed-starting setup (without building a NASA lab)
- Step 4: How to start flower seeds indoors (step-by-step)
- Step 5: Seedling careturn sprouts into strong plants
- Step 6: Direct sowing outdoors (aka letting the garden do the work)
- Step 7: Special seed tricksstratification, scarification, and other secret handshakes
- Step 8: Hardening off and transplanting (don’t throw them outside like a surprise boot camp)
- Troubleshooting: common problems (and how to fix them fast)
- Conclusion: from seed to bloom (the payoff is real)
- Real-World Experiences: 10 Lessons Seed Starters Learn the Fun Way
- 1) The label is not optional
- 2) Overwatering is the #1 accidental villain
- 3) Humidity domes are like training wheels
- 4) Light fixes more problems than pep talks
- 5) Some seeds are born to be direct sown
- 6) The seed packet is basically a tiny instruction manual
- 7) Cold stratification teaches patience (whether you asked for it or not)
- 8) “Thin to one plant per cell” feels cruel… until you see the difference
- 9) Hardening off is the difference between thriving and sulking
- 10) Keep notes (because next year You is a different person)
Growing flowers from seed is basically the gardening version of baking cookies from scratch: it’s cheaper, you get way more bragging rights,
and you’ll still occasionally wonder why everything looks great for five minutes… and then collapses dramatically.
The good news? Once you understand a few simple rulestiming, light, moisture, and a tiny bit of patienceyou can turn a packet of seeds into
a yard (or balcony) that looks like it hired a professional stylist.
This guide walks you through how to grow flowers from seedstarting indoors, direct sowing outdoors, and handling “diva seeds”
that demand special treatmentusing practical, real-world methods that actually work.
Why grow flowers from seed instead of buying seedlings?
- More variety: Seed catalogs have thousands of flower options you’ll never see at the garden center.
- Lower cost: A few dollars in seed can become dozens (or hundreds) of plants.
- Better timing: You control when plants are ready, instead of adopting whatever the store has left.
- It’s weirdly satisfying: Watching a tiny sprout become a blooming plant is peak “small joy.”
Step 1: Choose the right seeds (and read the packet like it’s the plot)
Annuals vs. perennials vs. natives
Start by figuring out what kind of flower you’re dealing with:
- Annuals bloom the first year and usually fast (zinnias, marigolds, cosmos). Great for beginners.
- Perennials come back for years, but many are slower and some need special germination steps (coneflower, columbine, milkweed).
- Native wildflowers can be incredibly hardy and pollinator-friendly, but may require cold treatment to sprout on schedule.
Beginner-friendly flowers from seed
If you want quick wins, pick flowers that germinate reliably and grow with minimal fuss:
zinnias, marigolds, sunflowers, cosmos, calendula, and nasturtiums.
Save the “rare heirloom perennial that needs a 90-day spa treatment in the fridge” for when you’re feeling bold.
Step 2: Timing is everythingcount backward from your last frost date
The easiest way to time seed starting is to work backward from your area’s average last spring frost date.
Many flowers are started indoors about 6–8 weeks before that date, while slower growers (like snapdragons) may need more lead time.
Starting too early often creates tall, weak, root-bound seedlings that struggle when transplanted.
A simple timing cheat sheet
- 8–10 weeks before last frost: slow growers like snapdragons and some perennials
- 6–8 weeks before last frost: many annual flowers you’ll transplant
- Direct sow after frost / warm soil: sunflowers, zinnias, cosmos (often happier outdoors anyway)
Step 3: Get your seed-starting setup (without building a NASA lab)
Use the right seed starting mix
For indoor seed starting, skip heavy garden soil. A good seed starting mix is fine-textured, airy, and typically soilless.
It helps prevent disease and keeps tiny roots from suffocating. Bonus: it’s easier to keep evenly moist.
Containers + cleanliness (yes, washing things is gardening)
You can use cell trays, small pots, recycled containers with drainage holeswhatever works. The key is sanitation.
If you’re reusing trays or pots, clean and disinfect them to reduce the risk of damping off and other seedling diseases.
Translation: last year’s “mystery gunk” is not a personality trait.
Light + warmth
Most seeds don’t need light to germinate, but they do need the right temperature and steady moisture.
Many gardeners use a heat mat for faster, more even sprouting. Once seedlings emerge, strong light becomes non-negotiable.
A sunny window can work, but a basic grow light setup is often the difference between sturdy plants and sad noodles.
Step 4: How to start flower seeds indoors (step-by-step)
1) Fill, pre-moisten, and level
Moisten your seed-starting mix before sowing (damp like a wrung-out sponge). Fill containers, tap to settle lightly, and level the surface.
You want good seed-to-soil contact, not compacted bricks.
2) Sow at the right depth
Follow the seed packet first. As a general rule, larger seeds get covered more; tiny seeds may need light and should be surface-sown
or barely dusted with mix. If your seed packet says “needs light,” don’t bury it like you’re hiding evidence.
3) Label like Future You will thank you
Label everything. When six trays of green sprouts appear, your brain will absolutely claim they are all “probably zinnias.”
Your brain is a liar. Use labels.
4) Cover for humiditythen remove at the right time
A clear dome or plastic wrap helps hold humidity during germination. But once a good portion of seeds sprout,
remove the cover so air can circulate. Too much humidity for too long invites fungal issues.
5) Water gently
Use a mister, a gentle shower setting, or bottom watering. The goal is consistent moisturenot soggy mix.
Overwatering is the most common way seedlings meet an early end.
Step 5: Seedling careturn sprouts into strong plants
Give seedlings enough light (the “no leggy drama” rule)
Once seedlings are up, they need bright light. If you’re using grow lights, keep them close enough to prevent stretching
(but not so close they cook the tops). Aim for a long, consistent light period dailyseedlings thrive on routine.
Water smart: damp, not drenched
Let the surface dry slightly between waterings, then re-moisten. Good airflow helps, tooa small fan on low can strengthen stems
and reduce fungal risk.
Feed lightly when true leaves appear
Seed-starting mixes are usually low in nutrients. Once seedlings produce their first set of true leaves (not the first baby “seed leaves”),
begin feeding with a diluted fertilizer as needed. Think “snack,” not “all-you-can-eat buffet.”
Pot up before plants get root-bound
If seedlings outgrow their cells (roots filling the space, growth stalling, top-heavy plants), transplant them into larger pots.
This is common for flowers you start early indoors.
Step 6: Direct sowing outdoors (aka letting the garden do the work)
Why direct sow?
Many flowersespecially fast-growing annualsdo great when you direct sow flower seeds outdoors.
You avoid transplant shock, and roots grow undisturbed.
Prep the soil for better germination
- Clear weeds and debris.
- Loosen the top several inches so roots can penetrate easily.
- Smooth and level the surface so seeds don’t wash away.
- Keep soil moist (not muddy) during germination.
Cool-season vs. warm-season flowers
Some hardy flowers can be sown when soil is workable in spring. Warm-season bloomers (like sunflowers and many annuals)
prefer waiting until after frost when soils are warmer and more stable.
Thin seedlings (yes, it’s heartbreaking… and necessary)
If everything germinates, congratulationsyou now have a tiny plant traffic jam. Thin seedlings so each plant has room
for light, airflow, and roots. For crowded cells indoors, you can snip the weaker seedling at the soil line instead of yanking roots.
Step 7: Special seed tricksstratification, scarification, and other secret handshakes
Cold moist stratification (for many perennials and natives)
Some seeds evolved to sprout only after experiencing winter. Cold stratification mimics that by keeping seeds moist and cold
for weeks to months. A common method: place seeds in a lightly moistened medium (paper towel, sand, peat, or vermiculite)
in a sealed bag/container in the refrigerator. Check occasionally for moisture and mold.
Examples: milkweed often benefits from cold treatment; many perennials germinate better after a cold, moist period.
If your packet mentions stratification, take it seriouslythese seeds are basically waiting for their “winter password.”
Scarification (for hard seed coats)
Some seeds have tough coats that slow water absorption. Scarification means scratching or nicking the coat (gently!)
so moisture can enter. Home-friendly methods include sandpaper or a small file. Some guides mention hot-water approaches,
but the safe move is to follow trusted instructions and your seed packetoverdoing it can damage the seed.
Light-sensitive seeds
Certain seeds need light to germinate and should be surface-sown. Others prefer darkness and should be covered.
The seed packet is the referee heredon’t ignore it.
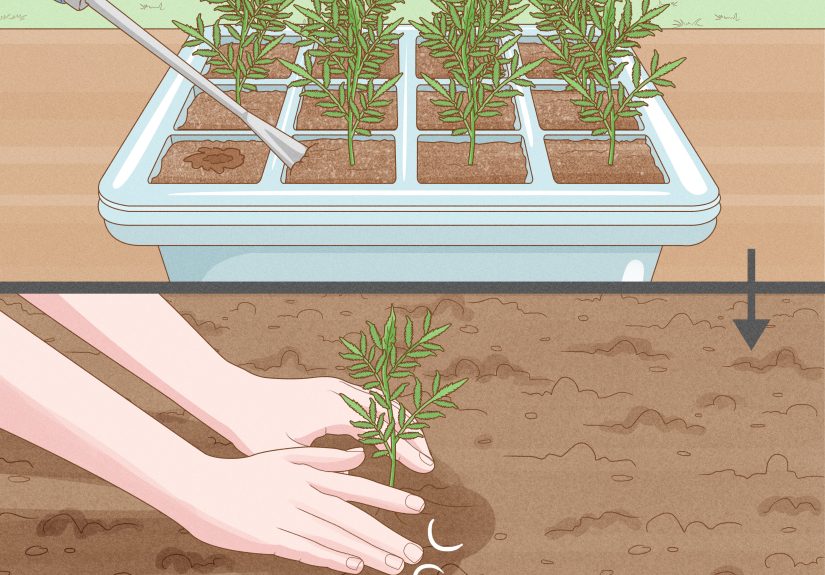
Step 8: Hardening off and transplanting (don’t throw them outside like a surprise boot camp)
Hardening off: the 1–2 week transition
Indoor seedlings are pampered: steady temps, no wind, no blazing sun. Outdoors is… not that.
Harden off by gradually increasing outdoor exposure over about two weeks:
start with a protected spot for a few hours, then extend time and slowly introduce more sun and breeze.
This reduces transplant shock and helps plants build resilience.
Transplanting tips for success
- Transplant on a mild day (cloudy or late afternoon is ideal).
- Water plants before and after planting.
- Plant at the same depth they grew in the container unless the species suggests otherwise.
- Keep an eye on late cold snapstemporary cover can save your work.
Troubleshooting: common problems (and how to fix them fast)
Damping off (seedlings collapse overnight)
This is the classic heartbreak: seedlings look fine, then suddenly keel over at the soil line.
Prevention is king: use sterile seed-starting mix, disinfect reusable containers, avoid overwatering,
and improve airflow. Remove affected seedlings promptly to limit spread.
Leggy seedlings (tall, floppy stems)
Almost always a light issue. Move plants closer to the light source, increase light intensity/duration,
and keep temperatures reasonable. A gentle fan can help strengthen stems.
No germination
Common culprits: old seed, wrong temperature, inconsistent moisture, or required pretreatment (like stratification).
Test viability by sowing a small batch under ideal conditions, and always double-check packet instructions.
Mold or algae on the mix
Usually a sign of too much moisture and not enough airflow. Reduce watering frequency, bottom-water,
remove covers sooner, and increase air circulation.
Conclusion: from seed to bloom (the payoff is real)
To successfully grow flowers from seed, focus on the fundamentals: pick appropriate varieties,
time your sowing, use a clean and airy seed-starting mix, manage moisture like a pro, and give seedlings the light they crave.
Whether you’re starting trays under lights or direct sowing a sunny patch outdoors, the process is the same:
create the conditions seeds expect, then get out of their way (while still checking on them like a proud plant parent).
Real-World Experiences: 10 Lessons Seed Starters Learn the Fun Way
Not “perfect” storiesmore like the greatest hits of what gardeners commonly learn once they’ve started seeds a few times.
Consider these friendly warnings from the school of slightly chaotic experience.
1) The label is not optional
Everyone thinks they’ll remember what they planted. Then two weeks later, all you have is “green.” The fastest way to turn
seed starting into a guessing game is skipping labels. Write the variety and date, and feel smug later.
2) Overwatering is the #1 accidental villain
Seedlings don’t want a swamp. They want consistent moisture and oxygen around roots. When trays stay soaking wet,
growth slows, fungus throws a party, and seedlings sometimes collapse. “Damp, not drenched” is the mantra.
3) Humidity domes are like training wheels
Great for germination, risky if left on too long. Once sprouts are up, they need airflow to stay healthy.
If your dome looks like a rainforest documentary, crack it open and start the weaning process.
4) Light fixes more problems than pep talks
When seedlings stretch, they’re not being “dramatic”they’re searching for light. A cheap grow light can outperform
a sunny window, especially in late winter. Strong light early = sturdy stems later.
5) Some seeds are born to be direct sown
Certain flowers (like sunflowers) often act like they’d rather not be moved. Direct sowing can produce tough, well-rooted plants
with less fuss. If a plant hates transplanting, the best strategy is not to make it do that.
6) The seed packet is basically a tiny instruction manual
Depth, timing, light needs, germination tempsseed packets contain the specific intel your seeds want you to know.
Ignoring them is like assembling furniture without the diagram and then blaming the chair.
7) Cold stratification teaches patience (whether you asked for it or not)
Perennials and natives sometimes need weeks of cold, moist conditions before they’ll sprout. The “experience” here is mostly waiting
but the reward is seedlings that pop up right when conditions make sense.
8) “Thin to one plant per cell” feels cruel… until you see the difference
Crowded seedlings compete for light and nutrients and stay smaller. Thinning creates healthier plants and reduces disease pressure.
If it helps, think of thinning as giving the chosen seedling its own apartment.
9) Hardening off is the difference between thriving and sulking
Seedlings raised indoors can get scorched by sun or battered by wind if they go straight outside. Gradual exposure builds tougher plants
that transition smoothly. This step feels slowuntil you skip it once.
10) Keep notes (because next year You is a different person)
Jot down what you started, when you started it, and what worked. Next season, you’ll thank Past You for remembering which flowers germinated
easily, which needed extra time, and which ones were “beautiful but emotionally exhausting.”