Table of Contents >> Show >> Hide
- Why a Bucket Organizer Works (and Why Kids Actually Use It)
- Shopping List (Budget-Friendly and Easy to Find)
- Before You Build: Two Quick Decisions
- DIY #1: The Classic 6-Bucket Pyramid Organizer (Fast + Sturdy)
- DIY #2: Wall-Mounted Bucket Organizer (Small-Space MVP)
- Make It Cute Without Making It Precious
- What Goes Where: A Kid-Friendly Sorting System
- Safety & Sanity Checklist (Worth the 2 Minutes)
- Maintenance Plan: Keep It Working (Without Becoming a Full-Time Organizer)
- Troubleshooting (Because Kids Will Stress-Test Your DIY)
- Conclusion: Cheap, Cheerful, and Actually Sustainable
- Extra: The Real-Life Experience of Living With a Bucket Organizer (About )
If your kid’s room is a crime scene where the victim is always your bare foot, you’re in the right place. This DIY bucket organizer is one of those “why didn’t I do this sooner?” projects: cheap, fast, surprisingly sturdy, and (the real miracle) easy enough that kids can actually use it without a 20-minute TED Talk.
We’re going to build a bucket-based toy organizer using dollar-store suppliesthen make it cute, label it like a pro, and set it up so clean-up time doesn’t feel like a hostage negotiation. You’ll get two build options (floor pyramid and wall-mounted), plus safety tips, toy-sorting strategy, troubleshooting, and a longer “what it’s like living with it” section at the end.
Why a Bucket Organizer Works (and Why Kids Actually Use It)
Open storage beats the “toy black hole” effect
Toy boxes are basically toy quicksand: everything sinks to the bottom, and the one thing your child wants becomes an archaeological dig. Buckets keep categories visible. When kids can see it, they can find itand when they can find it, they can put it back.
It creates “just enough” boundaries
Kids don’t need a museum-quality organizational system. They need a few obvious homes: cars here, dolls there, blocks in the “please don’t spill these” bucket. Buckets create simple lanes. The goal isn’t perfectionit’s reducing the daily mess to a 5-minute reset.
Cost-per-category is ridiculously good
One bucket equals one category. That’s the whole magic trick. Instead of paying for a large multi-bin unit, you can scale this up or down depending on your space, budget, and how many tiny plastic pieces currently rule your life.
Shopping List (Budget-Friendly and Easy to Find)
You can build this with just a few basics. Exact items vary by store, so shop by shape and sturdiness, not by brand name.
Core materials
- 6 plastic buckets (small to medium; same size looks best)
- Zip ties (medium to long; grab extras)
- Labels (or cardstock + tape; bonus points for picture labels)
- Non-slip pads (or shelf liner cut into squares)
Helpful tools (choose your adventure)
- Scissors (for trimming zip ties)
- Hole punch or drill with a small bit (for cleaner, stronger connections)
- Measuring tape and marker (for neat alignment)
- Optional: spray paint or acrylic paint (for the “Pinterest tax” look)
Optional wall-mount extras
- 1 small board (a simple wood strip) to mount to studs
- 2–6 utility hooks (screw-in) OR a small section of pegboard
- Wall anchors if you can’t hit studs (follow anchor packaging)
Budget note: Dollar stores vary on pricing tiers. Plan for “a few dollars per item” overall, then treat any slightly higher-priced pieces (labels, sturdier buckets, better hooks) as the upgrade that makes it last.
Before You Build: Two Quick Decisions
1) Floor pyramid or wall-mounted?
Floor pyramid is easiest, drill-free if you use handles, and great for toddlers.
Wall-mounted saves floor space and looks cleaner in small roomsbest for lighter toys and older kids who won’t swing from it like a jungle gym.
2) Connect by handles or by holes?
Handles are faster. But they can flex, pop off, or twist the structure if the buckets are overloaded.
Holes near the rim make a tighter, sturdier build. If you’re doing this for LEGO, Hot Wheels, or anything that multiplies overnight, holes are worth it.
DIY #1: The Classic 6-Bucket Pyramid Organizer (Fast + Sturdy)
This is the “starter set” that looks adorable and actually works. It’s a three-level pyramid: 3 buckets on the bottom, 2 in the middle, 1 on top. It fits nicely against a wall and feels intentional instead of “we live in a toy store now.”
Step 1: Layout your buckets
On the floor, arrange 3 buckets side-by-side for the base row. Place 2 centered above them, then 1 centered on top.
Step back and make sure it looks balanced. (This is your one chance to be picky before zip ties turn you into a commitment artist.)
Step 2: Mark connection points
If using holes, mark two points where buckets touch: one near the rim and one slightly lower (for stability). Try to keep marks symmetrical so the pyramid doesn’t lean like it’s late for work.
Step 3: Create holes (recommended)
Use a hole punch (if the plastic is thin) or a drill with a small bit (if the plastic is thicker). Make holes in matching spots on both buckets where they meet.
Keep holes about 1/2 inch below the rim so the plastic doesn’t tear.
Step 4: Zip-tie the bottom row together
Zip-tie bucket 1 to bucket 2 at two points. Repeat for bucket 2 to bucket 3. Pull the ties snugbut not so tight you warp the plastic.
Trim the tails with scissors.
Step 5: Add the middle row
Place the two middle buckets so each one sits in the “gap” between two bottom buckets. Zip-tie each middle bucket to the two buckets beneath it at two points (left and right).
This is what stops the pyramid from doing the worm every time your child grabs something.
Step 6: Attach the top bucket
Center the top bucket above the two middle buckets. Zip-tie it to both middle buckets at two points.
Give the whole structure a gentle shake. If it wobbles, add an extra tie where movement happens.
Step 7: Make it quieter and less “skid-y”
- Add non-slip pads or shelf liner squares under the bottom buckets.
- If the buckets clack against each other, place a thin strip of shelf liner between contact points before tightening ties.
- Keep heavier toys (blocks, cars, trains) on the bottom row to lower the center of gravity.
Step 8: Label it like you want your future self to thrive
Labels are not optional if you want kids to maintain this. Use:
- Words + pictures (best for pre-readers)
- One category per bucket (don’t create a “random stuff” bucket unless you enjoy chaos)
- Simple names kids already use (“Cars,” “Dolls,” “Art,” “Animals”)
DIY #2: Wall-Mounted Bucket Organizer (Small-Space MVP)
If floor space is precious (or you just want the room to look less like a toy hurricane landed), wall-mounting buckets can be a game changer. The key is to mount the support system to the wall, not the bucket alone.
Option A: The stud-mounted board + hooks method (best overall)
- Mount a board to studs at kid height using screws. Use a level so it doesn’t slant.
- Add screw-in utility hooks to the board, spaced for your buckets.
- Hang buckets by handles (or clip them with sturdy hooks).
- Assign “light toy” categories (stuffies, dress-up accessories, art supplies, play food).
This approach spreads weight across the board and studs, which is safer and sturdier than relying on drywall alone.
Option B: Adhesive hooks for ultra-light storage (use with caution)
Adhesive hooks can work for very light items (think: hair bows, pretend jewelry, small plush). If you go this route:
- Follow package instructions exactly, including pressing firmly and allowing full “set” time before hanging items.
- Stay well under stated weight limits and avoid high-traffic tugging zones.
- Do not hang anything heavy, valuable, or breakable.
Make It Cute Without Making It Precious
You want this to look intentional, not like you zip-tied six buckets together at 11:47 p.m. (No judgment. That’s basically the official parent crafting hour.)
Easy upgrades that hold up in real life
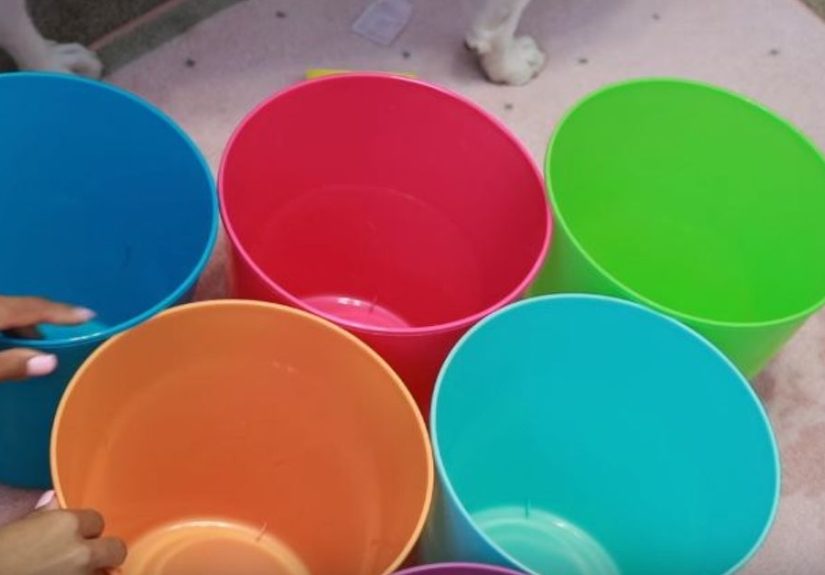
- Color-code by type: blue for building, pink for pretend, green for art, etc.
- Paint the outside only: inside paint chips = tiny flakes + mystery mess.
- Use removable labels: your kid will change interests faster than milk expires.
- Add a “theme stripe”: a single band of washi tape near the rim looks sharp and is easy to replace.
- Go neutral + fun labels: if you hate visual clutter, keep buckets white/gray and let labels add personality.
What Goes Where: A Kid-Friendly Sorting System
Sort by “how you play,” not by “what it is”
The best categories match real behavior. For example:
- Build: blocks, magnetic tiles, train track pieces
- Pretend: dolls, action figures, play food, costumes
- Create: crayons, markers, stickers, glue sticks
- Move: balls, jump ropes, small sports gear
Use picture labels for toddlers
A simple icon (car, doll, pencil) helps toddlers clean up independently. If you want to level up: take a quick photo of the bucket contents once it’s “correct,” print it, and tape it to the front. Kids match what they see. Adults rejoice.
Set a “bucket rule” to stop overflow
Here’s the rule: If it doesn’t fit, we edit. Buckets naturally limit clutter. When a category overflows, it’s your cue to purge broken pieces, donate duplicates, or rotate toys (store 20–30% elsewhere and swap monthly).
Safety & Sanity Checklist (Worth the 2 Minutes)
Because anything in a kid’s room can become a climbing challenge, a drum, or a physics experiment.
- Keep heavy items low. Bottom buckets should hold the densest toys.
- Place the pyramid against a wall. Less tipping, less sliding.
- Avoid overhead hanging above beds or where kids sleep/play underneath.
- Anchor tall furniture. Dressers and bookcases should be secured to the wall to reduce tip-over risk.
- Inspect monthly. Zip ties can loosen over timeswap any that look stretched or brittle.
- Skip sharp edges. Trim zip ties flush and rotate the cut ends toward the back.
Maintenance Plan: Keep It Working (Without Becoming a Full-Time Organizer)
The 5-minute reset
Once a day (or once every other dayreal life happens), do a quick reset:
toss stray items into the correct bucket, remove anything that doesn’t belong, and do a “floor sweep” for rogue pieces.
The buckets make this faster because you’re not sorting a giant pilejust returning items to obvious homes.
The monthly mini-declutter
Set a timer for 15 minutes. Pick one bucket. Remove broken items, mystery parts, and anything your child never touches.
If the bucket is always overstuffed, split it into two categories or rotate some items out.
Troubleshooting (Because Kids Will Stress-Test Your DIY)
“The pyramid wobbles.”
- Add two more zip ties at the widest connection points.
- Use holes near the rim instead of relying on handles.
- Move heavier categories to the bottom row.
“The buckets twist and look crooked.”
- Loosen and re-tighten ties while the structure is pushed flat against a wall.
- Use two attachment points per connection (not just one).
- Make sure buckets are the same size and shape.
“My kid dumps everything anyway.”
Totally normal. Start with fewer categories. Two or three buckets may be enough at first.
Also: put the most-used toys in the easiest-to-reach buckets, and keep “high-piece-count chaos” (hello, tiny blocks) in a bucket with a lid or inside a bag inside the bucket.
Conclusion: Cheap, Cheerful, and Actually Sustainable
The best kids-room organization isn’t the fanciest systemit’s the one your child can use without help. A bucket organizer works because it’s visible, simple, and flexible. It scales with your budget, adapts to new phases (dinosaurs today, space explorers tomorrow), and turns clean-up into a quick “match the label” routine instead of a dramatic monologue.
Build the 6-bucket pyramid first. Live with it for a week. Then decide if you want a second set, a wall-mounted version, or a smaller “activity station” bucket for art supplies. Either way, your feet will thank you.
Extra: The Real-Life Experience of Living With a Bucket Organizer (About )
Here’s what typically happens after you build one of these (besides feeling like a home-organization wizard for about six minutes): the system immediately reveals how your family actually uses the room.
In the first few days, you’ll notice “magnet categories.” One bucket will become the star of the showusually blocks, cars, or pretend play. Another bucket will quietly collect dust like it’s in witness protection. That’s not failure; that’s data. The dusty bucket is either the wrong category, the wrong location, or the wrong season of childhood. Swap it out for something your kid reaches for daily (hair accessories, art supplies, costume bits, stuffed animals).
Around week one, the bucket edges and zip ties get their first true test: the “grab-and-go yank.” Kids don’t gently lift. They snatch. If your pyramid shifts, it means you need either (1) more attachment points, or (2) better weight distribution. The fix is usually simple: double up the zip ties on the bottom row connections and move the densest toys to the bottom buckets. If you built using handles only, this is when you’ll understand why holes near the rim are the “I want this to survive” upgrade.
Then there’s the label moment. Labels work best when they match a child’s language. “Construction Vehicles” sounds organized, but “Cars” is what your kid will look for. If clean-up still isn’t happening, your labels might be too complicated or too similar. Keep categories obviously different“Build,” “Pretend,” “Create,” “Read”and you’ll see faster results.
You’ll also discover the “tiny piece tax.” Any bucket filled with small items (LEGO, beads, action-figure accessories) will try to escape and colonize the floor. The most successful workaround is nesting: put small pieces in a smaller container or zipper pouch inside the bucket. That way the bucket stays the category home, but the chaos is contained.
The best part is what happens after a couple of weeks: kids start using the organizer as a map. They don’t just put toys awaythey start finding toys faster, switching activities more smoothly, and doing mini cleanups without being asked (not always, but more than before). And for you? The room goes from “total reset required” to “quick sweep and we’re good.” That’s the win. Not perfection. Not a showroom. Just a kids’ room that looks like kids live thereminus the daily disaster movie soundtrack.