Table of Contents >> Show >> Hide
If you’ve ever had a heated debate about the “right” way to load the dishwasher, congratulationsyou are officially living a very relatable life. One of the biggest points of confusion? What actually belongs on the top rack of your dishwasher and why it even matters.
The short answer: the top rack is gentler. It’s farther from the heating element at the bottom, so it doesn’t get quite as hot. That slightly cooler, less intense zone makes it the safest place for delicate, lightweight, or heat-sensitive items. Use it correctly and you’ll protect your dishes, prevent warping and cracking, and get cleaner results overall.
Let’s break down the four things that should always go on the top rack of your dishwasher, along with some pro loading tips and real-life lessons learned the hard way (RIP to many a warped plastic lid).
Why the Top Rack Matters More Than You Think
Before we talk specifics, it helps to understand how most dishwashers work. In many models, the heating element that dries your dishes is located at the bottom of the machine. That means the bottom rack sits closer to intense heat and stronger water pressure, while the top rack tends to be slightly cooler and gentler.
That temperature difference might not matter much for sturdy dinner plates or heavy ceramic baking dishes, but it’s a big deal for things like plastics, glassware, and tiny pieces that can flip, melt, or break. When you use the racks as they’re designedheavy, heat-tolerant items on the bottom, lighter and more delicate items on topyou’re working with the dishwasher instead of against it.
Now, let’s get specific about what really belongs on the top shelf.
4 Things That Should Always Go on the Top Rack of Your Dishwasher
1. Anything Plastic (That’s Marked Dishwasher-Safe)
If there’s one golden rule, it’s this: dishwasher-safe plastic belongs on the top rack. That includes:
- Food storage containers and lids
- Kids’ cups and plates
- Reusable plastic water bottles
- Plastic measuring cups and spoons
- Plastic tumblers and “unbreakable” drinkware
Why the top rack only? Many plastics have relatively low melting points. On the bottom rack, they’re closer to the heating element and more likely to warp, sag, or come out looking like a modern art sculpture you didn’t ask for. The top rack is usually cooler, which makes it a safer place for plastic items that can handle the dishwasher but not direct, intense heat.
Check the label first. Look for markings like “dishwasher safe” or “top rack only.” If an item says “top rack only,” it’s basically begging you not to toss it on the bottom rack where it might melt, discolor, or deform. Older plastic containers (especially those made before stricter standards) are often better off hand-washed.
Placement tips for plastic:
- Secure light plastic lids and small containers in the top rack so they don’t flip over or fly around. Use a rack clip or a small mesh basket if you have one.
- Avoid placing very thin plastic directly over the hottest steam vents, even on the top rack, if your dishwasher has visible vents near the top.
- If a plastic piece feels flimsy or sentimental (we all have that one favorite travel mug), consider hand-washing to be safe.
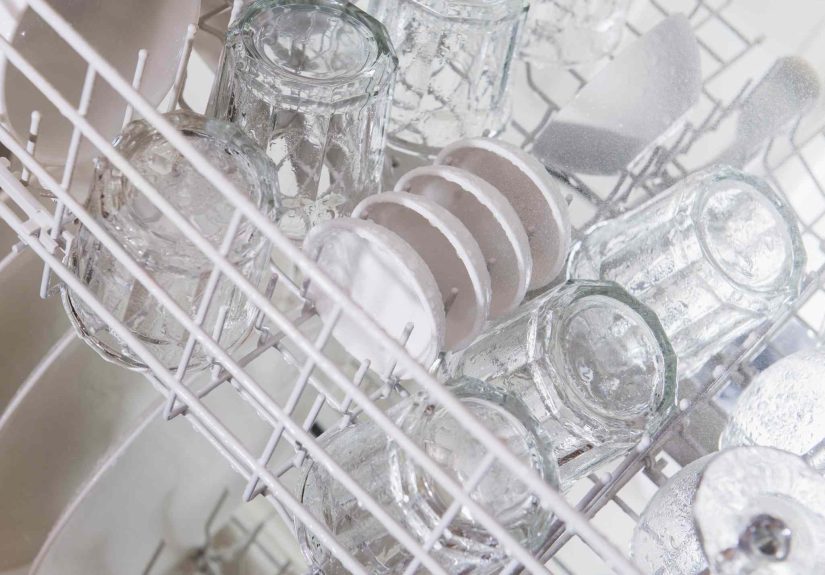
2. Glasses, Mugs, and Everyday Drinkware
Another top-rack VIP: your glasses and mugs. The top rack is designed with these in mind, and most manufacturers specifically call out cups and glasses as “upper rack items.” It’s gentler on fragile glass, helps prevent chips, and keeps your favorite coffee mug from banging against heavy plates.
Items that belong here include:
- Everyday drinking glasses
- Coffee mugs and tea cups
- Wine glasses and stemware (unless otherwise directed by your dishwasher manual)
- Reusable travel mugs labeled dishwasher-safe (usually on the top rack)
How to load glasses and mugs on the top rack:
- Place them upside down so water can drain and detergent can reach the inside.
- Position them between the tines, not directly on the prongs, to avoid stress points and tiny cracks.
- Leave a little space between glasses so they don’t clink and chip each other during the wash cycle.
- Use stemware holders if your dishwasher has themthey help keep tall or delicate wine glasses from tipping.
If you have very thin, expensive crystal or heirloom pieces, most cleaning experts recommend hand-washing instead. The dishwasher is safe for everyday glassware, but some delicate pieces just don’t love hot water, detergent, and jet streams, no matter how carefully you load them.
3. Small Bowls, Saucers, and Lightweight Dishes
Next up: small, lightweight dishware that might flip, slide, or collect water on the bottom rack. The top rack is better designed for these smaller items and usually has adjustable tines or angled sections to help them drain properly.
Good candidates for the top rack include:
- Cereal bowls and soup bowls that are lightweight
- Saucers and small side plates
- Dessert bowls and dip bowls
- Small ramekins that are heat-safe and dishwasher-safe
Putting these items on the bottom rack can cause a few issues:
- They may flip over from the strong water pressure and fill up with dirty water.
- They can block the spray arms or shield other dishes from getting clean.
- They might rattle against heavier items and chip.
Top-rack tips for bowls and small dishes:
- Angle bowls so they tilt slightly and water can run off instead of pooling.
- Don’t stack bowls inside each otherwater and detergent need room to flow between surfaces.
- Use folding or adjustable tines to secure smaller plates or saucers so they don’t slide around.
Think of the top rack as the “small dish parking lot”if it’s petite, lightweight, and likes to misbehave on the bottom rack, it probably belongs up top.
4. Long Utensils and Small Accessories
The last category people often overlook: long utensils and tiny accessories that are too awkward or too small for the silverware basket. These items are safer and easier to wash on the top rack, where they won’t block the spray arm or slip through the basket holes.
This includes:
- Long-handled serving spoons and ladles (if dishwasher-safe)
- Silicone or metal spatulas and turners
- Tongs that lock closed and are dishwasher-safe
- Whisks, if they fit and are marked dishwasher-safe
- Small accessories like baby bottle parts, sippy cup valves, and reusable straw pieces (in a mesh basket)
How to load long utensils on the top rack:
- Lay them flat across the rack, or nest them between bowls and cups so they don’t slip through gaps.
- Make sure they’re not so long that they block the spray arm from spinning.
- If your dishwasher has a third (topmost) cutlery rack, that’s the best place for these piecesspread them out so each surface gets hit by water.
Just remember: sharp knives usually don’t belong in the dishwasher at all, top rack or not. High heat and detergent can dull the blades over time, and there’s also a safety risk when unloading.
Common Mistakes People Make with the Top Rack
Even if you’re putting the right items on the top rack, a few classic mistakes can keep your dishes from getting truly clean or can shorten the life of your stuff.
Overcrowding the Top Rack
If your top rack looks like a game of dishware Tetris, you might be overdoing it. When glasses and bowls are jammed together, water and detergent can’t reach all the surfaces. You’ll end up with cloudy cups, gritty residue, or mysterious food spots that make you question whether the machine even ran.
Leave a little breathing room between items and resist the urge to squeeze in “just one more mug.” A slightly less packed dishwasher that actually cleans things is more efficient than running the same dishes twice.
Blocking the Spray Arm
Oversized utensils or tall items poking through can block the spray arms from spinning freely. When that happens, the whole load sufferstop and bottom racks. After loading, give the spray arm a quick spin with your hand to make sure nothing is in the way.
Mixing Hand-Wash-Only Items with Top-Rack Items
Just because the top rack is gentler doesn’t mean it’s a spa day for everything in your kitchen. Avoid putting these on the top rack:
- Wooden utensils or cutting boards (they can crack, split, or harbor bacteria)
- Cast iron or carbon steel pieces (they’ll rust and lose seasoning)
- Delicate fine china with metallic trim or decorations
- Non-stick pans that aren’t explicitly labeled dishwasher-safe
When in doubt, check the manufacturer’s instructionsor err on the side of hand-washing for special items.
How to Load the Top Rack Like a Pro
Still feeling unsure? Here’s a simple, repeatable routine you can follow every time you run the dishwasher:
- Start with glasses and mugs. Place them upside down along the sides of the rack, between the tines, with a little space between each one.
- Add small bowls and saucers. Angle them slightly for drainage and avoid nesting them together.
- Place plastics and lids. Keep all dishwasher-safe plastics on the top rack, securing lids so they don’t flip. Use clips or a small container if needed.
- Finish with long utensils and accessories. Lay them flat where they won’t block water flow or the spray arm. Put tiny parts in a mesh basket.
- Do a final spin test. Gently spin the spray arm by hand to make sure nothing is hitting it or blocking its rotation.
Once you get into the habit, loading the top rack correctly becomes automaticand you’ll notice fewer warped lids, fewer cloudy glasses, and far fewer arguments about “who loaded this thing like that.”
Real-Life Experiences and Extra Tips for Your Top Rack
Dishwasher manuals are useful, but let’s be honest: many of our best loading tips come from trial, error, and that one time we opened the dishwasher to find a plastic lid melted into the shape of the bottom rack. Here are some lived-in lessons and practical experiences related to keeping the right things on the top rack.
The tale of the warped plastic lid. A common story goes like this: someone tosses a plastic food storage lid on the bottom rack “just this once” because the top rack is full. The cycle finishes, and the lid comes out curved like a potato chip. It still technically fits… if you press and hold it with 10 fingers. That’s how many of us learn that “top rack only” isn’t just a suggestion. Keeping plastics on the top rack dramatically reduces the chances of warping or sagging, especially during high-heat or sanitize cycles.
Cloudy glasses and how the top rack helps. If your favorite drinking glasses start looking hazy, you might assume your detergent isn’t working. But it’s often a combination of hard water, very hot cycles, and rough loading. Moving delicate glassware to the top rack, spacing them out, and avoiding overcrowding can help reduce etching and cloudiness. People who’ve switched from bottom-rack glass loading to top-rack only frequently notice fewer chips and better-looking glass over time.
Parents and the top-rack shuffle. Families with young kids quickly discover that the top rack is prime real estate. Sippy cup lids, straw pieces, snack bowls, divided plates, baby bottle partsthey all belong up there. A lot of parents invest in a small dishwasher-safe basket just for tiny parts and park it on the top rack permanently. It keeps little pieces from falling through, getting lost, or resting on the heating element. The routine becomes: larger plastics and bowls on the rack, microscopic accessories in the basket.
The “everything in the silverware basket” mistake. It’s tempting to shove every odd-shaped utensil into the silverware basket, but long items like ladles and spatulas can easily block the spray arm or prevent the detergent door from opening fully. People often realize this only after opening the door and finding dry, dirty dishes. Moving those long utensils to the top racklaid flat or nested between bowlsusually solves the problem.
Top rack as an organization tool. Many experienced dishwasher users think of the top rack as a way to organize the wash. Top for small, delicate, and light; bottom for big, heavy, and tough. Once you commit to that mindset, loading gets faster. You don’t hold each item wondering where it goesyou follow the rule: “Is it plastic, small, delicate, or long and awkward? Top rack. Is it heavy, thick, or built like a tank? Bottom rack.” That simple decision tree saves time and brainpower after a long day.
Helping your dishwasher last longer. It’s not just about protecting your dishes; it’s also about protecting your machine. Misplaced items on the top rack can cause problemslike blocking the detergent dispenser or spray arms. On the flip side, correctly placing smaller and lighter items on top helps everything wash more efficiently. Over time, that can mean fewer re-washes, less strain on the motor, and a happier dishwasher overall.
Experimentbut pay attention. Every dishwasher model is slightly different, and so are your dishes. The best approach is a mix of following general rules and paying attention to results. If you notice certain items always coming out dirty, try repositioning them on the top rack. If something shows the slightest sign of warping or cracking, move it to the hand-wash category permanently. The more you observe what comes out at the end of the cycle, the better you’ll get at “reading” what your top rack prefers.
At the end of the day, loading the top rack properly doesn’t require perfection. It just takes a bit of logic: keep plastics and delicate items away from intense heat, give everything room to get sprayed, and use the top rack as the safe zone for fragile, small, or awkwardly shaped pieces. Once those four categoriesplastics, glasses and mugs, small bowls and saucers, and long utensils and small accessorieslive on the top rack where they belong, your dishes (and your dishwasher) will thank you.
The bottom line: top rack = gentle spa, bottom rack = power wash. Put the right things in the right place, and you’ll spend less time replacing warped lids and chipped glassesand more time enjoying a kitchen that basically cleans itself.