Table of Contents >> Show >> Hide
- What Makes a Furniture Makeover Truly Impressive?
- The Makeover Decision Tree: Paint, Stain, Fabric, or Fix?
- Prep Like You Mean It (Because Future-You Will Thank You)
- 7 Creative Before-and-After Furniture Makeover Ideas That Actually Look Expensive
- 1) The “New Personality” Dresser Flip
- 2) Painted Patterns: Stripes, Color Blocking, and “I Definitely Meant to Do That” Details
- 3) The One-Day Refinish (When You Want Wood, Not Paint)
- 4) Hardware Swaps: The Smallest Change With the Biggest Flex
- 5) Dining Chair Seat Reupholstery: Weekend Project, Instant Upgrade
- 6) Veneer and Particleboard Rescue (Yes, You Can Save It)
- 7) Distressed, Washed, and Textured Finishes (Without Looking Like an Accident)
- Finishing Touches That Separate “DIY” From “Whoa, That’s Nice”
- Common Makeover Mistakes (So You Don’t Star in Your Own “Before-and-After Fail”)
- Field Notes: of Real-World Makeover Experience
- Conclusion: Your “After” Starts With a Smart Plan
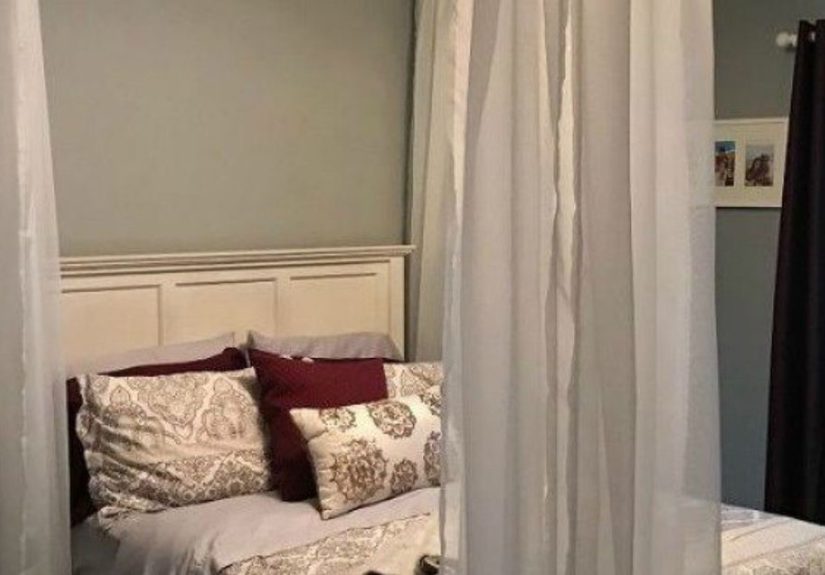
Before-and-after furniture makeovers are the home-improvement version of a plot twist: one minute you’re staring at a sad, scuffed dresser that looks like it lost a fight with a vacuum cleaner, and the next minute it’s the star of your bedroom. If you’ve ever watched an “ugly duckling” piece turn into a swan with new paint, fresh fabric, or upgraded hardware, you know the dopamine hit is real.
This guide pulls together the most useful ideas, techniques, and “learned-it-the-hard-way” lessons from trusted U.S. DIY and home brands. You’ll get practical, repeatable methods for turning thrift-store finds into “Where did you buy that?” conversation pieceswithout turning your garage into a crime scene of sanding dust and regret.
What Makes a Furniture Makeover Truly Impressive?
A great makeover isn’t just “painted = done.” The best transformations usually nail three things:
- Contrast: The after photo looks meaningfully differentcolor, texture, sheen, or function changes.
- Craft: Smooth finishes, crisp lines, and details that look intentional (not accidental “distressing”).
- Respect for the piece: The makeover works with the furniture’s shape and era instead of fighting it.
Translation: the wow factor is mostly prep and choices, not magic. (Okay, sometimes it’s also new knobs. Hardware is basically jewelry for furnituremore on that in a minute.)
The Makeover Decision Tree: Paint, Stain, Fabric, or Fix?
Before you commit, decide what your piece actually needs. Here’s a quick “choose-your-own-adventure,” but with fewer dragons and more drop cloths:
Paint It
Best for: dated finishes, mismatched sets, laminate/particleboard, or when you want a bold color moment. Painted furniture makeovers are the fastest route to dramatic before-and-after results.
Refinish or Restain It
Best for: real wood with decent grain, vintage pieces where you want a natural look, or anything that deserves to glow instead of being buried under beige.
Reupholster It
Best for: dining chair seats, benches, ottomans, and any chair that’s structurally solid but looks like it survived a snack-pocalypse.
Repair + Refresh
Best for: loose veneer, wobbly joints, chipped edges, sticky drawers, or anything that’s “cute but cursed.” Repair makes the makeover last, not just photograph well.
Prep Like You Mean It (Because Future-You Will Thank You)
Most “my paint scratched off when I looked at it” stories start with skipping prep. If you want a durable DIY furniture makeover, this is the unglamorous part that makes the glam part possible.
1) Clean First (Yes, Even If It “Looks Fine”)
Furniture holds onto invisible grimepolish residue, cooking grease, hand oils. Clean it thoroughly and let it dry. This matters especially for kitchen pieces, nightstands, and anything that’s been loved… with lotion.
2) Sand Smart (Not Aggressive)
You rarely need to sand a piece down to bare wood for paint. Often you’re scuff-sanding: creating a slightly rough surface so primer and paint can grab on. Use coarser grits only when removing flaking finish or smoothing damage, then work finer for a smooth feel.
3) Prime When It’s Not Optional
Primer is your insurance policy against stains bleeding through, glossy finishes rejecting paint, or tannins (hello, oak) ruining your dream color. When in doubtespecially on slick surfaces or heavy wood tonesprime.
4) Safety Sidebar: Lead Paint Isn’t Vintage Charm
If you’re working on older painted pieces (especially anything that seems pre-1978), treat it like it may have lead paint until tested. Use the right test kits, contain dust, and avoid dry sanding questionable coatings without precautions. Your lungs are not a “sanding accessory.”
7 Creative Before-and-After Furniture Makeover Ideas That Actually Look Expensive
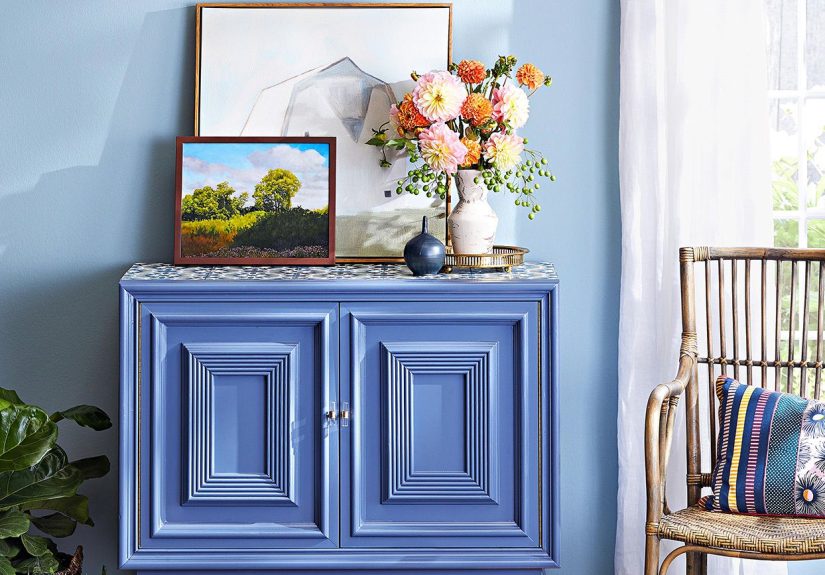
1) The “New Personality” Dresser Flip
A dresser is the makeover MVP: big impact, manageable shape, and it instantly changes a room. A common winning formula:
- Before: basic brown or tired tan finish, scuffed top, outdated knobs.
- After: a confident color (moody green, deep navy, warm white), plus upgraded hardware.
Pro move: paint the body one color and the drawers another (or keep drawer fronts wood-toned for contrast). Add modern pullssuddenly your “roadside rescue” looks boutique.
Extra credit: try a high-gloss or “automotive-style” finish for a sleek, modern vibe. It’s dramatic, light-reflecting, and slightly obnoxious in the best way.
2) Painted Patterns: Stripes, Color Blocking, and “I Definitely Meant to Do That” Details
If you want a truly creative furniture makeover, pattern is your shortcut to custom. Think:
- Color blocking: paint drawer fronts one shade and the frame another.
- Stripes: subtle tone-on-tone or bold high contrast.
- Stencils: great for the sides of a dresser or the back panel of a bookshelf.
Tip: keep patterns to one “zone” (drawer fronts, sides, or top) so it reads intentional, not like your furniture got into your washi tape stash unsupervised.
3) The One-Day Refinish (When You Want Wood, Not Paint)
Not every makeover needs paint. If the piece is real wood and the shape is good, refinishing can look high-endespecially on chests, side tables, and vintage nightstands.
A streamlined approach many DIYers use:
- Remove hardware and clean thoroughly.
- Sand in steps (start moderate, then go finer for smoothness).
- Wipe dust completely (tack cloth or microfiber helps).
- Apply stain evenly with a rag for control.
- Finish with multiple light coats of protective topcoat.
This is the makeover that makes people say, “Waitthat was thrifted?” with genuine confusion.
4) Hardware Swaps: The Smallest Change With the Biggest Flex
If you’re new to upcycled furniture, start with hardware. Swapping knobs and pulls is cheap, fast, and wildly effective.
- Brass or champagne pulls instantly warm up painted pieces.
- Matte black hardware makes even simple white paint look modern.
- Glass or ceramic knobs add vintage charm without going full grandma-core.
Want it to look designer? Choose hardware that matches the furniture’s “vibe.” Sleek piece = simple pulls. Ornate dresser = something with curves or vintage detail.
5) Dining Chair Seat Reupholstery: Weekend Project, Instant Upgrade
Reupholstering a dining chair seat is one of the most satisfying before-and-after transformations because the “before” is usually sad and the “after” looks professionally finished.
Classic beginner flow:
- Remove the seat (usually screws from underneath).
- Pry out staples and keep the old fabric as a cutting template.
- Replace foam if it’s flattened or crumbling (your butt deserves better).
- Center the new fabric pattern, pull taut, and staple opposite sides first.
- Fold corners neatly, trim bulk, and reattach the seat.
Choose a performance fabric if the chairs will see daily use. Your future self will appreciate the stain resistance when spaghetti night goes off-script.
6) Veneer and Particleboard Rescue (Yes, You Can Save It)
Not all thrift finds are solid woodsome are veneer over particleboard. The makeover key is repair first:
- Loose or bubbled veneer: carefully lift, apply adhesive/contact cement as appropriate, press and clamp (or weigh down) until cured.
- Chipped edges: fill, sand smooth, then prime before painting.
Once repaired, paint and primer can make these pieces look surprisingly polished. The “after” doesn’t need to announce what the “before” was made of.
7) Distressed, Washed, and Textured Finishes (Without Looking Like an Accident)
Texture is where furniture makeovers can go from “cute” to “wow.” Popular approaches:
- Dry brushing: minimal paint on the brush for subtle highlight and depth.
- Layered paint + distressing: base coat, top coat, then sand edges lightly for wear.
- Wax resist: apply wax in spots so the next layer doesn’t adhere, creating controlled distressing.
Rule of thumb: distress where real wear would happenedges, corners, drawer pullsnot random middle-of-the-panel chaos.
Finishing Touches That Separate “DIY” From “Whoa, That’s Nice”
You can do everything right and still lose the final look if you skip protection or rush curing. A few practical upgrades:
Seal It (Especially for Chalk-Style Paint)
Chalk-style paints are popular because they can require less sanding, but they generally need protection. Wax gives a soft, velvety feel; polyurethane (or similar clear coat) gives tougher protectiongreat for tabletops and high-traffic pieces.
Light Sanding Between Coats
If you want that smooth “factory” finish, lightly sand between coats (once dry) and wipe dust away. This knocks down tiny bumps and makes the final sheen look more refined.
Let It Cure
Dry isn’t the same as cured. Paint can feel dry in hours but still be soft underneath for days. Treat freshly finished furniture gently for a bitno dragging baskets across it like you’re testing its emotional resilience.
Common Makeover Mistakes (So You Don’t Star in Your Own “Before-and-After Fail”)
- Skipping cleaning: paint hates grease more than you hate repainting.
- Using the wrong primer: stains bleed, tannins creep, chaos wins.
- Rushing dry time: fingerprints become permanent decor.
- Not labeling hardware: “mystery screws” multiply overnight.
- Ignoring safety: contain dust, ventilate, and test suspicious old paint.
Field Notes: of Real-World Makeover Experience
If furniture makeovers had a motto, it would be: “This will be quick,” whispered moments before someone spends three hours removing staples from a chair like they’re defusing a tiny, upholstery-based bomb.
In real homes (not staged photo shoots where the sun always hits perfectly and nobody owns a dog), the biggest “aha” is that prep is the project. People tend to plan the fun partscolor, fabric, knobsand then act personally betrayed by sanding. But sanding isn’t punishment; it’s the handshake that introduces paint to the furniture. Skip it when you shouldn’t, and the relationship ends in peeling.
Another pattern: the first coat almost always looks worse than expected. Brush strokes show up, coverage looks patchy, and suddenly you’re Googling “can I unpaint furniture.” The fix is boring but effective: let it dry, lightly sand if needed, then apply the next coat. The second coat is the emotional support coat. The third coat is the “okay, now we’re talking” coat.
Hardware is the secret weapon beginners underestimate. A piece can be painted beautifully and still look “DIY” if the hardware is flimsy, mismatched, or fighting the style. Conversely, a simple paint job can look high-end with the right pulls. When in doubt, pick hardware like you’re styling an outfit: if the paint is bold, choose simpler hardware; if the paint is neutral, let the hardware shine.
Upholstery teaches patience fast. The real win isn’t just new fabricit’s tension and symmetry. Staples placed thoughtfully (opposite sides first, then work around) prevent wrinkles and lopsided patterns. And yes, centering that stripe matters. Nothing says “I did this at midnight” like a pattern drifting off to the left because you stapled first and hoped for the best.
Veneer repairs are another “trust the process” moment. Loose veneer looks like a deal-breaker, but it’s often fixable with the right adhesive, pressure, and time. The key is resisting the urge to rush: clamps, weights, and curing time are what make “saved” look like “restored.” Once it’s stable, primer and paint can give you a finish that nobody will interrogate for its material résumé.
Finally, the best makeovers start with a realistic question: Where will this live and how will it be used? A dining table needs tougher protection than a decorative side table. A kid’s dresser needs durable topcoat more than delicate wax. Matching your finish to real life is the difference between a makeover that photographs well and one that survives Tuesday.
Conclusion: Your “After” Starts With a Smart Plan
Creative furniture makeovers aren’t about having a perfect workshop or a magical paintbrush blessed by DIY deities. They’re about choosing the right approach (paint, refinish, reupholster, repair), doing the prep that makes it last, and adding the kind of detailshardware, pattern, sheen, texturethat look intentional. Start with one piece, build confidence, and don’t be surprised if your home slowly fills with “projects” that you swear were all incredible bargains.