Table of Contents >> Show >> Hide
- What You Need Before You Start
- Why Car Wrap Removal Can Be Easy or Miserable
- Easy Ways to Remove a Wrap from a Car: 8 Steps
- Step 1: Wash the Car First
- Step 2: Move the Car Into the Right Environment
- Step 3: Test a Small Area Before You Commit
- Step 4: Warm the Vinyl and Lift an Edge Carefully
- Step 5: Peel Slowly at a Shallow Angle
- Step 6: Reheat Stubborn Areas and Take Your Time Around Curves
- Step 7: Remove the Adhesive Residue
- Step 8: Wash, Inspect, and Protect the Paint
- Common Mistakes to Avoid
- When It Makes Sense to Hire a Professional
- Real-World Experiences and Lessons From Car Wrap Removal
- Final Thoughts
Note: This guide is best for standard vinyl wraps on factory paint that is still in solid condition. If the paint is already peeling, cracking, rusting, or was cheaply repainted, wrap removal can pull up more than just vinyl. That is the moment to stop being brave and start being wise.
Vinyl wraps are fantastic when you want a fresh look without committing to a full paint job. They can turn a plain commuter into a matte-black menace, a family SUV into a rolling billboard, or a tired hood into something that looks a little more intentional and a little less “I park under trees.” But eventually every wrap reaches the same dramatic ending: it has to come off.
The good news is that removing a car wrap is usually doable if you take your time, use the right tools, and resist the deeply human urge to yank on it like you are starting a lawn mower. The bad news is that impatience can leave you with torn vinyl, sticky adhesive, sore fingers, and a new appreciation for professional installers.
This guide breaks the process down into eight easy steps, plus practical advice on what tools to use, what mistakes to avoid, and what real-world wrap removal experiences teach you once the peeling starts. Whether you are taking off a faded roof wrap, stripping a full-body color change, or removing old branding from a work vehicle, the goal is the same: protect the paint, remove the vinyl cleanly, and keep your blood pressure in a safe range.
What You Need Before You Start
Before you touch the wrap, gather your supplies. A little preparation saves a lot of frustration later.
- Heat gun or a strong hair dryer
- Plastic razor blades or plastic trim tools
- Microfiber towels
- Automotive adhesive remover labeled safe for paint
- Car wash soap and water
- Spray bottle
- Nitrile gloves
- Optional: steamer, extension cord, clay bar, light polish, wax or sealant
If you are removing a full wrap, clear your schedule. This is not a “quick little project” unless your definition of quick includes several hours, warm arms, and occasional muttering.
Why Car Wrap Removal Can Be Easy or Miserable
Not all wraps come off the same way. A high-quality cast vinyl wrap installed on healthy factory paint and removed within its service life can peel away in large satisfying sheets. That is the dream scenario. Then there is the opposite version: sunbaked film on a hood, roof, or trunk that snaps into tiny bits like dry pastry. That is the version that makes people invent new vocabulary.
Several things affect how difficult the job will be: the age of the wrap, the quality of the film, how much sun and heat the car has seen, whether the wrap was laminated or printed, and the condition of the paint underneath. Cold weather can make vinyl brittle. Heavy UV exposure can make it stubborn. Weak paint can turn the whole project into a repair job.
That is why smart wrap removal starts with patience, not force. If the film is fighting you, the answer usually is not “pull harder.” It is “adjust your method.”
Easy Ways to Remove a Wrap from a Car: 8 Steps
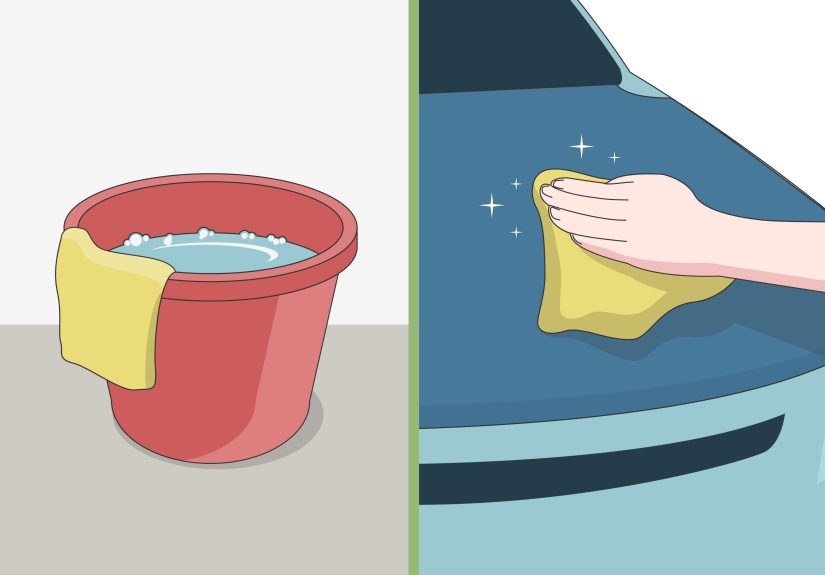
Step 1: Wash the Car First
Yes, even though the wrap is about to come off. Dirt, grit, and road film can scratch the paint while you peel, especially around edges and seams. Give the vehicle a basic wash with automotive soap and dry it thoroughly.
This step also helps you inspect the wrap. Look for cracked sections, lifting corners, deep cuts, rock chips, or areas where the paint underneath may already be compromised. Pay close attention to repainted panels. If a bumper or door was repaired in the past, that panel deserves extra caution.
A clean surface also lets your heat source work more evenly. Dirt is not a performance upgrade here.
Step 2: Move the Car Into the Right Environment
The ideal setup is a warm, shaded garage or covered area. You want the vinyl flexible, but you do not want to fight direct sunlight, dust, or a surface that is hot enough to fry your hand. A moderate, controlled workspace gives you better results than blazing sunshine or a cold driveway.
If the weather is chilly, warm the vehicle first. Even letting it sit in a garage for a while can help. Cold vinyl becomes brittle and tears more easily, which slows everything down. If the wrap feels stiff instead of pliable, the environment is working against you.
Think of vinyl like pizza cheese: warm is cooperative, cold is moody.
Step 3: Test a Small Area Before You Commit
Pick an inconspicuous section and do a test pull. A lower panel or corner of a door is a good place to start. Warm the area gently, lift a small edge with a plastic tool, and begin peeling.
This small test tells you almost everything you need to know. Does the wrap lift in smooth strips? Great. Does it tear into postage-stamp-sized pieces? You will need more heat, more time, and more emotional stability. Does adhesive stay behind? That is common, but heavy residue means you should plan for a dedicated cleanup phase.
Most important, the test helps you check the paint. If the surface underneath looks unstable, chalky, or starts lifting, stop immediately. Saving time is not worth sacrificing the finish.
Step 4: Warm the Vinyl and Lift an Edge Carefully
Use a heat gun or hair dryer to warm a manageable section. Do not try to heat the whole vehicle at once. Work in small zones so the film stays soft while you peel. Keep the heat source moving and avoid concentrating it in one spot for too long.
Once the vinyl is warm, use a fingernail, plastic razor blade, or plastic trim tool to lift a corner. Avoid metal blades on painted surfaces. They are fast, yes, but so is regret.
The goal is to soften the adhesive, not cook it. If the vinyl gets overly stretchy, gooey, or feels like it is smearing instead of peeling, back off on the heat and let the surface calm down for a minute.
Step 5: Peel Slowly at a Shallow Angle
This is the heart of the process. Pull the wrap back slowly and keep the angle low and shallow rather than straight out from the panel. A steady, controlled peel usually reduces tearing and leaves less adhesive behind.
Work panel by panel. Doors, fenders, hood, roof, trunk, bumpers. If you try to bounce all over the car, you will waste time and lose track of what is clean, what is heated, and what still has glue on it.
Do not yank. Do not twist. Do not try to win a strength contest with adhesive. Consistent pressure beats brute force almost every time.
If the wrap comes off in big sheets, enjoy the moment. This is the closest the project gets to being fun.
Step 6: Reheat Stubborn Areas and Take Your Time Around Curves
Mirrors, bumpers, recessed handles, body lines, emblems, and tight corners are where wrap removal stops feeling easy and starts feeling personal. These areas often hold more tension, more adhesive, or thinner pieces of film.
When the vinyl starts resisting, stop and reheat it. Do not keep pulling once it begins to snap. That only turns one stubborn section into ten annoying little sections. On curves and contours, smaller passes are better than one aggressive pull.
Printed wraps, laminated wraps, and film that has lived through years of sun may need repeated warming. A steamer can help in especially stubborn areas because it softens the material without blasting one point with dry heat. Either way, patience is cheaper than paint correction.
Step 7: Remove the Adhesive Residue
Once the vinyl is gone, the job is only mostly done. Adhesive residue may remain, especially on older wraps or panels that got the worst of the weather. Spray a paint-safe automotive adhesive remover onto a microfiber towel or directly onto the residue, according to the product instructions, and let it dwell briefly.
Then wipe gently. For stubborn glue, use repeated applications instead of harsh scrubbing. A plastic razor blade can help on some areas, but keep it flat and gentle. The goal is to lift the residue, not score the clear coat.
Do not reach for random household solvents just because they happen to be within arm’s reach. Cars are not kitchen countertops, and “it smelled strong” is not a detailing strategy.
Step 8: Wash, Inspect, and Protect the Paint
After the adhesive is gone, wash the vehicle again. This removes chemical residue, dust, and bits of leftover glue. Dry the car and inspect the finish in good lighting.
You may notice ghosting, uneven gloss, or color differences between wrapped and unwrapped panels. That does not always mean the wrap caused damage. Sometimes the exposed paint simply aged differently than the protected paint underneath. In many cases, a light polish by hand or machine can improve the look. Matte finishes and delicate paint, however, need extra care.
Once you are satisfied, protect the surface with a wax, sealant, or coating that is appropriate for your paint. The car has been through enough.
Common Mistakes to Avoid
Using Too Much Heat
More heat is not always better. Overheating can make adhesive smear, distort trim, or create extra cleanup work. Warm and controlled beats scorching and dramatic.
Removing the Wrap in Cold Weather
Cold vinyl loves to crack into tiny pieces. If possible, wait for a warmer day or work indoors.
Using Metal Tools on Paint
Metal scrapers can damage paint faster than most people expect. Plastic tools are slower, but they are much kinder.
Ignoring Bad Paint
If the paint is already failing, the wrap may not be the main problem. Peeling can expose underlying issues that were already there.
Rushing the Adhesive Cleanup
Residue removal is where many DIY jobs get sloppy. Slow, repeated passes are safer than aggressive rubbing.
When It Makes Sense to Hire a Professional
DIY wrap removal is possible, but there are times when paying a professional is the smarter move. If the wrap is very old, the vehicle has repainted panels, the film is heavily cracked, or the adhesive has clearly bonded hard to the surface, a pro may save you money in the long run.
Professional shops also make sense when the vehicle is high-value, the finish is delicate, or the job involves commercial graphics spread across multiple panels and contours. A full wrap removal can take a surprising amount of labor, especially when every square inch wants to argue.
In other words, if your car is expensive, rare, freshly painted, or emotionally important, do not let your first-ever vinyl removal experiment become a character-building event.
Real-World Experiences and Lessons From Car Wrap Removal
One of the most common experiences people have with wrap removal is total overconfidence in the first ten minutes, followed by deep humility somewhere around the second door. The first corner lifts nicely, the vinyl peels in a satisfying strip, and suddenly it feels like the whole project will be done before lunch. Then the roof happens. Or the bumper. Or the mirror cap that seems to have been wrapped by someone with octopus-level commitment.
A frequently repeated lesson is that flat panels are usually the easiest part of the job, while curves and edges are where time disappears. A hood or door can make you feel competent. A front bumper can make you question every life choice that led to the purchase of a heat gun. This is especially true with older wraps that have baked in the sun for years. The top surfaces of a car often age much harder than the side panels, so removal may go smoothly on the doors and then become painfully slow on the roof and trunk.
Another common experience is discovering that the vinyl was hiding more than color. Sometimes people remove a wrap and find paint chips, sanding marks, old bodywork, or mismatched panels underneath. This is not always a wrap problem. In many cases, the wrap simply covered flaws that were already present. That is why experienced installers and detailers recommend checking paint condition before installation and being cautious during removal if the car has a repair history.
Adhesive residue is another area where expectations and reality do not always match. Many first-time DIYers assume the wrap will peel off and leave a clean, shiny panel behind. Sometimes it does. Often it does not. Residue tends to linger around edges, deep recesses, and panels that got more heat and UV exposure. The people who have the smoothest removals are usually the ones who plan for residue from the start instead of treating it like a rude surprise.
There is also a big difference between “removable” and “effortless.” High-quality wrap films are designed to be removed, but that does not mean they leap off the car out of professional courtesy. Even a quality film can become difficult if it stays on too long, sees harsh weather, or sits on compromised paint. A lot of hard-earned experience in this space boils down to one simple truth: timing matters. Remove a wrap while it is still in decent shape, and the job is usually manageable. Wait until it is faded, brittle, and cracking, and the labor rises fast.
Finally, one of the best lessons from real wrap removal jobs is that slow progress is still progress. People who get the best results tend to work methodically, one panel at a time, one section at a time, one towel at a time. They stop when the film resists, add more heat, adjust their angle, and keep going. The people who get into trouble are usually the ones who rush, overheat, or treat the wrap like it personally insulted them. Car wrap removal is not glamorous, but it rewards patience in a very practical way: cleaner paint, less residue, and fewer expensive mistakes.
Final Thoughts
If you want the easiest way to remove a wrap from a car, the real secret is not a magic chemical or a heroic amount of force. It is controlled heat, a shallow peel angle, gentle tools, and enough patience to let the process work. That combination gives you the best chance of removing the vinyl cleanly while protecting the paint underneath.
For some jobs, DIY removal is absolutely realistic. For others, especially older wraps on fragile paint, hiring a professional is the smarter call. Either way, the goal is the same: get the wrap off without turning a cosmetic project into a body-shop invoice.
Take it slow, keep the surface warm, and remember: when a wrap refuses to peel, it is usually asking for a better method, not more aggression.