Table of Contents >> Show >> Hide
- What “Glue Hair Extensions” Really Means
- Should You Glue Hair Extensions at Home?
- What You Need Before You Start
- How to Prep Hair for Glued Extensions
- How to Glue Hair Extensions Step by Step
- 1. Section the hair neatly
- 2. Measure the weft before applying glue
- 3. Apply a thin line of bonding glue to the weft
- 4. Let the adhesive become tacky
- 5. Place the weft onto the section carefully
- 6. Hold and allow it to set
- 7. Continue working upward in rows
- 8. Keep the perimeter light
- 9. Blend and style gently
- Common Mistakes People Make
- How to Make Glued Extensions Look Natural
- How Long Glued Hair Extensions Last
- How to Remove Glued Hair Extensions Safely
- Aftercare for Natural Hair
- Who Should Skip Glued Hair Extensions
- Real-World Experiences With Glued Hair Extensions
- Conclusion
Hair extensions can give you instant length, fast volume, and that “Who is she?” mirror moment in under an hour. But glued hair extensions are not the kind of beauty move you want to freestyle with the confidence of a reality-show makeover montage. Done well, they can look smooth, natural, and surprisingly comfortable. Done badly, they can feel tight, look bulky, and leave you muttering apologies to your edges.
This guide walks through how to glue hair extensions the smart way, with a focus on temporary glued-in wefts and track application. It also explains when glue is the wrong move, how to avoid common mistakes, and how to remove the extensions without turning your hair into a sticky side quest. The goal is simple: better hair, fewer regrets.
What “Glue Hair Extensions” Really Means
Before anything touches your hair, let’s clear up the vocabulary. “Glue hair extensions” usually refers to wefted extension hair that is attached using a hair bonding adhesive. This is different from clip-ins, tape-ins, sew-ins, and salon fusion or keratin bond methods. Those other methods may also involve adhesive or bonding materials, but they are installed differently and often require professional tools or removal.
For most people searching this topic, the real question is how to attach extension wefts neatly and temporarily without damaging natural hair. That is exactly where technique matters. Glued-in extensions should be treated like a precision job, not a slap-it-on-and-pray project.
Should You Glue Hair Extensions at Home?
The honest answer: sometimes, but not always. If you are working with a simple temporary style, have healthy hair, and plan to wear the look briefly, at-home application can be manageable with patience. But if your hair is very fine, fragile, heavily bleached, already shedding, or your scalp is sensitive, glued extensions may be more drama than they are worth.
Also, not every extension method belongs in a DIY routine. Long-wear bonded methods, especially anything described as fusion, keratin tip, or salon-installed bonding, are better left to a trained stylist. Those techniques are supposed to look invisible and feel lightweight, which is hard to achieve when you are sectioning the back of your own head with one hand and holding your breath with the other.
What You Need Before You Start
Choose the right hair
Human hair extensions usually blend better, style more easily, and look more natural than synthetic hair. Remy hair is especially helpful because the cuticles run in the same direction, which reduces tangling and keeps the finish smoother. If your goal is a polished everyday look instead of a one-night glam cameo, quality hair matters.
Gather the right tools
You do not need a beauty supply store exploding on your bathroom counter, but you do need the basics: extension wefts, salon-grade hair bonding glue, clips, a rat-tail comb, small scissors, a mirror setup that lets you actually see what you are doing, and extension remover for later. Yes, later matters now. If you buy glue and skip remover, that is like adopting a puppy because it looked cute asleep.
Check your scalp and strands
If your scalp is irritated, flaky, sore, or inflamed, hit pause. The same goes for hair that is breaking heavily or snapping near the roots. Glued hair extensions work best on hair that can handle extra weight and manipulation. If your hairline already looks stressed, adding glued wefts is not a rescue plan. It is a plot twist.
How to Prep Hair for Glued Extensions
Start with clean, fully dry hair
Extensions do not bond well to dirty, oily, or damp hair. Wash your hair first and make sure it is completely dry before you start. Keep heavy oils, greasy serums, and rich leave-ins away from the root area. Adhesive and oil are not best friends. They are more like coworkers who should never be assigned the same shift.
Detangle everything first
Brush or comb through your natural hair thoroughly before sectioning. If you begin with knots, those knots will not magically become more charming once glue is involved. They will become sticky knots, which is a much less glamorous category.
Plan the style before you place the first track
Decide whether you want full volume, added length, a quick weave effect, or just more fullness in specific areas. Think about where your leave-out will sit and how you plan to style the finished look. The placement pattern should support the final hairstyle, not fight it.
How to Glue Hair Extensions Step by Step
1. Section the hair neatly
Use a rat-tail comb to create a clean horizontal part near the nape of the neck. Clip the rest of the hair out of the way. Keep the section thin enough to support the weft but thick enough to hide it. Clean sections are the difference between “seamless blend” and “visible ladder in the back.”
2. Measure the weft before applying glue
Hold the extension weft against the parted section and measure it from side to side. Trim only if needed. Do not guess. Do not cut while distracted. Do not tell yourself, “Close enough.” Hair has a funny way of making “close enough” look extremely not close enough.
3. Apply a thin line of bonding glue to the weft
Apply the glue to the stitched track of the extension weft, not in a giant blob and not directly onto the scalp. A thin, even line is the goal. Too much adhesive makes the track bulky, slows drying, and increases the chances of sticky residue later. In extension work, more glue does not equal more skill. It usually equals more cleanup.
4. Let the adhesive become tacky
Most bonding glues work better when allowed to sit briefly until tacky rather than soaking-wet. Follow the product directions, but in general, you want the glue ready to grip without running. This small pause makes placement easier and can reduce slipping.
5. Place the weft onto the section carefully
Press the glued side of the weft onto the parted section of hair, staying off the scalp and away from the very edge of the hairline. Use your fingers to press gently along the track so it lies flat and secure. The goal is firm contact, not aggressive mashing.
6. Hold and allow it to set
Give the track a moment to bond before moving on. Do not immediately tug it to “check” whether it is attached. Let it sit. Trust the process. Extensions hate trust issues.
7. Continue working upward in rows
Create the next horizontal part above the first one and repeat the process. Leave enough space between rows so the extensions sit naturally and do not form a heavy shelf. Avoid placing tracks too close to the crown or hairline where they may peek through.
8. Keep the perimeter light
Be extra cautious around the temples, nape, and outer edges. These areas are more delicate and more visible. Overloading them with thick wefts is one of the fastest ways to create tension and obvious attachment points. Think soft, strategic placement, not wall-to-wall carpet.
9. Blend and style gently
Once the rows are in place and the bonds have set, blend the extensions with your natural hair. A light trim can help the extensions look more believable. Then style with moderate heat if the hair type allows it, always using heat protection on the hair lengths. Keep excessive product away from bonded areas.
Common Mistakes People Make
Using too much glue
This is the classic beginner mistake. Too much glue can seep, harden unevenly, attract lint, and make removal a nightmare. Thin and controlled wins every time.
Placing tracks too close to the scalp
If the extensions feel tight when you turn your head, that is not a sign they are “extra secure.” It is a warning. Tracks need slight flexibility so the hair can move naturally.
Ignoring pain or headaches
If installation hurts, something is wrong. Stop and adjust. Extensions should feel present, not punishing. Pain is not part of the beauty package.
Applying to oily or damp hair
Moisture and oil shorten wear time and can make bonds slip. Prep is boring until you skip it and spend the next day trying to reattach one rebellious track in your car mirror.
Using the wrong adhesive
Only use products made for hair extensions. Never substitute household glue, nail glue, craft glue, or random “strong adhesive” products. Your hair is not a school project.
How to Make Glued Extensions Look Natural
Natural-looking extensions come down to three things: correct color match, smart placement, and restrained volume. Start with a shade that matches your hair when it is styled the way you actually wear it. Then place the extensions where your natural density can support them. Finally, resist the urge to use every weft in the package unless your hair truly needs it.
Another trick is to vary track width and avoid overly blunt layers. If every added piece is thick, straight across, and stacked too close together, the result can look heavy and obvious. A little shaping goes a long way. Good extension work whispers. Bad extension work introduces itself from across the room.
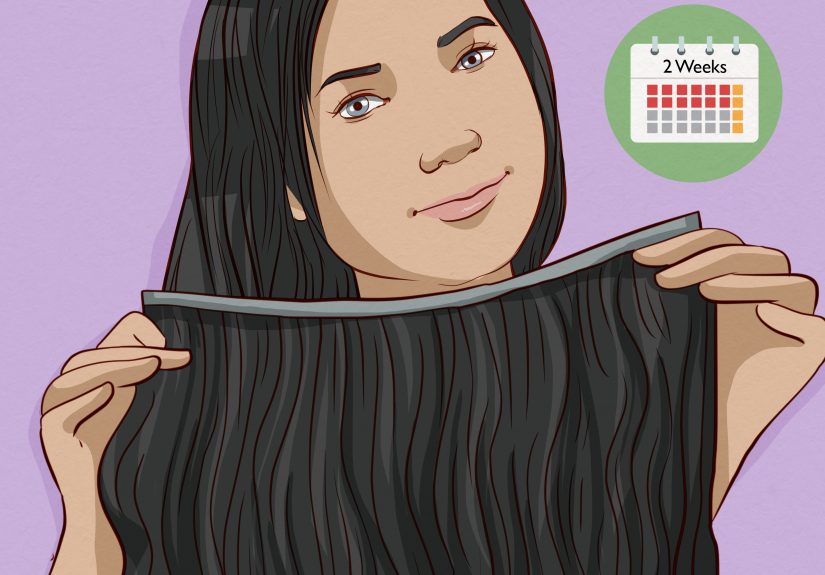
How Long Glued Hair Extensions Last
Traditional glued-in wefts are generally best for short-term wear. They are not the ideal choice for people who want a super long-wear, low-maintenance setup. How long they stay neat depends on your hair texture, scalp oil level, activity, weather, and how carefully they were applied. Sleeping rough, sweating hard, over-brushing, and using oily products near the bonds can shorten the life of the style fast.
If you want something that lasts for weeks with scheduled maintenance, other extension methods may be a better fit. Glue-in wefts shine when you want quick impact, not months of commitment.
How to Remove Glued Hair Extensions Safely
Removal is where good intentions go to die if you rush. Never pull, rip, peel, or “just see if it comes off.” That is how breakage happens.
1. Work on dry, detangled hair
Section the hair and start at the lowest track. Stay calm and work row by row.
2. Apply a proper bond remover
Use a remover designed for extension adhesive. Saturate the bond and allow it to break down the glue. Some removers work quickly, but they still need a little time to soften the bond.
3. Gently loosen the weft
Once the bond softens, slide the extension away gently. If it resists, add more remover and wait longer. The extension should release with very little force.
4. Remove leftover residue
After the weft is out, use more remover if needed and gently comb out any remaining glue. Be patient. This is not the moment for speed runs.
5. Wash and condition the hair
Once everything is removed, cleanse the hair well and follow with a deep conditioner. Your natural hair has just been through a whole event. Give it a proper recovery.
Aftercare for Natural Hair
Whether you wore the extensions for a day or longer, aftercare matters. Clean the scalp, condition the mid-lengths and ends, and avoid immediately jumping into another heavy extension style if your hair feels stressed. Gentle detangling, moisture, and a brief break can make a big difference.
Watch for warning signs like soreness, shedding beyond your normal amount, tenderness around the hairline, or tiny broken hairs where the tracks sat. If you notice ongoing irritation or visible thinning, stop using glued methods and talk to a professional stylist or dermatologist.
Who Should Skip Glued Hair Extensions
Glued extensions are probably not your best option if your hair is extremely fine, actively thinning, chemically overprocessed, fragile around the edges, or if your scalp tends to react badly to adhesives. In those cases, lighter temporary options or non-adhesive methods are usually smarter.
There is nothing glamorous about forcing your hair to cooperate with a method it clearly hates. The best extension choice is the one your real hair can survive with dignity.
Real-World Experiences With Glued Hair Extensions
One of the most common experiences people have with glued hair extensions is surprise at how little product is actually needed. First-timers often assume a thicker line of glue will make the weft more secure. Instead, it usually makes the track stiff, messy, and more visible. People who get the cleanest result almost always say the same thing afterward: the winning formula was less glue, thinner sections, and more patience. In other words, the extensions looked expensive because the application was careful, not because the adhesive was applied like icing on a cake.
Another frequent experience is realizing that placement matters more than volume. Many people start out wanting maximum fullness everywhere, only to discover that too many tracks make the style bulky and uncomfortable. The better result usually comes from adding hair where natural density is weakest, then blending strategically. A person with medium-density hair may only need a few well-placed rows to get a fuller look. Someone with fine hair often learns that lighter tracks, smaller wefts, and extra space between rows create a more believable finish than packing the head with hair that the natural strands cannot support.
People also tend to underestimate the lifestyle side of glued extensions. On day one, the hair looks fantastic. By day three, reality arrives wearing a satin bonnet and asking whether anyone remembered not to use oils near the roots. The people who enjoy glued extensions the most usually build small habits around them. They sleep with the hair wrapped, brush gently from the ends upward, avoid soaking the bonds, and keep styling products away from the glued area. The people who struggle most are often the ones who treat the extensions exactly like their own loose hair and then wonder why a track starts acting suspicious near lunchtime.
Removal stories are probably the most revealing of all. People who remove glued extensions successfully almost always describe the same turning point: they stopped trying to force the bond and started letting the remover do the work. Once the adhesive is softened properly, the process becomes far less dramatic. People who rush removal, on the other hand, often report tangling, residue, and unnecessary breakage. The lesson is not complicated, but it is important: the condition of your natural hair after extensions depends just as much on how you take them out as how you put them in.
There is also an emotional side to the experience that does not get talked about enough. Good extensions can make someone feel polished, camera-ready, and more like the version of themselves they had in mind. That confidence boost is real. But the healthiest long-term experience usually comes when the extensions are treated as an accessory, not a permanent rescue mission for every bad hair day. The happiest wearers tend to be the ones who enjoy the transformation, respect their natural hair underneath, and know when to take a break. That balance is the real secret. Not magic glue. Not celebrity-level bundles. Just smart technique and hair that still likes you afterward.
Conclusion
If you want glued hair extensions to look good, feel comfortable, and come out without drama, the rule is simple: keep everything light, clean, and intentional. Start with healthy hair, use the right adhesive, section carefully, avoid crowding the scalp, and never rush removal. The prettiest extension install is not the one with the most hair. It is the one that blends well, wears comfortably, and leaves your real hair intact when the show is over.
Done right, glued extensions can absolutely deliver fast glamour. Done carelessly, they can deliver a cautionary tale. Aim for the first option.