Table of Contents >> Show >> Hide
- What You’re Really Building (and Why It Matters)
- Before You Start: A Realistic Checklist
- Step 1: Pick Your Server Type (Vanilla vs. Paper)
- Step 2: Install the Right Java (This Is Where People Faceplant)
- Step 3: Download the Server Software
- Step 4: First Run + Accept the EULA
- Step 5: Configure server.properties Like You Actually Want to Live Here
- Step 6: Let Friends Join (LAN, Same Wi-Fi, or Internet)
- Step 7: Basic Admin Commands (So You’re Not Admin-ing With Vibes)
- Step 8: Backups (Your Future Self Will Send You a Thank-You Card)
- Paper Plugins: The Right Way to Add Features
- Troubleshooting: The Greatest Hits
- Security Checklist (Because the Internet Is the Internet)
- Conclusion: Your Server, Your Rules (Just Keep It Legit and Stable)
- of Real-World Server Owner Experiences (What People Learn the Hard Way)
Quick heads-up before we sprint into the Nether: I can’t walk you through creating a “cracked” server (the common meaning is turning off account authentication so unlicensed clients can join). That’s a piracy-adjacent setup and it also invites security problems, identity spoofing, and griefing faster than you can say “who replaced my house with lava?”
But if your real goal is “How do I host a Minecraft Java server for my friends?”you’re in the right place. Below is a complete, step-by-step guide to building a legit, stable, and secure Minecraft server on Java Edition (Vanilla or Paper), with practical examples, admin tips, and the stuff tutorials often forget (like backups… until you learn the hard way).
What You’re Really Building (and Why It Matters)
A Minecraft Java server is basically a small Java application running 24/7 (or whenever you want) that:
- Hosts a world file
- Manages player connections
- Enforces rules/settings from
server.properties - Optionally loads plugins (Paper/Spigot) to add features
The big choice you’ll make early is Vanilla vs. performance server software (Paper). Vanilla is the official server. Paper is a community server that’s typically faster and more configurableespecially if you plan to run plugins.
Before You Start: A Realistic Checklist
1) Hardware: How beefy does your server need to be?
For a small friend server (2–10 players) you can often run it on a decent desktop or laptop. For 10–30 players, you’ll want a more reliable machine or a VPS. What matters most:
- CPU: Higher single-core performance helps a lot (Minecraft is picky).
- RAM: 2–4 GB for small servers, 6–10 GB for bigger ones with plugins/mods.
- Storage: SSD strongly recommendedworld saves + chunk loading love speed.
- Network: Stable upload speed matters more than download.
2) Know your audience: friends-only or public?
If it’s friends-only, you should use a whitelist and keep it private. If it’s public, you’ll need stronger moderation, anti-grief measures, and probably a plugin stack. Public servers are fun… but they’re also magnets for chaos.
3) Legal & account safety
Use legitimate authentication (that’s the default). It keeps accounts consistent and helps protect players from impersonation. Also, if you plan to monetize in any way (donations, ranks, cosmetics), read the Minecraft usage guidelines and EULA carefully so you don’t accidentally speedrun yourself into getting shut down.
Step 1: Pick Your Server Type (Vanilla vs. Paper)
Option A: Vanilla (Official)
Best for: simple survival worlds, minimal setup, “just play.”
Tradeoff: fewer performance tweaks and no plugin ecosystem.
Option B: Paper (High-performance)
Best for: smoother performance, more settings control, and plugins (moderation tools, claims, economy, mini-games).
Tradeoff: slightly more setup and you should keep an eye on Java version requirements.
If you’re unsure: pick Vanilla for a first-time private server. Pick Paper if you expect more players or want plugins.
Step 2: Install the Right Java (This Is Where People Faceplant)
Minecraft Java servers require a compatible Java runtime. Different server builds may require different Java versions. Paper’s documentation is very clear about recommended Java versions by Minecraft version, and for modern releases you’ll likely be on Java 21.
How to check if Java is installed:
If that command prints a version, Java is installed. If not, install a modern Java distribution (many server admins use Temurin/Adoptium). Then verify again with java -version.
Pro tip: Don’t install 9 different Javas “just in case.” That’s how you end up debugging your PATH at 2:00 a.m. while your friends spam “server?” in Discord.
Step 3: Download the Server Software
Vanilla server
Download the official Minecraft Java server from the Minecraft website. You’ll get a .jar file.
Paper server
Download the Paper server jar for your Minecraft version from PaperMC’s official site/docs.
Create a dedicated folder like:
C:MinecraftServer(Windows)/home/mc/server/(Linux)~/minecraft-server/(macOS)
Put the server jar inside that folder so all generated files stay neatly contained.
Step 4: First Run + Accept the EULA
The first time you run the server jar, it will generate a handful of files and usually stopbecause you must accept the Minecraft EULA.
Run the server (basic)
After the first run, you’ll see an eula.txt file. Open it and set:
Then run the server again:
Recommended: Set a memory limit
Here’s a practical example for a small server using 4 GB RAM:
What it means:
-Xms= starting memory allocation-Xmx= maximum memory allocation
Giving your server all your RAM is tempting. Don’t. Your OS needs oxygen too.
Step 5: Configure server.properties Like You Actually Want to Live Here
The server.properties file controls core server behavior: game mode, difficulty, view distance, whitelist settings, and more. This file is where you transform “a server” into your server.
Core settings most servers change
Security settings you should not ignore
Keep authentication enabled. This is the standard, legitimate configuration and helps prevent impersonation and related problems:
Use a whitelist for private servers. It’s the single best “friends-only” feature.
Modern security: Many servers also keep secure profile enforcement enabled (especially on newer versions) to support safer identity and chat-related integrity features.
After editing, restart the server for changes to apply (some settings can be reloaded, but restarting is the “it just works” button).
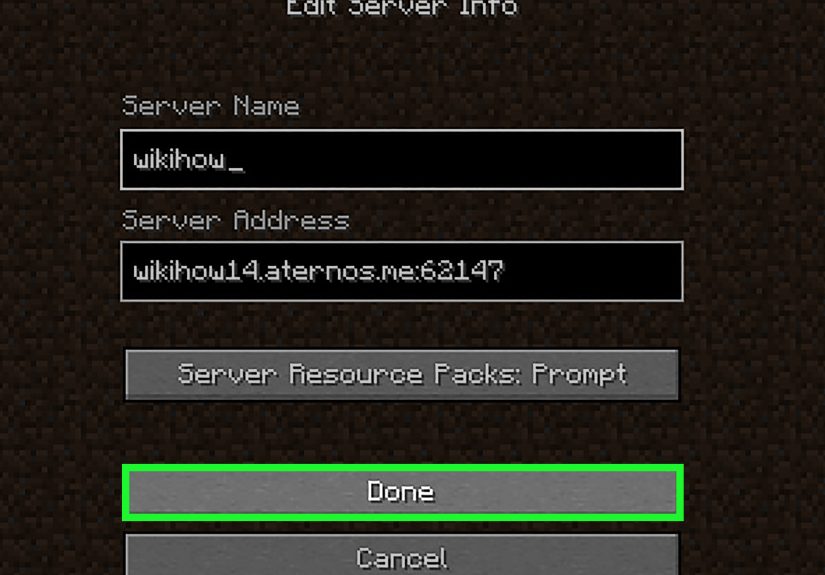
Step 6: Let Friends Join (LAN, Same Wi-Fi, or Internet)
Option A: Same network (easy mode)
If your friends are on the same home network, they can often connect using your local IP (like 192.168.x.x) and the server port (default 25565).
Option B: Over the internet (router boss fight)
For friends outside your network, you’ll usually need:
- Port forwarding on your router (TCP port
25565by default) - A firewall rule allowing inbound traffic on that port
- Your public IP or a domain/DDNS
Important safety note: Opening ports exposes your machine to the internet. Use a whitelist if it’s private, keep software updated, and avoid installing random plugins from sketchy sources.
Option C: Use managed hosting (least headache)
If you don’t want to mess with routers, hosting providers exist for a reason. The tradeoff is cost, but you gain convenience, uptime, and often built-in backups.
Step 7: Basic Admin Commands (So You’re Not Admin-ing With Vibes)
Once the server is running, you’ll manage it via the console or in-game commands (if you’re OP).
Whitelist commands
Operator (admin) controls
Save and stop safely
Yes, you can just close the window. And yes, your world can also just… hate you for it.
Step 8: Backups (Your Future Self Will Send You a Thank-You Card)
If you run a server long enough, something will eventually happen:
- Power outage
- Disk hiccup
- Bad plugin update
- Someone “accidentally” sets off 38,000 TNT
Minimum viable backup routine:
- Stop the server (or at least run
/save-all). - Copy the world folder(s) and important config files.
- Store backups somewhere else (another drive or cloud storage).
Bonus points: Keep multiple backups (daily + weekly) so you can roll back farther than “yesterday’s disaster.”
Paper Plugins: The Right Way to Add Features
If you use Paper, plugins can transform your server. A few popular categories:
- Moderation: anti-grief tools, logging, bans
- Quality of life: homes, warps, claims
- Performance: view distance tuning, optimization tools
- Fun stuff: cosmetics, mini-games, economies
Plugin safety rules:
- Only download plugins from reputable communities.
- Read compatibility notes for your Minecraft version.
- Update carefullyone-at-a-timeso you know what broke.
- Backup before major updates.
Troubleshooting: The Greatest Hits
“It won’t start”
- Check Java version:
java -version - Read the crash logyes, actually read it
- Make sure your jar filename matches your run command
- Confirm you accepted
eula=true
“Friends can’t connect”
- Are they using the correct IP and port?
- Is the firewall allowing inbound
25565? - Is port forwarding pointing to the correct local machine?
- Are you behind CGNAT (common with some ISPs)? If yes, hosting/VPS is easier.
“Lag city”
- Reduce view distance and simulation distance
- Limit heavy farms or entity piles
- Consider Paper if you’re on Vanilla
- Make sure you’re not starved for CPU
Security Checklist (Because the Internet Is the Internet)
- Keep
online-mode=trueto use legitimate authentication. - Use whitelist for private servers.
- Use strong OS passwords and keep your machine updated.
- Don’t enable remote admin features unless you know exactly what you’re doing.
- Use backups like it’s your religion.
- Don’t run random jars from random forums. Your server is not a science experiment.
Conclusion: Your Server, Your Rules (Just Keep It Legit and Stable)
Running a Minecraft Java server is one part tech setup, one part community management, and one part “why is there a chicken in the ceiling?” Once you get the basics rightJava version, clean server folder, EULA acceptance, server.properties tuning, and network accessyou’re basically a small-town mayor with a diamond budget.
If you want the smoothest experience: start small, whitelist it, back it up, and only add plugins once the core server is stable. Your future self (and your friends) will thank you.
of Real-World Server Owner Experiences (What People Learn the Hard Way)
Most first-time Minecraft server owners start with a simple dream: “I just want a cozy world where my friends can build stuff.” Then reality shows up wearing a router manual as a hat.
One common experience: the port-forwarding puzzle. You do everything “right,” it still doesn’t work, and you discover your ISP or router has opinions. People often spend more time fighting network settings than mining their first stack of iron. If you’re stuck here, you’re not alonemany admins eventually decide that paying for hosting is cheaper than paying with their sanity.
Another classic: underestimating backups. In theory, you’ll back up “later.” In practice, “later” is after a sudden power outage, a corrupted world file, or a plugin update that turns your spawn into a crater. Veteran admins tend to adopt a simple mantra: “If it isn’t backed up, it doesn’t exist.” The moment you schedule a backup routine is the moment your server starts feeling like a real project instead of a fragile science fair volcano.
Then there’s the social side: server rules are not optional. Even among friends, misunderstandings happen. Someone “borrows” resources, someone else feels robbed, and suddenly you’re mediating a conflict about enchanted books like it’s a courtroom drama. The best-run private servers usually have a few clear rules: don’t steal, don’t grief, ask before modifying shared builds, and keep pranks… actually funny.
Performance surprises are another rite of passage. Everything runs fine until someone builds a “totally harmless” farm that spawns more mobs than a blockbuster zombie movie. Or a player insists on keeping 300 villagers in one room because “trading is convenient.” New admins learn quickly that entities are performance vampires, and that view distance settings can be the difference between smooth gameplay and a server that moves like it’s wading through honey.
Finally, the most unexpectedly wholesome experience: community momentum. Once your server is stable, people start creating traditionsweekly building nights, nether expeditions, mini-competitions, a shared town, or a “museum” of everyone’s weirdest finds. The technical setup gets you online, but the shared stories are what keep people coming back. Running a server can feel like hosting a tiny world that evolveseven when someone inevitably builds a giant pixel-art potato for no reason.
In the end, the best advice server owners pass around is simple: start secure, stay backed up, keep settings sane, and treat your server like a living spacenot just a file folder full of jars. The rest is just block-based history.