Table of Contents >> Show >> Hide
- What Makes Angel Food Cake So Fluffy?
- Ingredients You Need for a Light Angel Food Cake
- Equipment That Actually Matters
- How to Make Angel Food Cake That’s Fluffy and Light
- Best Tips for a Perfect Angel Food Cake Every Time
- Common Angel Food Cake Problems (and How to Fix Them)
- Serving Ideas That Don’t Weigh It Down
- How to Store Angel Food Cake
- of Real-World Baking Experiences and Lessons (So You Don’t Learn the Hard Way)
- Conclusion
If cakes had personalities, angel food cake would be the friend who floats into the room looking effortless while the rest of us are still wrestling with butter wrappers. It’s tall, airy, sweet-but-not-too-sweet, and somehow dramatic enough for a celebration while still feeling perfectly at home with a bowl of berries on a Tuesday.
The catch? Angel food cake is a little fussy. Not “you need a culinary degree” fussy, but definitely “please don’t get egg yolk in my whites” fussy. The good news is that once you understand the why behind the steps, it becomes a lot easier to make a cake that’s fluffy, light, and gloriously cloudlike instead of short, dense, or deflated.
In this guide, you’ll learn exactly how to make angel food cake from scratch, what causes common problems, and how to fix them before they happen. I’ll also share practical baking experiences and real-world tips at the end so you can bake with confidencenot crossed fingers.
What Makes Angel Food Cake So Fluffy?
Angel food cake is a foam cake, which means its rise comes primarily from whipped egg whitesnot butter, oil, or heavy leavening. That’s why texture is everything. You’re building a delicate structure of air bubbles, then strengthening it with sugar and a small amount of flour.
In plain English: you’re making a sweet edible cloud and asking it to behave in a hot oven. Respect the foam, and the foam will reward you.
The key texture factors
- Egg whites whipped properly: They create volume and structure.
- Cream of tartar (or another acid): Helps stabilize the foam.
- Cake flour: Lower protein means a more tender crumb.
- Gentle folding: Keeps air in the batter.
- Ungreased tube pan: The batter needs to cling to climb.
- Cooling upside down: Helps prevent collapse while the structure sets.
Ingredients You Need for a Light Angel Food Cake
Angel food cake uses a short ingredient list, which means every ingredient earns its spot. There’s nowhere for poor techniqueor mystery substitutionsto hide.
Core ingredients
- Egg whites: The star of the show. Freshly separated whites usually perform best for volume and stability.
- Granulated sugar (often pulsed finer): Sweetens and helps stabilize the meringue.
- Cake flour: Gives a soft, delicate structure.
- Cream of tartar: Stabilizes the whipped egg whites.
- Salt: Balances sweetness.
- Vanilla extract: Adds classic flavor (some bakers also use almond extract).
Optional flavor additions
- A little almond extract for a bakery-style aroma
- Lemon or orange zest for brightness
- A pinch of warm spice (like ginger or cardamom) for a subtle twist
Pro tip: If you’re new to angel food cake, start with classic vanilla before experimenting. This cake is simple enough that even “just a little extra” can change the texture.
Equipment That Actually Matters
For many cakes, you can improvise. Angel food cake is less forgiving. This is one of those times when the right pan matters more than the trendy spatula you bought at 2 a.m.
Must-have tools
- Tube pan (angel food cake pan), preferably with removable bottom: The center tube helps the cake bake evenly and rise properly.
- Electric mixer (stand or hand): You can whisk by hand, but prepare for an upper-body workout.
- Fine-mesh sieve: For sifting flour and sugar.
- Rubber spatula: For gentle folding.
- Large metal or glass mixing bowl: Clean and grease-free for whipping whites.
What not to use
- Greased pan: The batter won’t cling and may not rise well.
- Decorative Bundt pan: Pretty? Yes. Ideal for angel food cake? Not really.
- Greasy bowls or tools: Even a little fat can sabotage your egg whites.
How to Make Angel Food Cake That’s Fluffy and Light
Here’s the full process, step by step. The technique is the recipe’s secret sauce.
1) Separate the eggs carefully
Separate egg whites from yolks while the eggs are cold (it’s easier), then let the whites sit until they lose their chill. Make sure no yolk sneaks in. Egg yolk contains fat, and fat is the villain of a stable meringue.
If you’re separating a lot of eggs, crack each one into a small bowl first, then transfer the white to your mixing bowl. That way, one rogue yolk doesn’t ruin the whole batch.
2) Prep the dry ingredients
Sift the cake flour with part of the sugar (and salt, if your method includes it). Some bakers sift multiple times to make the mixture extra fine and airy. Is it mildly annoying? Yes. Does it help create a lighter batter? Also yes.
3) Start whipping the egg whites
Beat the egg whites until foamy, then add cream of tartar. Continue whipping until soft peaks form. At this stage, the whites should look glossy and light, not dry or chunky.
4) Add sugar gradually
Add the remaining sugar slowlythink “rain,” not “sugar avalanche.” This helps it dissolve into the foam and keeps the meringue stable. Keep beating until you reach stiff, glossy peaks.
Important: Stiff peaks should still look smooth. If the whites look clumpy, dry, or curdled, they may be overbeaten.
5) Fold in the flour mixture gently
Sift the flour mixture over the whipped whites in several additions, folding carefully after each addition. Use a spatula to cut down through the center, sweep across the bottom, and fold up the side of the bowl while rotating.
This is not the moment for aggressive stirring. You’re trying to combine the ingredients without knocking out all the air you just spent several minutes building.
6) Transfer to an ungreased tube pan
Spoon the batter into the pan and smooth the top lightly. Some bakers run a thin knife or spatula through the batter to pop large air pocketshelpful if you poured it in too enthusiastically.
7) Bake until set and springy
Bake until the top is golden and springs back when lightly touched. The exact baking time depends on the recipe and oven, but angel food cake usually takes long enough for your kitchen to smell like a bakery and for at least one person to ask, “Is it done yet?”
Avoid opening the oven door too early. Sudden temperature drops can affect the rise.
8) Cool upside down immediately
This step is non-negotiable for classic angel food cake. Invert the pan and let the cake cool completely before unmolding. Many pans have feet for this; if yours doesn’t, the center tube can often rest over a bottle neck.
Cooling upside down helps the cake keep its height while the structure finishes setting. If you cool it right side up, gravity may win.
9) Unmold gently and slice with a serrated knife
Run a thin knife or offset spatula around the edges and center tube to release the cake. Use a serrated knife to slice so you don’t crush that delicate crumb you worked so hard to create.
Best Tips for a Perfect Angel Food Cake Every Time
Use a clean, grease-free bowl
Wipe your bowl and whisk attachment before starting. Egg white foam is famously dramatic around fat.
Don’t skip the sifting
Sifting isn’t just tradition. It helps distribute the flour and sugar evenly and makes folding easier, which protects the volume of the batter.
Choose cake flour for tenderness
You can make substitutions in a pinch, but cake flour gives the classic soft texture and fine crumb most bakers want in a fluffy angel food cake.
Add sugar slowly
Gradual sugar addition helps the meringue stay glossy and stable. Dumping it in too fast can deflate the foam or create a grainy texture.
Avoid overmixing the whites
There’s a sweet spot between underwhipped and overwhipped. Underwhipped whites won’t support the cake; overwhipped whites can make the batter dry and hard to fold.
Bake in the right pan
A straight-sided tube pan is designed for this cake. Angel food cake batter needs traction and even heat to rise tall and bake through.
Common Angel Food Cake Problems (and How to Fix Them)
Problem: The cake collapsed
Possible causes: Underbaking, cooling right side up, or weak/deflated meringue.
Fix: Bake until the top springs back and cool the cake upside down immediately. Be gentle during folding.
Problem: Dense or rubbery texture
Possible causes: Overbeaten egg whites, overmixed batter, or too much flour packed into the measuring cup.
Fix: Stop at stiff glossy peaks, fold lightly, and measure flour correctly (spoon and level or use a kitchen scale).
Problem: Cake didn’t rise much
Possible causes: Greased pan, yolk contamination, old technique errors, or weak whipping.
Fix: Use an ungreased tube pan, keep tools grease-free, and whip the whites properly before adding dry ingredients.
Problem: Large holes or tunnels
Possible causes: Batter folded unevenly or large air pockets trapped during pan filling.
Fix: Fold more evenly and gently run a knife/spatula through the batter in the pan before baking.
Problem: Cake sticks badly
Possible causes: Not cooling enough before unmolding or rough removal technique.
Fix: Cool completely, then loosen carefully around the edge and center tube with a thin knife.
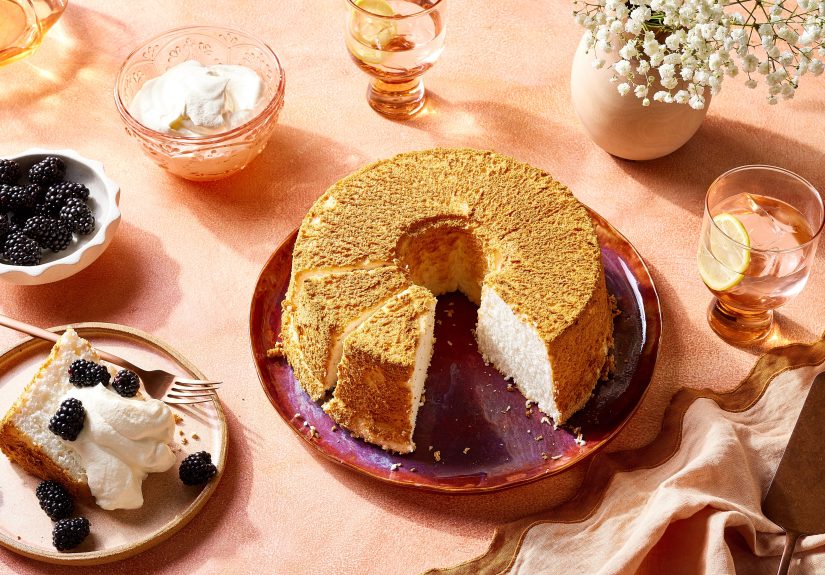
Serving Ideas That Don’t Weigh It Down
The beauty of angel food cake is that it pairs well with toppings without turning into a sugar brick. Keep it light and let the texture shine.
Great serving options
- Fresh strawberries, blueberries, or raspberries
- Lightly sweetened whipped cream
- Lemon curd (especially useful if you have leftover yolks)
- Berry compote or fruit sauce
- A dusting of powdered sugar
- Toasted coconut or sliced almonds for texture
Want a simple crowd-pleaser? Serve slices with whipped cream and macerated berries. It looks fancy, tastes bright, and requires approximately zero pastry-chef swagger.
How to Store Angel Food Cake
Angel food cake is at its best fresh. Because it’s low in fat, it can dry out faster than richer cakes.
At room temperature
Store it covered in an airtight container or wrapped well. If it’s plain (no dairy topping), room temperature storage usually works for short-term freshness.
Freezing tips
You can freeze angel food cake, but texture may be less perfect after thawing. Freeze it sooner rather than later, preferably in slices wrapped well to protect against freezer burn. Serve thawed slices with fruit, whipped cream, or a little syrup if they seem dry.
of Real-World Baking Experiences and Lessons (So You Don’t Learn the Hard Way)
One of the most common experiences people have when making angel food cake for the first time is assuming it behaves like “regular cake batter.” It absolutely does not. A first-time baker might think, “I’ll just stir until smooth,” and then wonder why the final cake looks more like a polite pancake than a towering cloud. The lesson here is simple: when the recipe says fold gently, it means you’re preserving air, not just mixing ingredients. Once you understand that, the entire process makes more sense.
Another very real experience: the accidental yolk incident. You separate eleven eggs perfectly, start feeling like a baking champion, and then egg number twelve breaks badly and drops yolk into the bowl. It’s frustrating, but it teaches a smart kitchen habitseparate each egg into a small cup before adding it to the mixing bowl. That tiny extra step feels annoying until it saves a whole batch of whites. Suddenly, future-you feels brilliant.
Then there’s the “my pan is nonstick, so it must be better” experience. This is a classic trap because nonstick is amazing for many cakes. But angel food cake needs to grip the pan to climb and hold its height. Bakers who use the wrong pan often report a shorter cake or a cake that slips and sinks. It’s a memorable lesson in how baking is part recipe, part physics, and part choosing the right tool even when it’s less convenient.
Cooling the cake upside down is another moment that feels strange the first time. New bakers often stare at the inverted pan like they’re defusing a bomb in a sitcom kitchen. “You want me to do what?” Yes. And when they skip it, many learn quickly why that step matters. The cake may shrink, flatten, or collapse in the center. After one side-by-side experienceone cooled properly, one cooled uprightmost bakers never question the upside-down step again.
A more encouraging experience is the moment people realize angel food cake doesn’t need heavy frosting to be impressive. Many bakers who are used to layer cakes discover that a clean slice of angel food cake with berries and whipped cream looks elegant, tastes fresh, and feels lighter after a meal. It becomes the dessert that guests keep “just taking a little more of,” which is the dessert equivalent of a standing ovation.
Finally, there’s the confidence-building experience of the second or third bake. The first cake teaches caution. The second teaches timing. By the third, you begin to recognize what foamy whites look like, what glossy stiff peaks look like, and how gentle folding feels in your hands. That’s when angel food cake stops being intimidating and starts becoming fun. And honestly, that transformationfrom “please work” to “I’ve got this”is one of the best parts of baking.
Conclusion
If you want angel food cake that’s truly fluffy and light, focus on technique more than fancy ingredients: clean equipment, properly whipped egg whites, gentle folding, the right tube pan, and upside-down cooling. Master those fundamentals and you’ll get a tall, tender cake with a cloudlike crumb that tastes just as good plain as it does dressed up with fruit and cream. In other words: simple ingredients, serious payoff.