Table of Contents >> Show >> Hide
- First: Figure Out What “Stripped” Means in Your Situation
- Safety and Setup (Because Bolts Love Chaos)
- Start Here: The “No-Drama” Methods That Often Work
- If the Bolt Head Is Rounded: External Removal Methods
- If It’s a Stripped Allen (Hex) or Torx Bolt
- If the Bolt Is Broken or the Head Is Gone: Internal Extraction Methods
- Heat: The Persuasion Technique for Seized Bolts
- After the Bolt Comes Out: Don’t Skip the “Clean Exit”
- How to Prevent a Stripped Bolt Next Time (Future You Will Thank You)
- Real-World Experiences: What Usually Works (and What Usually Backfires)
- Conclusion
A stripped bolt is basically a tiny piece of metal with big “main character energy.”
It’s supposed to turn. Instead, it just sits thererounded off, smug, and somehow immune to your best efforts.
The good news: you can usually remove a stripped bolt without wrecking the part it’s stuck in… as long as you
pick the right method and work from “least dramatic” to “full villain arc.”
This guide walks you through practical, proven strategies used by mechanics and DIYerseverything from better
socket choices and extractor sockets to left-hand drill bits, heat cycles, and the famous “weld a nut on it”
trick. You’ll also get prevention tips so you don’t meet this same bolt again in a sequel.
First: Figure Out What “Stripped” Means in Your Situation
People say “stripped bolt,” but it can mean a few different disasters:
- Rounded bolt head: The outside hex is smoothed off. A normal socket slips.
- Stripped internal hex (Allen) or Torx: The inside recess is chewed up.
- Partially rounded + seized threads: You’ve got both head damage and a stuck fastener.
- Broken bolt/stud: The head snapped off or it broke flush with the surface.
The method that works best depends on which problem you have. If you try the wrong approach too aggressively,
you can turn a “10-minute fix” into “I now own a tap-and-die set and regrets.”
Safety and Setup (Because Bolts Love Chaos)
Before you start swinging hammers or bringing out heat, set yourself up for success:
- Eye protection: Metal chips and broken bits are fast and rude.
- Stabilize the work: Use jack stands on vehicles, clamps on benches, and common sense everywhere.
- Clean the head: Pick out dirt/rust so your tool seats fully.
- Use the right geometry: A 6-point socket grips flats better than a 12-point when rounding is a risk.
- Soak it: If corrosion is involved, penetrating oil and time are your best opening move.
Start Here: The “No-Drama” Methods That Often Work
1) Seat a 6-Point Socket Like You Mean It
If the bolt head isn’t completely rounded, start with the simplest win: a tight-fitting 6-point socket.
Push it on firmly. If it’s a little loose, tap it on gently with a hammer so it bites the flats more securely.
Then try slow, controlled pressure with a ratchet or breaker bar.
Pro move: If the correct-size socket slips, try a slightly smaller metric/SAE socket (whichever is “just barely too small”),
then tap it on. This can create a fresh grip on a rounded head.
2) “Rock” the Bolt to Break the Bond
Instead of only loosening, try tightening a hair, then loosening, repeating in small movements.
This rocking motion can crack rust and corrosion without instantly rounding the head further.
Think of it as negotiating with the bolt. Politely. At first.
3) Add Friction (When Slipping Is the Enemy)
If a socket is almost gripping but not quite, add a little grit:
a dab of valve grinding compound (or even a pinch of fine abrasive) can increase traction between the socket and bolt head.
Use this sparinglyyour goal is grip, not turning your hardware into a sanding project.
4) Shock Therapy (The Helpful Kind)
A few sharp taps on the bolt head (straight down) can help break corrosion in the threads.
Do this before you try again with steady turning force. You’re not trying to flatten the boltjust jolt it.
If the Bolt Head Is Rounded: External Removal Methods
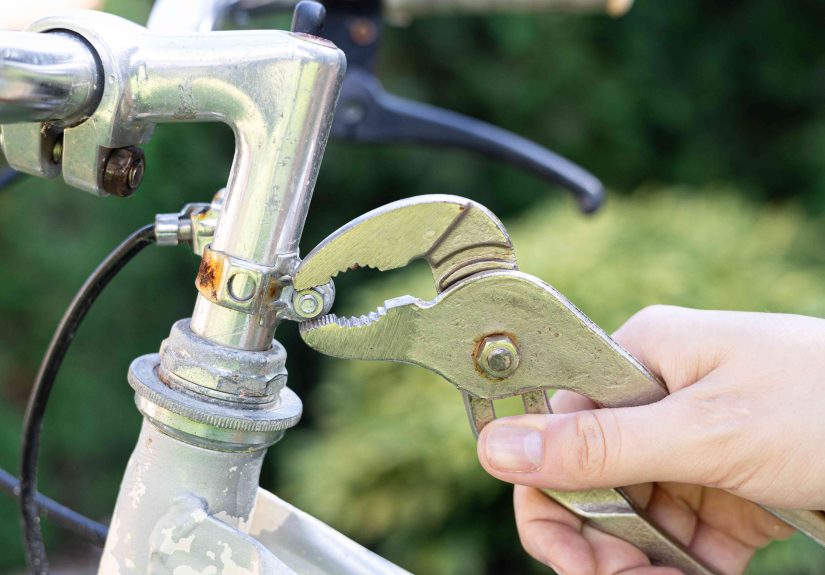
5) Use a Bolt Extractor Socket (A.K.A. “Bolt-Grip” or “Turbo” Sockets)
If the outside hex is rounded, a bolt extractor socket is often the fastest and cleanest solution.
These sockets have spiral or multi-spline flutes that bite into damaged heads as you turn.
- Choose the extractor socket size that fits snugly (usually slightly smaller than the original head size).
- Tap it onto the bolt head so the flutes bite.
- Use a breaker bar or ratchet and apply slow counterclockwise force.
- If it starts to move, keep pressure steadydon’t “jerk” it off the head.
Tip: If you have room, a breaker bar gives better feel than a power tool.
If you do use an impact wrench, start with lower power and stop if the extractor starts to walk off.
6) Locking Pliers (Best When the Head Sticks Out)
If there’s enough bolt head exposed, clamp it with locking pliers (Vise-Grips) as tight as possible.
Position the jaws so they bite on fresh metal, not the smoothest rounded section.
Trick: Clamp, try to turn, reclamp tighter if it slips.
It’s annoying, but it’s cheaper than drilling out a bolt because you rushed.
7) Chisel-and-Hammer “Turn” Method (When You Need a New Edge)
For stubborn rounded heads, you can use a cold chisel to cut a notch on the outer edge of the bolt head,
angled so hammer strikes drive it counterclockwise. This is a last-resort external methodeffective, but easy to slip.
If It’s a Stripped Allen (Hex) or Torx Bolt
8) Hammer In the Next Size Up (Often Works Shockingly Well)
If the internal hex is stripped, you can sometimes hammer in a slightly larger Torx bit or a tight-fitting Allen key.
The hammering both seats the bit and helps break corrosion.
- Clean the recess first.
- Tap the bit in straight so it seats deep.
- Turn slowly with steady forceavoid sudden twists that shred the recess further.
9) Add a “Friction Layer” for Internal Recess Bolts
For mildly stripped internal heads, a small piece of rubber (like a bit of rubber glove) between the bit and recess can increase grip.
It’s not magic, but it can be enough to get one last turn out of a stubborn fastener.
If the Bolt Is Broken or the Head Is Gone: Internal Extraction Methods
10) Left-Hand Drill Bits (Reverse Drilling That Sometimes Solves the Problem by Itself)
Left-hand drill bits spin counterclockwise. When you drill into a broken bolt, the drilling force can sometimes “catch”
and back the fastener out while you’re making the pilot hole. Even when it doesn’t, the pilot hole sets you up for an extractor.
- Center punch the bolt dead center (this step is non-negotiable).
- Start with a small left-hand bit, drill slowly, and keep the drill straight.
- Step up bit sizes gradually if needed.
Keep it cool: Use cutting oil and go slowoverheating dulls bits and hardens your mood.
11) Screw Extractors (“Easy-Outs”)Effective, But Use Them Carefully
Spiral screw extractors bite into a drilled hole and turn the bolt out counterclockwise.
They work best when the bolt isn’t seized like it’s holding together the space station.
- Drill the recommended pilot hole (straight and centered).
- Tap the extractor in gently so it seats.
- Turn counterclockwise with a wrenchslow, steady pressure.
Important: Extractors are hard and brittle. If you snap one off in the bolt, you’ve created a new problem:
hardened tool steel is much harder to drill. That’s why patience and correct sizing matter.
12) Weld a Nut Onto the Broken Stud (The “Why Didn’t I Do This First?” Method)
If a stud is broken off (especially if it’s slightly below or near flush), welding can be a game-changer.
You weld a washer and nut to the broken stud, then remove it with a wrench. Bonus: heat from welding can help break corrosion.
- Place a washer over the stud area (helps you build up weld material and protects the surrounding surface).
- Fill the washer center with weld to fuse it to the stud.
- Weld a nut onto the built-up weld.
- Let it cool slightly, then turn the nut counterclockwise.
If you’re not comfortable welding, a local shop can sometimes do this quicklyand it may be cheaper than replacing a damaged part.
Heat: The Persuasion Technique for Seized Bolts
Heat can expand metal and help break rust bonds. The usual strategy is to heat the surrounding area (like the bracket)
and/or the fastener, then let it cool a bit, then try again. Heat-and-cool cycles are often more effective than one long roast.
- Be cautious: Avoid open flame near fuel, brake cleaner, solvents, wiring, rubber, or plastic.
- Use controlled heat: A heat gun is safer; a torch is faster but riskier.
- Combine with penetrating oil: Let things cool before applying oilhot metal can vaporize oil and create fumes.
After the Bolt Comes Out: Don’t Skip the “Clean Exit”
Removing the bolt is the big victory, but the cleanup is what prevents future headaches:
- Chase the threads: Use the correct tap (internal) or die (external) to clean rust and debris.
- Inspect the hole: If threads are damaged, consider thread repair inserts (like a helicoil-style insert).
- Replace questionable hardware: Rounded, stretched, or rusted bolts aren’t trustworthy.
- Use correct torque: Over-tightening is a common reason bolts strip next time.
- Use anti-seize where appropriate: Especially on exhaust or exposed fasteners (but be mindful: it can affect torque readings).
How to Prevent a Stripped Bolt Next Time (Future You Will Thank You)
Most stripped bolts are caused by one of three things: wrong tool, wrong technique, or rust doing rust things.
Here’s how to reduce the odds:
- Use a 6-point socket for stubborn boltsespecially in automotive work.
- Avoid worn tools (rounded sockets and tired Allen keys are bolt-stripping machines).
- Seat tools fullyclean out mud and rust first.
- Apply force straightangled force leads to slipping and rounding.
- Use penetrating oil earlydon’t wait until the head is already damaged.
- Know when to stopif it’s slipping, change strategies before you destroy the head.
Real-World Experiences: What Usually Works (and What Usually Backfires)
In the real world, stripped bolts rarely happen in a clean workshop with perfect lighting and unlimited space.
They happen under a sink, behind an engine mount, or in that one corner of a lawnmower where your wrench only has
enough room to move in emotional support increments. So here are some experience-based patterns you can use to pick the
smartest move quickly.
Scenario 1: The “Outdoor Rust Special” (mowers, patio furniture, trailers).
These bolts often fail because corrosion has basically glued the threads in place. The first mistake people make is
grabbing a 12-point socket or an adjustable wrench and muscling through it. The second mistake is continuing after the
first slip. What tends to work best: start with penetrating oil and patience, then switch to a 6-point socket and a
breaker bar. If it feels like it’s about to round, stop and move to an extractor socket early. The goal is to preserve
what little shape is leftonce the head is fully rounded, you’ve traded “hard” for “extra hard with a side of drilling.”
Scenario 2: The “Soft Metal Surprise” (bathroom fixtures, light-duty brackets, imported hardware).
Some bolts and internal-hex screws are made of softer metal that strips if you look at it funny. Here, the best move is
often the least aggressive one: clean out the recess, seat the tool deeply, and use controlled hand force instead of a
power tool. For internal hex fasteners, hammering in a Torx bit is frequently a winner because it creates a fresh bite.
What backfires: spinning it with a drill/driver on high speedonce it cams out, it chews the recess into a perfect
circle. Congratulations, you’ve invented a tiny metal donut.
Scenario 3: The “Automotive Stuck Fastener” (brake calipers, suspension, exhaust).
These bolts may be thread-locked, heat-cycled, or simply angry. What tends to work: heat cycles plus a proper 6-point
impact-rated socket, then steady force with a breaker bar. If the head rounds, extractor sockets are often the fastest
escape hatch. What backfires: blasting it immediately with maximum impact power. Impacts can be helpful, but they can
also snap hardwareespecially if the bolt is corroded and already weakened. If you feel the bolt twisting without moving,
that’s a clue it’s about to break, not loosen. Switching tactics at that moment can save hours later.
Scenario 4: The “Broken Stud Flush with the Surface.”
This is where people lose weekends. The most common failure is drilling off-center. Once you drill into the threads of
the surrounding part, your extractor won’t seat correctly and you may need thread repair. The method that tends to win:
center punch carefully, start small with a left-hand drill bit, and step up gradually. If you have welding access, welding
a washer and nut onto the stud can be shockingly efficientand the heat helps loosen the bond. What backfires: using a
too-large extractor and reefing on it until it snaps. A broken extractor is basically a “nope” sign made of hardened steel.
Scenario 5: The “I Only Have Basic Tools” Reality.
Not everyone has a welder, torch, or a wall of specialty sockets. In that case, you can still win with smart sequencing:
try the tightest 6-point socket you can seat, use penetrating oil, rock it back and forth, and add leverage with a breaker
bar if you can do it safely. If the head is already rounded, a modestly priced bolt extractor socket set is often the most
cost-effective “special tool” you can buy because it solves multiple problems (rounded heads, damaged nuts, stubborn bolts).
The biggest experience-based takeaway: stop as soon as you feel slipping. Switching methods early is what keeps
this from turning into a drill-and-repair mission.
Conclusion
Removing a stripped bolt is less about brute strength and more about choosing the right grip strategy.
Start with the simplest fixescleaning the head, using a snug 6-point socket, rocking the fastener, and letting
penetrating oil do its job. If the head is rounded, step up to extractor sockets or locking pliers. If the bolt is broken,
use careful center-punched drilling with left-hand bits, then an extractor (or welding, if available). And once you’re done,
chase the threads and replace questionable hardware so you don’t repeat the saga.