Table of Contents >> Show >> Hide
- Before You Start: What “Replacing a Backsplash” Actually Means
- Tools and Materials Checklist
- Step 1: Protect the Kitchen Like You’re About to Demo a Tiny Museum
- Step 2: Remove the Old Tile Without Wrecking the Wall (More Than Necessary)
- Step 3: Fix the Wall So the New Tile Sits Flat
- Step 4: Plan the Layout (This Is Where the “Wow” Lives)
- Step 5: Choose the Right Adhesive (Thinset vs. Mastic)
- Step 6: Install the New Tile
- Step 7: Let It Set, Then Grout
- Step 8: Caulk Changes of Plane (Because Tile Moves, Even If It Pretends Not To)
- Step 9: Fix Outlets So They’re Not Floating in Mid-Air
- Troubleshooting: Common DIY Backsplash Problems (and How to Avoid Them)
- When to Hire a Pro
- Maintenance Tips So Your New Backsplash Stays Gorgeous
- FAQ: Quick Answers People Actually Search For
- Real-World Experiences: of “What I Wish Someone Told Me”
- Conclusion
A tile backsplash is basically the kitchen’s splash guard, stain shield, and style statementall squeezed into the 18 inches between your countertop and cabinets.
And when it’s cracked, dated, or just giving “early 2000s Tuscan café” (no offense to the café), replacing it is one of the highest-impact upgrades you can do without
remodeling your entire kitchen into bankruptcy.
The good news: replacing a tile backsplash is absolutely doable for a careful DIYer. The better news: you don’t need mystical masonry powersjust patience, the right prep,
and a willingness to vacuum dust like it’s your new part-time job. This guide walks through the full process: removing the old tile, fixing the wall, laying out the new design,
setting tile, grouting, caulking, and finishing details so it looks clean, intentional, and not like you tiled during a minor earthquake.
Before You Start: What “Replacing a Backsplash” Actually Means
Quick reality check
- Removal is often the hardest part. Tile usually comes off with a pry bar, but adhesive and drywall damage are the plot twist.
- Wall repair is normal. Even “gentle” removal can tear drywall paper or gouge the surface.
- Layout is where pros win. A good layout hides weird cuts, keeps grout lines balanced, and prevents awkward slivers.
- Finishing is what makes it look expensive: straight lines, clean edges, caulk at changes of plane, and outlets that sit correctly.
Safety and common-sense prep
- Shut off power to the backsplash outlets at the breaker before you remove cover plates or loosen devices.
- Wear eye protection during demotile chips fly with the confidence of a major-league fastball.
- Use a dust mask or respirator when scraping old mortar/adhesive or cutting tile.
- If your home was built before 1978, consider lead-safe practices (especially if you’re disturbing painted surfaces around the work area).
Tools and Materials Checklist
Tools
- Safety glasses, gloves, dust mask/respirator
- Drop cloths, plastic sheeting, painter’s tape
- Flat pry bar, putty knife/scraper, hammer
- Utility knife
- Level (or laser level), tape measure, pencil
- Notched trowel (size depends on tile)
- Tile cutter and/or wet saw (depending on tile type)
- Tile spacers (or leveling clips for larger tiles)
- Grout float, sponges, microfiber cloths
- Caulk gun
- Non-contact voltage tester (for outlets)
Materials
- Tile (plus 10% extra for cuts and breakage)
- Tile adhesive: thinset mortar or premixed mastic (choose based on tile and conditions)
- Grout (sanded vs. unsanded depends on joint size and tile)
- Flexible caulk for edges/corners (often 100% silicone for wet-prone zones)
- Optional: tile edge trim/profile for exposed ends
- Drywall patch materials: setting-type compound/joint compound, sanding sponge, primer
- Outlet extenders/longer screws if needed
Step 1: Protect the Kitchen Like You’re About to Demo a Tiny Museum
Backsplash demo makes gritty dust and sharp fragments. Cover countertops with cardboard or a drop cloth, tape plastic to cabinets, and protect floors. Remove everything from the
counter that you love, including your coffee maker (because it will otherwise become a dust sculpture).
- Turn off the circuit feeding the backsplash outlets at the breaker.
- Confirm power is off with a non-contact tester.
- Remove outlet/switch cover plates and set screws aside.
- Loosen outlets slightly so you can later adjust them to the new tile thickness.
Step 2: Remove the Old Tile Without Wrecking the Wall (More Than Necessary)
Start where the backsplash is weakest
Begin at an edge, a top corner, or any spot where tile is already cracked or loose. The general strategy is top-to-bottom so gravity doesn’t help tiles surprise you.
Slide a putty knife behind a tile edge, then carefully introduce a flat pry bar and tap it with a hammer.
Work slowyour drywall will thank you
- Pry gently to pop tiles off in chunks rather than pulverizing them into confetti.
- If tile is stubborn, remove grout lines first with a scraper to reduce tension between tiles.
- Expect some drywall paper to tearthis is normal, not a personal failure.
Remove leftover adhesive/thinset
Once tile is off, you’ll see what you’re really dealing with: mastic blobs, thinset ridges, or both. Scrape down high spots. Your goal is a flat surfacenot a perfectly
pristine wallbecause you’ll repair and prep next.
Step 3: Fix the Wall So the New Tile Sits Flat
Decide: patch, skim, or replace?
- Minor paper tears & small divots: prime torn drywall paper, then skim with compound.
- Moderate damage: patch gouges, then skim coat the whole backsplash zone for flatness.
- Severe damage or missing drywall: replace the drywall section (or install a tile backer board if you prefer).
A backsplash lives in the “splashes happen” zone, but it’s not a shower. Many installers use drywall as the substrate for kitchen backsplashes as long as it’s sound and properly
prepped. The key is flatnesstile does not forgive humps, ridges, and crater walls.
How to repair like you mean it
- Scrape off loose paper and crumbly bits.
- Prime any torn drywall paper so it doesn’t bubble under compound.
- Fill gouges with setting-type compound or joint compound.
- Sand smooth (wear a mask), then wipe dust away.
- Prime again if you patched heavily, then let it dry.
Step 4: Plan the Layout (This Is Where the “Wow” Lives)
Find your focal points
Most kitchens have a “main stage” areaoften behind the range, behind a sink, or centered under a window. Start by deciding what should look perfectly centered and symmetrical.
If you’re doing classic 3×6 subway tile, for example, you might center a full tile (or a grout joint) behind the faucet or range.
A practical example layout
Let’s say your sink run is 72 inches wide. With 3×6 subway tile in a running bond pattern and 1/8-inch grout lines, your “module” width is roughly 6 1/8 inches.
72 ÷ 6.125 ≈ 11.75 tiles. That “.75” means you’ll end with a cut. The layout trick: adjust the starting point so you get two medium cuts on both ends instead of
one sad 1/2-inch sliver that looks like an accident.
Use a level line (not the countertop)
Countertops are often close to level, but “close” is not the same as “tile professional.” Mark a level reference line one tile-height above the countertop,
then use a temporary ledger (a straight board) if needed to keep the first course perfectly straight.
Step 5: Choose the Right Adhesive (Thinset vs. Mastic)
For many kitchen backsplashes, you’ll see two common options:
- Thinset mortar: cement-based, mixed from powder (or sometimes premixed specialty). Strong bond, moisture-tolerant, great for porcelain and larger tile.
- Premixed mastic: sticky, convenient, often used for small wall tile in drier areas. Not the best for constant moisture or very large/heavy tiles.
When in doubtespecially with porcelain, larger formats, or slightly uneven wallsthinset is usually the safer long-term choice. Always follow the tile and adhesive manufacturer’s
recommendations for your specific tile type and substrate.
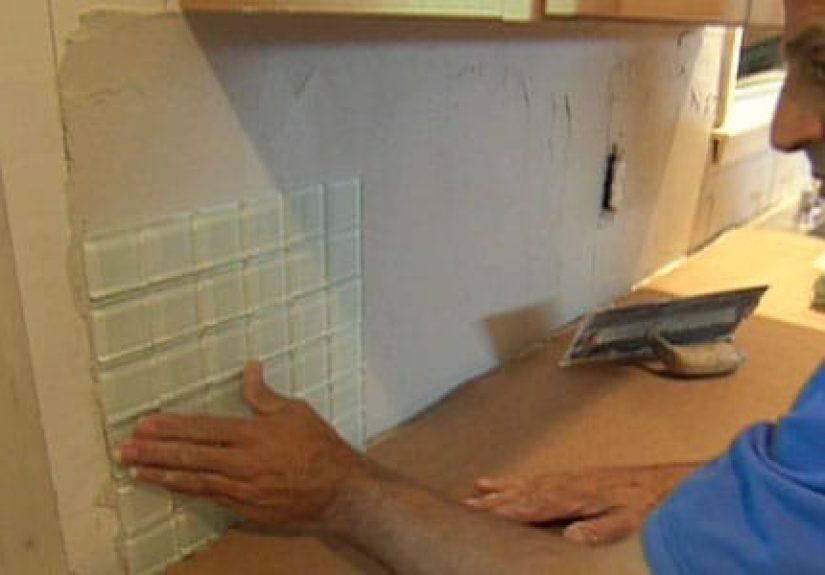
Step 6: Install the New Tile
Dry-fit first
Lay a row of tile on the countertop with spacers to preview where cuts will land around outlets, corners, and cabinet edges. This is the moment to tweak layout before adhesive
turns your plan into a permanent decision.
Spread adhesive in small sections
- Work in 2–3 square foot areas so the adhesive doesn’t skin over before tile is set.
- Use the flat side of the trowel to key-in a thin layer, then comb with the notched side in consistent ridges.
- Press tile into place and gently shift it to collapse ridges for better coverage.
- Use spacers and check with a level frequently.
Cut tiles cleanly
Straight cuts on ceramic subway tile can often be handled with a snap cutter. Porcelain, glass, and stone tend to behave better with a wet saw. For outlet cutouts, mark carefully,
and make multiple relief cuts rather than trying to carve out a perfect rectangle in one heroic move.
Don’t forget edge finishing
If your backsplash ends on an open wall, you’ll want a clean termination. Options include a bullnose tile, a pencil trim, or a metal profile/edge trim. A profile can also help
hide slight thickness differences and makes the whole thing look crisp and intentional.
Step 7: Let It Set, Then Grout
Wait the recommended time
Many guides recommend letting the adhesive cure about a day before grouting. Check your product labelhumidity and tile type can affect cure time.
Grout like a grown-up
- Remove spacers.
- Mix grout to a peanut-butter consistency (or prep premixed grout).
- Use a grout float at a 45-degree angle to pack joints full.
- Scrape excess off the tile face, then wipe with a damp sponge once grout starts to firm up.
- After it hazes, buff with microfiber to restore tile shine.
Grout haze happensdon’t panic
A light haze is common. Start with dry buffing and clean water. If haze persists after proper curing, a grout haze remover made for your grout type can helpalways test in an
inconspicuous spot and follow product directions (especially on natural stone).
Step 8: Caulk Changes of Plane (Because Tile Moves, Even If It Pretends Not To)
Where the backsplash meets the countertop, inside corners, and any transition between planes, use a flexible caulk rather than grout. This helps handle minor movement and reduces
cracking. Tool the bead smoothly so it looks cleannot like toothpaste applied in a moving vehicle.
Step 9: Fix Outlets So They’re Not Floating in Mid-Air
Adding tile changes wall thickness. Outlets should sit properly and be securednot hanging on by the cover plate like a cliffhanger in a soap opera.
If the electrical box is now too deep, use outlet extenders/box extensions and longer screws so devices sit correctly relative to the finished surface.
If you’re unsure about electrical adjustments, this is an easy moment to call an electrician.
Troubleshooting: Common DIY Backsplash Problems (and How to Avoid Them)
“My tiles are sliding down the wall”
Too much adhesive, not enough initial tack, or working too large of an area at once. Use a ledger board for the first course, and don’t overdo the mortar.
“My grout lines look uneven”
Spacers help, but layout and consistent pressure matter. Also, check tile for size variationhandmade-look tile may need wider joints to hide inconsistencies.
“My wall looks wavy after tiling”
This usually starts with wall prep. Tile follows the substrate. Spend more time flattening the wall than you think you need. Future You will send a thank-you card.
When to Hire a Pro
- You’re dealing with large-format tile, tricky patterns (herringbone), or expensive materials like marble.
- The wall is significantly out of plumb/flat and needs serious correction.
- You need electrical relocation or additional outlets.
- You suspect lead paint risks in an older home and want certified help.
Maintenance Tips So Your New Backsplash Stays Gorgeous
- Wipe splatters earlytomato sauce is basically red concrete if you give it time.
- Use a pH-neutral cleaner for tile and grout, especially for natural stone.
- Re-caulk if you see gaps or mildew, and reseal grout if your grout type requires it.
FAQ: Quick Answers People Actually Search For
Can I tile over an existing backsplash?
Sometimes, but it depends on how solid and flat the existing surface is and whether outlets and edges can be properly addressed. Removal is usually the cleaner long-term option
when the old tile is loose, uneven, or dated in a way that haunts you.
How much tile should I buy?
Buy about 10% extra for cuts and breakage (more for complex patterns). If your tile has noticeable shade variation, extra also helps you blend pieces naturally.
How long does a backsplash replacement take?
Many DIYers split it into phases: demo and wall repair, tile setting, then grout/caulk and finish. Dry times can stretch the calendar even when the work itself is quick.
Real-World Experiences: of “What I Wish Someone Told Me”
Here’s the part nobody warns you about: replacing a backsplash is not one project. It’s three projects in a trench coat pretending to be one. First, it’s demolition.
Then it’s drywall repair. Then it’s tile installation. If you go into it thinking, “I’ll knock this out in an afternoon,” the kitchen will politely laugh at you
and then cover your entire countertop in gritty dust as a response.
The biggest lesson is that wall prep is the secret sauce. I’ve seen people spend hours choosing the perfect tile and then slap it onto a wall that looks
like it lost a fight with a cheese grater. The tile doesn’t magically flatten things. If your wall has humps, your backsplash will have humps. If your wall dips, your grout lines
will start to look like they’re telling a dramatic story. The “pro look” is 70% prep, 20% layout, and 10% pretending you didn’t make mistakes.
Another real-life discovery: outlets are the boss battle. You remove the cover plate and think, “Cute, that was easy.” Then you tile, step back, and realize the outlet is now
recessed like it’s hiding from responsibility. That’s when outlet extenders and longer screws become your best friends. It’s not glamorous, but it’s what separates a finished job
from a “why is my outlet wobbly?” situation.
Cutting tile is also way more emotional than it should be. Straight cuts feel amazing. You score, snap, and suddenly you’re a tile wizard. Then you hit the first outlet cutout
and you’re making tiny relief cuts like you’re carving a miniature staircase. The trick I’ve learned: mark carefully, cut slowly, and accept that your cuts don’t need to be
museum-quality because the outlet cover plate is basically a tiny frame that hides minor sins.
Grouting is the moment people either celebrate or spiral. My advice: work in manageable sections, keep your sponge just damp (not dripping like a sad mop), and rinse often.
If you wipe too soon, you can pull grout out of joints. Too late, and you’ll be buffing grout haze like you’re polishing a car in a parking lot at midnight. Microfiber cloths
are magical hereseriously underrated.
Finally: caulk is your finishing move. Grout at changes of plane is a common rookie mistake because grout seems like the “tile stuff,” so why not use it everywhere? But corners
and countertop transitions move a little, and flexible caulk helps prevent cracking. Tool it neatly, step back, and you’ll be shocked how “professional” the whole backsplash
suddenly looks. It’s the difference between “DIY project” and “Wait… you did this yourself?”
Conclusion
Replacing a tile backsplash is one of those home upgrades that delivers instant visual payoffand everyday practicalitywithout requiring a full kitchen overhaul. If you focus on
careful removal, solid wall repair, smart layout, and clean finishing details (edges, caulk, and outlets), you can end up with a backsplash that looks sharp, cleans easily, and
makes your kitchen feel brand new.