Table of Contents >> Show >> Hide
- Why the Roller Technique Matters So Much
- Gear Up: Tools and Materials You Actually Need
- Step 1: Prep the Room and Walls Like a Pro
- Step 2: Cut In the Edges Before You Roll
- Step 3: Load the Roller the Right Way
- Step 4: Use a Pro-Style Rolling Pattern
- Step 5: How to Avoid Lap Marks, Streaks, and Heavy Stipple
- Step 6: Second Coat, Clean Up, and Curing
- Bonus: Time-Saving Tricks Pros Swear By
- Real-World Roll-Painting Experiences and Lessons
- Conclusion: Your Walls Are Ready for Their Close-Up
Few DIY upgrades deliver as much satisfaction per dollar as a freshly painted wall.
One minute your room looks tired and dingy; a few passes with a roller and suddenly
it’s giving “TV makeover reveal.” The difference between a pro-looking wall and a
streaky, patchy mess, though, usually comes down to one thing: how well you use your
paint roller.
Inspired by classic techniques often seen on This Old House, this guide walks
you step-by-step through roll-painting walls like a seasoned painter. We’ll cover the
right tools, prep, roller technique, and those small pro tricks that quietly separate
“yep, I did it myself” from “wait, you hired someone?”
Why the Roller Technique Matters So Much
Rollers are the workhorses of interior painting. Used correctly, they lay down a smooth,
even film of paint across big wall surfaces in a fraction of the time it would take with
a brush. Used poorly, they leave behind lap marks, heavy stipple, roller lines, and odd
sheen changes that you notice every time the light hits the wall.
The good news? Professional-looking results don’t require professional muscles or
secret paint formulas. They come from:
- Choosing the right roller cover and nap for your wall texture.
- Loading the roller correctly so it’s saturated but not dripping.
- Rolling in a consistent pattern while keeping a “wet edge.”
- Working in the right order and at the right pace.
Let’s set you up like a pro before you even crack open the paint can.
Gear Up: Tools and Materials You Actually Need
Roller Frame, Roller Covers, and Extension Pole
Start with a sturdy 9-inch roller frame that doesn’t flex or wobble when you press
it against the wall. If you’re painting larger rooms or tall walls, add a screw-on
extension pole so you can reach high spots and roll from floor to ceiling without
constantly moving a ladder.
The roller cover (also called the sleeve) is where many DIYers go wrong. Nap length
should match your surface:
- 1/4–3/8 inch nap: Very smooth or smooth walls and ceilings (new drywall, skim-coated plaster).
- 1/2 inch nap: Typical interior walls with minor texture or light orange peel.
- 3/4 inch and up: Rough surfaces like heavy texture, masonry, or stucco.
Too long a nap on a smooth wall leaves a bumpy, “orange peel” look. Too short a nap
on a textured wall fails to reach into all the low spots, leaving patchy coverage.
Invest in decent-quality roller covers; they hold more paint and shed less lint.
Paint, Primer, and Sheen
For most interior walls, a high-quality latex (water-based) paint is the standard.
A popular choice is eggshell or matte for living rooms and bedrooms,
because these sheens hide minor imperfections while still being wipeable. In high-moisture
areas like bathrooms or kitchens, consider a satin or semi-gloss finish
that stands up better to steam and regular cleaning.
If your walls are stained, patched extensively, or switching from a dark to a light
color, use a dedicated primer first or a high-quality paint-and-primer formula to get
consistent color and adhesion.
Prep, Protection, and Safety Essentials
You’ll also want:
- Drop cloths or rosin paper to protect floors and furniture.
- Painters tape for baseboards, trim, outlets, and fixtures.
- A 2–2.5 inch angled sash brush for cutting in edges.
- Spackle, putty knife, and fine-grit sanding sponge for repairs.
- Step ladder for high corners and around doors or windows.
- Gloves, safety glasses, and at least a basic mask or respirator.
- Fans and open windows for ventilation and fume control.
Boring? Maybe. Essential for not repainting the same room twice? Absolutely.
Step 1: Prep the Room and Walls Like a Pro
Pro painters spend a surprisingly large chunk of their time on prep. That’s because
paint only looks as good as the surface underneath it.
-
Clear and cover. Move furniture to the center of the room and cover
it completely. Protect floors with drop cloths or paper. Remove switch plates and
outlet covers so you’re not painting around tiny rectangles like a surgeon. -
Clean the walls. Dust and grime weaken paint adhesion. Run a
microfiber cloth or vacuum with a brush attachment over the walls, then spot-clean
greasy or grimy areas with a mild detergent solution. Let everything dry thoroughly. -
Repair flaws. Fill nail holes, small dents, and cracks with lightweight
spackle. Once dry, sand smooth so the patch is flush with the surrounding wall.
If you can feel an edge with your fingers, you’ll see it after painting. -
Tape what you don’t want painted. Mask off trim, baseboards, and
adjacent surfaces you want to protect. Press the tape down firmly to prevent paint
from bleeding underneath. -
Prime if needed. Spot-prime patches and stains at a minimum. For
dramatic color changes, glossy existing paint, or water stains, priming the whole
wall will help your topcoat look even and stay put.
Step 2: Cut In the Edges Before You Roll
“Cutting in” means painting a neat border along edgescorners, ceilings, trimusing a
brush. This gives your roller a clear boundary and keeps you from accidentally kissing
the ceiling with a loaded roller.
Load your angled brush with paint and tap off the excess. Start a little away from the
edge, then gently work the paint right up to the line. Aim for a band about 2–3 inches
wide. For best blending, pros often:
- Cut in a single wall at a time instead of the entire room.
- Roll that wall immediately so the brushwork and roller paint stay “wet” together.
This “one wall at a time” rhythm is a big reason pro paint jobs look seamless instead
of patchy.
Step 3: Load the Roller the Right Way
A roller that’s too dry leaves streaks. One that’s drowning in paint flings specks
everywhere. Here’s the balanced approach:
-
Dampen the roller first. For latex paint, lightly moisten the roller
with clean water and spin out the excess. This helps the roller absorb paint more
evenly. -
Pour paint into the tray. Fill the reservoir about one-third full.
You only need enough depth so the roller can pick up paint without being fully submerged. -
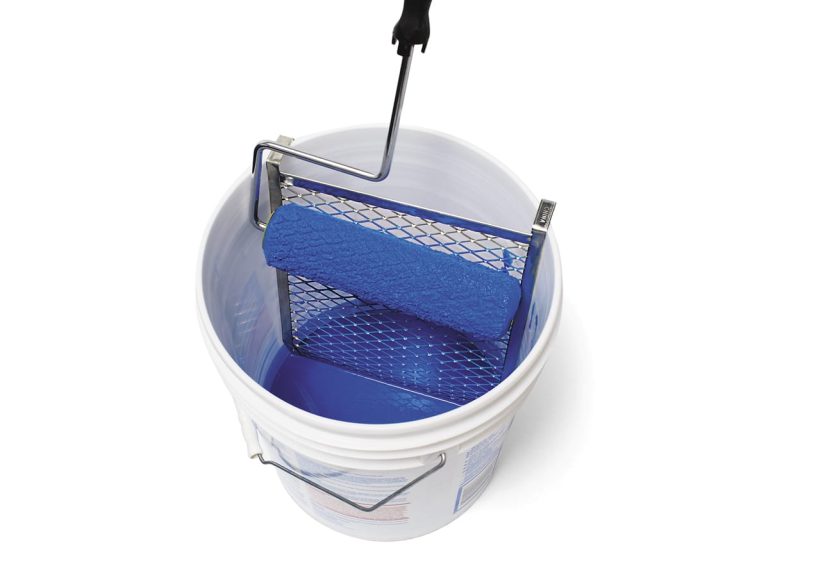
Roll, don’t dunk. Dip the roller into the paint, then roll it back
and forth on the ridged part of the tray. Repeat until the roller is uniformly
saturated but not dripping.
If the roller makes a squelching sound or leaves thick ridges, it’s overloaded. If it
feels draggy or leaves thin, transparent areas, it’s underloaded. You’ll find the sweet
spot within a few passes.
Step 4: Use a Pro-Style Rolling Pattern
This is where the magic (or the mess) happens. The classic This Old House–style approach
is to work in manageable sections, roughly 3 by 3 feet, using a pattern that spreads
paint evenly and blends edges before they dry.
Start a Few Inches from the Edge
Place the roller on the wall about 6 inches away from a corner or edge. You’ll roll back
toward the corner in a moment, but starting away from it prevents a heavy deposit of paint
in the corner that can sag or flash.
Roll a “W” (or “N”) Pattern
With light to moderate pressure, roll upward at an angle, then sweep back down in a loose
zigzag to form a big “W” or “N” shape inside your 3×3 foot area. Without reloading the
roller, fill in the open spaces of the letter by rolling in various directions until the
section is covered.
The point isn’t to draw a perfect letterit’s to spread the paint randomly and evenly so
you don’t leave telltale roller tracks.
Maintain a Wet Edge
Work your way across the wall, section by section, slightly overlapping the previous area
while it’s still wet. This “wet edge” is crucial for avoiding lap marksthose darker or
shinier bands where fresh paint overlaps dried paint. Reload the roller often; pros tend
to reload more than beginners, not less.
Finish with Light, One-Way “Tipping Off” Passes
Once a section is covered, finish by lightly rolling from top to bottom in one direction
with almost no pressure. This levels out roller texture and lines. Then move on. Resist
the urge to keep fiddling with areas that have begun to dry; that’s how you create more
marks, not fewer.
Step 5: How to Avoid Lap Marks, Streaks, and Heavy Stipple
Even careful DIY painters sometimes end up with streaks or stripes. Here’s how to dodge
the most common problems:
Problem: Lap Marks (Stripy Overlaps)
Lap marks happen when you roll back over paint that has already started to dry. The overlap
area gets a slightly different sheen or color, especially with darker hues or low-sheen
paints.
Fix it like a pro by:
- Working in smaller sections so you can move faster.
- Keeping that wet edgedon’t skip around the room.
- Reloading the roller frequently rather than trying to squeeze out “just one more pass.”
- Finishing each section with those gentle, one-direction passes.
Problem: Heavy Stipple or Orange Peel
Stipple (the texture left by the roller) is normal, but heavy stipple looks rough and
uneven. It’s often caused by using the wrong nap length, pressing too hard, or letting
the paint start to dry under the roller.
To tame stipple:
- Match nap length to your wall texturedon’t use a thick cover on smooth walls.
- Use a quality roller cover that lays paint evenly.
- Let the roller do the workpressing harder doesn’t spread more paint, it just squishes it around.
- Back-roll lightly before the paint sets up.
Problem: Roller Lines and Missed Spots
If you see long, faint lines where the edge of the roller traveled, or small “holidays”
(missed specks), you’re probably moving too fast, too dry, or both.
- Slow down slightly and overlap each pass by about half a roller’s width.
- Check the wall from different angles as you goside lighting reveals misses.
- Keep lighting consistent if possible while you’re painting, so you’re not surprised later.
Step 6: Second Coat, Clean Up, and Curing
Most interior walls look best with two coats. Even if the first coat looks okay, the
second coat deepens color, evens out sheen, and helps the paint film last longer.
-
Follow the label for recoat time. High humidity and low temperatures
slow drying. If the room feels damp or sticky, build in extra time between coats. -
Use the same technique for the second coat. Cut in, roll in sections,
keep a wet edge, and tip off in one direction. The second pass usually goes faster.
When you’re done rolling, peel painters tape off at a slight angle before the paint fully
cures, which helps prevent it from ripping off the new film.
Clean Your Gear the Right Way
For water-based paints, scrape excess paint back into the can, then rinse roller, tray,
and brushes with warm soapy water until the water runs clear. Spin or shake out as much
moisture as you can and let them dry. For oil-based products, follow the manufacturer’s
instructions using the proper solvent and dispose of rags and waste safely.
Ventilation and Indoor Air Quality
During and after painting, keep windows open when weather allows and use fans to move
fresh air through the space. If you’re sensitive to fumes or painting a frequently used
room, consider low- or zero-VOC paints and keep ventilation going for a couple of days.
This helps off-gassing dissipate and keeps the space more comfortable for everyone.
Bonus: Time-Saving Tricks Pros Swear By
Want that This Old House–level efficiency as well as finish? Try these pro moves:
-
Use an extension pole. Rolling from floor to ceiling in one smooth
pass is faster and helps maintain an even texture. -
Consider a wider roller. An 18-inch roller and matching frame can
almost halve your rolling time on big walls, while helping keep a consistent wet edge. -
Work in pairs. One person cuts in while the other follows right behind
with the roller. This keeps all edges wet and speeds up the entire job. -
Box your paint. If you’re using more than one gallon, pour them all
into a larger bucket and mix thoroughly so the color is perfectly consistent from wall
to wall.
Real-World Roll-Painting Experiences and Lessons
Techniques and theory are great, but the little “I-wish-someone-had-told-me” moments are
what really make you feel like a pro on your next paint job. Here are some experience-based
insights many homeowners and pros discover the hard way.
1. Lighting Can Make or Break Your Paint Job
The wall that looked flawless at night can suddenly show every roller mark when the morning
sun hits it. It helps to pause during painting, turn off the main overhead light, and use a
bright work light or even your phone flashlight held at a shallow angle along the wall.
This raking light reveals thin spots and roller lines before the paint fully dries.
Fixing them in the moment is a lot easier than sanding and repainting later.
2. Humidity Isn’t Just a Comfort Issue
Many DIYers learn the hard way that painting on a hot, humid afternoon means the paint
stays tacky longer, which increases the chances of lap marks, drips, and roller tracks.
When possible, schedule painting for cooler, drier parts of the day. Use fans or a
dehumidifier to keep conditions stable while the paint cures. Your nose (and your walls)
will thank you.
3. Cheap Tools Are Secretly Expensive
That bargain-bin roller cover might seem like a win at checkout, but halfway through the
job, you’re picking lint out of your paint and fighting uneven coverage. Quality roller
covers hold more paint, shed less, and leave a smoother finish. The few extra dollars
you spend on good tools often save you an entire extra coat of paintnot to mention your
patience.
4. Cutting In Slowly Beats Taping Everything
It’s tempting to tape every edge in sight, but taping a whole room is time-consuming and
still not foolproof. Many experienced DIYers eventually find that steady, careful cutting
in with a good angled brush is faster and yields cleaner lines than miles of tape.
You don’t have to be an artist; a little practice on a less-visible wall builds confidence
fast.
5. Take Breaksbut Plan Them
Painting a full room is surprisingly physical work. When your arms get tired, your form
changes, and that’s when you start pressing harder, leaving marks and uneven coverage.
Short breaks are smartjust plan them at natural stopping points, like after finishing an
entire wall, so you’re not walking away with half a section drying while the rest is still
wet. Cover your roller tray with plastic wrap during breaks to keep paint from skinning over.
6. Expect the First Wall to Be the “Learning Wall”
Even pros adjust to each new paint, room, and roller combo. It’s normal for your first wall
to take longer and look slightly less perfect than the others. Pay attention to how far the
roller goes before it starts to feel dry, how quickly the paint is setting, and how much
pressure gives you the smoothest result. By the second wall, you’ll have your rhythmand the
last wall is where you realize you’ve just leveled up your painting skills.
7. The Payoff Is Every Time You Turn on the Lights
Once the tape is off, the furniture’s back in place, and the drop cloths are folded up, that
freshly painted wall pays you back over and over. The color feels richer, the room feels
cleaner, and you get to casually mention, “Oh yeah, I did it myself,” whenever anyone
compliments the space. That’s the real “pro-level” winknowing you can roll-paint a wall
confidently anytime the mood (or color trend) strikes.
Conclusion: Your Walls Are Ready for Their Close-Up
Rolling paint onto a wall like a pro isn’t about mysterious tricks; it’s about stacking a
bunch of small, smart habits. Prep the surface thoroughly, choose the right tools, keep a
wet edge, and finish each section with light, deliberate passes. Respect drying times,
manage your lighting and humidity, and treat the first wall as practice, not failure.
Follow these This Old House–style techniques and your next paint day can end not with
frustration and touch-up fatigue, but with a room that looks clean, fresh, and expertly
finishedno contractor required.