Table of Contents >> Show >> Hide
- What Makes Skillet Focaccia Special?
- Ingredients
- Equipment
- Timeline Options (Pick Your Adventure)
- Step-by-Step: No-Knead Skillet Focaccia
- How to Tell When It’s Done
- Flavor Variations (Same Dough, Different Vibes)
- Troubleshooting: Fixes for Common Focaccia Problems
- Serving Ideas (A.K.A. How This Bread Disappears)
- Storage + Reheating
- FAQ
- Conclusion: Your New Go-To “Effortless” Bread
- of Real-Life Focaccia Experiences (The Fun Part)
If bread had a “low-effort, high-reward” Olympic event, no-knead skillet focaccia would take gold, pose for photos, and still be warm when it got home. This is the kind of bread that makes people think you own a flour-dusted apron with your initials embroidered on iteven if you made the dough in a bowl while watching TV.
The magic is simple: a wet dough + time. Instead of kneading like you’re trying to win an argument with gluten, you let fermentation do the heavy lifting. Then you bake it in a hot, oil-slicked skillet so the bottom turns shatter-crisp while the inside stays pillowy and full of bubbles. Welcome to your new favorite “I swear I didn’t try that hard” bread.
What Makes Skillet Focaccia Special?
Classic focaccia is known for its dimpled top, generous olive oil, and chewy-yet-airy interior. Baking it in a cast iron skillet (or any oven-safe skillet) adds two big perks:
- Crispier crust: The skillet retains heat and fries the bottom gently in olive oil (in the best way).
- Taller, fluffier focaccia: The high sides support the dough so it rises up, not just out.
Ingredients
This recipe makes one thick focaccia in a 10-inch skillet (or a thinner one in a 12-inch). For best results, use a kitchen scalebut cups work too.
Dough
- 400g all-purpose flour (about 3 1/3 cups, spooned and leveled) or bread flour for extra chew
- 8g fine salt (about 1 1/4 tsp)
- 2g instant yeast (about 1/2 tsp) or active dry yeast (see notes)
- 320g warm water (about 1 1/3 cups; warm like a comfy bath, not a hot tub)
- 20g olive oil (about 1 1/2 tbsp) for the dough
For the Pan + Top
- 3–5 tbsp extra-virgin olive oil (yes, really)
- 1–2 tsp flaky salt (or kosher salt)
- 1–2 tbsp fresh rosemary, torn (optional but iconic)
- Optional toppings: thin-sliced garlic, olives, cherry tomatoes, caramelized onions, grated Parmesan, cracked pepper
Optional “Salty Shine” Brine (Highly Recommended)
This little mix helps create that signature focaccia topglossy, seasoned, and deeply snackable.
- 2 tbsp warm water
- 2 tbsp olive oil
- 1/2 tsp salt
Equipment
- 10-inch cast iron skillet (12-inch works too)
- Large mixing bowl
- Rubber spatula or wooden spoon
- Plastic wrap or a lid
- Oven + cooling rack
Timeline Options (Pick Your Adventure)
- Overnight (best flavor): Mix dough at night → rise 12–18 hours → bake next day.
- Same-day (still great): Mix dough early morning → rise 6–8 hours (warm room) → bake evening.
- Cold ferment (flexible schedule): Mix dough → refrigerate overnight → bring to room temp → bake.
Step-by-Step: No-Knead Skillet Focaccia
Step 1: Mix the Dough (5 minutes, max)
- In a large bowl, whisk together the flour, salt, and yeast.
Active dry yeast? You can mix it with the dry ingredients, or dissolve it in the warm water for 5 minutes firsteither works. - Add the warm water and the olive oil. Stir with a spoon or spatula until no dry flour remains. The dough will look shaggy and sticky. That’s not a problem. That’s the plan.
- Cover the bowl tightly (plastic wrap, lid, or a plate). Let it rest at room temperature until doubled and bubbly, 12–18 hours.
Step 2: Strengthen the Dough (Quick folds, no drama)
After the long rise, the dough should be puffy and jiggly, with bubbles on the surface. Now we give it a little structure.
- Wet your hand (water helps prevent sticking) and grab one side of the dough.
- Stretch it up gently and fold it over the center. Rotate the bowl and repeat 3–4 times.
- Let the dough rest 10 minutes. It will relax and spread slightlytotally normal.
Step 3: Oil the Skillet Like You Mean It
- Add 2–3 tbsp olive oil to the skillet and swirl to coat the bottom and sides.
- Transfer the dough into the skillet. Flip it once so both sides get a thin oil coat.
- Cover the skillet and let the dough rise again until noticeably puffy, 1–2 hours at room temperature.
Step 4: Preheat the Oven
About 30 minutes before baking, set your oven to 450°F. If your oven runs cool, 475°F can help. Focaccia loves a hot ovenit’s basically a sunbather.
Step 5: Dimple, Dress, and Don’t Be Shy
- Pour a little olive oil over the dough (another 1–2 tbsp).
- With oiled fingertips, press straight down to make deep dimples all over. Try to reach near the bottom without tearing through.
Pro tip: Confident dimples = better texture. Timid dimples = polite bread. We want bold bread. - If using the brine: whisk the warm water, olive oil, and salt, then drizzle it over the dimpled dough. It’ll pool in the dimples like tiny flavor hot tubs.
- Sprinkle rosemary, flaky salt, and any toppings you want. Keep toppings light so the dough can rise and crisp.
Step 6: Bake
- Bake for 22–28 minutes, until the top is deeply golden and the edges look audibly crisp.
- For an extra-crispy bottom, place the skillet on the lower rack for the last 5 minutes. If the top is browning too fast, move it up a rack.
- Cool in the skillet for 5 minutes, then carefully lift out and cool on a rack (so the bottom stays crisp).
How to Tell When It’s Done
- Color: Deep golden top with darker edges
- Sound: A hollow-ish sound when tapped (and a faint crackle from the crust)
- Texture: Springy interior, not wet or gummy
Flavor Variations (Same Dough, Different Vibes)
Classic Rosemary-Garlic
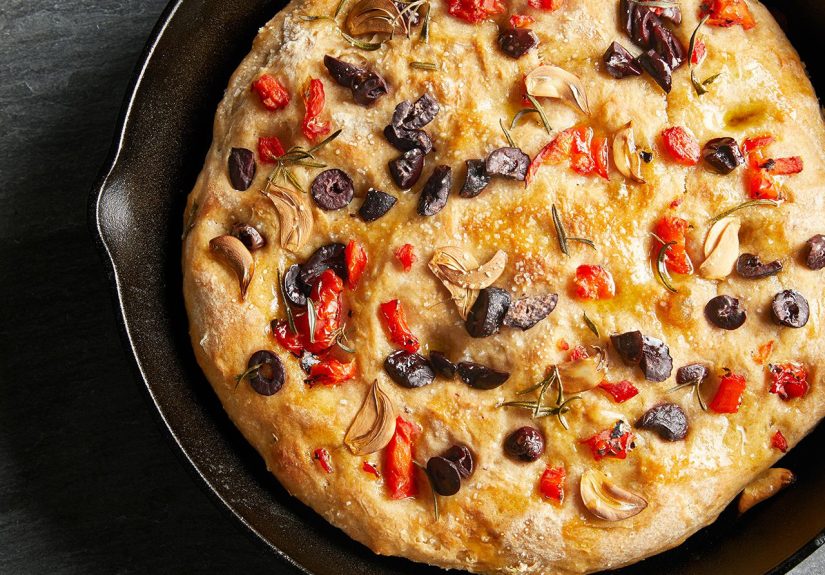
Add thin-sliced garlic and torn rosemary on top. Finish with flaky salt and a final drizzle of olive oil after baking.
Tomato + Olive “Pizza Energy”
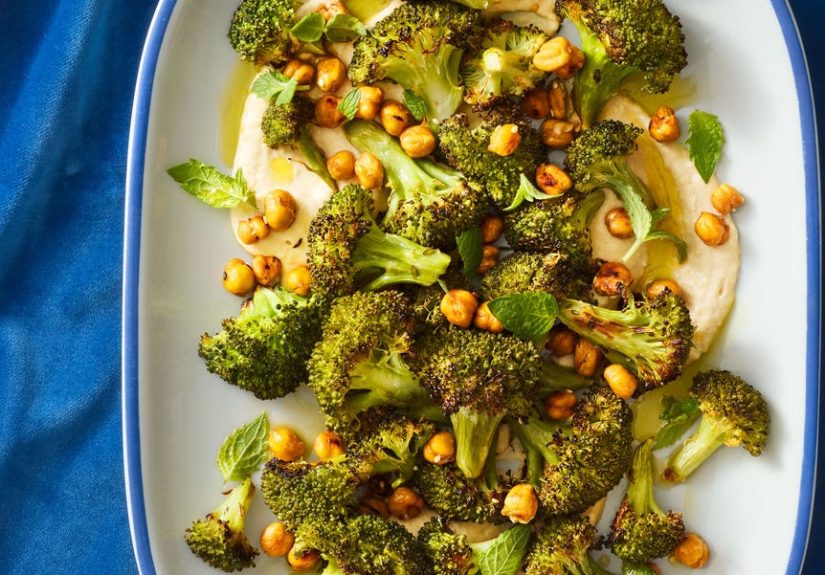
Press halved cherry tomatoes and chopped olives into the dough after dimpling. Add oregano or rosemary. Serve with marinara for dipping.
Caramelized Onion + Parmesan
Scatter caramelized onions and grated Parmesan over the top. Add black pepper. This one tastes like “fancy appetizer tray” without the fancy.
Whole-Grain Boost
Swap 10–20% of the flour for whole wheat flour. You’ll get a slightly nuttier flavor with minimal texture compromise.
Troubleshooting: Fixes for Common Focaccia Problems
My dough didn’t rise much.
Most likely: the yeast was old, your room was cold, or the water was too hot and weakened the yeast. Give it more time in a warmer spot. A turned-off oven with the light on can help.
My focaccia is dense, not bubbly.
This usually happens when the dough didn’t ferment long enough, or it got aggressively deflated. Next time, extend the first rise (overnight is ideal) and handle the dough gently after it’s risen.
It stuck to the skillet.
Two fixes: more oil in the pan, and letting it cool 5 minutes before lifting out. If your skillet is older and clingy, line the bottom with a circle of parchment (still oil it).
The bottom burned before the top browned.
Your skillet may be running hot (cast iron is enthusiastic). Bake one rack higher, or reduce temp to 425°F and extend bake time slightly.
It’s oily.
Focaccia is supposed to be rich, but it shouldn’t feel like it survived a slip ’n slide. Use enough oil to coat well, but avoid pouring so much that it forms a deep lake under the dough.
Serving Ideas (A.K.A. How This Bread Disappears)
- Dip in olive oil + balsamic + black pepper
- Use for sandwiches (it’s unreal with turkey, pesto, and arugula)
- Slice, toast, and serve with soup
- Make focaccia “croutons” for salad (yes, you’re allowed to be brilliant)
- Turn leftovers into panini or breakfast toast
Storage + Reheating
Focaccia is best the day it’s baked, when the crust is at peak crackle. But leftovers can still be fantastic:
- Room temp: Wrap loosely (paper bag is great) for up to 2 days.
- Reheat: 300°F oven for 8–12 minutes, or toast slices in a skillet.
- Freeze: Slice, wrap well, freeze up to 2 months. Reheat from frozen at 325°F until warm.
FAQ
Can I make this with active dry yeast?
Yes. Use the same amount. If you want extra insurance, dissolve it in the warm water for 5 minutes first.
Do I really need a cast iron skillet?
Cast iron gives the crispiest crust, but any oven-safe skillet works. You can also bake in a 9×13 panjust expect a slightly different thickness.
Why is focaccia dough so wet?
A higher-hydration dough helps create big bubbles and a light interior. The long rest time allows gluten to develop without kneading. Translation: time is your stand mixer.
Can I refrigerate the dough overnight?
Absolutely. A cold ferment boosts flavor and makes scheduling easier. If chilled, let the dough sit at room temp until puffy before baking.
Conclusion: Your New Go-To “Effortless” Bread
This no-knead skillet focaccia recipe is the sweet spot between “homemade bread bragging rights” and “I did not knead anything and I refuse to feel guilty.” Once you nail the base methodwet dough, time, olive oil, dimplesyou can riff forever: herbs, olives, tomatoes, cheese, even sweet versions. Make it once and you’ll start finding excuses to keep a bowl of dough hanging out in your kitchen like it pays rent.
of Real-Life Focaccia Experiences (The Fun Part)
The first time I made skillet focaccia, I treated the dough like it was fragile glassware. I barely touched it, gave it polite little dimples, and whispered, “Rise, please,” like the yeast could hear me. The bread came out… fine. Tasty. But also kind of shy. The top wasn’t dramatically dimpled, the crumb was tight, and it looked like focaccia’s introverted cousin who prefers emailing over phone calls.
The second time, I got bolder. I used more olive oil in the skillet (not reckless, but confident), waited for the dough to get genuinely puffy, and then dimpled it like I meant itfingertips straight down, no hesitation. That batch came out with those gorgeous, craggy hills and valleys you see in bakery windows. The brine pooled in the dimples, baked into salty little flavor pockets, and the bottom crust was so crisp it practically announced itself when sliced. Lesson learned: focaccia rewards confidence.
I’ve also learned that time is your secret ingredient. On days when I rushed the first rise, the bread tasted flatterstill good, but missing that slightly fermented depth that makes focaccia feel “restaurant-y.” When I let it go overnight, the flavor got noticeably better: a mild tang, more aroma, and bigger bubbles. It’s the same dough, but with a different personality. Like someone who had a full night’s sleep and drank water.
There was the “topping avalanche” era, too. I got excited and loaded the dough with tomatoes, olives, onions, cheese, and herbsbasically everything short of my car keys. It tasted great, but the dough struggled to rise under the weight and the top stayed soft instead of crisp. Now I keep toppings light and strategic: a handful of halved tomatoes pressed into the dough, a scatter of olives, maybe a whisper of Parmesan. If I want heavy toppings, I bake the focaccia mostly plain, then add things after (or slice and build sandwiches like an adult with priorities).
My favorite use-case might be the “accidental dinner party.” You know: friends drop by, you don’t have a plan, and suddenly you’re the host. If there’s dough resting in the fridge, you look like a genius. Pull it out, oil the skillet, let it puff, dimple, bakeand your kitchen smells like an Italian bakery. Serve it warm with olive oil and salt, and people will hover around the cutting board like it’s the main attraction. Which, honestly, it is. The best part? You didn’t knead a thing. The dough did the work. You just showed up for the dimples.