Table of Contents >> Show >> Hide
- What “Wipe-On” Really Means (and Why It Works)
- Quick Comparison: The 6 Best Wipe-On Finishes
- How to Choose the Right Wipe-On Finish
- Wipe-On Success: The Simple Method That Prevents 90% of Problems
- 1) General Finishes Arm-R-Seal (Oil-Based Topcoat)
- 2) Minwax Wipe-On Poly (Oil-Based Polyurethane)
- 3) Watco Danish Oil
- 4) Waterlox Original Sealer & Finish
- 5) Tried & True Danish Oil
- 6) Osmo Polyx-Oil (Hardwax Oil)
- Troubleshooting: The Problems Everyone Hits (and How to Fix Them)
- Final Thoughts: The Best Finish Is the One That Matches the Job
- Workshop Experiences: Real-Life Lessons from Wipe-On Finishing (Extra )
If you love woodworking but you don’t love brush marks, drips, dust nibs, and the emotional rollercoaster of
“Did I just ruin this project at the very last step?”welcome. Wipe-on finishes are the calm, steady friend
of the finishing world. You apply them with a cloth (or pad), build protection in thin layers, and get a
clean look without needing a spray booth, a fancy brush collection, or a deal with the dust-free gods.
This guide breaks down six of the best wipe-on wood finishes you can actually buy and use with confidence.
You’ll learn what each one is best at, where it shines (sometimes literally), and how to avoid the most
common “why is it sticky?” tragedies. We’ll also talk about real-world finishing experiences at the end
the kind that turn beginners into finish nerds.
What “Wipe-On” Really Means (and Why It Works)
A wipe-on finish is usually either (1) a thinned film finish (like wipe-on polyurethane or wiping varnish),
(2) a penetrating blend (like Danish oil), or (3) a modern hardwax oil that’s meant to be applied thin and
buffed out. The common thread: you’re applying thin coats on purpose. Thin coats level better, are
less likely to run, and dry more predictably. The tradeoff? You build protection through patience instead of
brute force.
Quick Comparison: The 6 Best Wipe-On Finishes
| Finish | Best For | Look | Protection | Beginner-Friendly? |
|---|---|---|---|---|
| General Finishes Arm-R-Seal | Furniture, tabletops, cabinets | Warm, rich, “fine furniture” | High (film-building) | Yes |
| Minwax Wipe-On Poly (Oil-Based) | Everyday projects, trim, shelves | Classic poly look | High (film-building) | Very |
| Watco Danish Oil | Decor pieces, low-wear furniture | Natural, hand-rubbed | Low–Medium | Yes |
| Waterlox Original Sealer & Finish | Tabletops, counters, high-touch surfaces | Amber glow, deep grain pop | Medium–High | Yes (with patience) |
| Tried & True Danish Oil | Food-contact items, low-odor projects | Soft luster, very natural | Low–Medium | Yes |
| Osmo Polyx-Oil | Floors, tabletops, modern matte finishes | Matte-to-satin, “bare wood but better” | Medium–High | Yes (apply thin!) |
How to Choose the Right Wipe-On Finish
Pick a Film Finish When Durability Matters
If the surface will see water, mugs, cleaning, kids, pets, or general “life happening,” choose a film-building
wipe-on (polyurethane or a wiping varnish). These create a protective layer on top of the wood. They’re harder
and more resistant to abrasion and moisture than straight oils.
Pick an Oil or Oil/Blend for Easy Repairs and a Natural Feel
Danish oils and oil blends soak in and leave a low-build finish that looks and feels close to raw wood. They’re
usually easier to repair because you can clean the surface and reapply without stripping a thick film. The
downside is lower protectionespecially against standing water.
Pick a Hardwax Oil for “Modern Matte” + Practical Protection
Hardwax oils are the new school: apply very thin, work it in, wipe/buff off excess. You often get a durable,
natural-looking surface without the “plastic-y” shine some people dislike about thick poly. The biggest rule:
don’t overapply. Hardwax oils punish heavy-handedness.
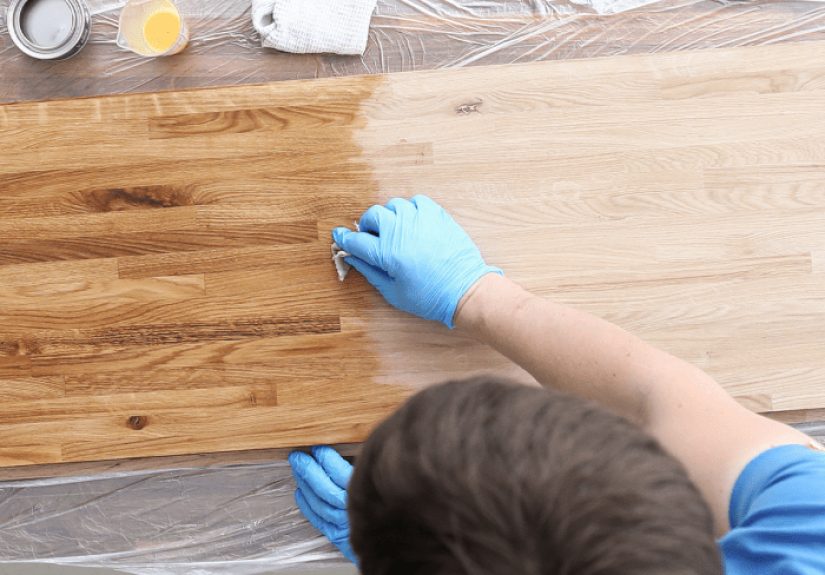
Wipe-On Success: The Simple Method That Prevents 90% of Problems
- Prep the surface: Sand to a consistent grit (commonly 180–220 for furniture). Vacuum and wipe off dust.
- Use a clean applicator: Lint-free cotton cloth, shop towel, or applicator pad. Avoid fluffy mystery rags.
- Apply thin: Wet the surface evenly; don’t flood it. Thin coats beat thick coats every time.
- Wipe off excess: If the finish is meant to be wiped off, actually wipe it off. Leaving puddles = sticky mess.
- Let it dry, then scuff: Lightly scuff between coats if needed (especially for film finishes) and remove dust.
- Respect cure time: “Dry to touch” isn’t the same as “fully cured.” Be gentle for the first week.
1) General Finishes Arm-R-Seal (Oil-Based Topcoat)
Arm-R-Seal is a favorite because it hits the sweet spot: it wipes on easily, builds real protection, and leaves
a warm, rich look that flatters most hardwoods. It’s commonly used on fine furniture, cabinet doors, and tables
where you want durability without brush drama.
Why it’s great
- Durable protection that builds into a real film
- Wipe-on friendly (also workable with foam brush)
- Beautiful amber warmth that enhances grain
Best use cases
Dining tables (especially if you like a warm tone), coffee tables, nightstands, cabinet faces, and high-touch
furniture that still needs to look “crafted,” not coated.
Pro tip
If you want a smoother final feel, do your last coat, let it cure, then lightly buff with a brown paper bag or a
very fine pad. Your hand will tell you when it’s right.
2) Minwax Wipe-On Poly (Oil-Based Polyurethane)
Minwax Wipe-On Poly is the “easy button” you can find in many stores. It’s a thinned oil-based polyurethane
designed specifically for wipingmeaning you get the protective benefits of poly with fewer application
headaches than brushing. It’s a great starter finish and a solid “I just need this to work” option.
Why it’s great
- Widely available and consistent
- Fast recoats compared with many oils
- Strong protection for everyday wear
Best use cases
Shelves, desks, trim, small tables, picture frames, and projects where you want reliable protection without
complicated technique.
Common mistake to avoid
Don’t try to “make it build faster” by wiping on heavy. Thick coats can dry unevenly and feel gummy. Thin, even
wipes win. Your future self will thank you.
3) Watco Danish Oil
Watco Danish Oil is a classic oil/varnish blend that’s popular because it’s forgiving and gives wood a warm,
hand-rubbed look. It penetrates, brings out grain, and leaves a soft sheen that feels more like wood than a
coating. It’s not the toughest finish in the lineup, but it’s one of the nicest-feeling.
Why it’s great
- Grain pop and warmth with minimal fuss
- Easy repairs (clean and recoat)
- Great for beginners learning finishing rhythm
Best use cases
Decorative boxes, indoor furniture that won’t face heavy water exposure, turned objects, and projects where you
want a natural look more than maximum durability.
Finish strategy that works
Apply, let it soak briefly, then wipe off thoroughly. Repeat for a few coats over days as needed. If you leave
oily wet spots on the surface, the finish can wrinkle or stay tacky. The wood should look nourishednot wet.
4) Waterlox Original Sealer & Finish
Waterlox Original is often described as a tung-oil-modified varnish system that gives a warm amber tone and can
build into a water-resistant film with multiple coats. Many woodworkers like it on tabletops and counters
because it can look “in the wood” while still offering meaningful protection when built up correctly.
Why it’s great
- Excellent grain enhancement with a classic amber glow
- Buildable protection (more coats = more resistance)
- Great for high-touch surfaces when properly cured
Best use cases
Tabletops, countertops, vanities, bar tops, and furniture surfaces that need a step up from Danish oil without
going full “thick poly shell.”
Reality check
Waterlox rewards patience. If you rush recoats, you can trap solvent and slow curing. Give it breathing room:
good airflow, reasonable temperatures, and enough time between coats.
5) Tried & True Danish Oil
Tried & True Danish Oil is a different vibe: it’s built around polymerized linseed oil with no added
solvents, and it’s often chosen for lower odor, a natural feel, and projects where you care about simple
ingredients. It won’t create a thick plastic film, but it can leave a handsome, hand-rubbed surface that’s
easy to refresh.
Why it’s great
- Low odor approach compared with many solvent-heavy finishes
- Great “wood feel” with a mellow sheen
- Easy maintenance over time
Best use cases
Cutting boards and utensils (once fully cured), children’s furniture (once cured), salad bowls, and indoor
pieces where you want a natural finish you can renew without stripping.
Application tip
Less is more. Apply a very thin coat, let it penetrate briefly, then wipe off thoroughly. Thick application is
the fastest route to a surface that feels perpetually “kinda oily.”
6) Osmo Polyx-Oil (Hardwax Oil)
Osmo Polyx-Oil is a go-to hardwax oil for people who want a durable finish that still looks like wood. Done
right, it can feel silky and natural while holding up well on floors and furniture. Done wrong (read: applied
like paint), it can get sticky and uneven. So yes, it’s powerfulbut you must respect it.
Why it’s great
- Modern, natural look (especially in matte/satin)
- Good durability for real-life use
- Spot repair potential when maintained properly
Best use cases
Floors, stair treads, dining tables, desktops, and furniture where you want protection but you don’t want the
finish to look like it’s wearing a raincoat.
The “thin coat law”
Apply extremely thin, work it in, and wipe/buff off excess. If it’s still wet-looking after you’ve finished,
you probably applied too much. Hardwax oils want to live in the surface, not puddle on it.
Troubleshooting: The Problems Everyone Hits (and How to Fix Them)
“It’s sticky and won’t dry.”
Most common cause: too much finish left on the surface. For wipe-off products, wipe off harder and sooner next
time. For hardwax oils, apply thinner and buff off excess. For film finishes, thin coats and better airflow
usually solve it. If it’s already sticky, you may need to wipe with the appropriate solvent (carefully, with
ventilation) or let it cure longer, then scuff and recoat properly.
“I can feel dust bumps.”
Totally normal. Let the coat dry, then scuff sand lightly with a fine abrasive and wipe clean before the next
coat. Wipe-on finishes are forgiving because you’re building in layers anyway.
“It looks blotchy.”
Common on softwoods like pine or unevenly sanded surfaces. Improve sanding consistency, consider a conditioner
for blotch-prone woods, and always test on a scrap board from the same material.
Final Thoughts: The Best Finish Is the One That Matches the Job
If you want maximum durability with easy application, choose a wipe-on poly or wiping varnish like Arm-R-Seal
or Minwax Wipe-On Poly. If you want a natural hand-rubbed look with easy refresh, Danish oils are your friend.
If you want that modern “bare wood but upgraded” look with practical durability, a hardwax oil like Osmo is a
strong contender.
One last rule: always test your finish on a scrap piece first. Wood species, sanding grit, stain color, and
lighting can change the final look. A five-minute test can save you five hours of regretting your life choices.
Workshop Experiences: Real-Life Lessons from Wipe-On Finishing (Extra )
Ask any woodworker about finishing and you’ll get the same nervous laugh you hear right before someone says,
“So anyway, I had to sand the whole thing back to bare wood.” Wipe-on finishes reduce the drama, but they don’t
eliminate itbecause the real challenge isn’t the product. It’s the moment you decide to “just do one more pass”
with a rag that’s already drying out, while your shop fan blows yesterday’s sawdust directly onto your wet coat.
A common first experience goes like this: you wipe on your first coat of wipe-on poly, step back, and think,
“That’s it?” The wood looks slightly richer, but not dramatically different. This is where people panic and
start applying it like frosting. The better move is to trust the process. The magic of wipe-on finishes shows
up after a few thin coats, when the sheen evens out and the surface starts to feel consistent under your hand.
If you want a great-looking table, you’re building a finish slowlynot trying to dunk the table in it.
Another real-world lesson: different woods behave like different personalities at a dinner party. Walnut tends
to look handsome with almost anything; it’s the friend who shows up in a plain T-shirt and still looks like a
movie star. Maple can be a little more picky; it likes clean prep and can look “busy” if you over-warm it with
ambering finishes. Pine is the chaotic one. With oils, pine can blotch if your sanding is uneven or if some
areas absorb more than others. In practice, many people learn to test Danish oil on pine scraps before committing,
or they choose a more film-building wipe-on finish for a more uniform look.
You’ll also discover that “dry” is not the same as “ready.” A tabletop might feel dry to the touch, but if you
put a heavy box on it too soon, you can get a ghostly print that looks like your project was haunted by a shipping
label. Wipe-on finishes, especially oils and oil-rich blends, often need time to cure and harden. The best habit
is to finish a project earlier than you think you need it, then let it sit in peace. Finishing rewards patience
like few other woodworking steps.
Finally, there’s the safety lesson that shows up in every serious shop story: oily rags are not trash until
they’re truly safe. People talk about it because it matters. Rags wet with drying oils can heat up as they cure,
and if they’re wadded in a pile, that heat can build. The practical shop routine is simple: spread rags flat to
dry in a safe, ventilated area or store them in a sealed metal container designed for that purpose. It’s not
glamorous, but neither is explaining to your family why your “little weekend project” turned into a fire
department event.
The upside of all these experiences is that wipe-on finishes are wonderfully forgiving once you learn their rhythm.
Thin coats, clean wipes, and a little patience create a finish that looks intentionallike you meant for it to
turn out that good all along.