Table of Contents >> Show >> Hide
- What Makes a Good Slurpee-Style Drink?
- Method 1: The Classic Blender Slurpee
- Method 2: The Freezer-and-Shake Soda Trick
- Method 3: The Frozen Juice or Fruit Tray Method
- How to Make Your Homemade Slurpee Taste Better
- Which Method Is Best?
- of Real-Life Experience: What It’s Actually Like Making a Slurpee at Home
- Conclusion
There are two kinds of people in summer: the ones who gracefully sip iced water, and the ones who want a neon-cold, brain-freeze-inducing cup of happiness immediately. This article is for the second group. If you’ve ever wanted that thick, frosty, spoon-meets-straw texture at home, good news: you do not need a convenience-store machine humming in your kitchen like a tiny frozen spaceship.
You just need the right method. In fact, there are three easy ways to make a Slurpee-style drink at home, and each one has its own personality. One is fast and blender-friendly. One feels like a science trick you’ll want to show off. And one is perfect if you want bigger fruit flavor and a texture that tastes less like melted soda and more like you actually had a plan.
Below, you’ll learn how to make a homemade slush drink three different ways, what ingredients work best, which mistakes turn your masterpiece into sad sweet soup, and how to get a smoother, better texture every time. Grab your ice, lower your expectations for dignity, and let’s make something gloriously cold.
What Makes a Good Slurpee-Style Drink?
Before jumping into the methods, it helps to know what you’re aiming for. The best Slurpee-style drink isn’t just cold. It’s icy, thick, pourable, and sippable. That means the texture matters as much as the flavor. Too much liquid, and you get a sad slosh. Too much ice, and your blender starts sounding like it’s filing a complaint.
A good homemade frozen drink usually needs three things:
- A cold base, like soda, juice, lemonade, or fruit puree
- Something icy, like ice cubes, frozen fruit, or frozen liquid cubes
- A little sweetness, which helps the texture stay slushy instead of freezing into a boring chunk of flavored iceberg
The trick is balancing flavor and texture. If you dump in too much plain ice, you dilute the drink. If you start with room-temperature liquid, you’ll have to over-blend and add more ice. Translation: cold ingredients are your best friend, and frozen fruit deserves a slow clap.
Method 1: The Classic Blender Slurpee
This is the easiest and most dependable way to make a Slurpee at home. It’s fast, flexible, and forgiving, which is more than can be said for most summer hairstyles.
Best for
Anyone who wants a homemade slushie in under 10 minutes.
What you need
- 2 cups chilled soda, lemonade, sports drink, or fruit juice
- 3 to 4 cups ice
- 1 to 3 tablespoons simple syrup, sugar syrup, or frozen juice concentrate
- Optional: 1 cup frozen fruit for extra flavor and body
How to do it
- Add the chilled liquid to a blender.
- Add sweetener if needed. Skip this if your drink is already very sweet.
- Add ice and frozen fruit, if using.
- Pulse first, then blend until the texture is thick and snowy.
- Serve immediately with a straw and zero patience.
Why this method works
The blender method gives you the most control. If the drink is too thin, add more ice. If it’s too thick, add a splash more liquid. If it tastes flat, a squeeze of lemon or lime can wake it right up. Frozen fruit is especially useful because it boosts flavor without watering things down the way regular ice can.
Flavor ideas
- Cherry lime: lemon-lime soda, frozen cherries, fresh lime juice
- Blue raspberry vibe: raspberry lemonade plus a few blueberries
- Cola freeze: chilled cola, ice, and a touch of vanilla syrup
- Watermelon slush: frozen watermelon cubes, lime juice, and a little soda water
Common mistake
Using too much ice right away. Start with less than you think you need and build from there. Otherwise, your frozen drink can go from “refreshing” to “why am I chewing this?”
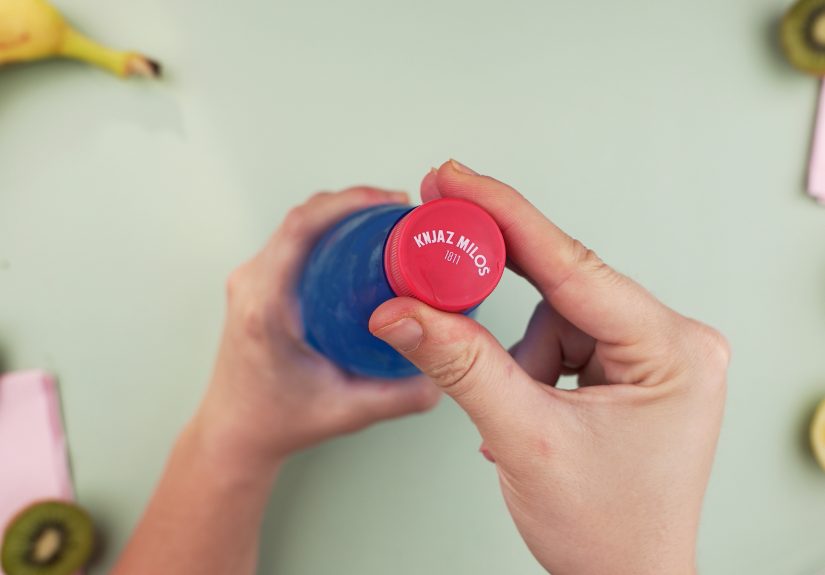
Method 2: The Freezer-and-Shake Soda Trick
This one feels like kitchen wizardry. It’s ideal when you want that fizzy, store-style soda slush effect without dragging out the blender. It’s also the method most likely to make you say, “Wait, that actually worked?”
Best for
Making a quick Slurpee-style drink from soda with almost no cleanup.
What you need
- 1 plastic bottle of soda or other carbonated drink
- A freezer
- A timer, because confidence is not a timing tool
How to do it
- Take a sealed plastic bottle of soda and chill it if needed.
- Shake it well to build pressure.
- Place it carefully in the freezer for roughly 3 to 3 1/2 hours, depending on bottle size and freezer strength.
- Remove it while it’s still liquid, not frozen solid.
- Open the cap briefly, then close it again.
- Turn the bottle upside down or pour it into a cold glass to trigger the slushy effect.
Why this method works
This is basically a super-cold soda trick. The drink gets chilled below its normal freezing point but stays liquid until movement or pressure change encourages ice crystals to form. That’s why the flip, pour, or slight disturbance suddenly turns the drink from calm liquid into frosty magic.
Important tips
- Use plastic bottles, not glass.
- Do not forget the bottle in the freezer unless you enjoy sticky archaeology.
- This works best with carbonated drinks.
- If the drink freezes solid, let it thaw slightly and try again another day with less freezer time.
Best flavors for this method
Cola, lemon-lime soda, orange soda, and fruit-flavored soft drinks usually work beautifully. The bubbles help create that signature light, fluffy slush texture that feels closest to the convenience-store experience.
Method 3: The Frozen Juice or Fruit Tray Method
If the blender method is the everyday hero and the soda trick is the flashy cousin, this method is the one for people who want better fruit flavor and a slightly more homemade, upgraded result. Think less gas-station impulse, more “I knew what I was doing all along.”
Best for
Fruit-based slushies, lemonade slush, and richer homemade frozen drinks.
What you need
- 3 cups fruit juice, lemonade, or pureed fruit
- 2 to 4 tablespoons sugar or simple syrup, if needed
- 1 tablespoon corn syrup or honey, optional for a smoother texture
- A shallow pan or ice cube tray
- A fork or blender
How to do it
- Mix your juice, puree, and sweetener together.
- Pour into a shallow pan or ice cube trays.
- Freeze until mostly solid.
- Scrape with a fork for a granita-style slush, or blend the frozen cubes with a splash of soda or juice.
- Serve right away.
Why this method works
Freezing the flavor first gives you a stronger finished drink. Instead of adding lots of plain ice, you’re blending or scraping frozen juice, frozen lemonade, or frozen fruit base. That means more flavor, less dilution, and a texture that stays icy longer. A little sugar or syrup also helps keep the mixture from freezing into a brick.
Great combinations
- Strawberry lemonade slush: lemonade, strawberries, and a bit of honey
- Grape cooler: grape juice base with lemon-lime soda added at the end
- Peach basil slush: peach puree, lemon juice, and torn basil
- Watermelon mint: watermelon puree, lime juice, and fresh mint
How to Make Your Homemade Slurpee Taste Better
Start with colder ingredients
Cold liquid makes a colder slush. Revolutionary, I know. But it matters. If your juice or soda is already chilled, you’ll need less ice and get stronger flavor.
Add acid
A little lemon or lime juice can brighten sweet drinks fast. This is especially helpful for cola, cherry, strawberry, or watermelon slushies.
Use frozen fruit instead of extra ice
Frozen berries, mango, pineapple, watermelon, or grapes add both flavor and body. This is one of the easiest ways to get a thicker drink without turning it bland.
Sweeten strategically
If your frozen drink tastes weak, don’t just add more sugar blindly like a dessert goblin. Use simple syrup, honey, or a spoonful of frozen concentrate so the sweetness blends evenly.
Serve immediately
Slurpee-style drinks have a short window of perfection. Wait too long, and gravity, heat, and betrayal begin. Serve as soon as the texture looks right.
Which Method Is Best?
If you want the simplest option, go with the blender method. It works with almost anything and lets you adjust as you go.
If you want the closest soda-shop experience, try the freezer-and-shake method. It’s fun, fizzy, and weirdly satisfying.
If you want bold fruit flavor and a less watery result, the frozen tray method wins. It takes a little more patience, but the payoff is excellent.
of Real-Life Experience: What It’s Actually Like Making a Slurpee at Home
Making a Slurpee-style drink at home is one of those kitchen projects that sounds a little silly until you try it and realize it’s wildly satisfying. There is something deeply fun about turning ordinary soda, juice, or fruit into a frosty drink that looks like summer in a cup. It feels half snack, half experiment, and if you’re making it with kids or friends, it becomes entertainment almost immediately.
The first experience most people have is with the blender method, and honestly, it tends to be the gateway recipe. You throw in ice, pour in something brightly colored, hit blend, and within seconds you have a drink that looks far more impressive than the effort required. The downside is that the first batch is often too thin or too thick. That’s normal. Homemade frozen drinks are a little like pancakes: the first one teaches you what the rest need.
The soda bottle freezer trick feels totally different. It’s less like cooking and more like getting away with something. You put a bottle in the freezer, wait, pull it out, and hope you timed it right. When it works, the transformation is dramatic. You open the bottle, flip it, and suddenly the soda starts turning icy right in front of you. It’s the kind of thing that makes grown adults call someone into the kitchen just to watch. When it doesn’t work, though, you learn quickly that freezers are moody and timing matters. One freezer gives you perfect slush in three hours. Another gives you a stubborn bottle of very cold soda or a block of disappointment.
The fruit-based tray method usually feels the most rewarding. It tastes fresher, looks prettier, and gives you the kind of result that makes you feel oddly accomplished. Scraping a frozen fruit mixture with a fork or blending frozen juice cubes into a bright, thick drink feels more intentional than dumping soda over ice. It is also the method that tends to impress people the most, especially if you garnish it with fruit, herbs, or a colorful straw and pretend this was all part of your lifestyle brand.
In real life, the biggest lesson is that texture beats perfection. You don’t need a machine or a secret formula. You just need to notice what your mixture is doing. Too watery? Add frozen fruit. Too sweet? Add citrus. Too stiff? Loosen it with a splash of cold liquid. Once you stop expecting exact results and start adjusting by feel, homemade slush drinks become much easier and much more fun.
And maybe that’s the best part. A homemade Slurpee is not just a drink. It’s a tiny summer ritual. It’s the sound of a blender on a hot afternoon, the satisfaction of scraping frost into a glass, the ridiculous joy of getting the straw through that first icy layer. It’s messy, cold, colorful, and a little nostalgic. In other words, exactly what a great summer treat should be.
Conclusion
If you’ve been wondering how to make a Slurpee at home, the answer depends on what kind of frozen drink experience you want. Use a blender for speed, the soda bottle trick for fun, or the frozen fruit method for better flavor. All three work. All three are easy. And all three are much cheaper than chasing brain freeze one convenience-store cup at a time.
Start with the method that matches your mood, then experiment with flavors, sweetness, and texture until you find your perfect icy blend. Once you get the hang of it, homemade slush drinks become less of a novelty and more of a hot-weather habit. A delicious one.